With the introduction of macOS High Sierra, browsing web has become a lot faster and smooth-sailing. Depending on your convenience, you can set your own rules to bolster your experience. For instance, you can enable content blockers to navigate through pages peacefully, activate reader view to read pages without any interference, completely disable autoplaying videos to keep distraction at bay. Sounds really impressive, doesn’t it? Follow through this complete guide to customize website options in Safari on Mac running macOS High Sierra.
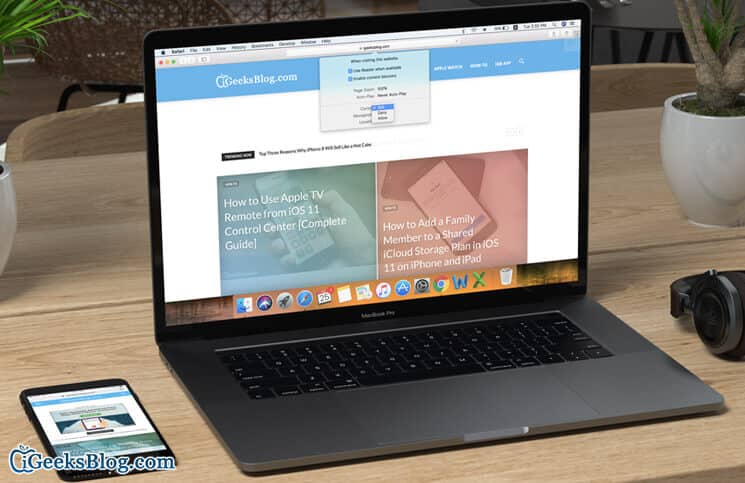
What has really won me over about these all new features is that you can set custom rules for both specific websites and all websites at one go. For example, you can select a preferred page zoom for a particular website or for all the websites you visit at one shot!
- How to Customize Options for Specific Websites in Safari on Mac running macOS High Sierra
- How to Enable Reader View for Selected websites in Safari on macOS High Sierra
- How to Enable Content Blockers for Websites in Safari on Mac
- How to Disable Autoplay Videos for Websites in Safari on Mac
- How to Customize Page Zoom for Specific Websites in Safari on Mac
- How to Deny Websites to Access Camera on Mac Running macOS High Sierra
- How to Allow/Deny Websites to Access Microphone on Mac
- How to Allow/Deny Websites to Access Your Location on Mac
- Allow/Deny Websites to Send You Notifications on Your Mac
Customize Options for Specific Websites in Safari on Mac running macOS High Sierra
Step #1. Open Safari on your Mac and head over to any website → Click on Safari menu at the top left corner → Click on Settings for This Website.

Step #2. Next, a small window will appear right under the URL bar.
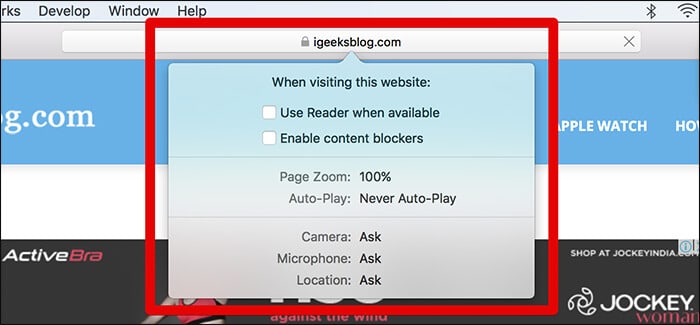
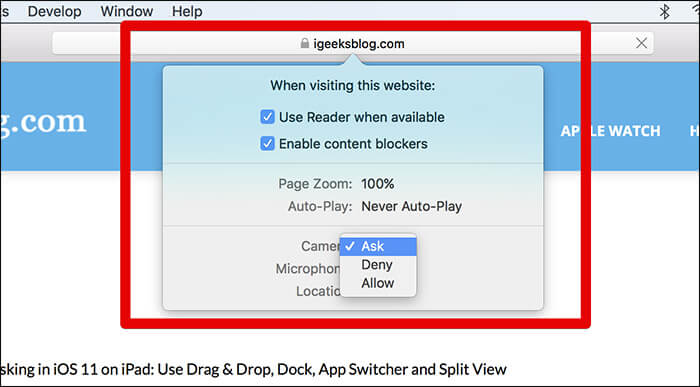
Now, choose how you wish view this website. For instance, you can enable Reader view, activate Content Blockers, use Page Zoom, turn off Auto-Play videos. There is also an option to allow/deny Camera, Microphone and Location access.
Enable Reader View for Selected websites in Safari on macOS High Sierra
You can instantly enable reader view for websites which are currently opened in order to read them with the desired peace of mind. Besides, there is also an option to activate reader view for all the websites you visit.
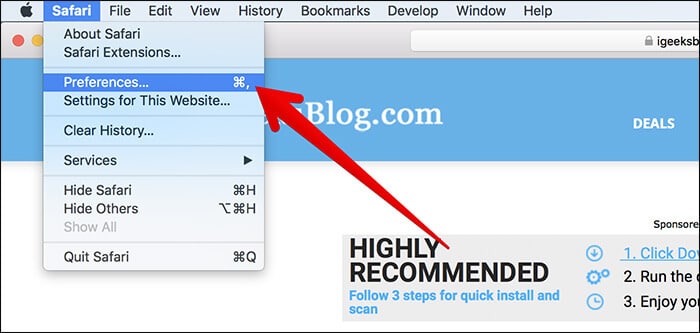
Step #1. Open Safari on your Mac and click on the Safari menu at the upper left corner of the screen → Click on Preferences.
Step #2. Select the Websites tab → Click on Reader in the sidebar.
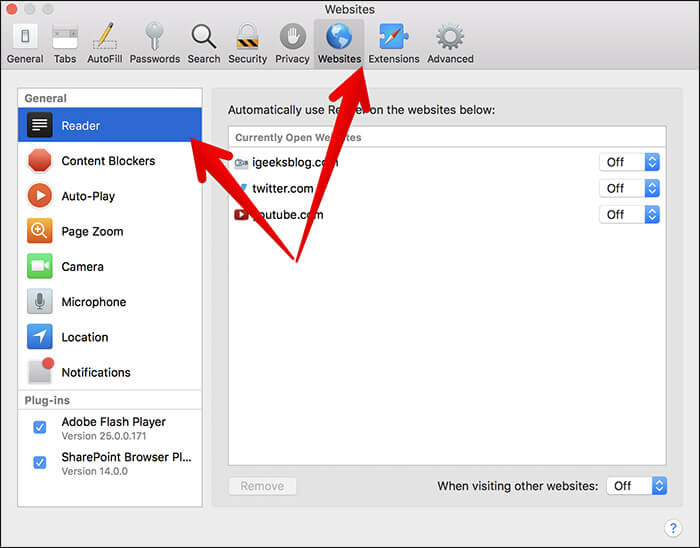
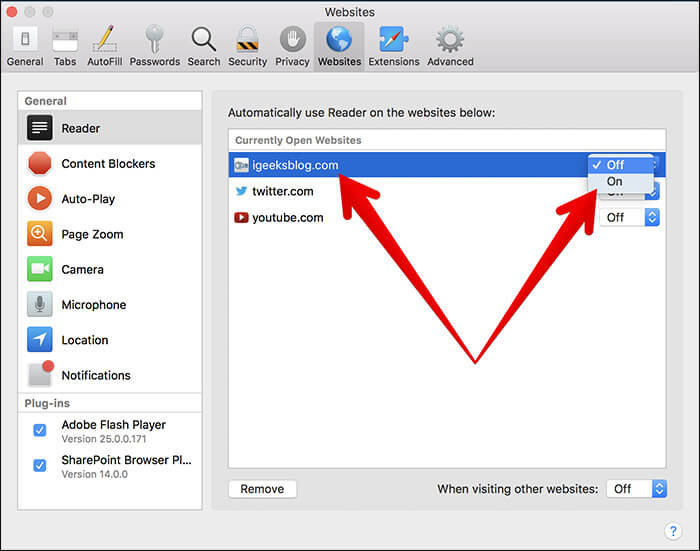
Step #3. Next up, you have to select a website → Click on the drop down menu next to the website and select ON/OFF as per your need.
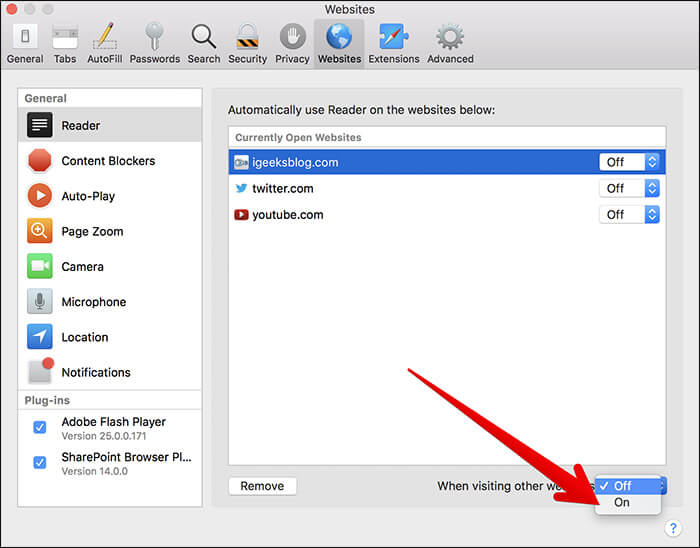
You can set a general rule for other websites. Just click on the drop-down menu next to When visiting other websites and select ON/OFF.
Enable Content Blockers for Websites in Safari on Mac
Step #1. Open Safari → Safari menu → Preferences.

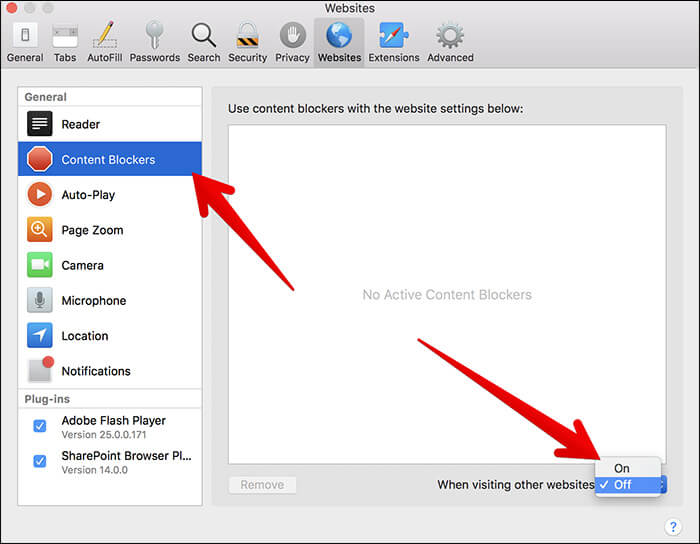
Step #2. Select the Websites tab → Click on Content Blockers in the sidebar.
Step #3. Now, select a website.
Next, click on the drop-down menu and select ON/OFF.
Check out the option to how you want to deal with other websites at the bottom. Just click on the drop-down menu and select ON/OFF.
Disable Autoplay Videos for Websites in Safari on Mac
No longer want to be distracted by those auto-playing videos, you can easily keep them silent. (if you want to disable auto-playing videos for websites on your Mac which is not supported by macOS High Sierra, check out this quick guide.)
Step #1. Open Safari → Safari menu → Preferences.

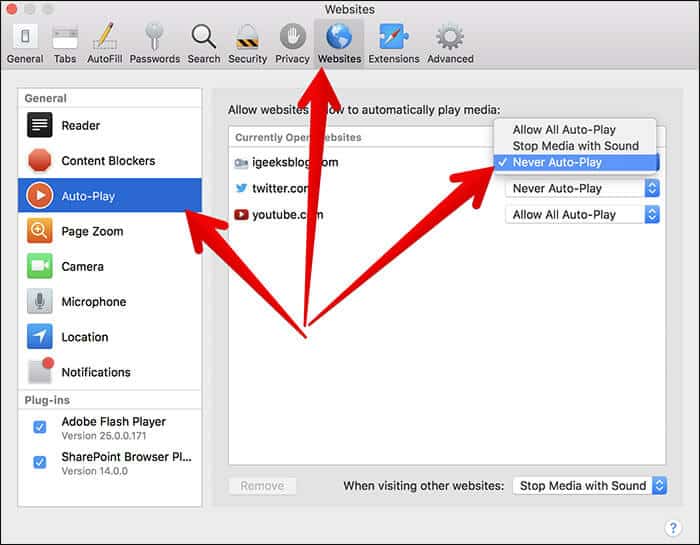
Step #2. Click on Websites tab → Click on Auto-Play in the sidebar.
Step #3. Next, you need to click on the drop-down menu right before the website in which you want to turn off videos automatically.
Step #4. Up next, you have three options:
- Allow All Auto-Play
- Stop Media with Sound
- Never Auto-Play
Select Never Auto-Play. From now onwards, videos won’t be playing automatically when you visit this website.
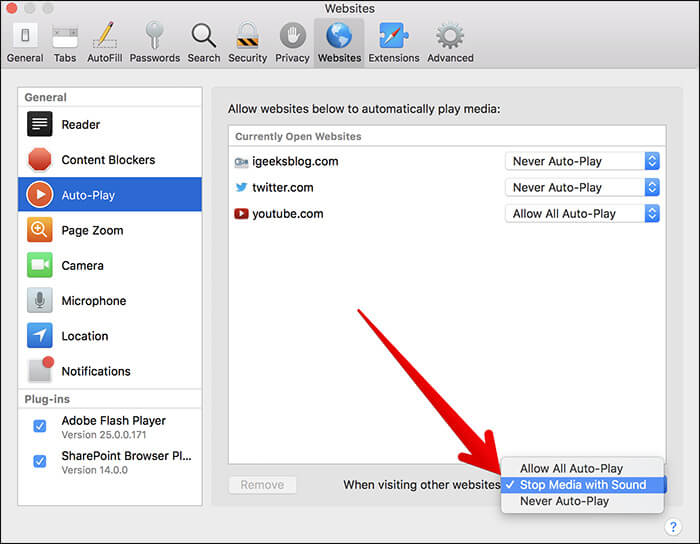
Again, check out the option to how you wish to deal with other websites. Click on the drop-down button next to When visiting other websites at the bottom and choose the preferred option.
Later, if you happen to change your mind and don’t find auto-playing videos distractive, follow all the steps mentioned above.
Customize Page Zoom for Specific Websites in Safari on Mac
Step #1. Open Safari → Safari menu → Preferences.

Step #2. Click on Websites tab → Click on Page Zoom in the sidebar.
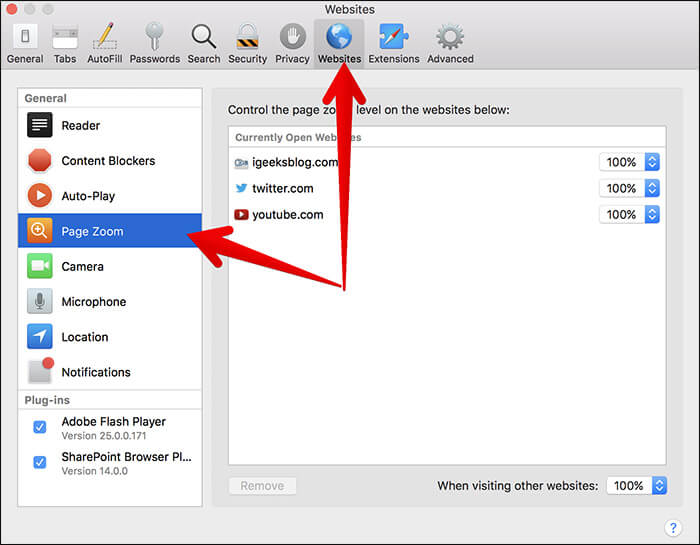
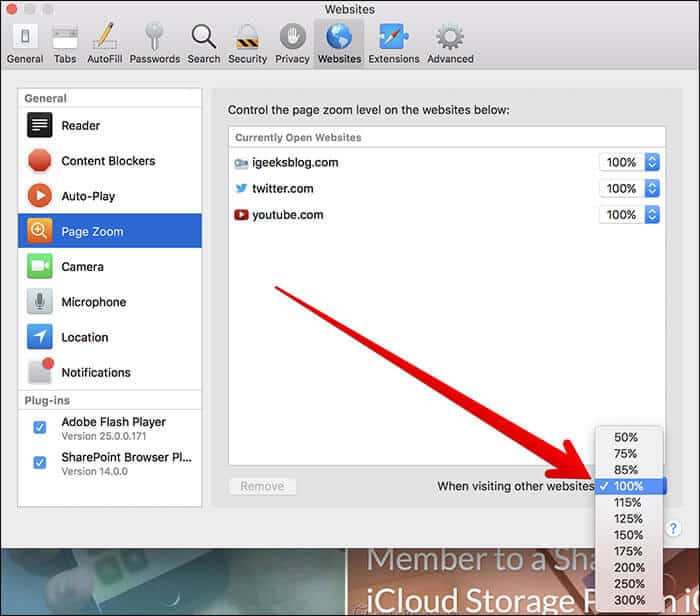
Step #3. Select a website which is currently opened → Select the preferred zoom level for the website. For instance, you can select 50%, 100% or even 300% zoom level.
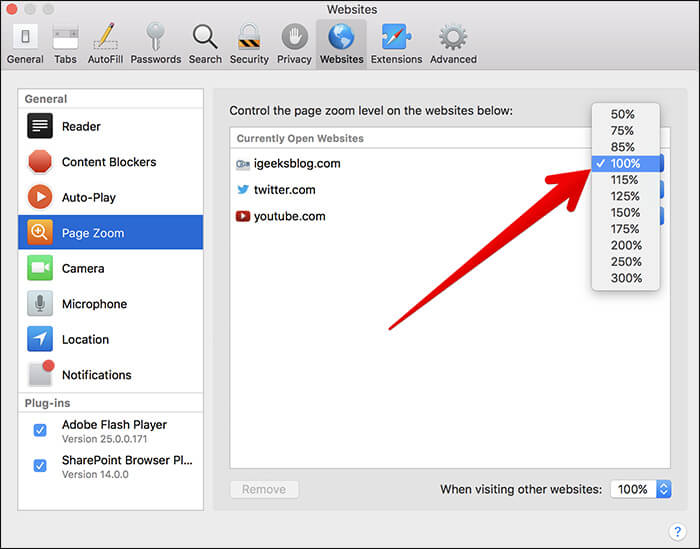
As always, check out how you would like to deal with other websites. Click on the drop-down menu next to When visiting other websites option and choose the preferred zoom level.
Allow/Deny Websites to Access Camera on Mac Running macOS High Sierra
Step #1. Open Safari → Safari menu → Preferences.

Step #2. Click on Websites tab → Click on Camera in the sidebar.
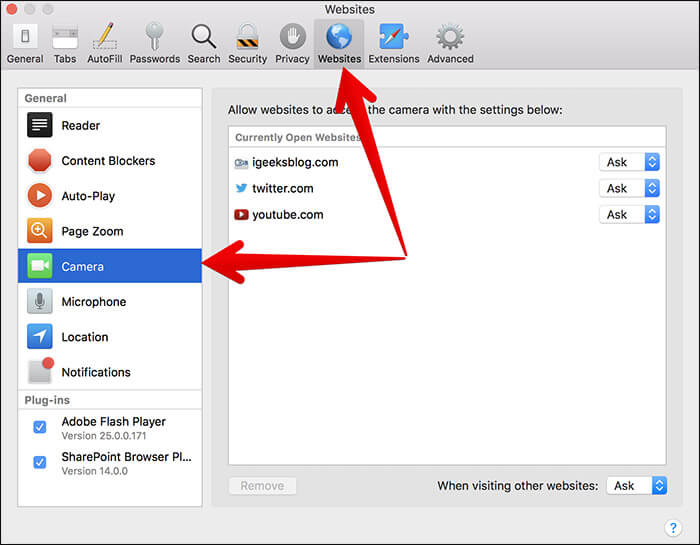
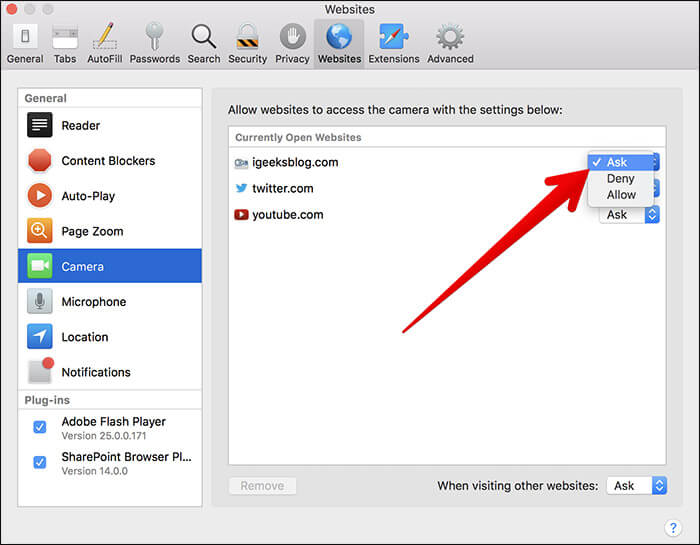
Step #3. Click on the drop-down menu next to Ask (which is on the far right of the website). Next, choose Deny or Allow.
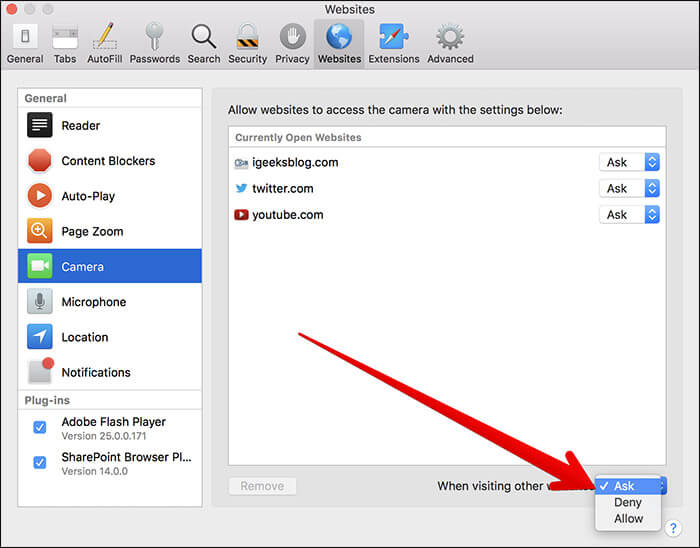
Set a general option for other websites if you want to: Click on the drop-down menu next to When visiting other websites and select the preferred rule.
Allow/Deny Websites to Access Microphone on Mac
Step #1. Open Safari → Safari menu → Preferences.

Step #2. Click on Websites tab → Click on Microphone in the sidebar.
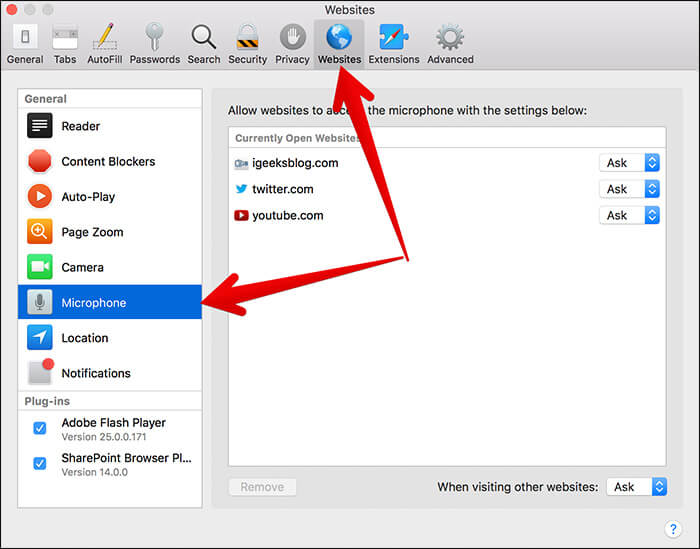
Step #3. Click on the drop-down menu next to Ask (which is on the far right of the website). Next up, select Deny or Allow.
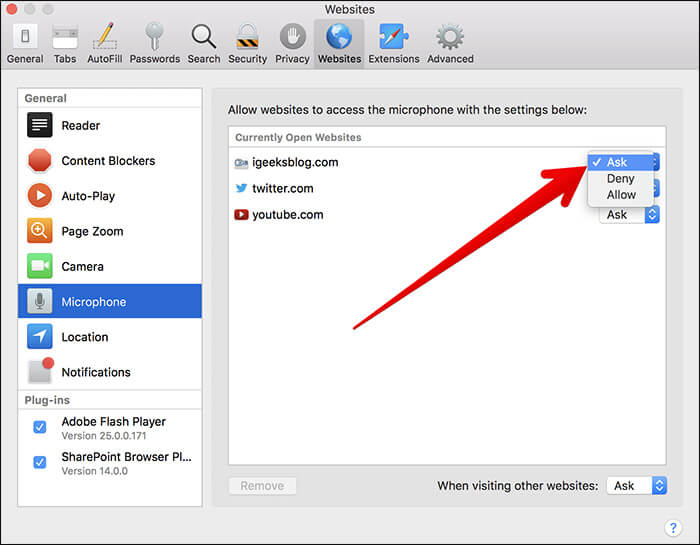
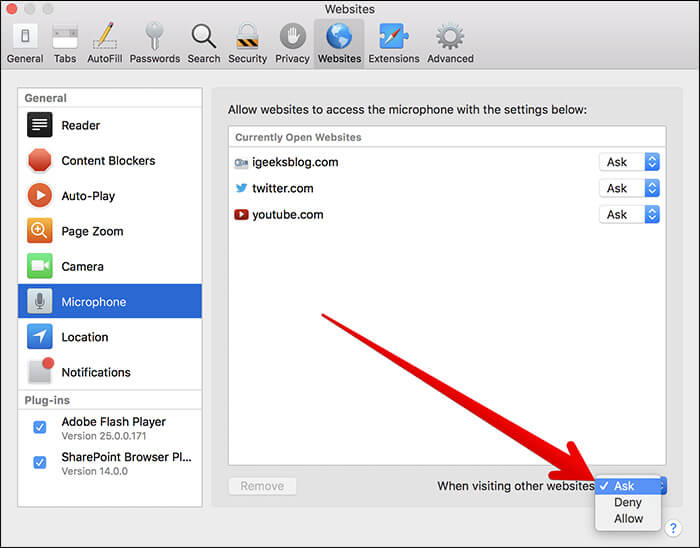
Choose how you would like to treat other websites. Click on the drop-down menu next to When visiting other websites and select the preferred option.
Allow/Deny Websites to Access Your Location on Mac
Step #1. Open Safari → Safari menu → Preferences.

Step #2. Click on Websites tab → Click on Location in the sidebar.
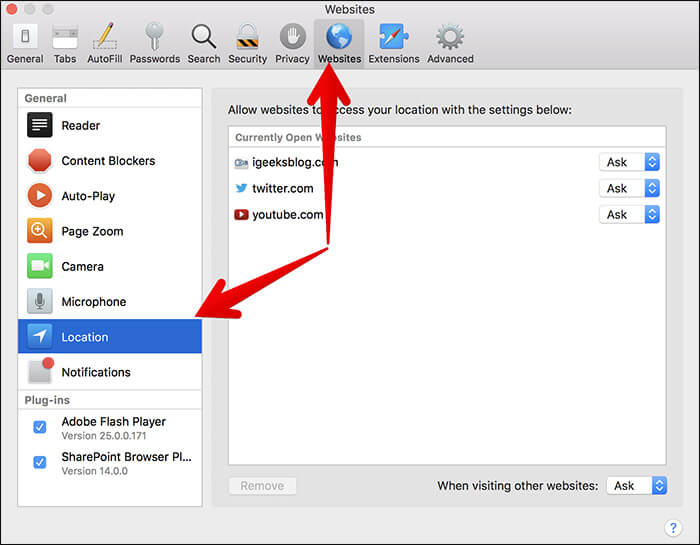
Step #3. Click on the drop-down menu next to Ask (which is on the far right of the website). Up next, select Deny or Allow.
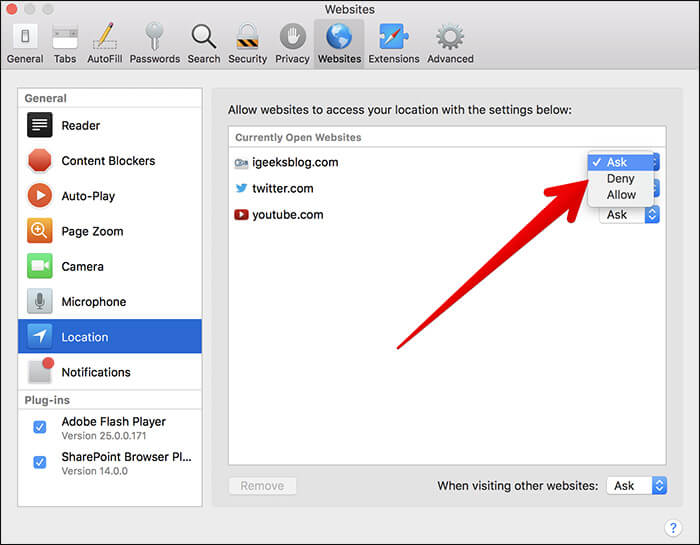
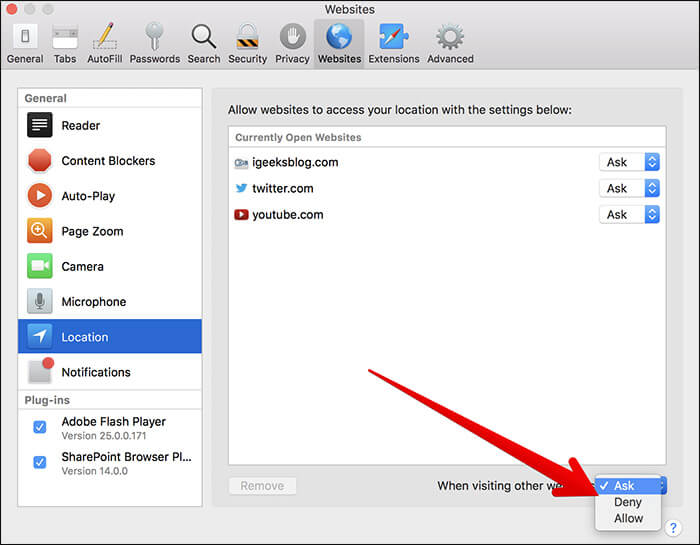
Decide how you want to treat other websites. Click on the drop-down menu next to When visiting other websites and select the preferred rule.
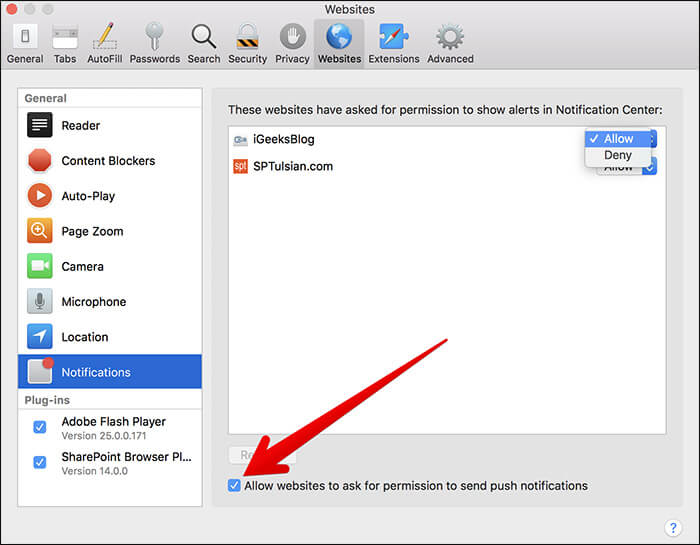
Allow/Deny Websites to Send You Notifications on Your Mac
Step #1. Open Safari → Safari menu → Preferences.

Step #2. Click on Websites tab → Click on Notifications in the sidebar.
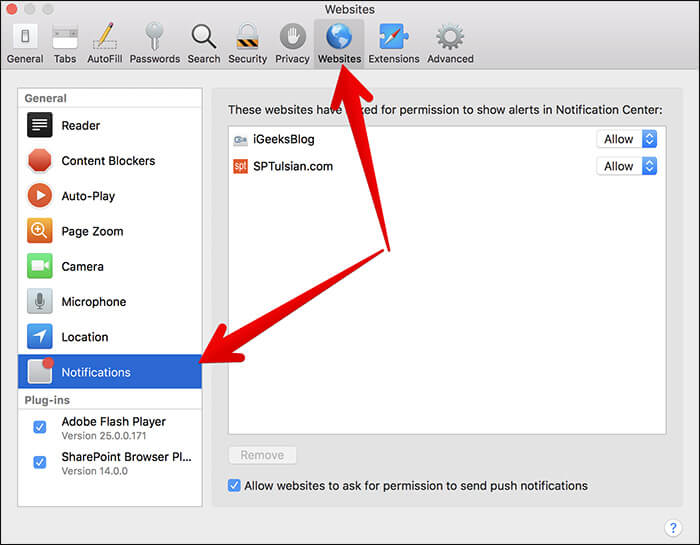
Step #3. Click on the drop-down menu next to Ask (which is on the far right of the website). Next up, choose Deny or Allow.
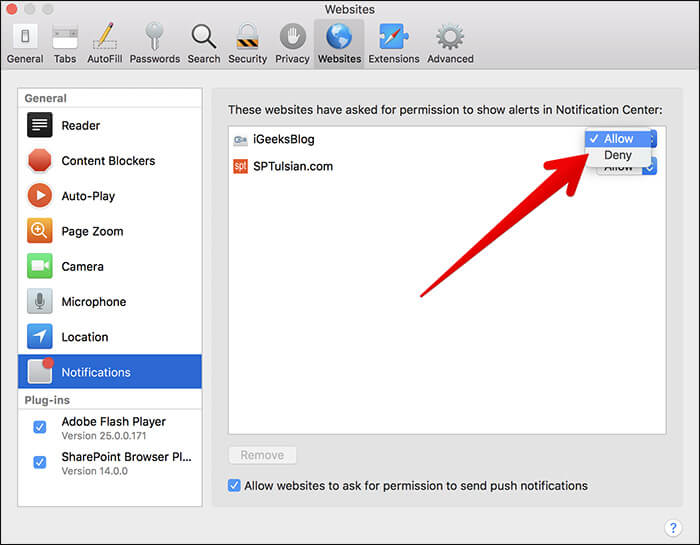
If you no longer want websites to ask for permissions to send you notifications, uncheck the box next to Allow websites to ask for permissions to send push notifications.
Wrapping up
Indeed, browsing web has gotten more fluid in Safari now than ever before. You can ideally fine tune websites to enhance your reading or navigating experience. What’s your thought about this neat feature? Shoot it in the comments below.
You might want to have a go at these posts as well:
