Are you struggling to accommodate all your precious images in the available storage space on your Mac or iCloud? In this case, the image compressors can help you reduce your image’s file size without compromising its quality. Here, I will share how to compress images on your Mac in 6 different ways.

- How to compress a photo on Mac using Preview app
- How to compress images using Quick Actions on Mac
- How to compress a photo album on Mac
- Compress images using Photos app on Mac
- Compress images using Finder
- Compress images using third-party apps/tools on Mac
How to compress photo on Mac using Preview app
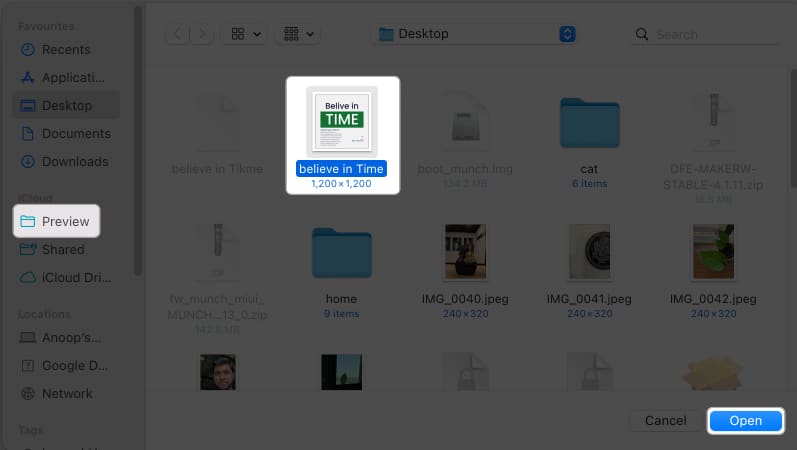
- Launch the Preview app → Select the photo to compress.
- Now hit Open.
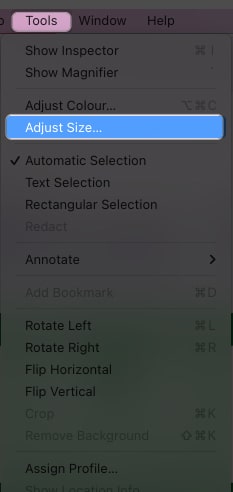
Alternatively, you can right-click on a photo → Open with → Preview. - Click Tools from the menu bar → Select Adjust size.
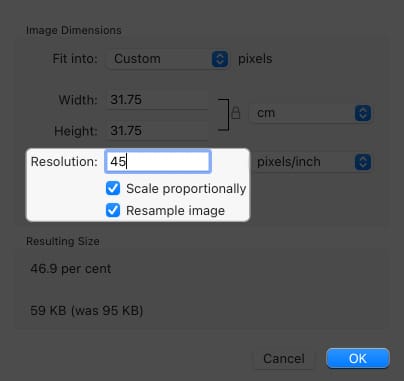
- Enter a smaller value in the Resolution field → Check Resample image.
You can also check Scale proportionally. - Check the size and hit OK.
Don’t worry if you have entered a minimal value, resulting in a tiny image. You can repeat the same steps to change the resolution value to meet the required size, and the quality loss will not be noticeable.
Change image’s dimensions on Mac
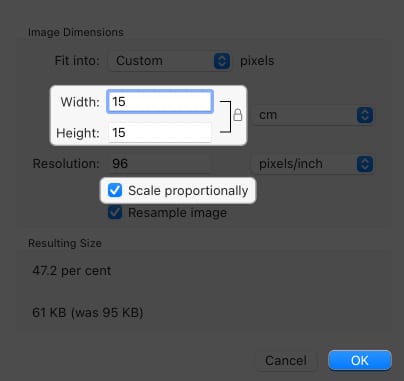
Image dimensions also impact its size. The file size of a 1920 x 1080 image is larger than a 720 x 480 image. So, you can also play around with the dimensions to compress images on your Mac. For that, follow 1-3 steps above and then:
- Enter a smaller value inside the Width and Height fields.
- Check Scale proportionally to ensure the image dimensions are not destroyed.
- Check the new size below and hit OK.
Export to another image format
The size of an image also depends upon the image format. JPG/JPEG files are often smaller than PNG files for most images. So, you may convert your images to reduce the file size. We already have a guide on how to compress HEIC to JPG, and for other formats, follow these steps:
- Open the image in Preview.
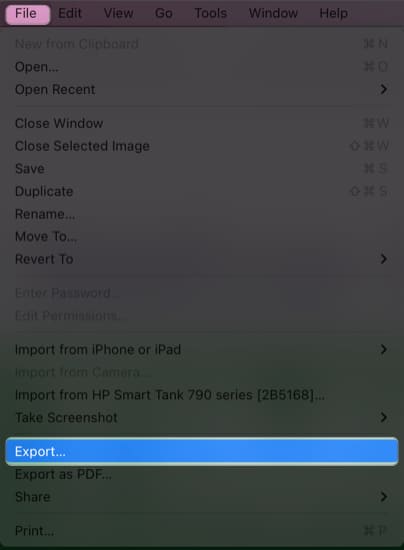
- Click File from the menu bar → Select Export.
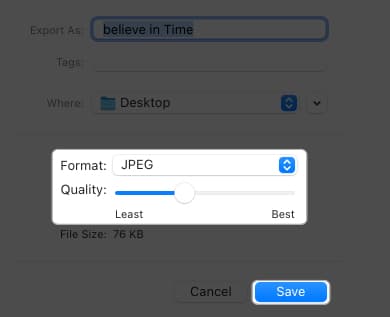
- Add a new name → Select the location to save.
- Open the drop-down menu next to Format and select JPEG → Adjust Quality by dragging the slider.
- Once you achieve the required file size, hit Save.
Note: You can not upscale the image using the same steps once saved. Hence, you must repeat the same steps on the original file to resize the image.
How to compress images using Quick Actions on Mac
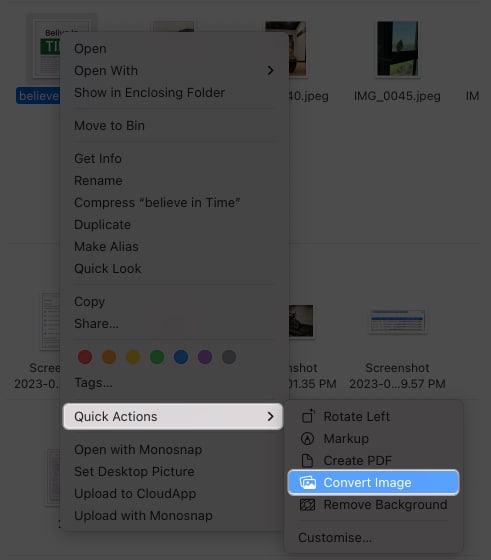
- Open Finder and right-click over the photo to compress on Mac.
- Go to Quick Actions → Select Convert image.
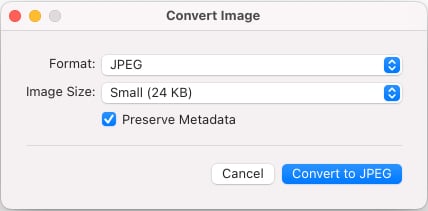
- Choose the Format → Select the Image Size.
Here, I’m choosing JPEG and Small accordingly. - You can check or uncheck Preserve Metadata.
- Hit Convert to JPEG.
You can follow the same steps to compress a photo album on Mac. Open the folder → Select all images → Right-click, and follow the abovementioned steps.
How to compress photo album on Mac
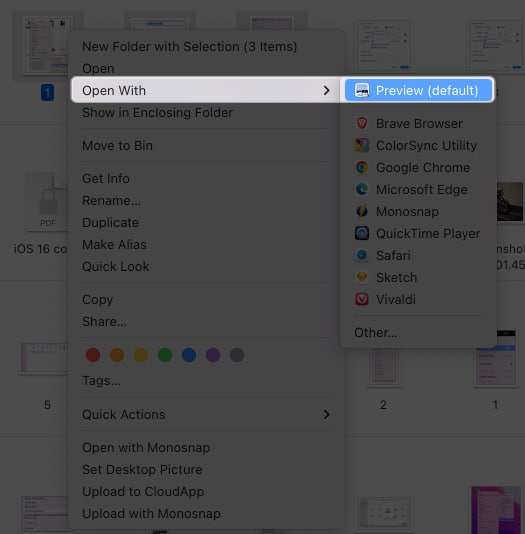
- Open the photo album → Select all the images to compress.
- Right-click over any image → Choose Open With → Preview.
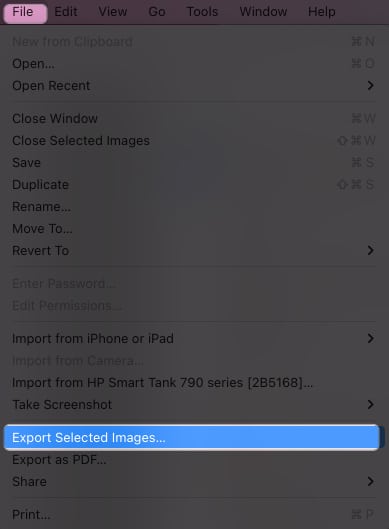
- Use Command + A to select all images in the left sidebar.
- Click File from the menu bar → Choose Export Selected Images.
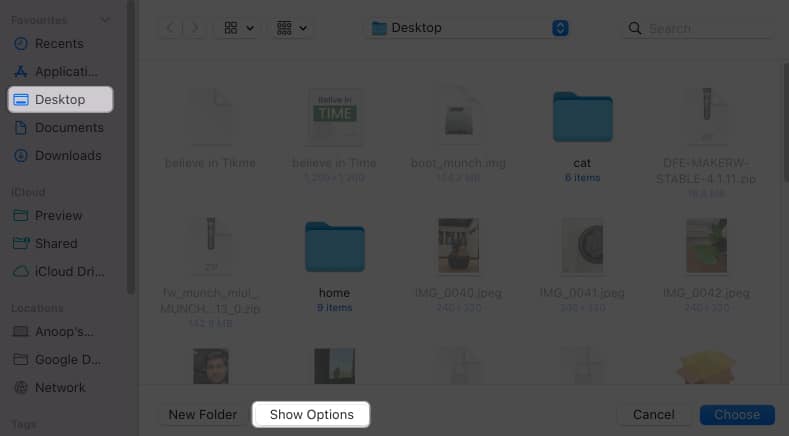
- Choose a location to save and hit Show Options.
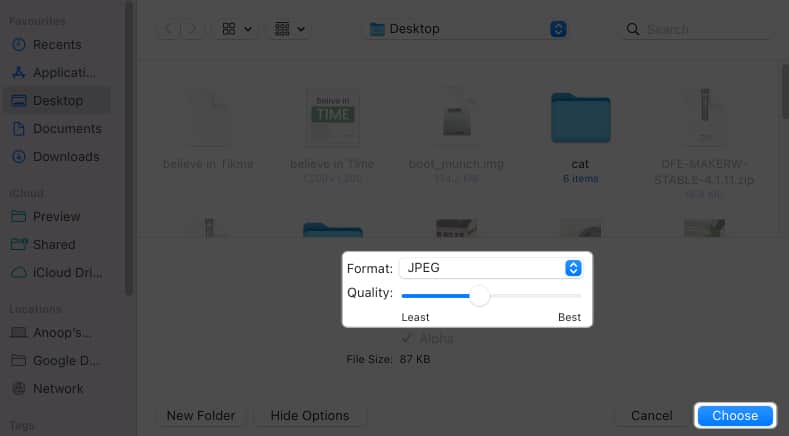
- Now, Choose the Format.
Here, I’m selecting JPEG. - Drag the slider to adjust the Quality → Hit Choose.
If you have selected images with a different format, there will be a Preview window for each format. You have to repeat the same steps on all of them. In case you face the “Cannot export selected” items” error, unselect images with different formats and perform the method again.
Compress images using Photos app on Mac
Apart from the Preview app, you can also use the Photos app on Mac to compress a photo or even an album. The most significant benefit of using this method is that your image sizes will be reduced on iPhone and iPad as well.
- Launch Photos → Select the images to compress.
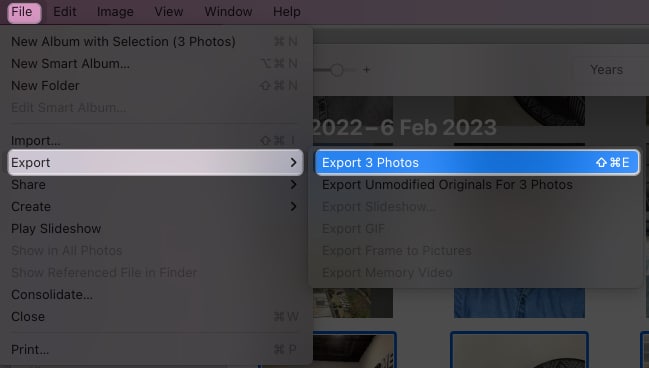
- Click File from the menu bar → Choose Export → Export X photos.
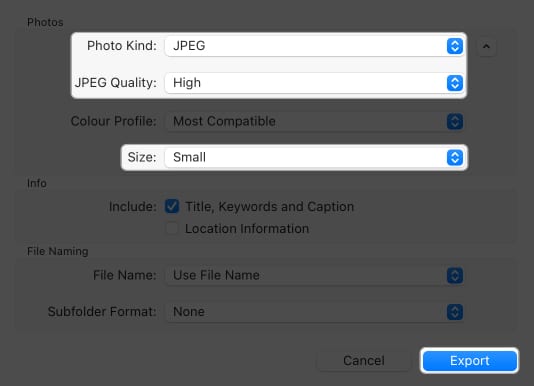
- Next, choose the Format from the drop-down menu.
- Choose JPEG Quality image to reduce the size.
I’m choosing High and Small, respectively. - Give a File Name and hit Export.
Compress images using Mac’s Finder
I don’t think anyone might have expected they could compress Mac images using the Finder app. But this method is beneficial if you are sharing your pictures.
- Open Finder → Select the image or the album to compress.
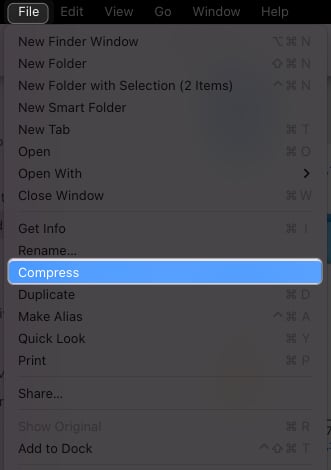
- Click the File option from the menu bar → Choose Compress.
Since these steps result in converting the images to a zip file, you might need a good unarchive app to unzip it. I have recommended some good ones below.
Compress images using third-party apps/tools on Mac
You can also use the help of many other third-party apps or tools to compress images on a Mac. I have also prepared a detailed guide on the best image compressors for Mac! You can choose any of them as I have tested and ensured all work great and is safe.
Save memories without sacrificing space!
With these steps I have mentioned here, you can easily compress images on a Mac. I suggest trying all the default methods to check which suits you. However, if you use any third-party tools, please don’t upload personal images. In case you have any issues or doubts, drop them in the comments below.
More interesting guides for you:

