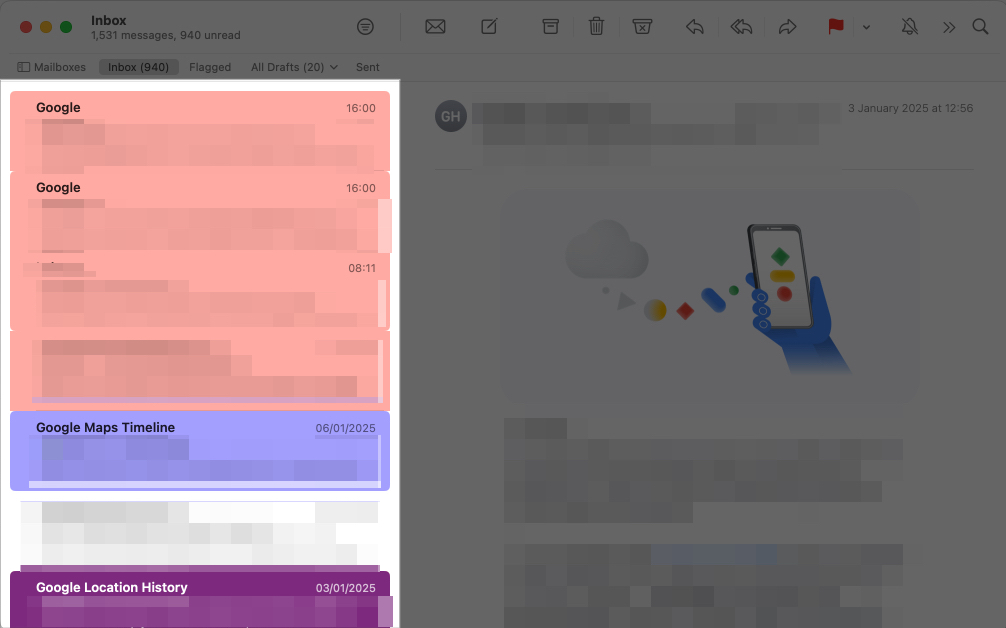
Did you know that the Mail app on Mac lets you customize your inbox through color-coding? This can help you categorize your emails to stay more organized and keep track of what’s most important. So, in this article, I’ll show you how to color-code emails on Mac to visually categorize them. This simple yet powerful hack is sure to change the way you manage your email, making the process faster and more efficient.

Why color-coding emails is helpful?
If you’re wondering what’s the purpose of color-coding emails, here are some of the benefits this process has:
- Improved Organization: Assigning colors to categories like work, personal, and urgent emails can help you quickly find what you need.
- Prioritization: You can use bright colors for high-priority messages and subtler tones for less critical ones to focus on what matters most.
- Time-Saving: Visually categorizing your emails lets you scan your inbox and act on key messages without sifting through clutter.
How to manually color-code emails in the Mail App on Mac
You can manually assign a color to highlight emails by following the steps below:
- In the Mail app, select one or multiple messages in your inbox.
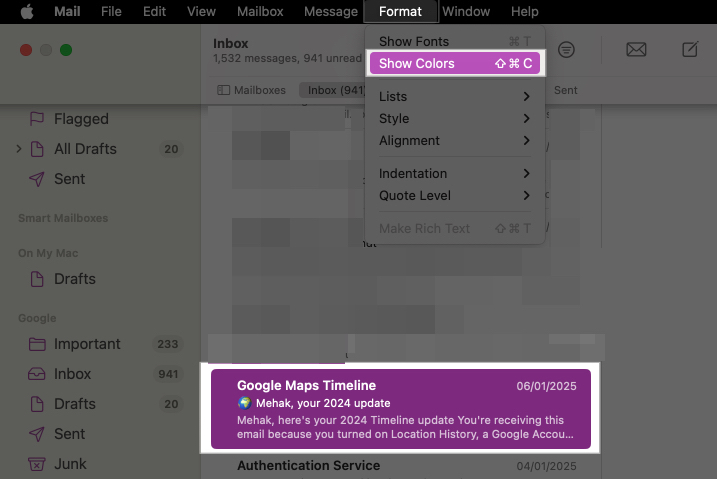
- Click on Format in the top menu and click Show Colors.
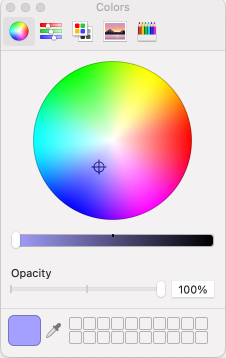
- Select a color of your choice.
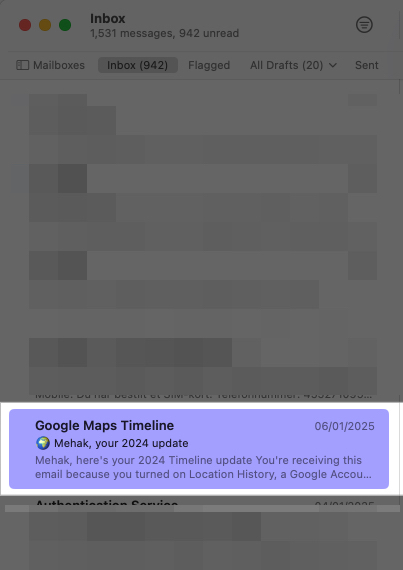
- The selected message(s) will change to the background color you picked.
Use Rules to automatically color-code emails in the Mail App
You can set custom rules to automatically color code emails in the Mail app. This means that depending on the criteria you set, incoming emails will show up in the colors you assign. Follow the steps below to set up the rules in the Mail app on macOS Sequoia:
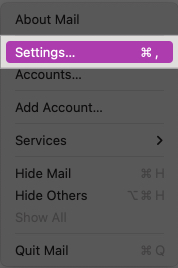
- In the Mail app, click on the Mail menu at the top and select Settings.
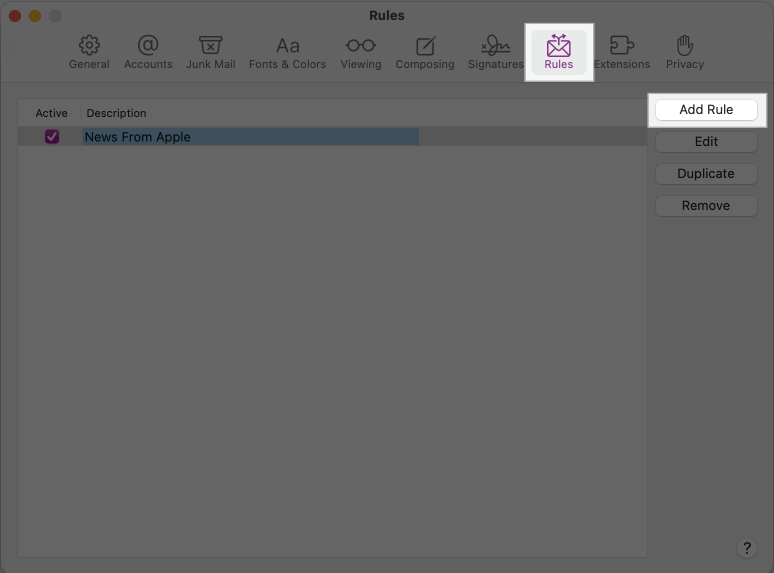
- Click the Rules tab and then click Add Rule.
- In the Description field, you can give a name to your rule.
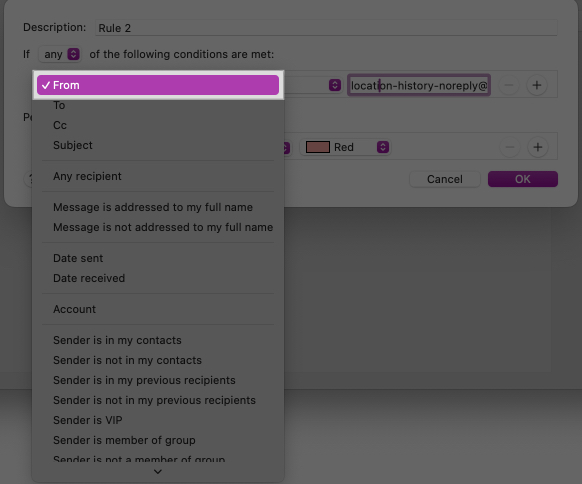
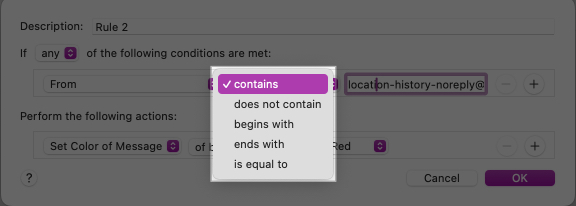
- Use the other fields to set your conditions. You will see various options to choose from, such as if the message is from a specific contact, if the subject contains certain text, if the sender is in your contacts or not, and more. Pick your condition in the first drop-down.
- Then, complete the subsequent boxes to the right for that condition.
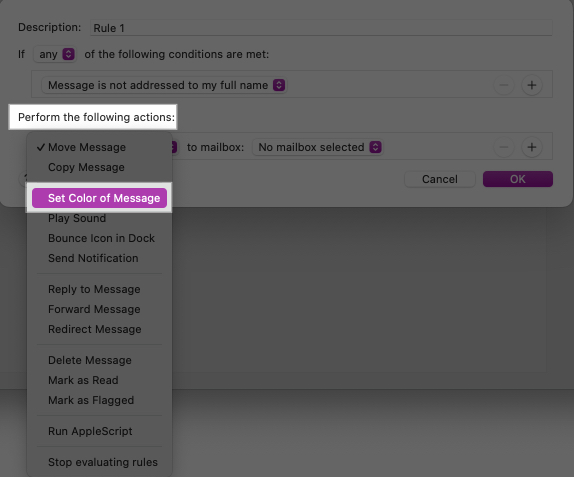
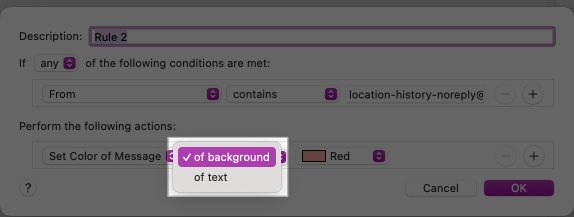
- In the Perform the following actions field, select Set Color of Message.
- You can also choose if you want to set the color of the background or the text of the email.
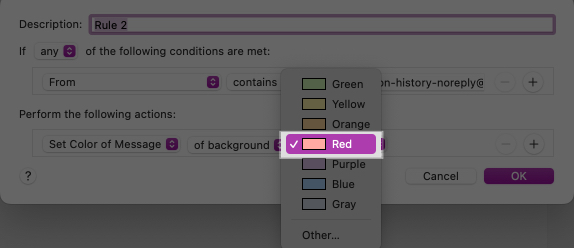
- Finally, select the color you want.
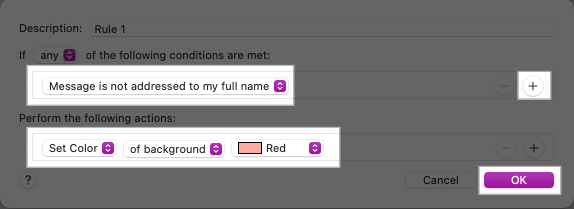
- For instance, I selected the condition that if a message is not addressed to my full name, the background should be set to Red. You can use the + icon to add more conditions and actions as you like. When you’re satisfied, click OK.
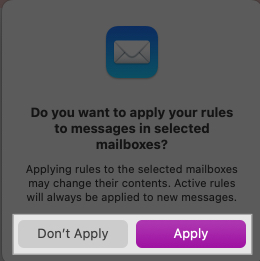
- You’ll then be asked if you want to apply your new rule to the messages already in your inbox currently. Choose either Don’t Apply or Apply, as per your preference.
- Here’s what my inbox looked like after setting up the rule of turning the background color red if the message is not addressed to my full name.
All incoming emails will now be automatically color-coded according to the rules you’ve set. However, keep in mind that this color-coding will only be visible on your Mac, not on any other devices.
Moreover, the rules will apply to emails in the order in which you have them. So, if you have several rules set up, each message that arrives will use the top rule in your list first, the one below it second, and so on. You can reorder your rules by selecting and dragging them to different positions in the list.
Signing off…
Color coding is a great way to customize your inbox on your Mac. You might also want to set up auto-reply in the Mail app to make email management even easier.
You might also like:


