The iPhone produces top-notch pictures and has many features that make it enjoyable for users. But what’s an iPhone without its speaker and microphone. Although other factors might cause your iPhone speaker and mic to malfunction, stuck dirt, dust, and wax are common causes of problems. They pile up and clog the meshes over time, reducing the quality of sound that goes in or out. And worse, this might prevent them from working at all.

If your iPhone speaker and microphone don’t work, you might want to try these fixes before spending a fortune at a repair shop. And even if they work, you might want to make cleaning them a routine to prevent dirt build up over time.
Keep reading to see how you can clean your iPhone mic and speaker.
- Things to know before cleaning iPhone’s speaker and microphone
- How to clean iPhone speakers
- How to clean the iPhone microphone
- Use a putty cleaner
- Get the iPhone speaker and microphone cleaned from Apple
Things to know before cleaning iPhone’s speaker and microphone
Before going ahead to clean your iPhone speaker and mic, there are a few things you need to note to avoid breaking these iPhone parts.
1. Where is the iPhone microphone?
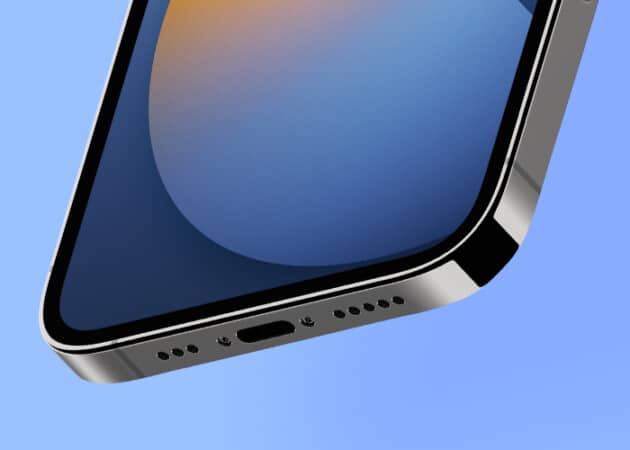
You’ll find the iPhone’s primary microphone at the bottom-left of the device for most series. It’s a small opening between the rear camera and the flashlight. They’re the small, round openings to the left of the iPhone charging port. Then recent iPhones also have a microphone on the back case. This helps filter noise from sounds that enter the iPhone.
2. Where can you find the iPhone speakers?
There are two sets of speakers on the iPhone. You’ll find the primary one (for calls) at the very top of the screen. It’s that horizontally line hole above the screen, next to the front camera on most iPhones. The other stereo speakers (for music and videos) are the dotted holes at the bottom-right of the iPhone, precisely to the right of the lightning charging port.
3. Best practices for cleaning iPhone speakers and microphone
- Unplug your iPhone from the power cable before you start cleaning. You might also want to turn it off during the process.
- Avoid using metallic objects to scrape mic ports and speaker mesh. This might pierce the meshes and break the mic and speaker.
- Don’t use water to clean any part of your iPhone. While some iPhones are waterproof, adding water deliberately to some units might cause damage.
- Even if you’re using non-metallic objects to scrape the speaker, be careful not to pierce the mesh.
- Apple recommends that you avoid using cleaners containing bleach or hydrogen peroxide.
- Don’t dip your iPhone in any cleaning fluid.
Now let’s start cleaning your iPhone speakers and microphone.
How to clean iPhone speakers
A dirty or clogged speaker might prevent you from enjoying music, videos, or calls on your iPhone. I thought mine got broken but got it fixed after cleaning. However, the iPhone speaker has a soft mesh covering (this looks like padded nets). So you need to be careful while cleaning this part. But below are ways you can go about cleaning it.

1. Get rid of debris or lint with cotton earbuds
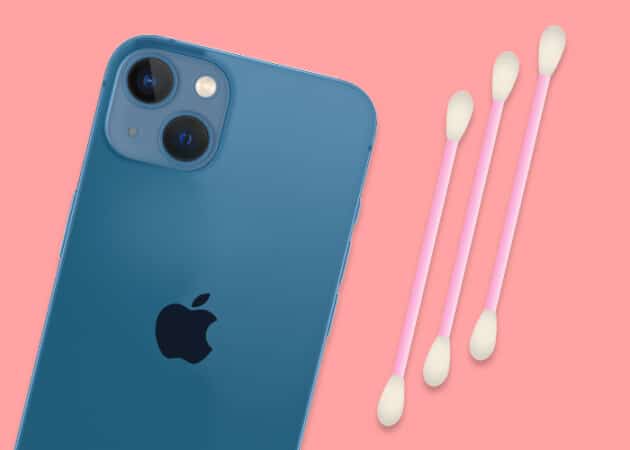
The first thing you want to do is wipe your iPhone speaker with cotton earbuds. This is handy for cleaning the top speaker above the screen. To start, find a dry cotton swab stick:
- Point the cotton earbud to start at one edge of the speaker.
- Apply gentle pressure to ensure it doesn’t break the screen.
- Next, slowly roll the swab back and forth over the mesh.
- You might notice some dirt on the swab.
With that said, you can try the same process on the bottom speakers, too. However, this time, you need more precision.
2. Use a toothpick
Although a toothpick appears sharp for cleaning the speakers, it works well. I used it when my iPhone bottom stereo speakers got blocked. However, be careful not to pierce the mesh. So be gentle with it.
I recommend using this method to clean the bottom speakers, as they’re thinner than the upper ones. So an earbud might not do much cleaning since it can’t penetrate the spots. To do this, gently point the toothpick at each speaker spot. Then roll it slowly on each opening, scraping it gently. Then, ensure that it doesn’t penetrate the mesh.
3. Use a toothbrush
There’s so much a toothbrush can achieve while using it to clean the speakers. It was what I tried next after using a swab and toothpick on my speakers. The idea is to dust off left-over debris while the toothbrush scrapes what it can out of the speakers, too. However, ensure that you use a soft toothbrush.
Using the toothbrush is straightforward. Place it on the speakers and scrape gently back and forth. When you are at it, you can also clean the charging port with the help of the brush.
4. Remove stubborn dust with painter’s tape
The painter’s tape contains tiny pieces of adhesins that adhere to dirt and dust and is pressure-sensitive. So this can help extract stuck dirt from the speaker. You might want to try using this after cleaning with the other methods.
To use the Painter’s tape method, take a piece of it and stick it to the speakers (this works for both speakers). Apple a bit of pressure and then remove the tape at once to get rid of stuck dust or dirt. You might notice dirt adhering to the surface of the tape when removed. Repeat the process until you feel that there is no more dirt or dust.
5. Use Air dusters/compressed air
Although Apple warns not to use compressed air while cleaning the iPhone, it works if you know your way around it. The compressed air helps remove trapped dust that might’ve entered the inner part of the speakers while cleaning. You need to be careful while applying an air duster or compressed air on the speakers (especially the top speaker). First, you might want to grab an aerosol-compressed gas can like Falcon Dust from Amazon.
Next, follow these steps to clean your speakers using the compressed air:
- Ensure that the compressed air can is standing upright.
- To clean the top speaker:
- Place the compressed air can a few centimeters away from the speaker, ensuring that it points at the mesh hole and not the screen.
- Apply a few blasts of air to remove trapped dust.
To blast specks of dust from the bottom speakers, point the air duster direct towards the openings and apply a few basts. However, ensure to leave a little space between the air duster and the meshes.
6. Test speakers
Once done with the cleaning, you can now play a song or video to test the speakers. Notice the difference in the audio quality before and after cleaning.
How to clean the iPhone microphone
The microphone helps transmits sound from you to the receiver during calls. It also receives sound and filters noise whenever you record a voice note. Like the speakers, the audio quality is affected if clogged up.
Follow these steps to clean your iPhone microphones.
1. Use an earbud or swab to clean the microphone

Although an earbud has broad tips, you might want to craft this into a precision tip so it can penetrate the mic spots. But no worries if you’re unable to do that. The broad tips still work but only require a bit of rolling.
To clean the mics with the cotton swap:
Point it at each microphone opening and apply light pressure. Then roll the earbud over it. Check the tip of the swab to see if there is any dirt on it. Repeat the process with a new earbud until there are no more stains on the cotton buds.
2. Use a microfiber cloth
Microfiber is a soft piece of cloth that doesn’t scratch your iPhone. To clean your iPhone microphone with a microfiber cloth: fold the fleece to create a tiny edge. Next, roll it over each mic spot repeatedly to remove dirt.
3. Clean mic using isopropyl alcohol, toothbrush, and earbud
Isopropyl alcohol is a volatile liquid with a wax-dissolving property. So it dries off quickly and doesn’t soak your iPhone microphone since it’s a volatile liquid. You can get this liquid from any nearest chemical store.
To clean your iPhone with isopropyl alcohol:
- Pour a little of the liquid into a small container.
- Dip a clean, soft toothbrush or painter’s brush into the liquid gently.
- Ensure that the brush endings reach the mesh.
- Rub the brush gently over the rear and bottom microphone openings.
Repeat the process as many times as you can. Once done, use a dry earbud swab to clean the mic meshes. This helps remove leftover wax or dirt.
4. Use Air dusters/compressed air
As in the case of speakers, you can also use an air duster to blast off debris from your iPhone microphone. If you didn’t read the earlier step for cleaning the speaker with this method, here’s how:
Point the opening of the air duster at the microphone openings and apply a few shots of compressed gas to blow off trapped dust from within the mic.
5. Test iPhone mic
Now test the microphone by recording a voice note using the Voice Memo app. Then note if there’re any improvements in recording quality. You can also call a friend to ask if they can hear you better.
Use a putty cleaner
Electronic putty cleaners are soft silicone-like materials that stick to nooks and crannies of a device to adsorb stuck and hidden dirt. Putty cleaners help remove dirt from unreachable corners in your iPhone speakers and mics. You can get putty cleaners from any electronic store close to you.
Next, pinch off a small part of the putty and press it against the speakers and mics. Then remove it to grab dirt from the corners of these parts.
Get the iPhone speaker and microphone cleaned from Apple
There are many Apple-authorized repair services all over the world. Locating them depends on your location or region, though. You can trust these agents since they’re Apple-certified. But while some repairers might help clean your iPhone for free, others might charge you for it. You might want to take your iPhone to the Apple repair center closest to you if the dirt has built up to a level beyond your control. Here’s how you can reach out to Apple Support.
Wrapping up
The speakers and microphones are essential parts of the iPhone. And they might dull you up if they fail to work. The methods I’ve recommended in the post are proven ways you can clean them up to boost their performance or get them working again.
With that said, keep in mind that your iPhone needs periodic cleaning to prevent dirt buildup. Additionally, you can invest in this PurePort Multi-Tool iPhone Cleaning Kit from Amazon if you don’t mind the cost. This one has all the tools for cleaning every part of your iPhone, including the speakers and microphones.
Any comments or questions? Let me know in the comments box below.
Related Reads:

