From getting access to geo-restricted apps and services to spoofing someone off your actual location to prevent apps from accessing the real location, there can be several reasons why you might want to change location on your iPhone.
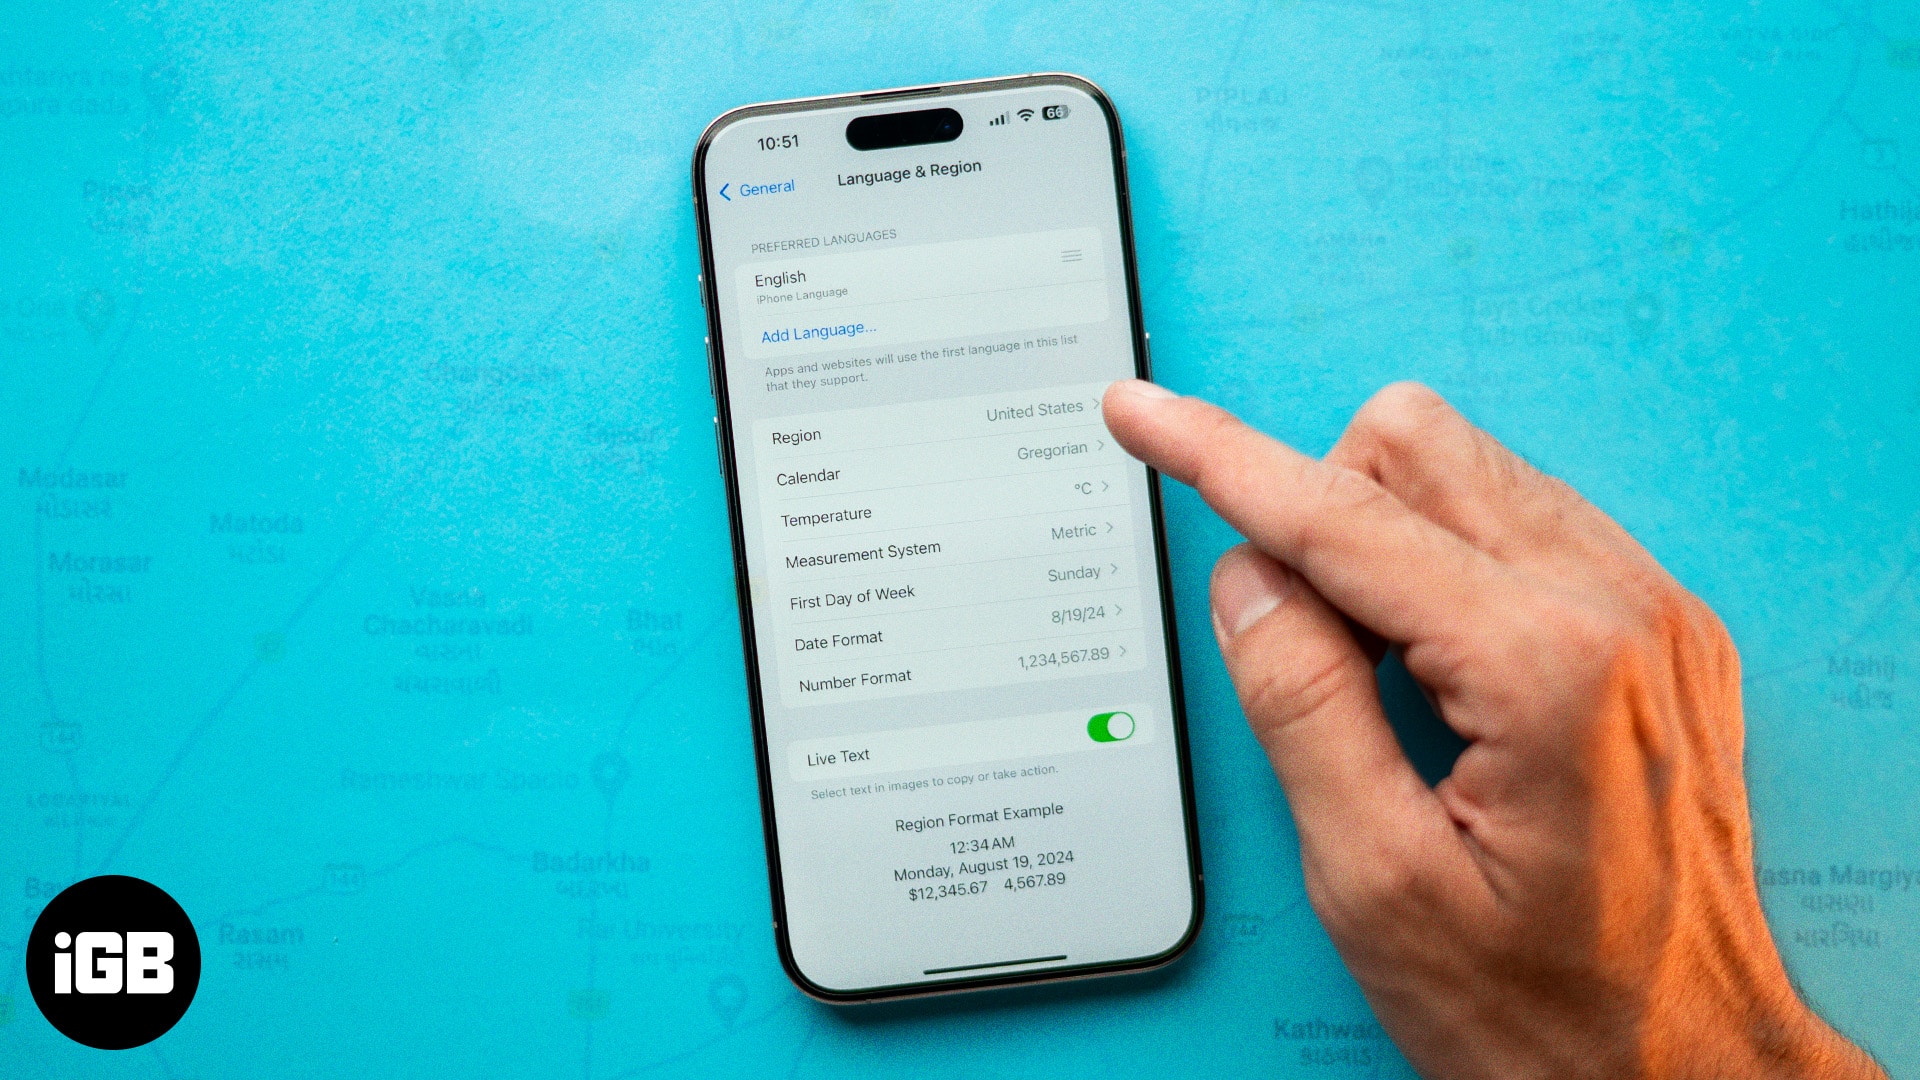
While there are various methods to do so, each has its own pros and cons. In this guide, we will look at all the different ways to change the location on your iPhone.
Why should you change your current location on an iPhone?
Before you dive into the methods, let’s explore some reasons why you might want to change your iPhone’s location.
- Access geo-restricted content: Many apps and services offer different content in different countries, so by changing your iPhone’s location, you can access content that isn’t available in your own.
- Privacy and security: Turning off location services or masking your location can enhance privacy and prevent apps from tracking your activity & location.
- App testing: If you are an app developer, you might need to test your apps in different geographical locations to ensure they work properly in all regions.
- Social media fun: Spoofing your GPS location can help you trick your friends on social media apps.
4 ways to change location on an iPhone
From turning off the location services to prevent apps from accessing your location to using a VPN service to change your virtual location, you can hide or change your iPhone location in a few simple steps.
1. Turn off Location Services
While there can be many reasons why you want to change the location on your iPhone, the primary reason for most people is they don’t want apps and services to access their real location. If that’s the case with you, too, you can turn off the Location Services on your iPhone to shield your location.
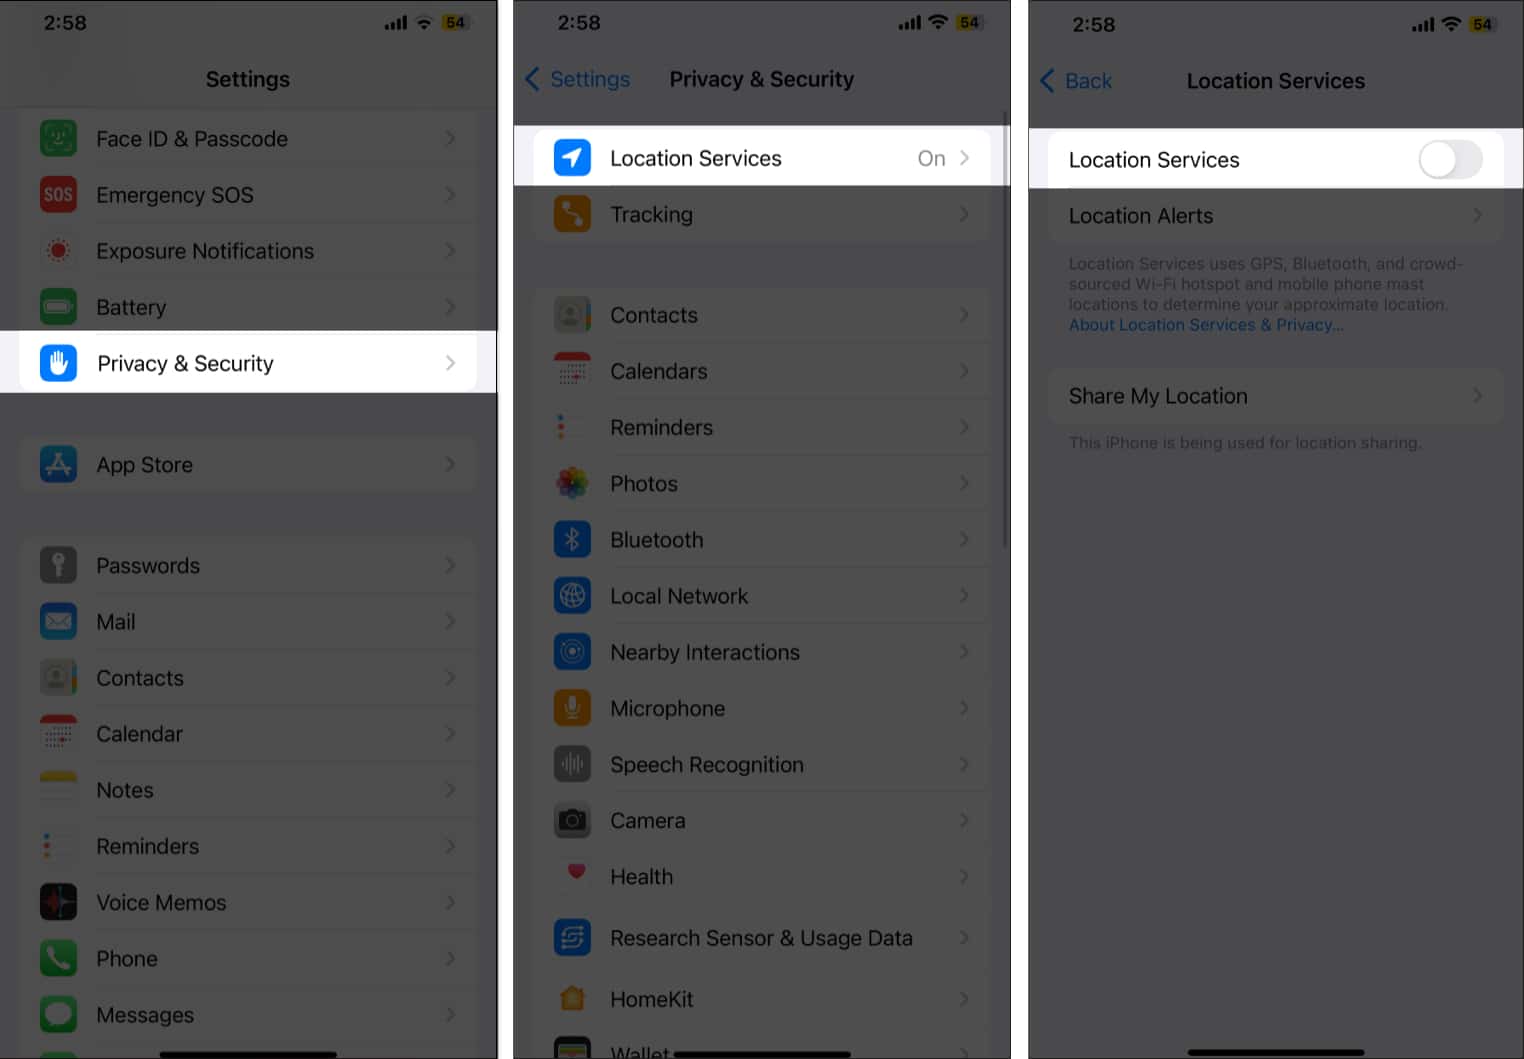
- Open the Settings app on your iPhone.
- Head to Privacy & Security settings.
- Here, tap on Location Services.
- Toggle off Location Services.
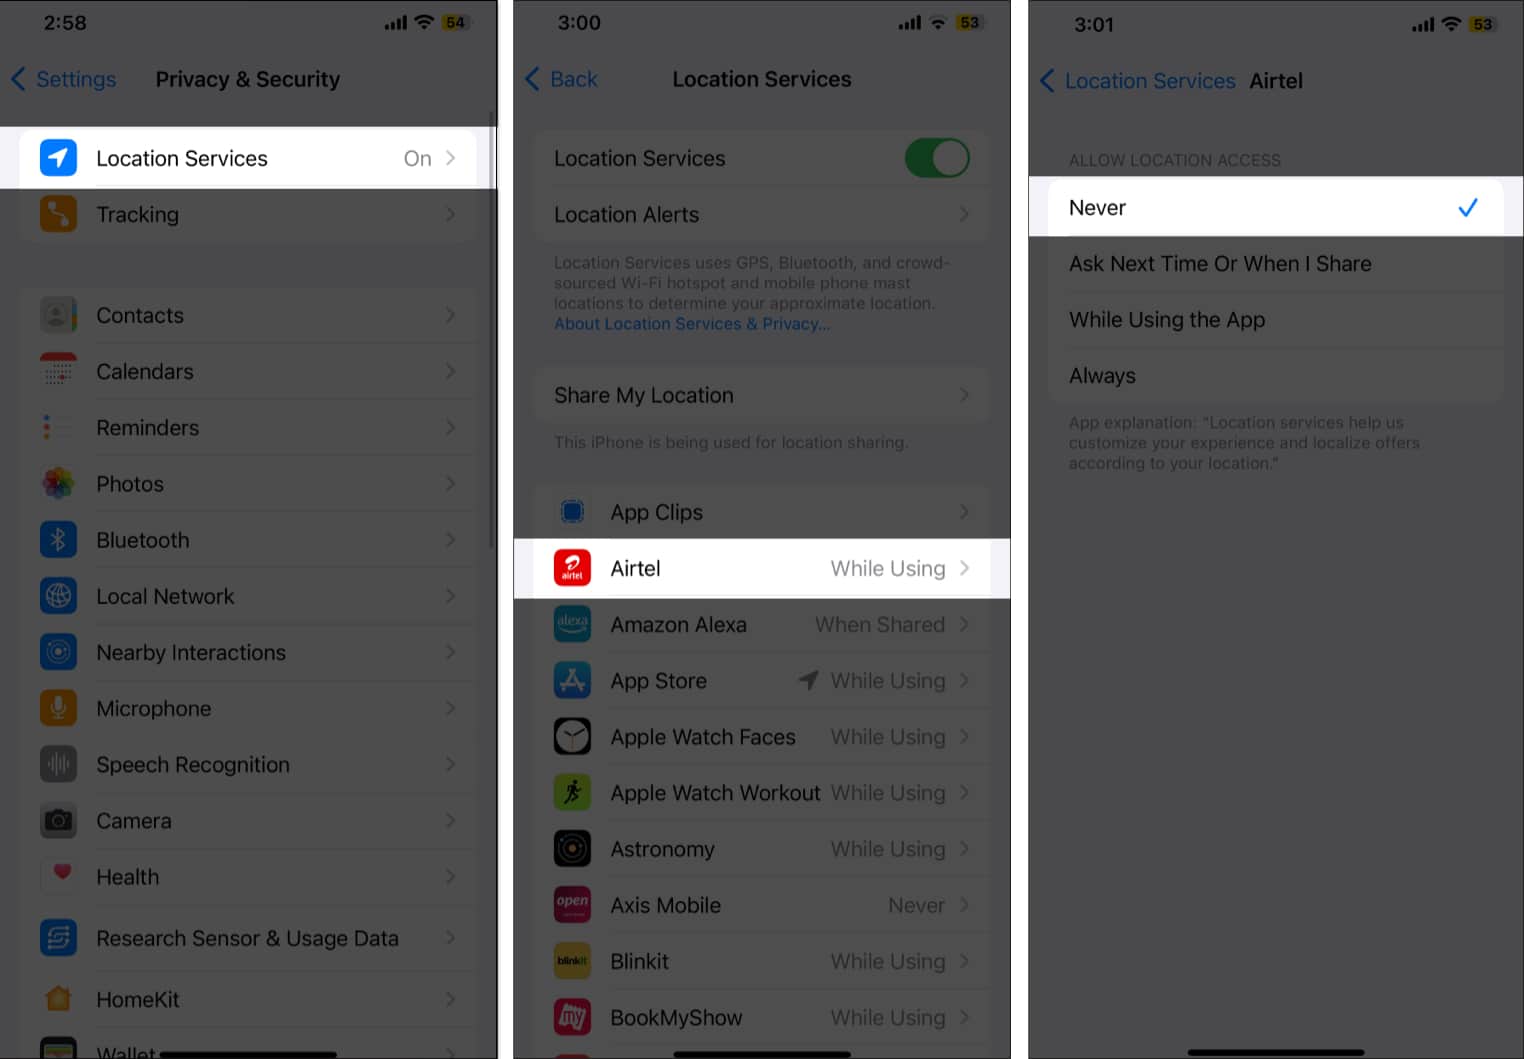
Alternatively, if you want to shield your location from a particular app, you can restrict that app from accessing your location instead of turning off the location services altogether.
- In the Privacy & Security settings, tap on Location Services.
- Scroll down and choose the app for which you want to turn off the Location Services.
- Select the Never option in the subsequent menu.
2. Use a VPN to change the location on an iPhone
Using a VPN on your iPhone is by far the easiest way to change your location on your iPhone. A reputable VPN service such as Surfshark VPN has its server set up in multiple countries. The VPN routes your internet connection through your chosen server and makes it appear as if you are browsing from that particular location, shielding your actual location from prying eyes.
Besides, VPN not only helps you change your iPhone’s location, but it also allows you to access content and services that are otherwise geo-restricted in your country.
To change your iPhone’s location, all you need to do is:
- Install the Surfshark VPN app from the App Store.
- Create a new account or sign in to your existing one and subscribe to the service if you haven’t already.
- Choose a VPN server under Locations to which you want to connect.
Benefits of using a VPN on iPhone
Using a reputable VPN like Surfshark offers several benefits beyond just masking your iPhone’s real location:
- Safety and security: An active VPN connection encrypts your internet connection, making it hard for hackers and malicious entities to intercept your data. This is most useful when you connect your iPhone to a public Wi-Fi network.
- Anonymity and privacy: With a masked IP address, websites and online services can not track your real location and browsing habits and patterns, preventing you from targeted ads and improving your online privacy.
- Access to restricted content: VPN allows you to easily bypass any geo-restrictions, enabling you to access and enjoy content otherwise unavailable in your region.
Why choose Surfshark VPN?
Now that you know the benefits a VPN can offer, it is time for you to consider which one to go for. And when it comes to a power-packed VPN service, you can not go wrong with Surfshark VPN. Here’s why:
- Killswitch Feature: Surfshark VPN comes with a Killswitch functionality that protects your data from scammers in case the VPN connection suddenly drops for any reason.
- Top-notch Security: Surfshark uses strong encryption protocols such as WireGuard, IKEv2, and OpenVPN and has a strict no-logs policy, ensuring your data remains secure and private.
- Extra Features: Unlike other VPNs, Surfshark has a lot to offer, including but not limited to CleanWeb (ad and malware blocking), Dynamic MultiHop (multi-server VPN chaining), IP Rotator, and the ability to be used on unlimited devices.
3. Change your GPS location on an iPhone without a VPN
While using a VPN is an easy way to change the location of your iPhone, you can also use various GPS spoofing tools, such as Foneazy MockGo and UltFone iOS Location Changer, for the same. With these, not only will you be able to access geo-restricted content, but you can also trick your friends on social media apps like Snapchat.
That said, we at iGeeksBlog do not recommend blindly trusting these tools, as it may cause security risks. So, use such tools at your own risk.
4. Change your App Store region
If you recently came across an app on the App Store that isn’t available to download in your region, Apple lets you change the App Store region/country on your iPhone so you can access those apps. Follow these steps to do this:
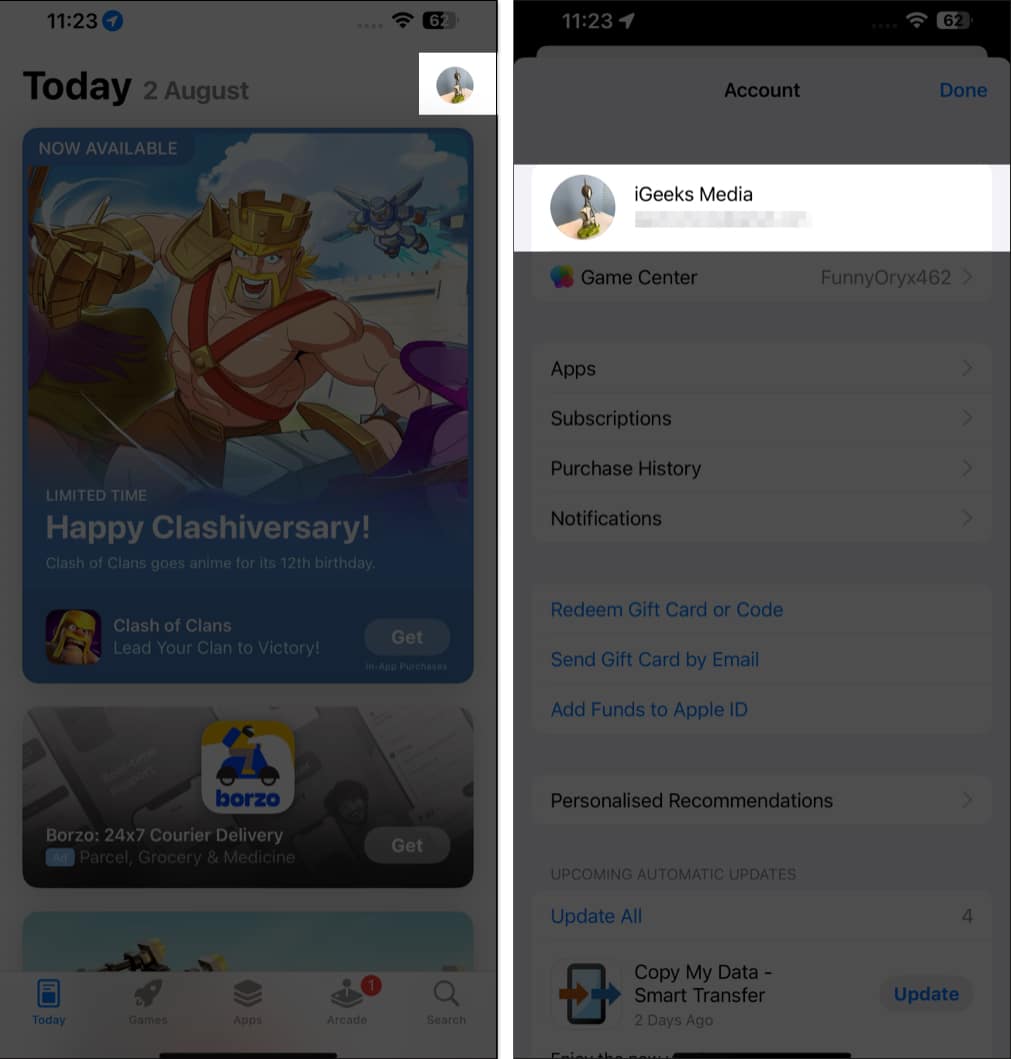
- Open the App Store and tap your profile icon in the top-right corner.
- Here, tap your name.
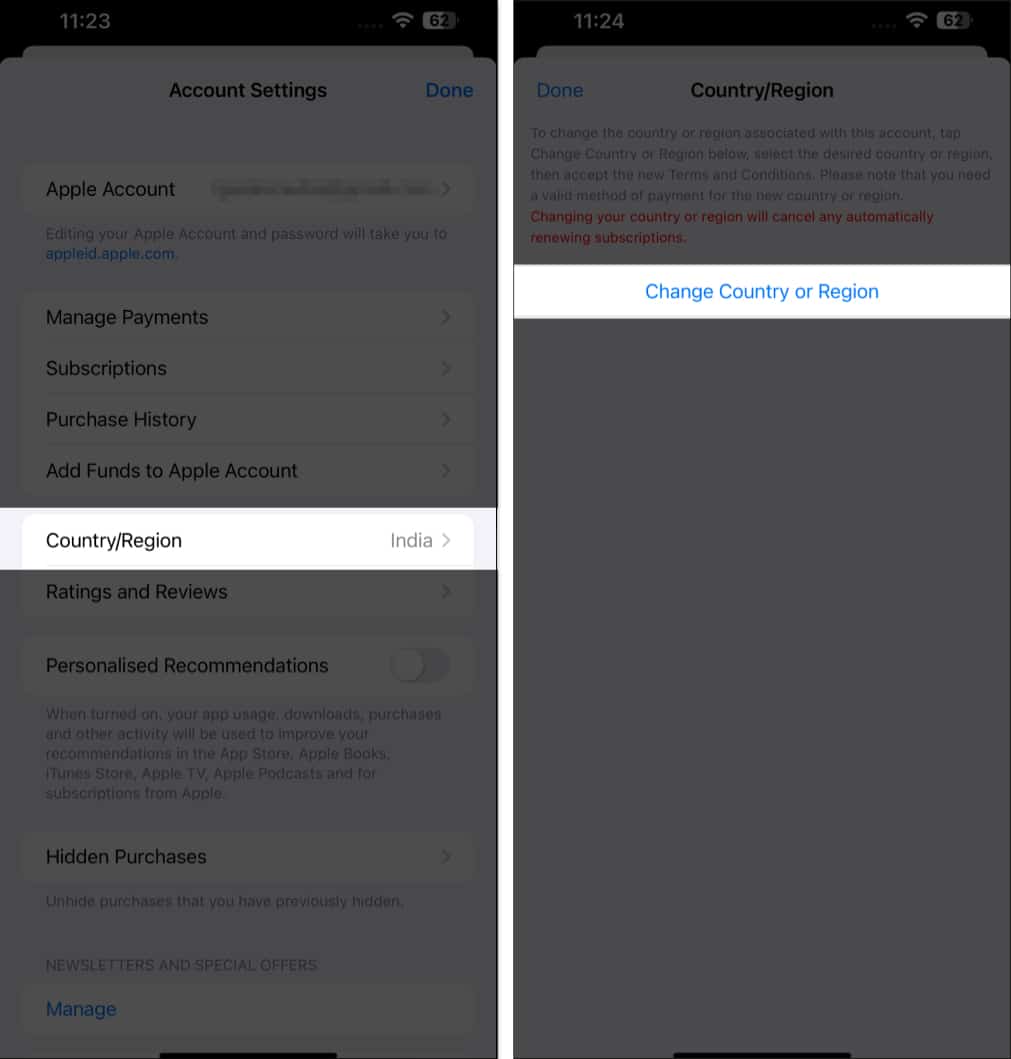
- Next, tap on Country/Region.
- Choose your preferred country or region and follow the on-screen instructions to complete the process.
Alternatively, you can do the same through your Apple ID settings in the Settings app.
Besides this, you must leave Family Sharing on your iPhone before you begin changing the App Store country.
Signing off…
Those are all the ways you can change your iPhone’s location. Once done, you can enjoy global content and services without any restrictions and prevent apps from using your location for targeted ads. Not all methods are meant for everyone, so choose the one that best suits your needs and technical competence.
Read More :

