Maybe your existing iPhone phone number is well past its prime or perhaps you no longer use it much to communicate with your friends. Whatever could be your personal reason, you can always change the phone number in iMessage on your iOS device.
Even though the process seems to be straightforward, at times, it doesn’t go as per the expected line. But thanks to a nifty little trick, removing the existing phone number from iMessage and switching to a new one is pretty simple. Let me help you perfectly set up your new number for iMessaging!
How to change your iMessage phone number
Switching to a new SIM card often necessitates updating your iMessage settings to reflect your new phone number. If you forget to deregister your old number and associate iMessage with the new SIM number, you will experience issues sending and receiving messages.
Here’s what you need to do to change your iMessage number to use a new SIM card on your iPhone:
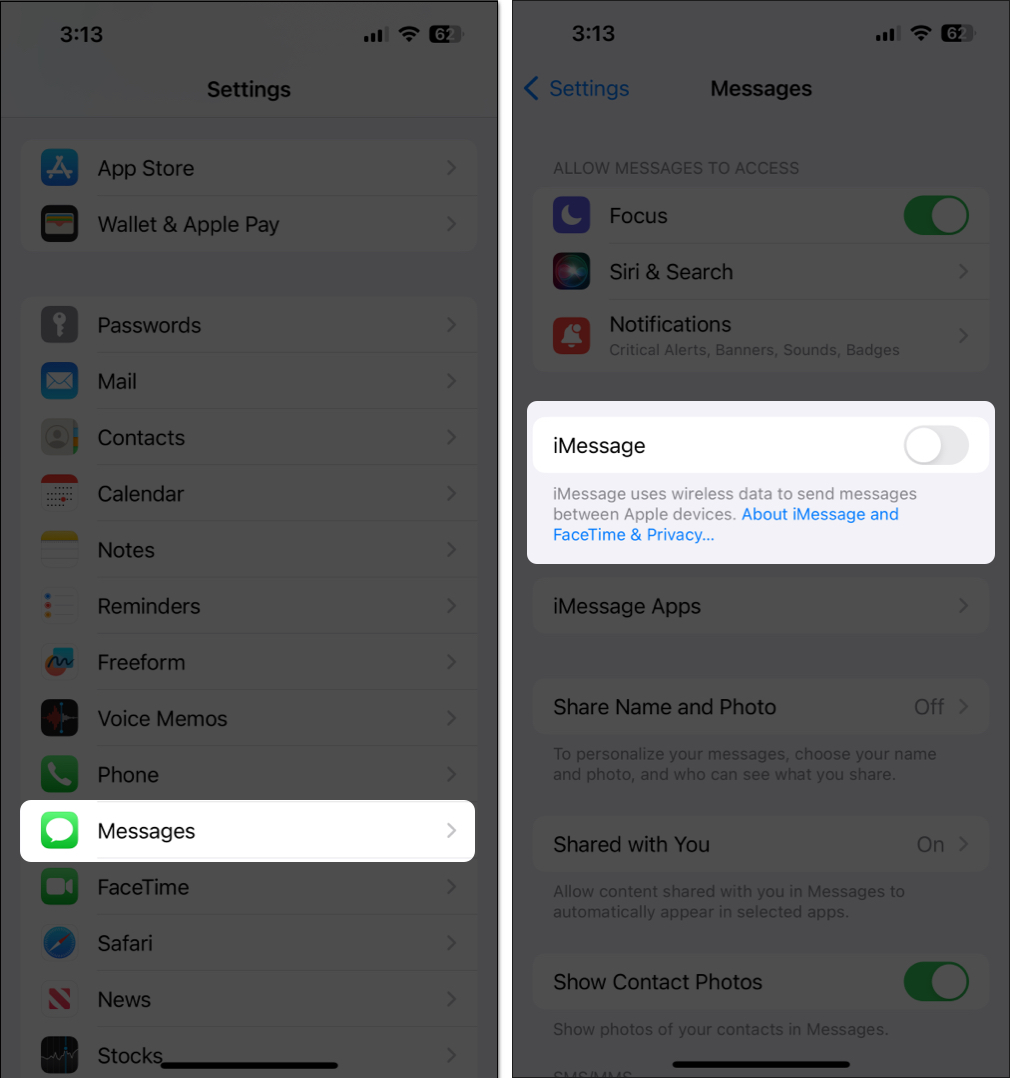
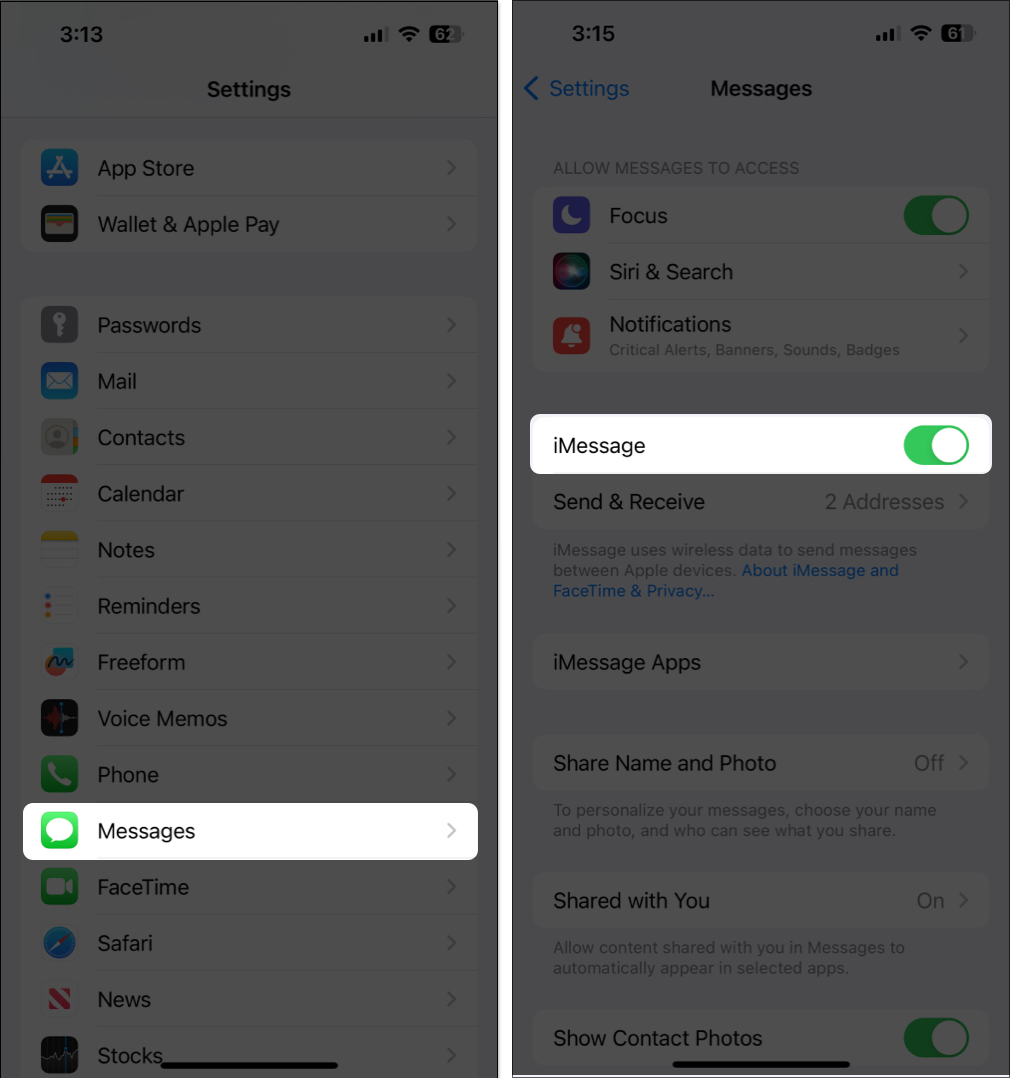
- Navigate to Settings → Messages → Toggle off iMessage.
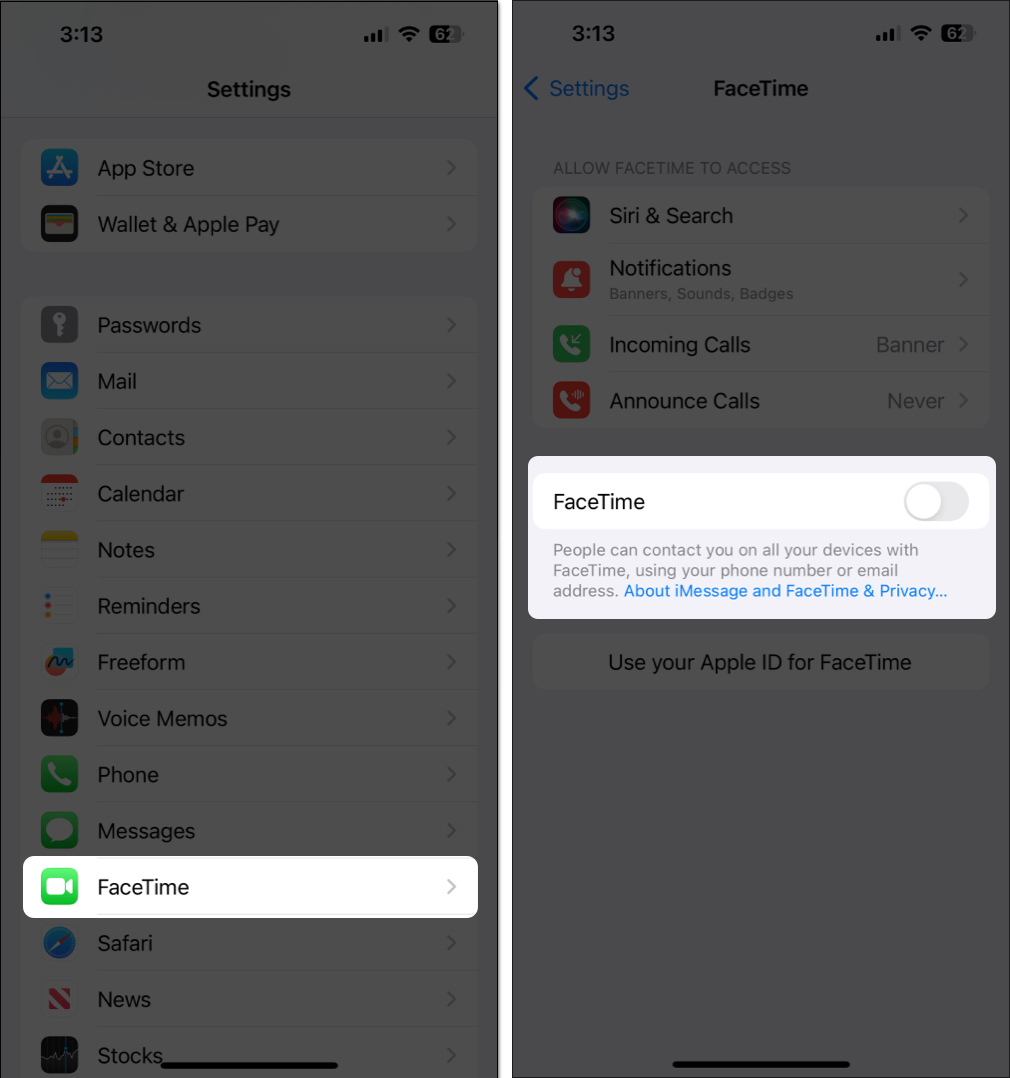
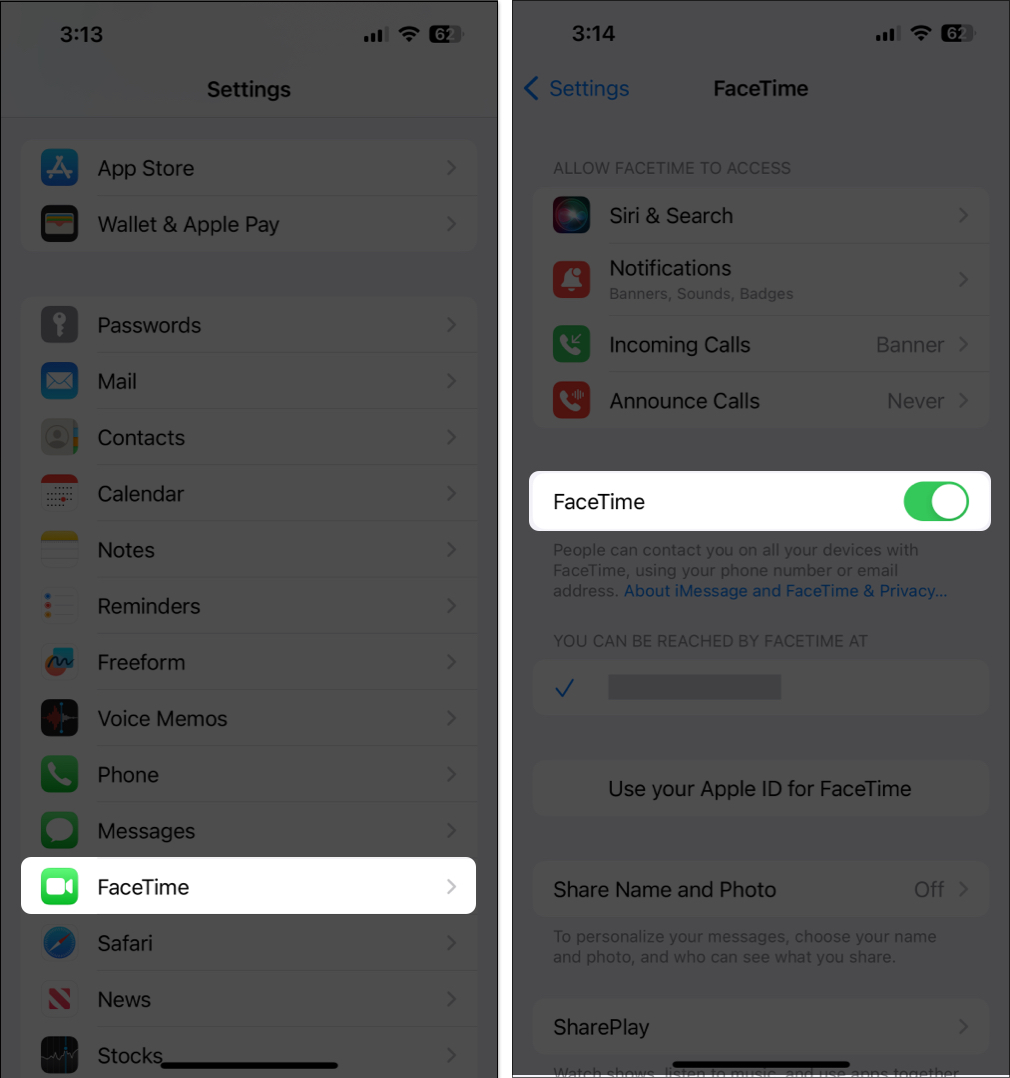
- Navigate to Settings → FaceTime → Toggle off FaceTime.
- Remove your old SIM card and replace it with the new SIM.
If you have an eSIM, delete the old eSIM and add the new one. - Restart your iPhone.
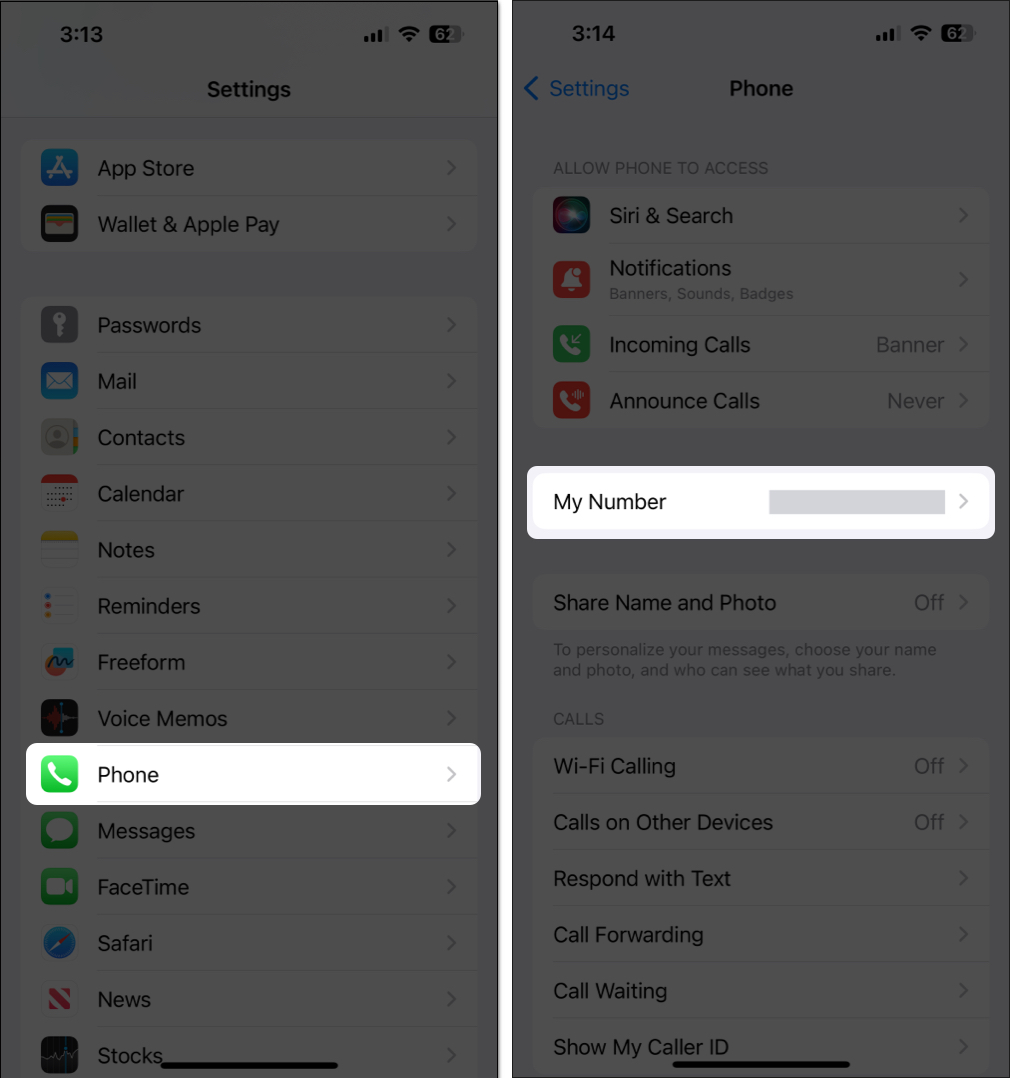
- Now, go to Settings → Phone → Then, tap My Number.
- If you don’t see your new number, type it into the text field → Tap Save.
You must add your county code and enable cellular data. - Navigate to Settings → Messages → Toggle on iMessage.
- Navigate to Settings → FaceTime → Toggle on FaceTime.
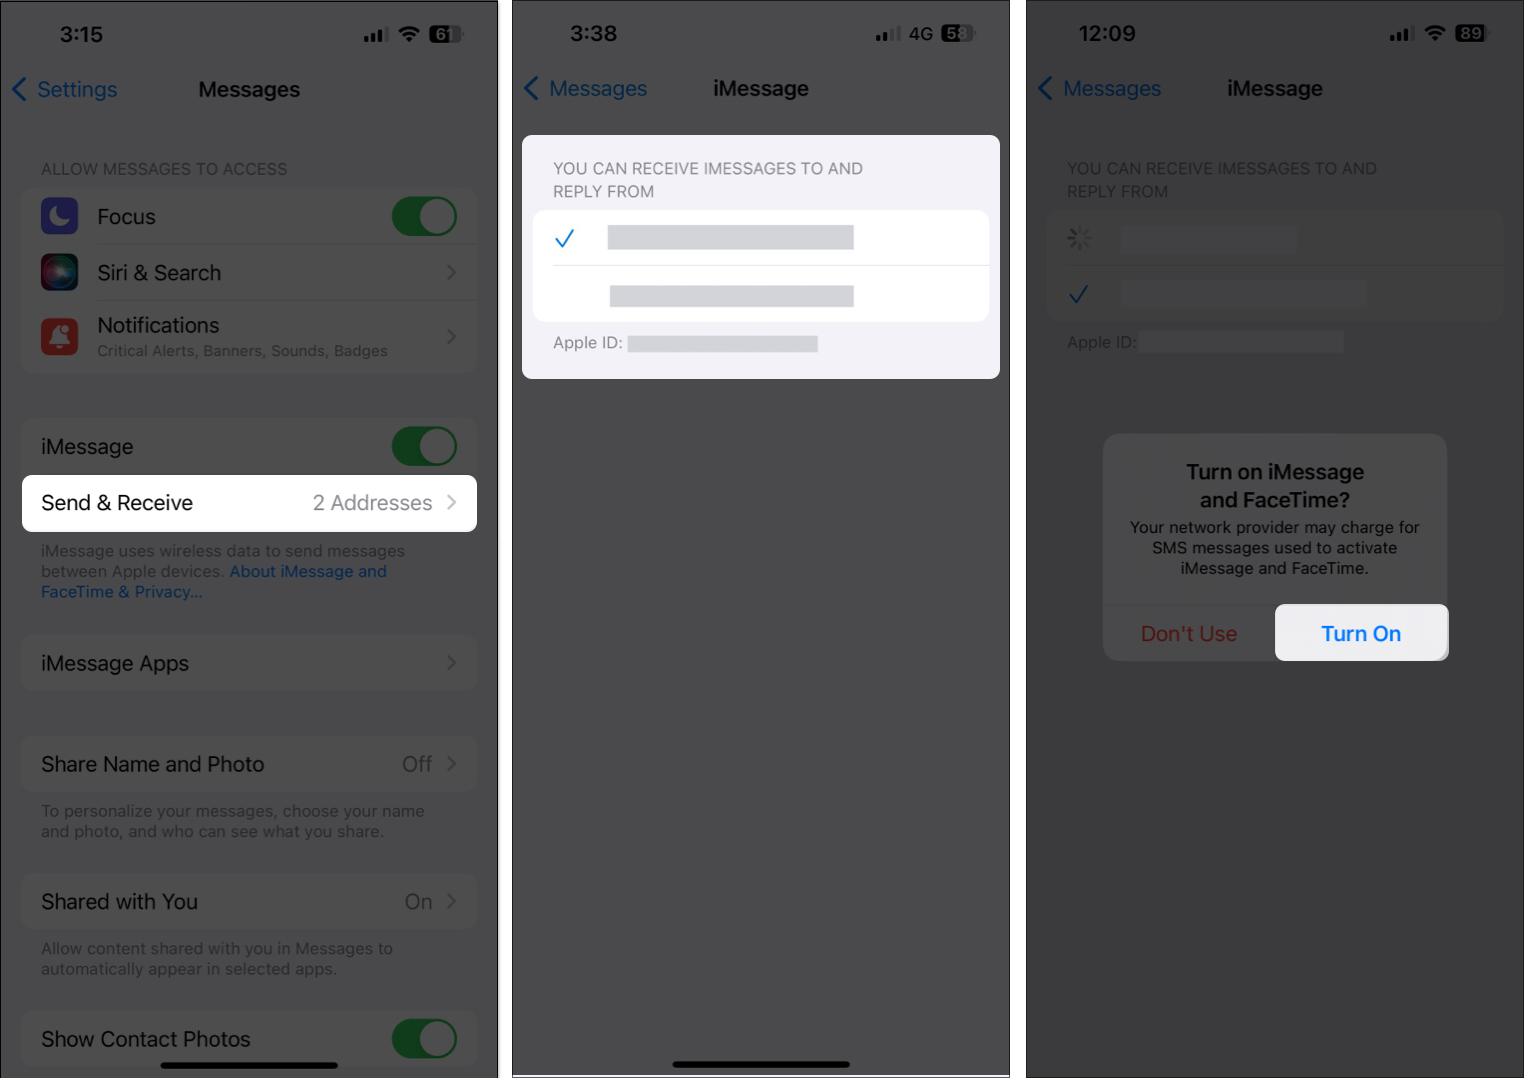
- Go to Settings → Messages → Send & Receive → Then, select the new number.
- When a dialog box appears, tap Turn On and wait until the verification completes.
Once you tap Turn On, the phone number will be added to iMessage and FaceTime.
That’s all! However, if you face any iMessage activation error, ensure you have a strong internet connection and check the date and time settings.
Note: If the phone number you want to remove is set on the iPhone that is currently not accessible to you, change your Apple ID password. This will remove the phone number from all of your synced devices, including iPhone, iPad, and Mac.
How to switch your iMessage number on iPhone
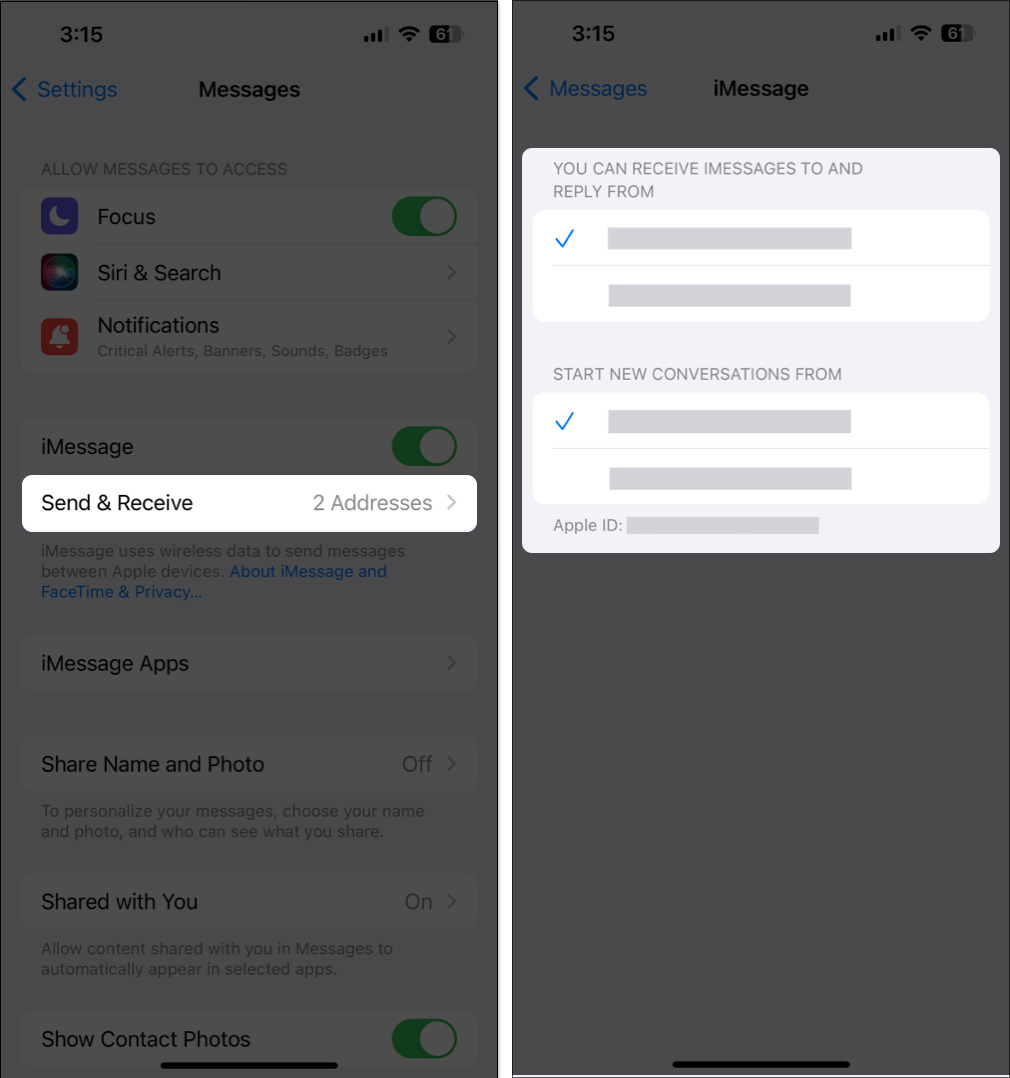
If you have a dual SIM iPhone or multiple email addresses linked to iMessage, you may want to switch your iMessage number for new conversations. Therefore, the selected phone number will initiate new iMessage or FaceTime conversations, preventing confusion.
Here’s how you can change these settings on your iPhone:
- Open the Settings app on your iPhone.
- Then, navigate to Messages → Send & Receive.
- Select your preferred phone number to use with iMessage.
- De-select the phone numbers you don’t wish to use with iMessage.
Wrapping up…
Hopefully, the trick has helped you easily set up the new phone number for your iMessaging. Having tried it on quite a few occasions, I can vouch for its veracity. However, I’d love to have your feedback about it and whether or not it clicked for you.


Thanks for your help. It all worked. It did take a long time for iMessages to verify the new number. I guess that was a poor internet connection.
However, I switched off the phone and switched it on again which helped the new number to stay where it belonged. All osrted now. thanks. x