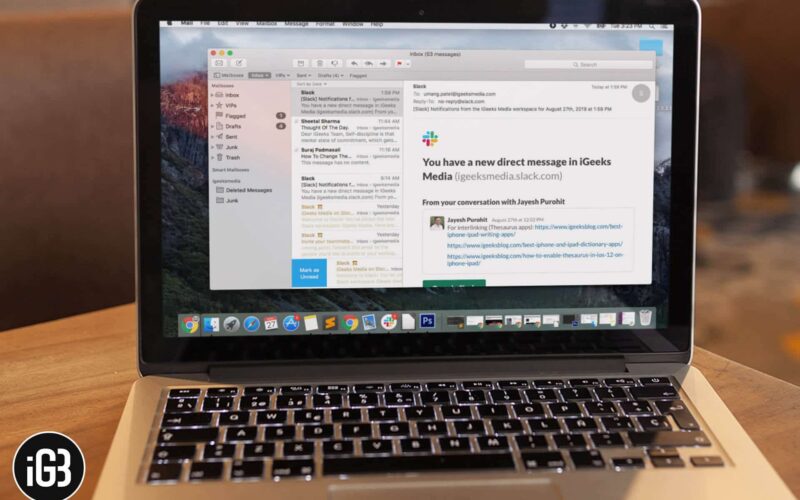
The Mail app might be your most used app on your Mac. From receiving work emails to private notes, from the credit report to day-to-day bills, from social-media notifications to formal invites; the app sees all this and more.
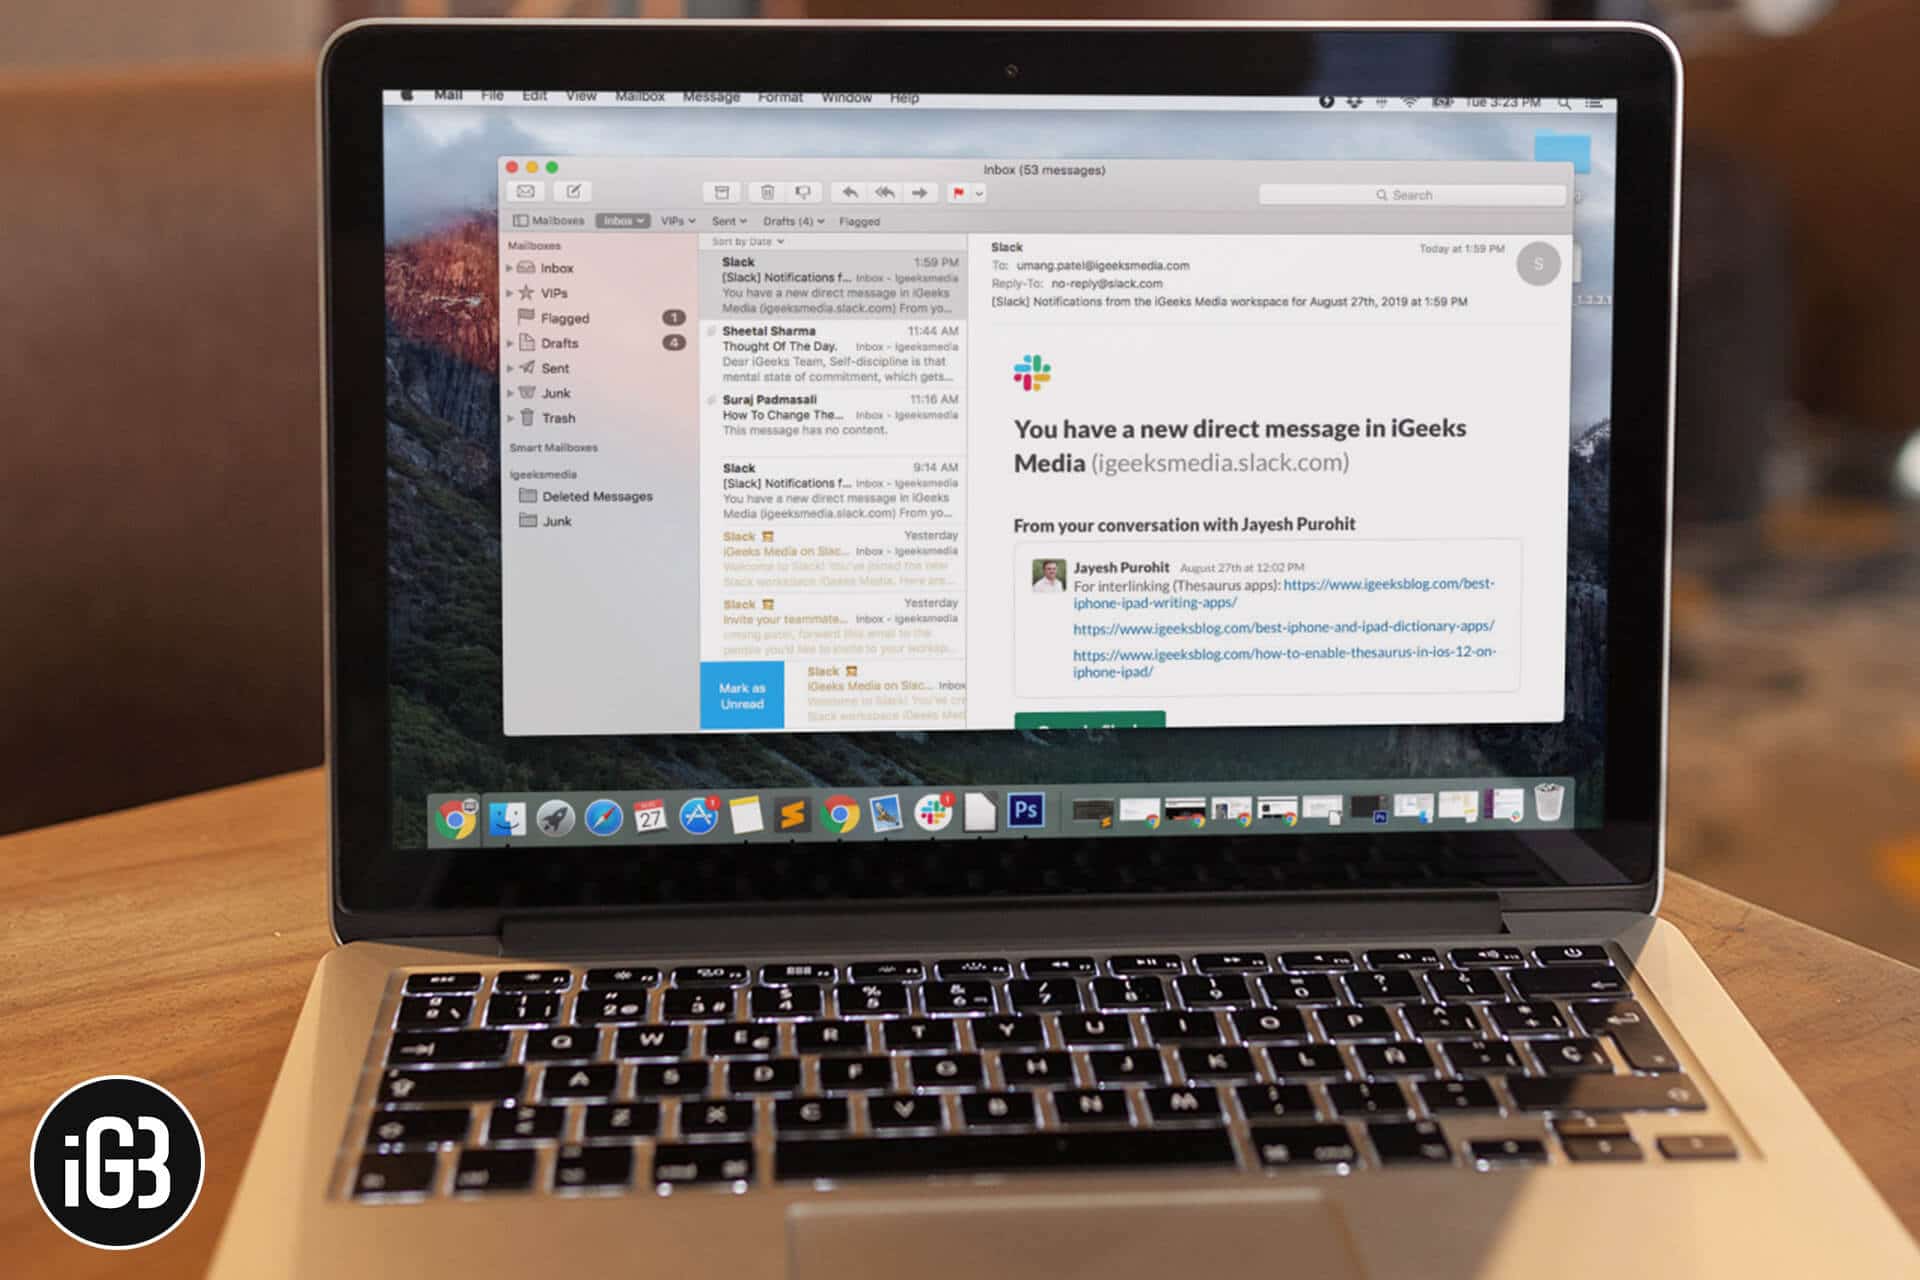
While Mac does not have the provision to change the look of the built-in Mail app, it does give you the liberty to make some tweaks. You can choose the layout of the Mail app, customize the fonts, font size, and font color that suits you. Here’s how all this can be done:
- How to Customize Viewing Layout of Mail App on Mac
- How to Customize the Mail App Fonts and Colors on Mac
- How to Change the Mail App Colors on Mac
How to Customize Viewing Layout of Mail App on Mac
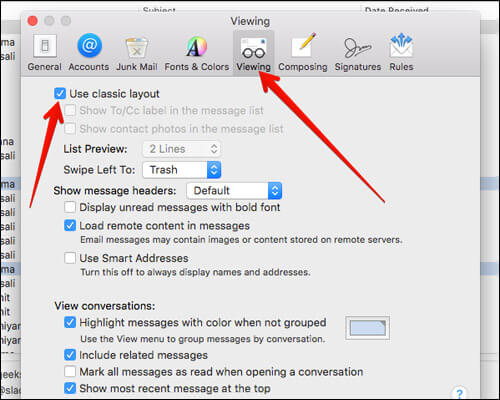
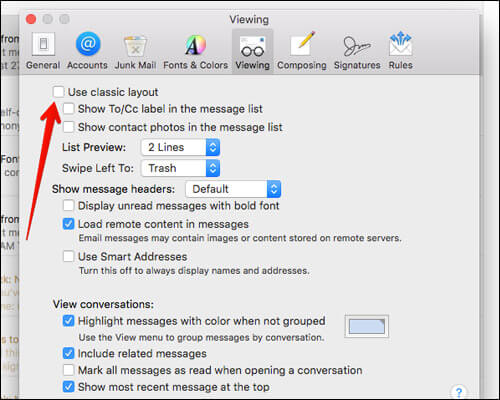
There are two types of layout commonly available in the mail app. The classic layout stacks the message list on the top and the message content on the bottom. Whereas, the other layout stacks the message list in the left corner and the message content on the right corner. Here’s how you can switch between the layout.
Step #1. Open the Mail app on your Mac, click on Mail, and choose Preferences from the Menu Bar.
You can also press “Command Key (⌘) + ,” after opening the Mail app to open the preferences window directly.
Step #2. Now select Viewing tab from the given options.
Step #3. Depending upon your current layout, the Use classic layout box will either be marked or unmarked. Accordingly, mark/unmark your box to change the layout of the Mail app on Mac.
How to Customize the Mail App Fonts and Colors on Mac
Step #1. Open the Mail app on your Mac, click on Mail, and choose Preferences from the Menu Bar.
You can also press “Command Key (⌘) + ,” after opening the Mail app to open the preferences window directly.
Step #2. Now select the Fonts & Colours tab from the given options.
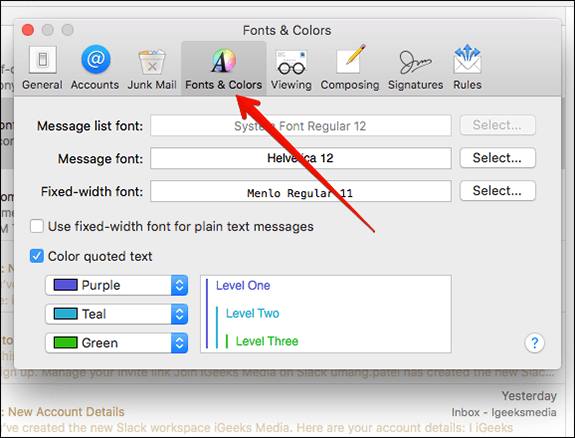
Once you reach this window, there will be multiple options; let’s explore each option individually.
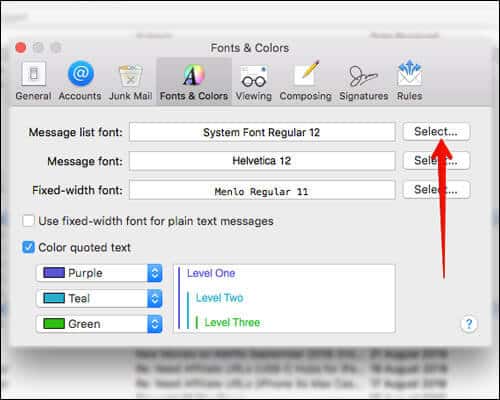
Message List Font: Font and Font Size Of The Message list
This option allows you to change the font and font size of the Message list. However, you can only change from the default System font Regular 12, if you are using the Classic Layout.
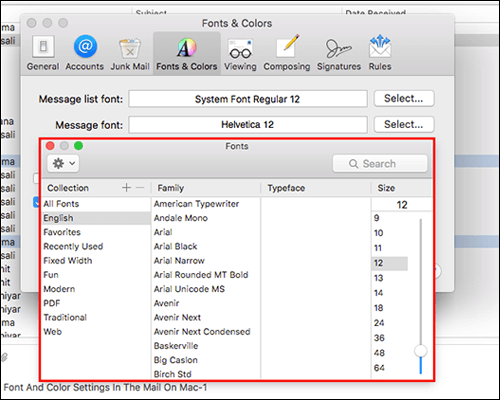
So, if you are using Classic Layout, click on Select and surf through the pop-up window to find the Collection, Font, Typeface, and Size that you prefer.

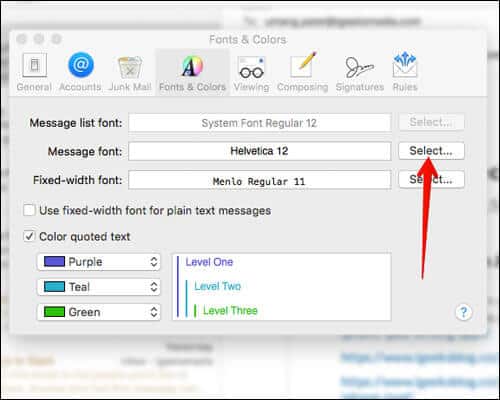
Message Font: Font and Font Size For Regular Emails
This option allows you to change the font and font size for messages viewed and for all written messages, whether new messages, replies, or forwards. Click on Select and surf through the pop-up window to find the Collection, Font, Typeface, and Size that you prefer.
Do note that if the sender has used a specific font and font size, you will see the font used by the sender when viewing the message.
You can also change the font and font size for a single message while composing it.
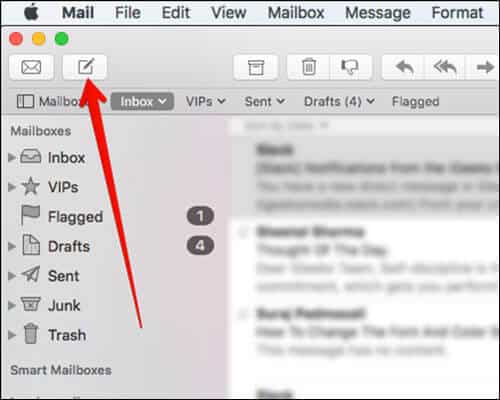
While writing click on the “Choose the font family” dropdown menu and customize the font and other details from the format bar that appears.
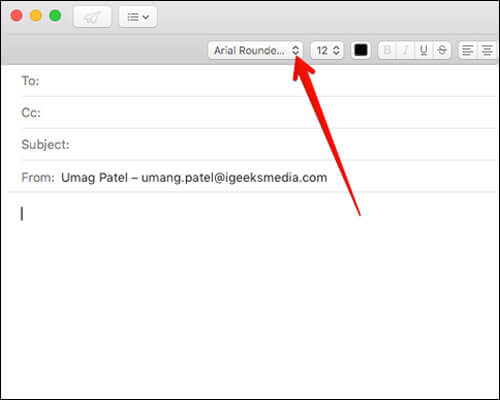
Furthermore, it is essential to note that if you use a font that the recipients do not have, your font is substituted by a similar font that the recipients have.
Fixed-Width Font: Font and Font size for Plain Text Messages
This option allows you to change the font and font size used writing and viewing plain text messages, i.e., the messages not formatted as HTML.
Click on Select and surf through the pop-up window to find the Collection, Font, Typeface, and Size that you prefer.
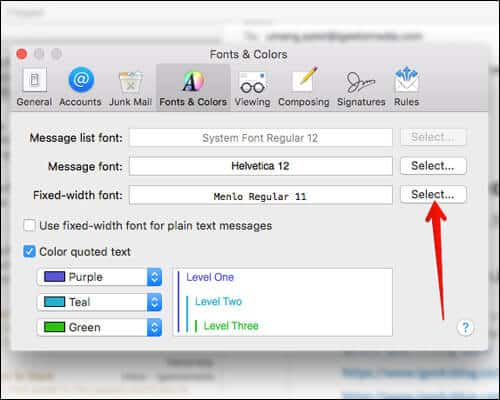
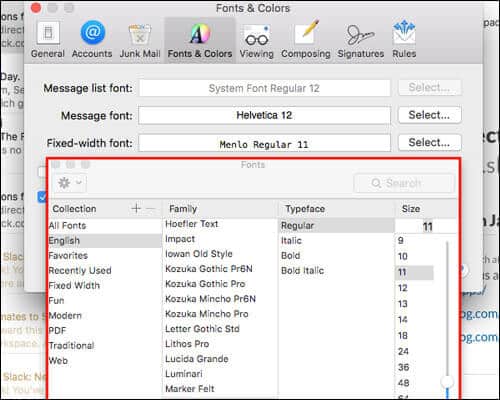
In order to apply this font, you need to check the box of Use fixed-width font for plain text messages. This further ensures that every character is of the same width and aids in aligning your text using spaces instead of tabs.
If you are looking to add special characters in your email, check out our step-by-step tutorial on how to quickly type special characters on Mac.
How to Change the Mail App Colors on Mac
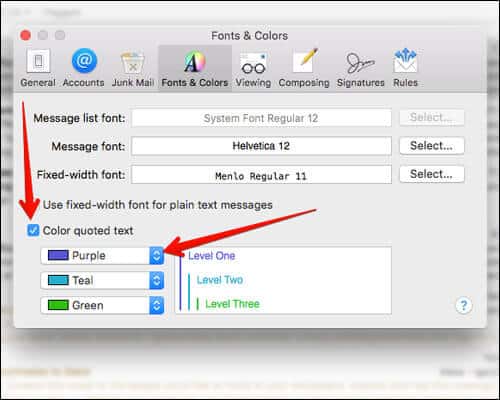
When you reply or forward an email, the original message you have received gets quoted. This also occurs when you receive a forwarded message. In addition to the indented lines, you can also choose the color of the quoted text.
Check the color quoted text if you want quoted text and the indented lines to be colored. You can also customize the color, click on the drop-down box in front of the color, and select the color you prefer.
That’s all for now!!
Signing off…
Updating your email settings, such as fonts and font size, ought to have many benefits. One of them being a comfortable viewing experience when you check your daily emails. In fact, you can even adjust the font size on your iPhone and iPad to make your viewing experience more comfortable.
There is also an additional benefit of customizing font settings in your email; you can leave a lasting impression on the receiver/reader of your email. Our email correspondence i.e., how we compose an email, can tell a reader a lot about our personality.
While a lot depends on what you write, a little part also depends on how you write. For instance, feel the difference between the two sentences – “DO THE NEEDFUL NOW” or “Do the needful now.” Similarly, the font and font size chosen by you can add a tone to your words, and the settings mentioned above gives you the liberty to choose your tone.
Like this hack? Here are a few more Mac hacks:

