The two-colored smiley face has been the Finder icon on the Mac for ages. Even after changing the name from OS X to macOS, this iconic logo has stayed. People love to personalize their devices, and what better way than changing the photo that is on every Mac! You can set your company or organization’s logo or your kid’s picture here. I have changed it on my Mac, and let me tell you, it looks great! So, if you too want to be a bit different and stand out, then here are easy steps to change the default Mac Finder icon to any image you like. Check it out.

How to change finder dock icon on Mac
Here is a summary of what we will do. First, we will select a picture, then disable System Integrity Protection; after that, replace the icon with our image and finally refresh the dock. Let us begin.
Step #1. Select the picture you want to use. It should be a PNG file. If it is in any other format, you can easily convert JPEG to PNG or JPG to PNG.
Step #2. Now that you have the PNG image, rename it precisely as finder.png (you do not have to type .png). Now move this image to your Mac’s desktop (see image below).

Note: If you have a Mac with retina screen, rename this image as finder@2x.png.
Step #3. With modern macOS versions (OS X El Capitan and later), Apple uses System Integrity Protection (SIP). This is for the protection of our files and data. Since we will be changing the system icon, we will have to first disable SIP. We can disable SIP by going into recovery mode. To do this, first of all, shut down your Mac ⟶ Apple Logo ⟶ Shut Down ⟶ Shut Down. Wait for at least 30 seconds.
Step #4. Now read this step till the end before following it. We will be entering Recovery Mode. For this, switch on the Mac, and as soon as you hear the chime or see the screen light up, press and hold together Command + R keys. Leave the keys when you see the Apple Logo. The Mac will now take some time to go into recovery mode.
Step #5. Now you will see that your Mac is asking you to choose a language. I am selecting ‘Use English for the main language.’ After this, click on the right-pointing arrow.
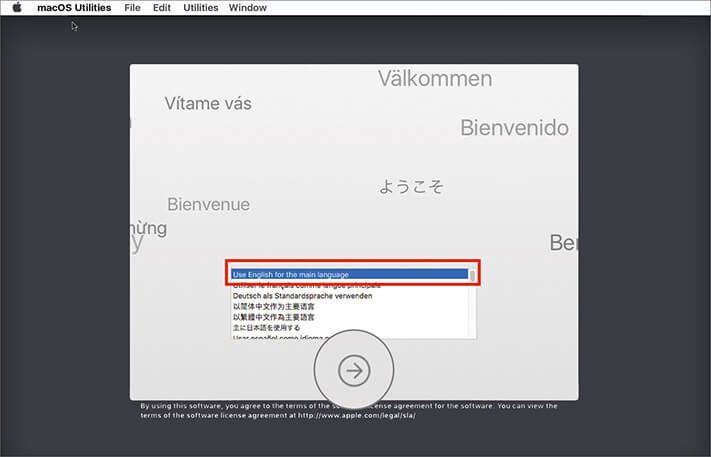
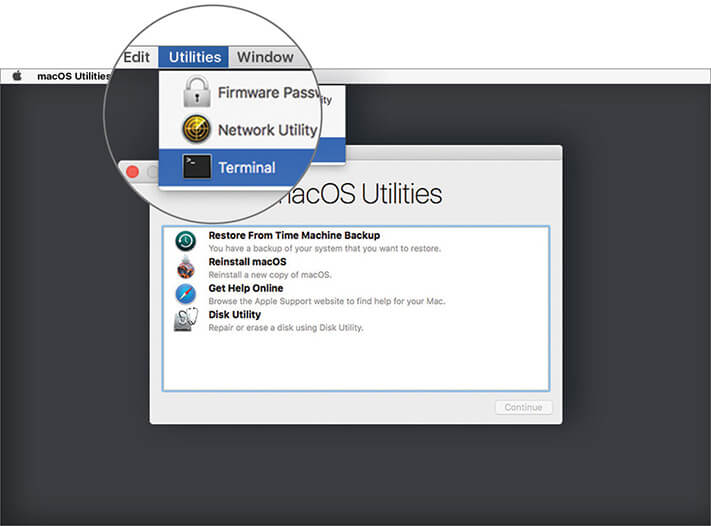
Step #6. From the top menu bar, click on Utilities and then Terminal.
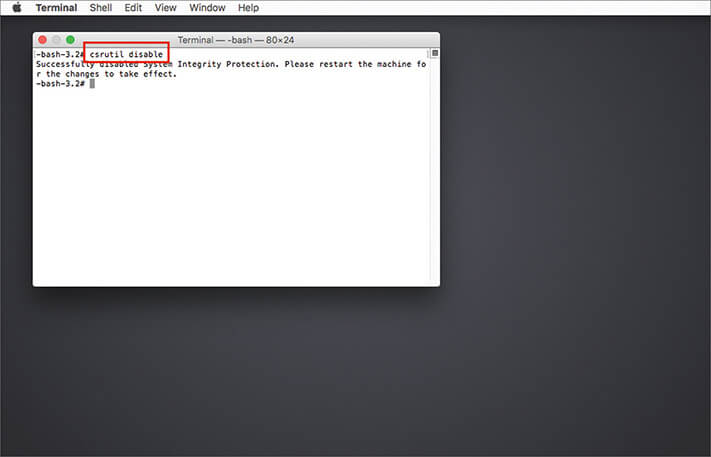
Step #7. In the Terminal, type the following command and hit enter key: csrutil disable
Step #8. Now click on the Apple logo and then click on restart. Do not press any key. Let it restart normally.
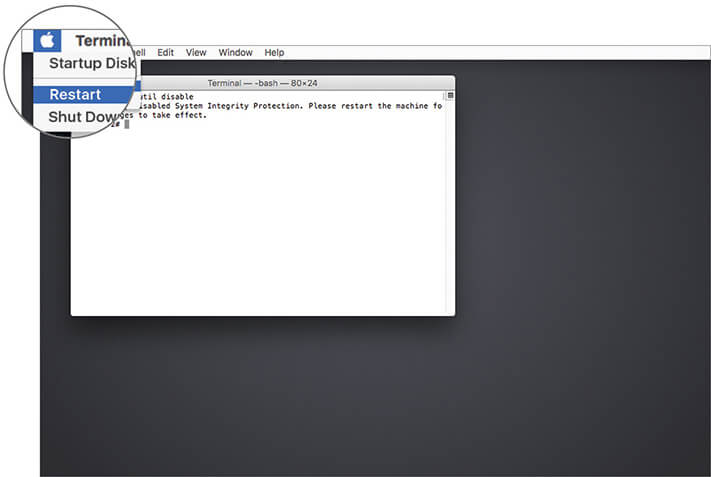
You have now successfully disabled System Integrity Protection (SIP).
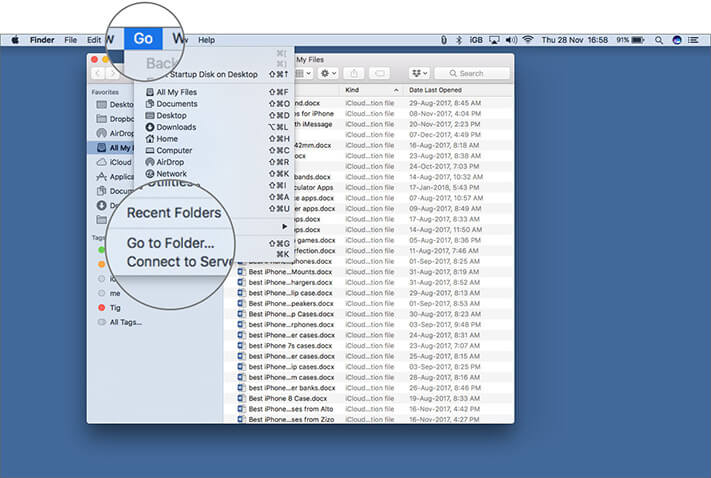
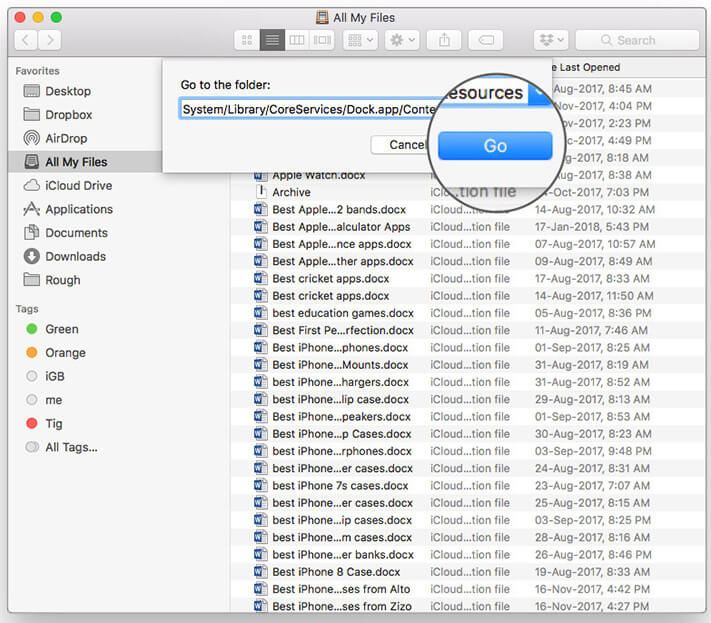
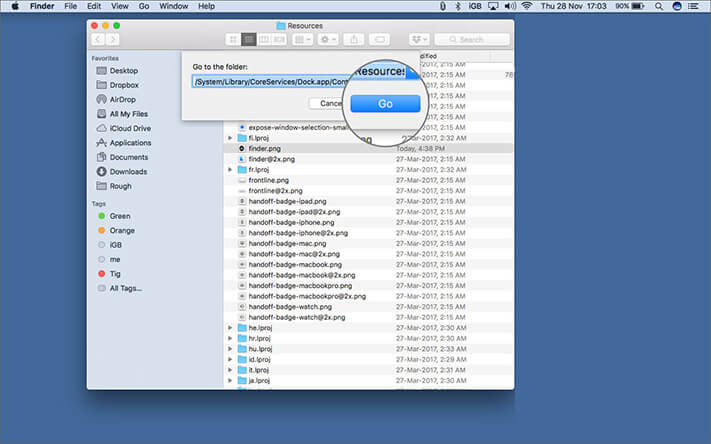
Step #9. Click on Finder icon and now from the top menu bar, click on Go and then click on Go to Folder. (Or you may press together Command + Shift + G.) In the search box, type (or copy-paste) the following path and click on Go (or hit enter):
/System/Library/CoreServices/Dock.app/Contents/Resources/

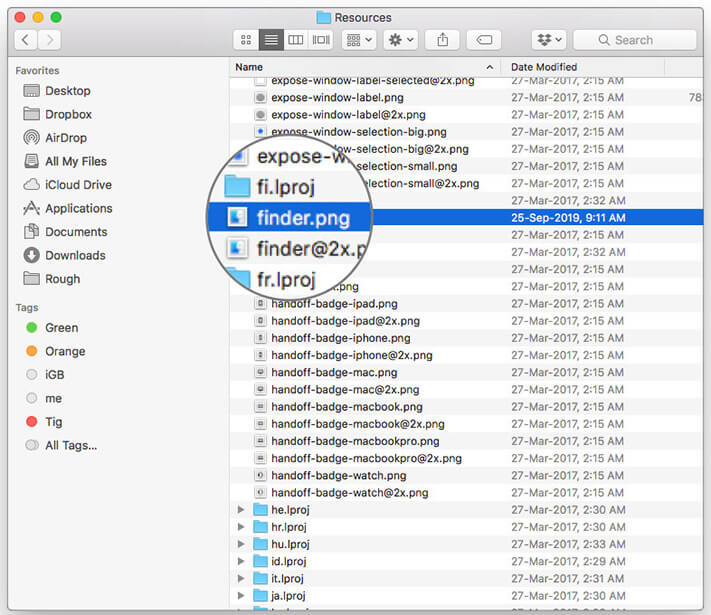
Step #10. Now find the file named finder.png or finder@2x.png (for retina Mac). Copy the file to another folder on your desktop or anywhere (this is a backup for safety).
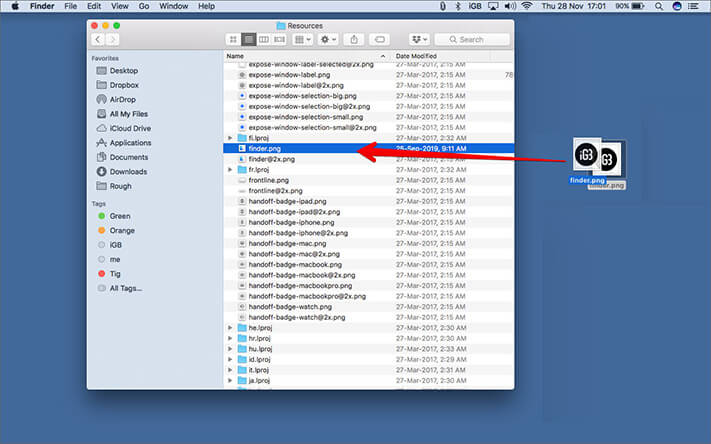
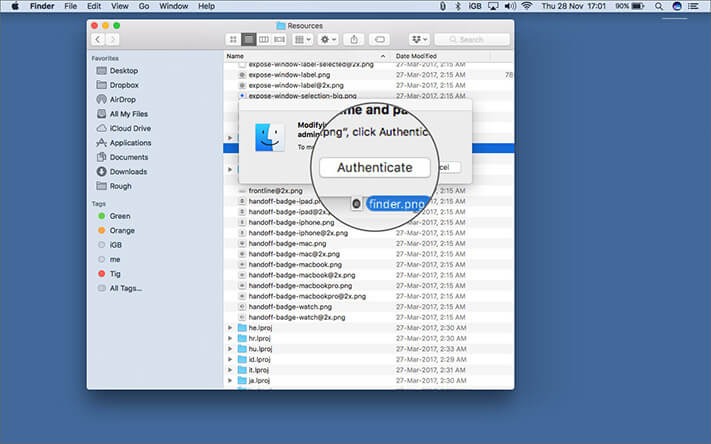
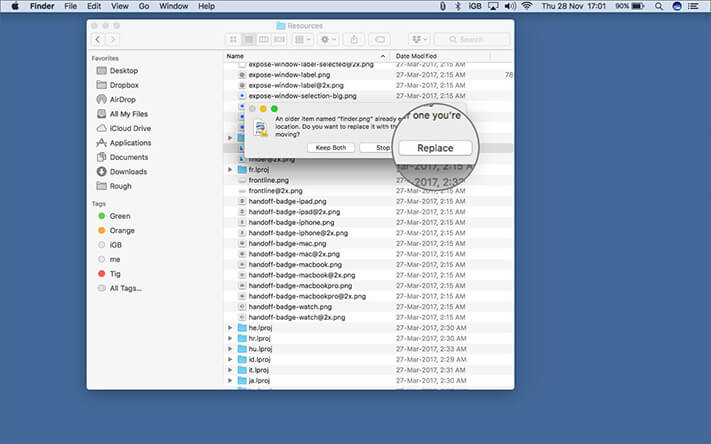
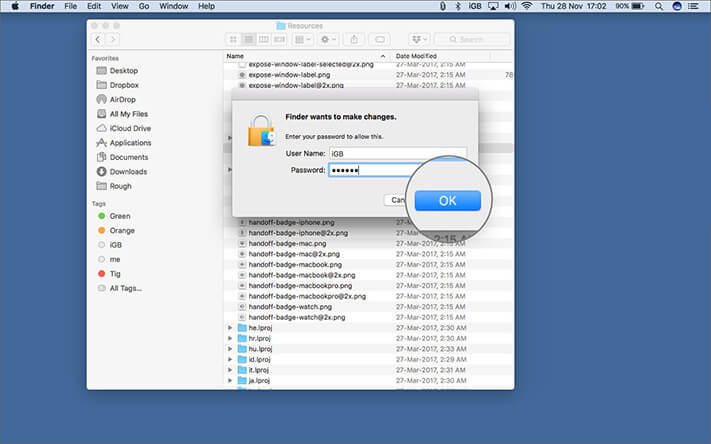
Step #11. Drag the PNG image you created in step #2 from the desktop to this folder (where the current finder.png and finder@2x.png images are). It will ask for authentication. Click on Authenticate. Next, click on Replace. Now enter your Mac’s password if requested and click on OK.
You have successfully replaced the icon file.
Step #12. Once again press Command + Shift + G. Then, type:
/private/var/folders/ and click Go or hit enter.
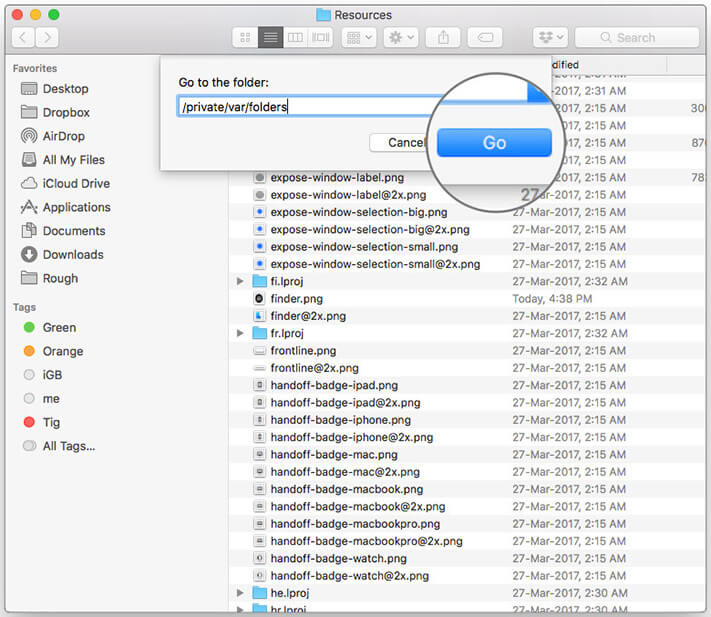
Step #13. Type “com.apple.dock.iconcache” in the search box. Click on the folders tab to search within this folder. Delete the “com.apple.dock.iconcache” file.
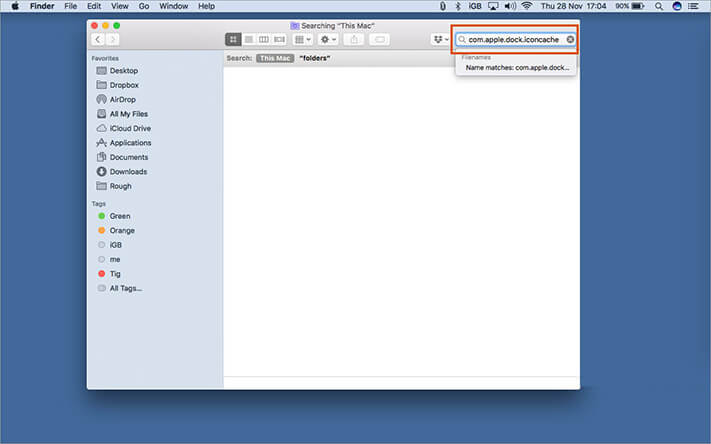
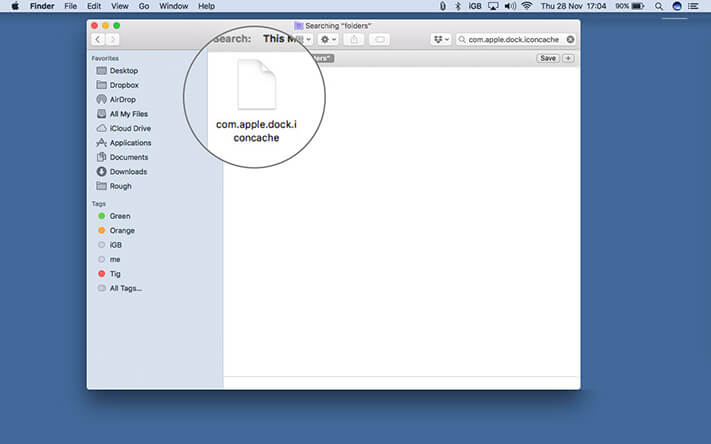
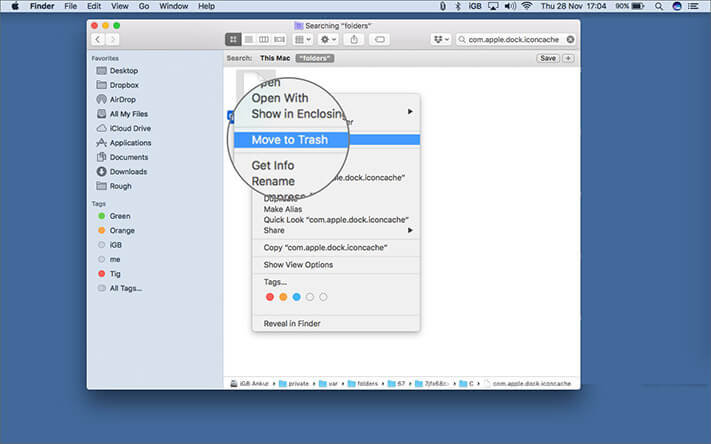
Note: Even after deleting, you may find that this file stays there. Do not worry. It has been deleted. Or just for satisfaction, you may delete it once again by selecting it and pressing the keys (Command + Delete).
Now we need to kill (refresh) the dock for changes to show up.
Step #14. Launch Terminal from Application ⟶ Utilities and type: killall Dock and hit enter.

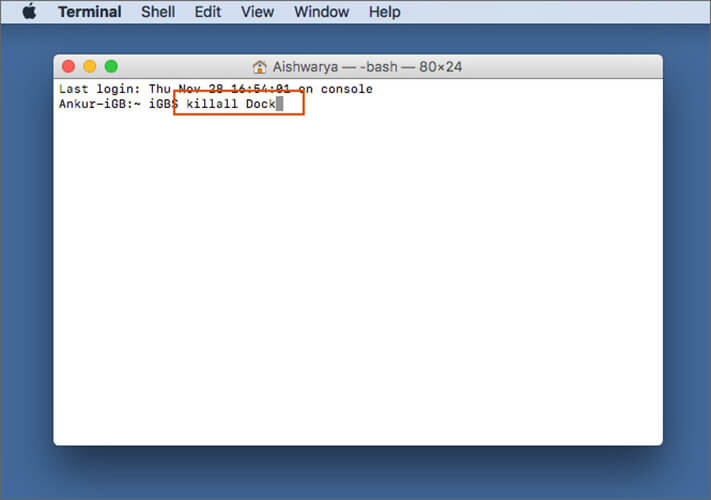
Done! Your dock will be refreshed, and your Finder icon will change to the new one.

After you have enjoyed looking at your new picture as the Finder icon, there is one more essential step to take – enabling System Integrity Protection (SIP) back on. For this repeat step #3 to step #8. But instead of typing csrutil disable in the terminal type csrutil enable and restart the Mac. By this SIP will be enabled back on for the protection and safety of our files and data.
So this is how you can change the Finder icon of the dock on your Mac. Wasn’t this exciting!
You may like to read…



Not working.
This is not working in MacOS Sonoma. I have SIP disabled but i cannot pull the file inside the folder.
If you’re facing issues, even with SIP disabled, make sure you have the necessary permissions to modify system files. Additionally, consider re-enabling SIP after making changes for security reasons. If the problem persists, you might want to check online forums or contact Apple Support for further assistance.