While you don’t see spam emails in your primary mail directory or receive notifications for them, some emails evade spam detection and land in your primary folder. If you are as tired of receiving such emails as I am, there’s a way out! You can block those unwanted emails right from your iPhone, iPad, or Mac.
Keep reading as I show you how to do it!
- How to stop unwanted emails using the Apple Mail app
- How to block an email address in Gmail
- Stop unwanted email in AOL app on iPhone, iPad, or Mac
- Can you block a contact in the Outlook app on iPhone?
- Block unwanted email sender via iPhone Settings
- What happens when you block an email on your iPhone?
How to stop unwanted emails using the Apple Mail app
The Mail app on iOS and Mac has an option for blocking an email address. If you’re using this app to manage your emails, you can do so with a few taps.
Block unwanted emails in the Mail app on iPhone and iPad
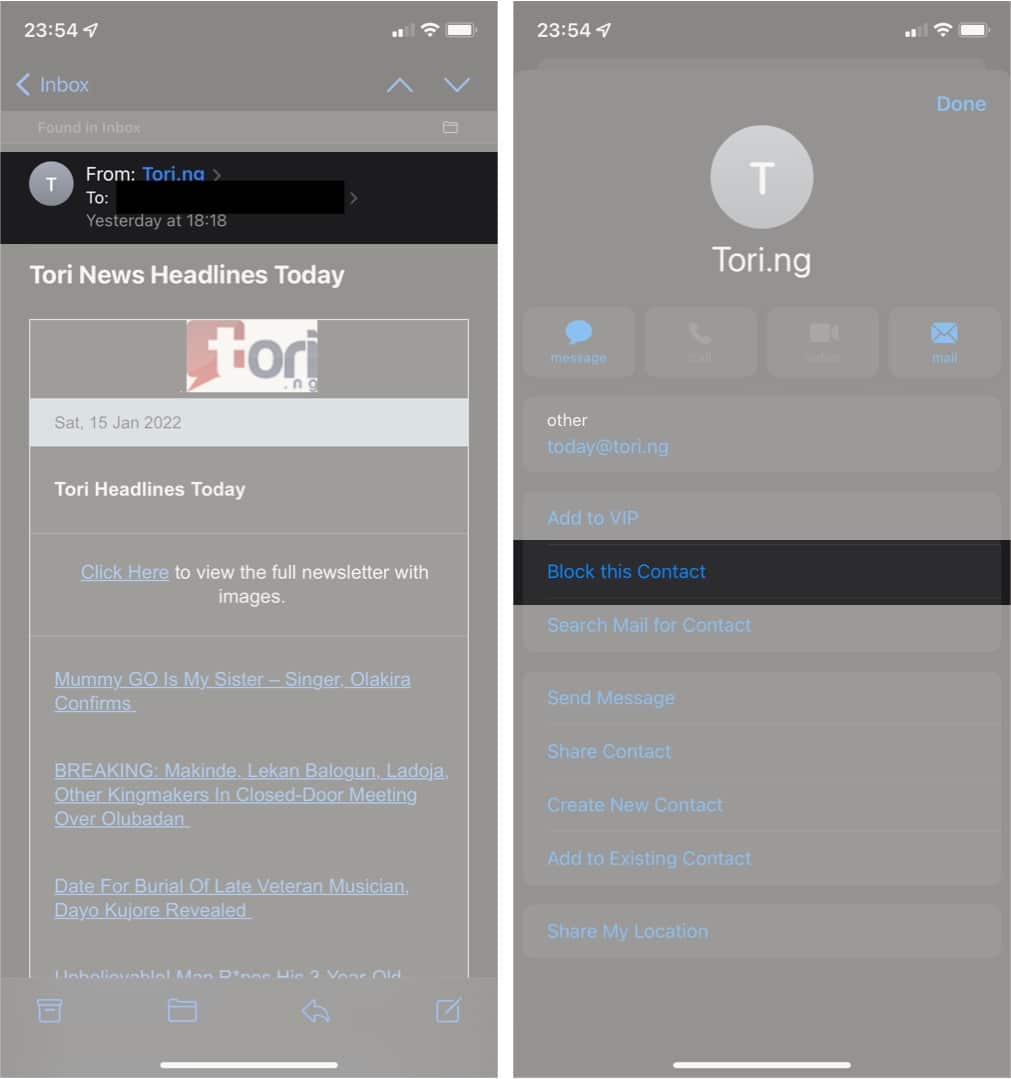
- Open the Mail app.
- Open any mail from the email address you want to block.
- Tap the sender’s name at the top.
- Select their name/email address highlighted in blue.
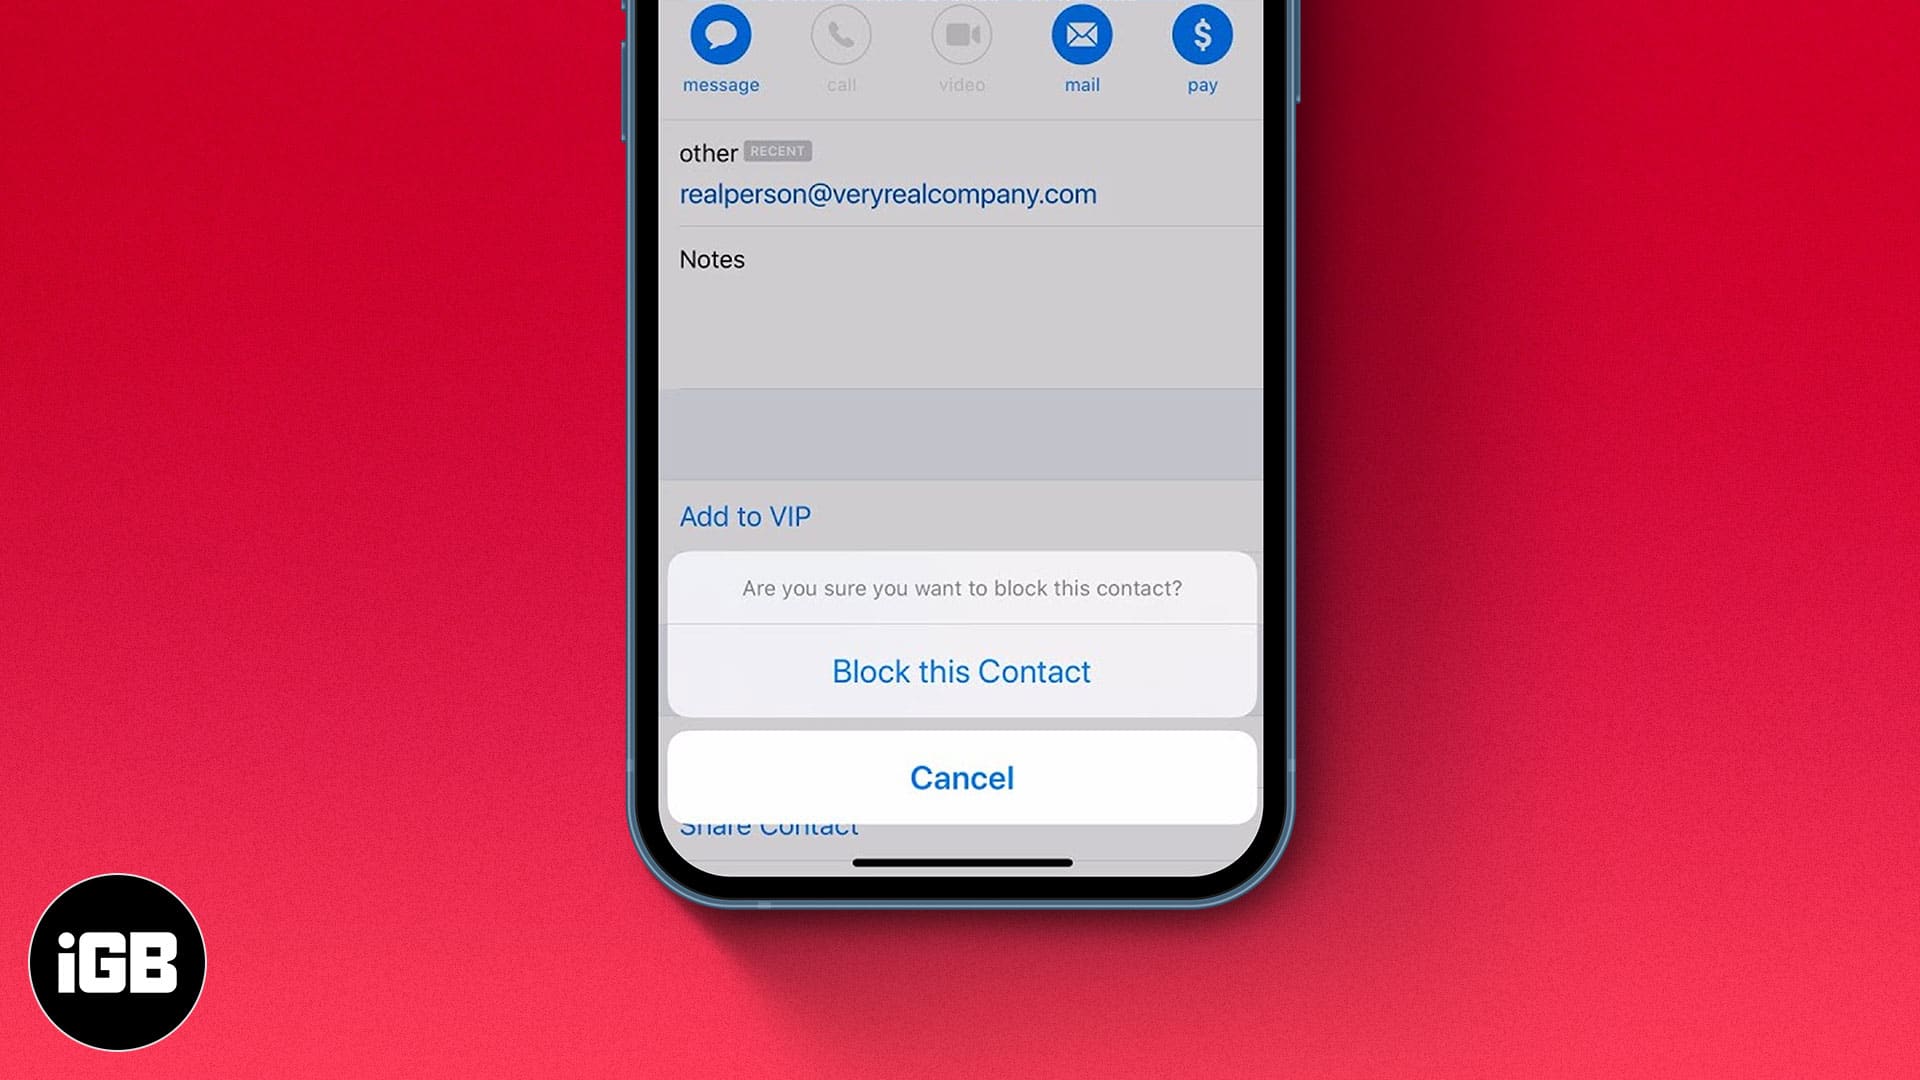
- Choose Block this Contact to stop that address from sending you messages.
Block unwanted emails in the Mail app on Mac
The best way to block an email address on Mac’s Mail app is to set its rules. It’s as easy as adding an email account to the Mail app. Follow the below steps:
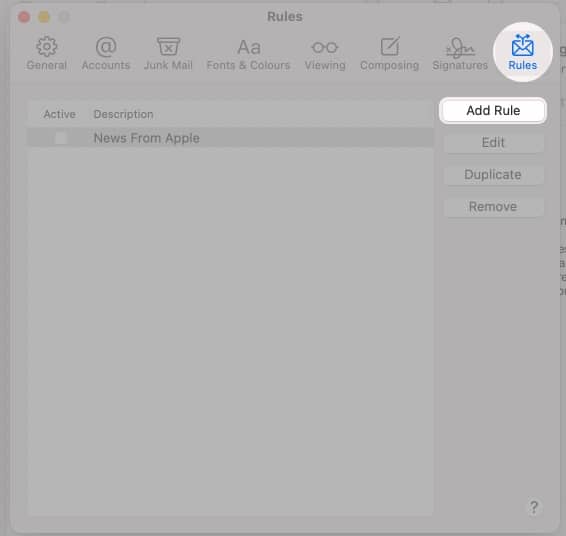
- Click Mail at the top left → Preference.
- Go to Rules at the top right.
- Next, choose Add Rule from the sidebar.
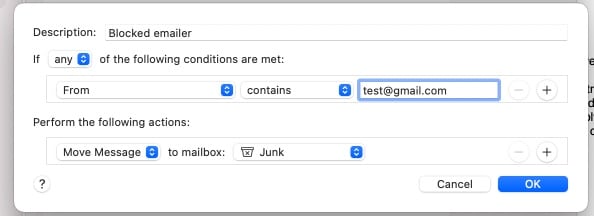
- Fill in the Description field, For example: “Blocked emailer“
Type the email address you wish to block in the empty field. - Click the dropdown under the Perform the following actions section. For example – Select “Move Message” in the first box and “Junk” in the box to the right of “to mailbox:”
- Click OK.
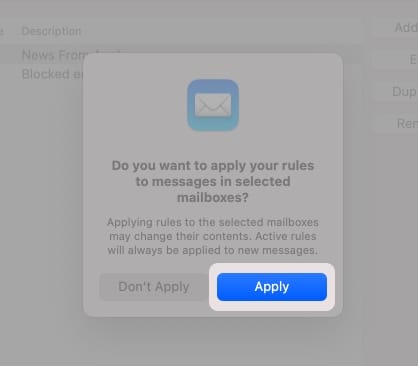
- Next, select Apply.
How to block an email address in Gmail
You can block the email ID using the Gmail mobile app and the web browser. Read on to know more.
Block a sender in Gmail app on iPhone and iPad
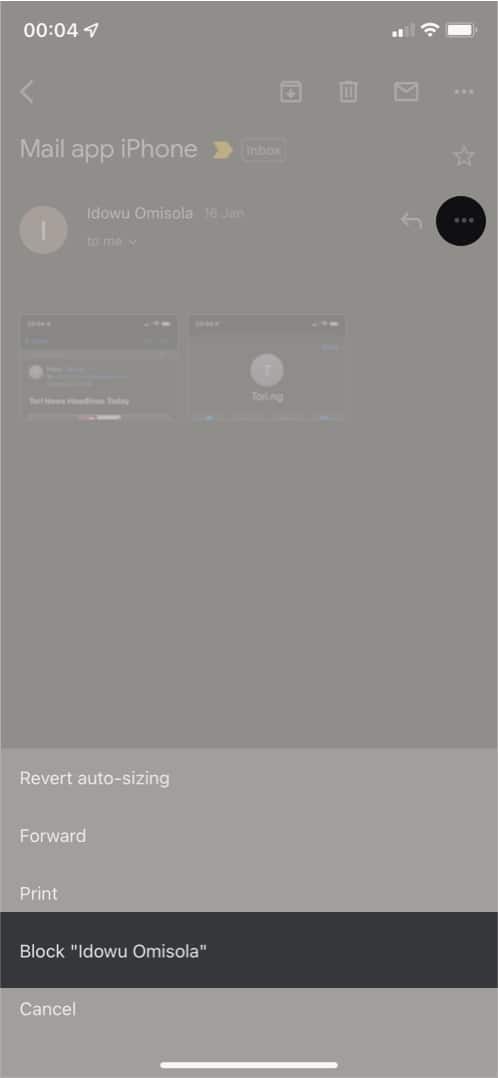
- Tap the email sent from the email address you want to block.
- Tap the three horizontal dots at the top right.
- Select Block ‘name of sender’ to stop them from sending further emails.
Block a sender in Gmail app on Mac
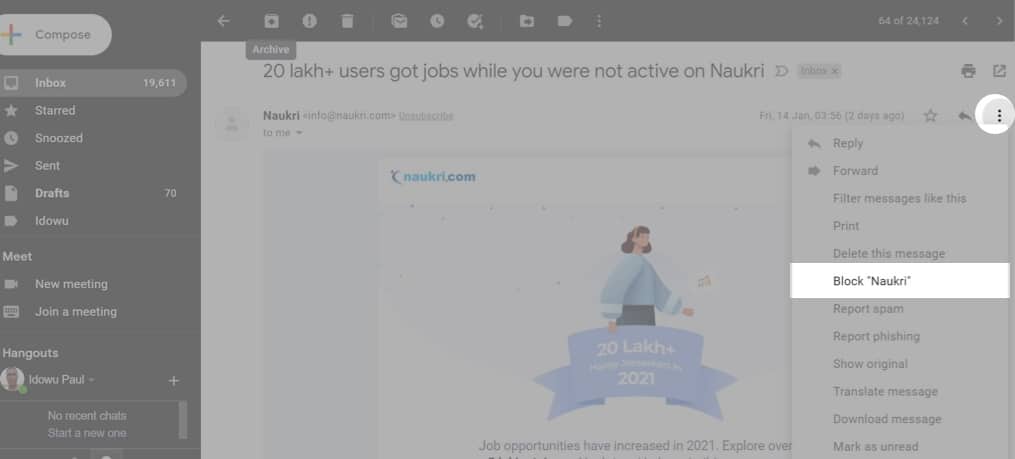
- Launch Gmail from your browser.
- Select a message from the sender you want to block.
- Click the three vertical dots to the right.
- Select Block “X” to block the said email address.
Stop unwanted email in AOL app on iPhone, iPad, or Mac
The option for stopping an unwanted email address is only available in AOL’s desktop app. While there’s no straightforward option for blocking in the iOS app, you can still mark an email sent from someone as spam. So AOL automatically diverts subsequent messages coming from that address into the spam or junk folder.
Mark an email address as a spammer in iOS AOL app
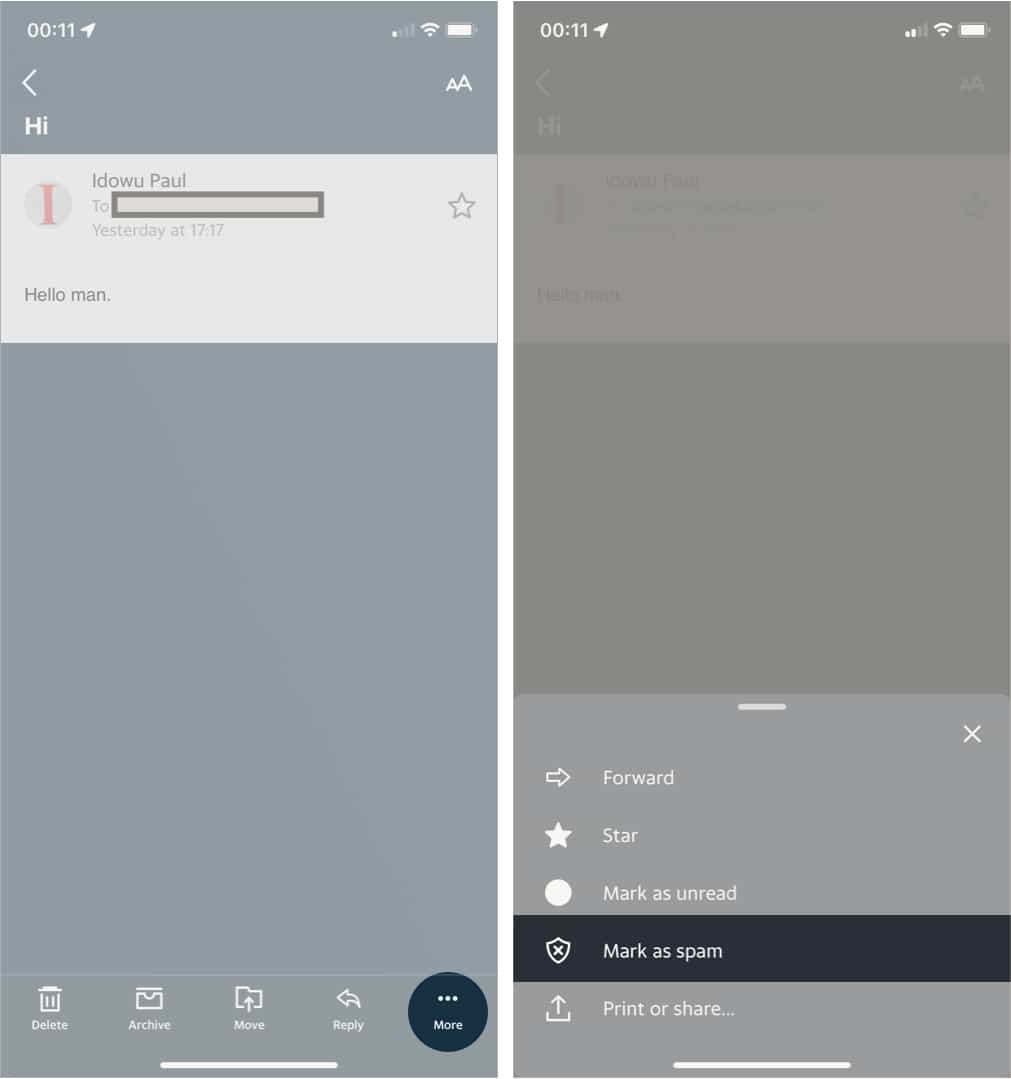
- Open the AOL app and go to your inbox.
- Go to the message sent from the address you want to block.
- Tap the three horizontal dots at the lower-right.
- Select Mark as spam.
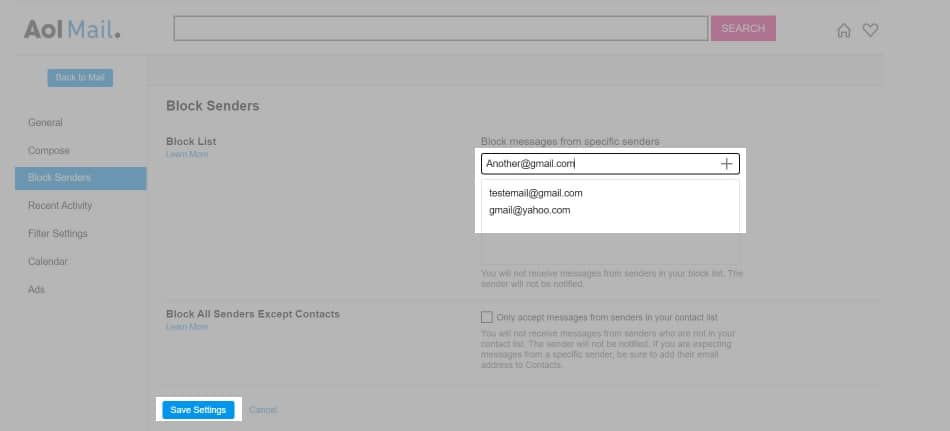
Block an email address using the AOL web browser
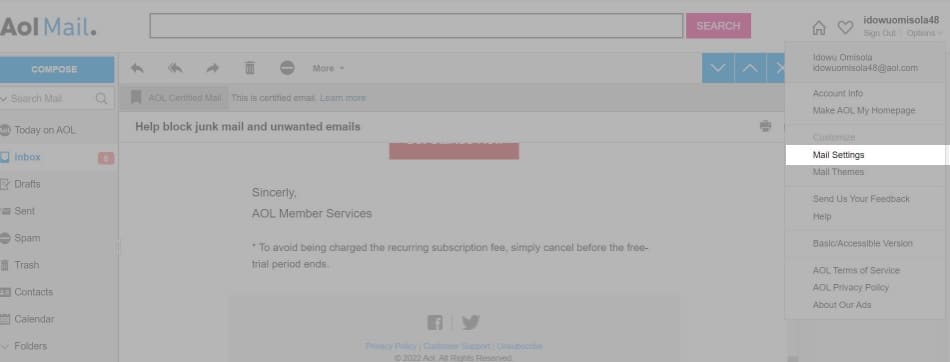
- Click the Options dropdown at the top left.
- Go to Mail Settings.
- From the left sidebar, tap Block Senders.
- Type the email address under Block messages from specific senders.
- Tap the + icon to add that address to the blocked address list.
Note: You can add as many emails as you want. - Tap Save Settings at the bottom left.
Can you block a contact in the Outlook app on iPhone?
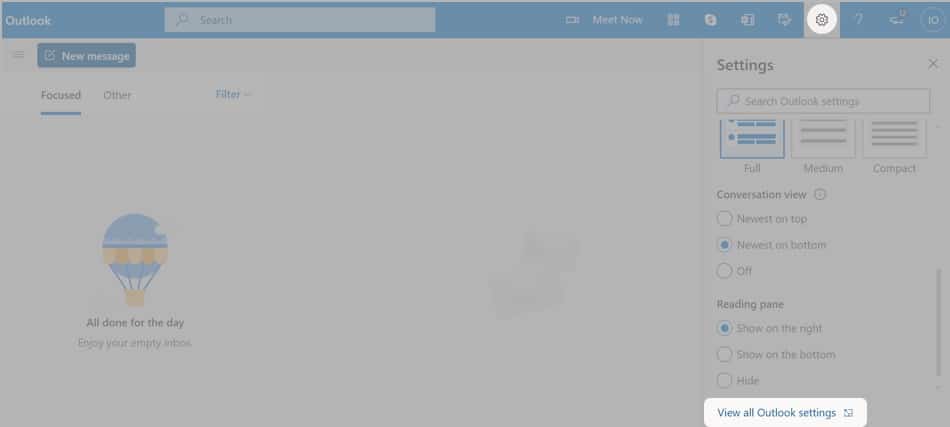
The Microsoft Outlook iOS app doesn’t have an option for blocking email addresses as of writing this. Nonetheless, you can block unwanted contact via the browser. Here’s how:
- In the browser or desktop app, click the Settings icon at the top right.
- Select View all Outlook settings.
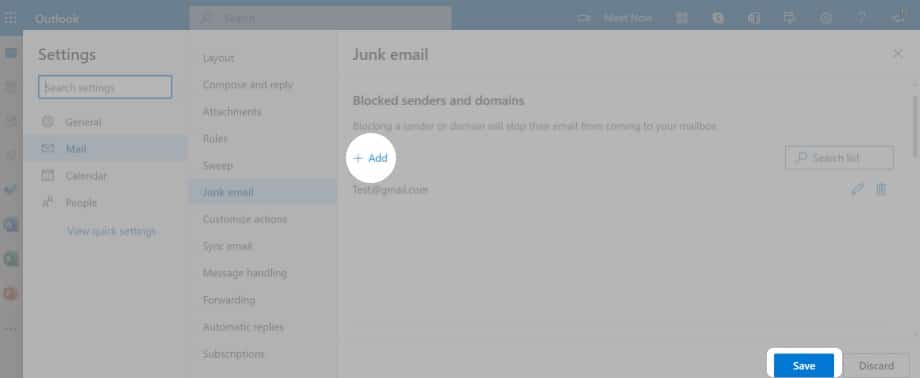
- Click Junk email.
- Under the Blocked senders and domains section, click +Add.
Fill the provided field with the email address you wish to block. - Next, hit return (on Mac) or Enter (for Windows) on your keyboard to add the email address to the blocked list.
- Finally, click Save at the bottom right.
Note: To remove the blocked address, click the delete icon to its left to unlist it from the blocked emails.
Block unwanted email sender via iPhone Settings
The Settings app not only lets you block someone’s email address but also stops them from calling or sending you an SMS. However, this method only works with the email addresses of people in your iPhone’s contact list. So it’s handy if you want to block someone from reaching you via any of the media listed earlier.
Thus, you might want to ensure that the email address of the person you wish to block also has their email listed on their contact card. Otherwise, you’ll end up blocking only their phone number instead.
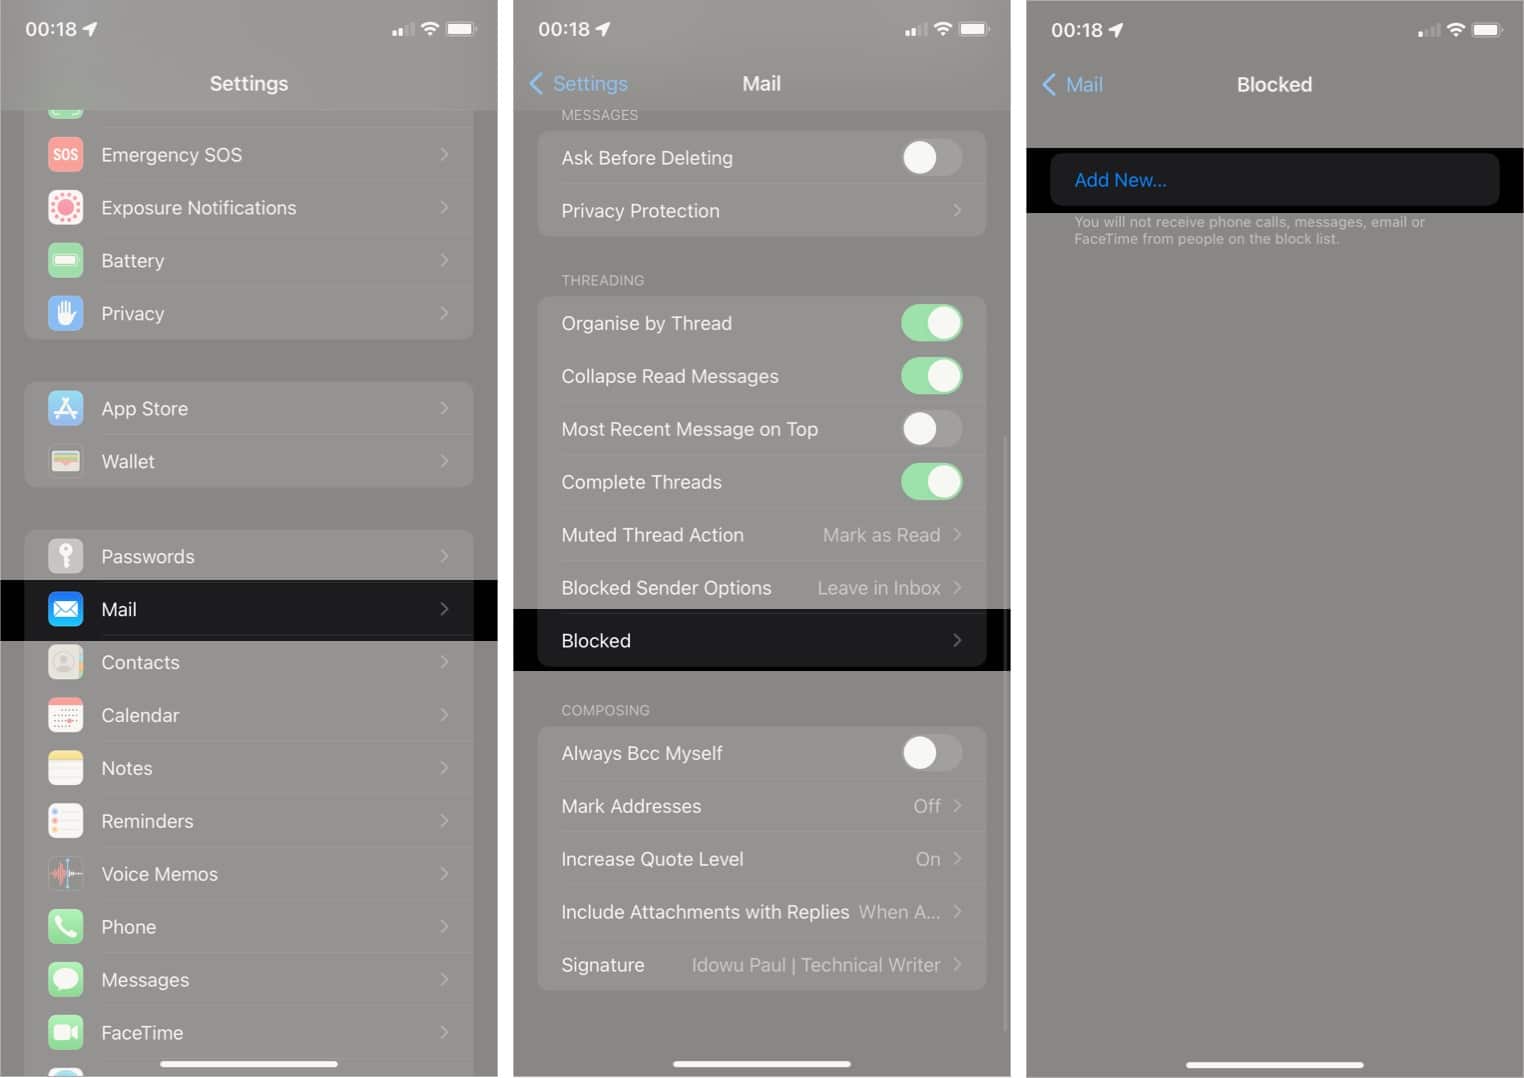
Here’s how to block an email address with this feature on iPhone or iPad:
- Open iPhone Settings.
- Scroll down and select Mail.
- Swipe down and tap Blocked.
- Tap Add New.
- Select the contact you want to block. That’s it!
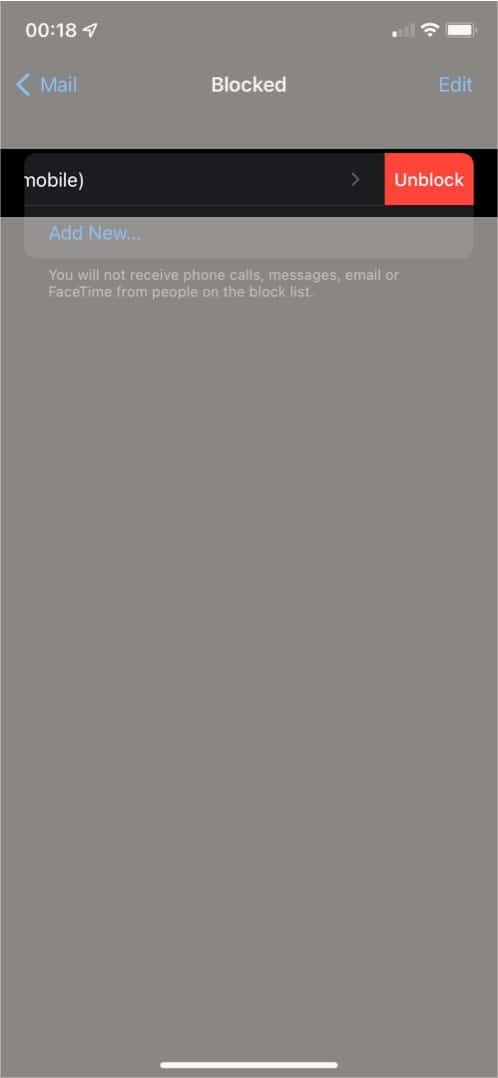
Note: To unlock the contact, swipe it left → tap Unblock.
What happens when you block an email on your iPhone?
All previous emails sent by a blocked email address still appear in your primary inbox until you delete them. Whether you block an email address via your iPhone or any other device, the changes sync across them.
However, when you do so, you won’t receive new messages from it anymore, as your mailing provider subsequently sends it to the junk or spam folder or prevents it from reaching you. It’s hard for the sender to know you’ve blocked them, though.
However, they may get a return email that tells them their email landed in the spam or wasn’t delivered.
That wraps up this guide on blocking emails on iPhone!
While I’ve explained how to block an email address on the iPhone, the process is more or less the same for Android devices, perhaps with slight differences. Blocking unwanted private email addresses is often the best option. But if an email comes from a website or company, consider unsubscribing from their mailing lists instead of blocking.
Did this guide help you get the job done? What other iPhone or any Apple product-specific guides do you want us to create next? Share in the comments below.
Read more:

