You can not predict when an unforeseen event, such as accidental loss or hardware failure, may occur. Hence, it is crucial to have your Mac data backed up in advance. Not only does this give you peace of mind, but it also ensures your data is safe and that you can restore it whenever you want.
While many users feel backing up a Mac is tedious, the process is fairly simple. Keep reading to learn how to back up your Mac and prevent unexpected data loss.
Why you should back up your Mac
Having your Mac backed up in advance ensures that your files, settings, and apps are safe in case of:
- Hard drive failure: Every internal component in a Mac has a limited lifespan, and you never know when they will fail unexpectedly. A regular backup can prevent data loss in case of hardware failure.
- Data loss: Data loss can occur due to hardware failure, accidental deletions, software corruption, or theft. Critical files like photos, documents, and work projects could be permanently lost without a backup.
- Physical damage: You can never predict when an accident, such as an accidental drop or electric short circuit, will happen with your Mac. Having your Mac data backed up gives you peace of mind that at least your data is safe.
- Device migration: When switching to a new Mac, having a backup from your old device will help you effortlessly transfer all your personal files and apps, ensuring a smooth and seamless transition.
5 ways to back up your Mac
You can back up your MacBook in multiple ways, using both native and third-party solutions.
1. Use Time Machine
All Macs have a built-in backup tool called Time Machine. This tool lets you back up all your Mac data to an external drive. We suggest investing only in an external SSD drive, not a regular external hard drive, as SSDs are faster and more reliable.
Here’s how you can use Time Machine to back up your Mac data to an external drive:
- Connect the external drive to your Mac.
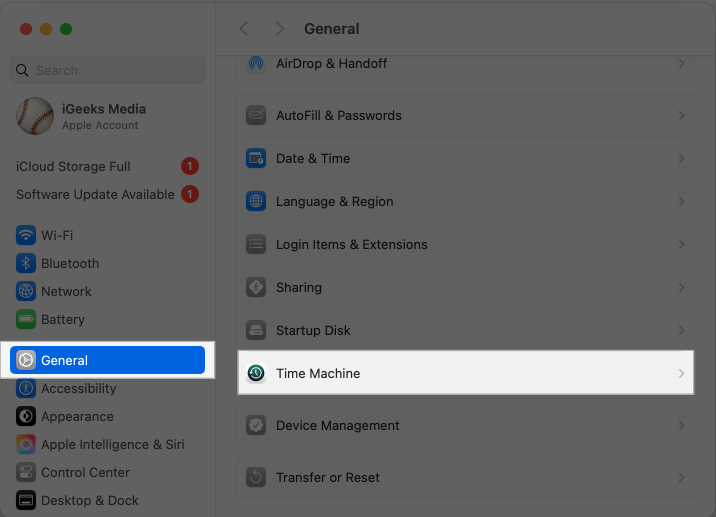
- Now, open System Settings → General → Time Machine.
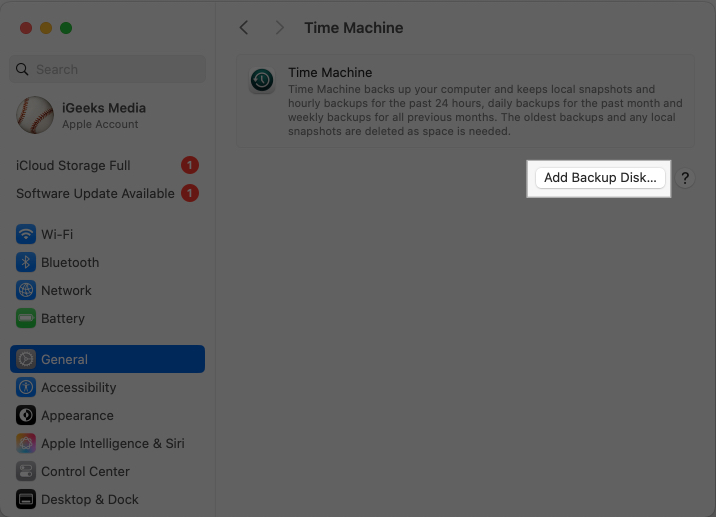
- Click on the Add Backup Disk button and select the connected external drive.
- Next, click Set Up Disk.
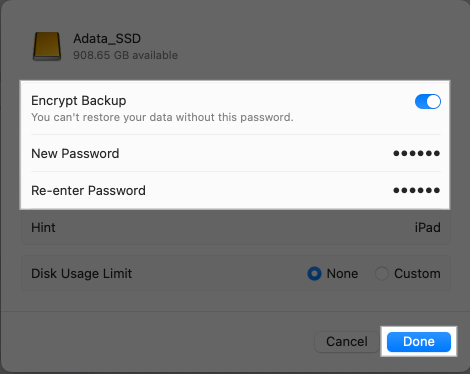
- Toggle on the Encrypt Backup option, create a disk password, and click Done.
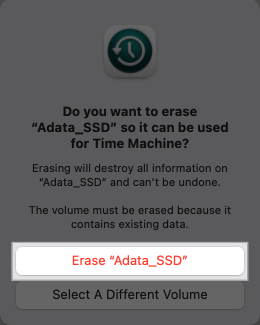
- Now, click the Erase disk button to begin the backup process.
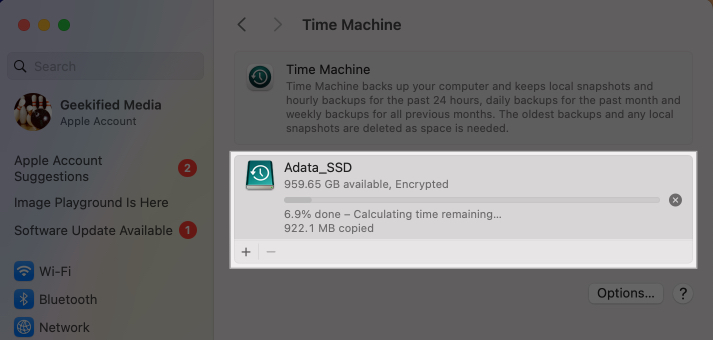
- Once done, the backup process will commence shortly. Sit back and let it finish.
Furthermore, you can decide what locations you want to exclude in your Time Machine backup. This ensures no unnecessary stuff gets backed up in your external drive.
To do so, go to System Settings → General → Time Machine → Options. Then, click the + button, select the folder or folders you want to exclude, and click Exclude.
Besides this, you can also choose the backup frequency and decide which backup schedule suits you best. In System Settings, go to General → Time Machine → Options. Click the up-down arrow button next to Backup Frequency and choose the appropriate option in the drop-down menu.
2. Back up to iCloud
To be clear, you can not back up your Mac to iCloud; you can only manage how apps and various features on your Mac can sync data to iCloud.
You can choose to sync all your photos, files, and other important supported stuff to iCloud so you can access them on all your Apple devices, and iCloud.com signed in with the same Apple Account. This way, you won’t lose access to your critical Mac data even if it refuses to boot up.
Here’s how you can sync your Mac data to iCloud:
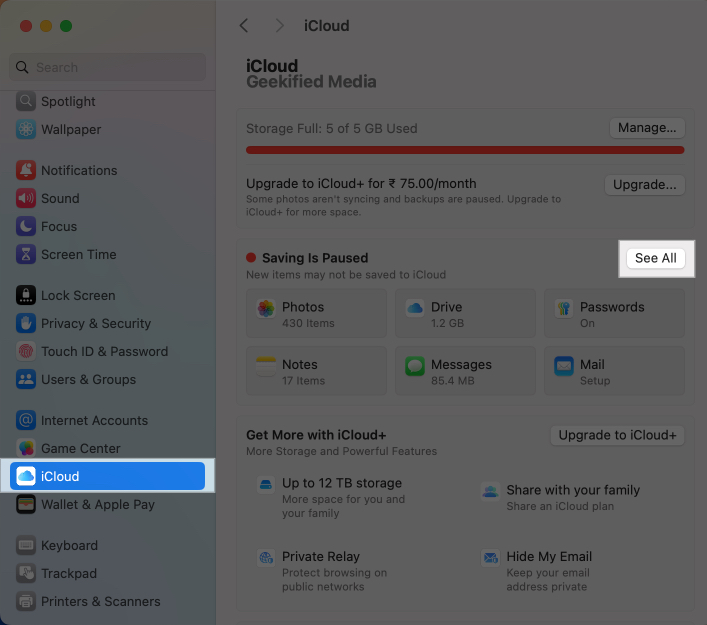
- Open System Settings, scroll down, and select iCloud from the left sidebar.
- Click the See All button next to Saved to iCloud on the right.
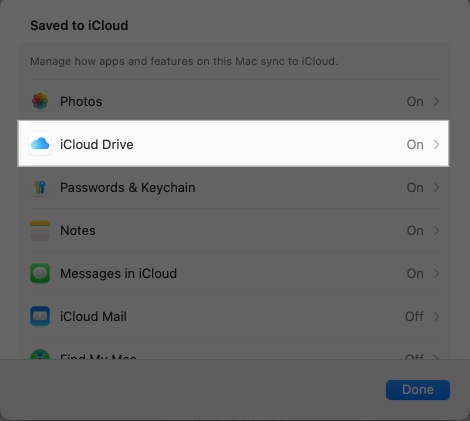
- Here, toggle on the apps whose data you want to sync to iCloud.
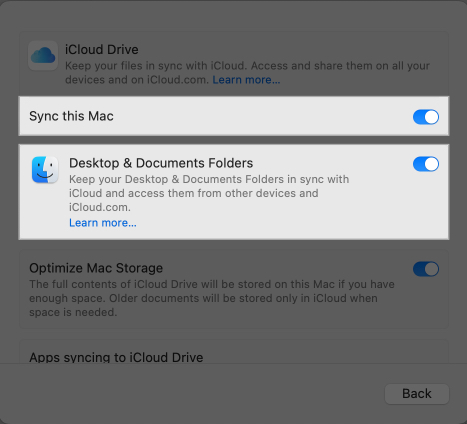
- Next, click on iCloud Drive.
- Finally, toggle on Sync this Mac and Desktop & Documents Folders.
3. Manually back up data to an external drive
The Time Machine backup method discussed above gives you a limited opportunity to exclude specific data from the backup, making the backup process too long as not everything is important and needs to be backed up. So, if you prefer more control over what gets backed up, you can manually copy only the important files to an external drive or cloud storage.
This is what you need to do:
- Connect an external drive to your Mac and format it using the Disk Utility app.
- Alternatively, log in to a cloud service, like Google Drive, OneDrive, or another via Safari or its dedicated app.
- Identify and select the files critical to you (e.g., documents, photos, downloads).
- Drag and drop the selected files to the external drive or upload them to the preferred cloud service.
4. Create a bootable clone
While backing up and restoring your Mac using Time Machine is a good option, a bootable clone offers significant advantages, especially when immediate system recovery is crucial.
A bootable clone is essentially an exact copy of your Mac’s system drive, including the operating system, apps, settings, and files. This type of backup allows you to boot your Mac directly from the clone in case of a system failure without needing to reinstall macOS or restore from a backup.
Although there are various third-party Mac cloning software, such as Carbon Copy Cloner or SuperDuper!, the same can be done using macOS’s Disk Utility app. Here’s how:
- Connect an external hard drive to your Mac.
- Open Disk Utility and select your hard drive from the sidebar under External.
- Click the Erase button in the toolbar in the top-right corner.
- Now, choose APFS under Format in the pop-up window that appears.
- Click Erase.
- Next, make sure the external drive you just erased is selected in Disk Utility, then click the Restore button in the toolbar in the top-right corner.
- A new pop-up window will appear with a drop-down menu called Restore From. Select your Mac’s internal drive as the source drive.
- Once done, click the Restore button to begin the cloning process.
- When the cloning process is complete, click Done. Before disconnecting the cloned external drive from your Mac, make sure to eject it.
5. Use third-party backup tools
If you want more customization options and multiple backups without the hassle of going through the Time Machine backup process, you can opt for the best Mac backup software that best suits your needs.
Third-party Mac backup software, such as Carbonite and Get Backup Pro, offer advanced features and flexibility that go way beyond what macOS’s Time Machine offers. These third-party tools are mostly useful for users who need comprehensive solutions for offsite backups, advanced scheduling, or enhanced security.
All you need to do is just download the app, sign in or create an account, select the files and drives you want to back up, and let the app automatically handle future backups.
How to verify and restore your Mac backup
While backing up your Mac data is indeed helpful, it does no good if it isn’t functional. This is why verifying the backup data is important. Verifying the backup ensures your data is accessible and recoverable when needed. Here’s how you can verify your Mac backup:
Time Machine:
- Go to System Settings → General → Time Machine and browse through backups to ensure your files are present and up to date.
iCloud:
- Sign in to iCloud.com and check for your files under iCloud Drive or Photos.
Now that you have verified your backup data, you can easily restore your Mac from a Time Machine backup. In the case of iCloud, you just need to ensure you are signed in, and you should be able to access all the synced data.
Secure your data today….
That’s all pretty much it. Using any of the methods above, you can easily back up your Mac to protect yourself against any unexpected data loss and restore it when required. Choose the method that best suits your needs, and you should be ready for any data-related challenges.
Have more questions you want us to answer? Drop them in the comments below.
FAQs
The frequency of Mac backup depends on your usage. If you regularly make changes to your Mac’s data and settings, you should back up your Mac every day.
If your Mac backup fails, you could lose access to the critical data.
To ensure that backups do not fail, use an external drive with at least twice as much free storage as your Mac’s internal drive.
Read more:

