Apple’s recent iOS 15.4 update bundles some salient features. A remarkable addition is that it lets you add notes to credentials stored in iCloud Keychain. You probably know the power of iCloud Keychain with password autofill. But this new feature is handy for storing extra details with your passwords, card details, and more.

Moreover, even if you’ve saved a credential before the update, you can edit and add notes to them. But how do you start adding notes to your iCloud Keychain entries? Keep reading as I show you!
Why add notes to iCloud Keychain?
Besides passwords, security questions, and credit card information, extra details like an app’s access rules and more are easy to forget. iCloud Keychain notes let you pen these right with your password so you can look them up while accessing an app or website that requires authentication.
Ultimately, you might want to leverage iCloud Keychain notes to jot essential points while using a website or an app for the first time. Let’s jump right into how you can use notes in iCloud Keychain.
Activate iCloud Keychain
This section might help if you’ve never used iCloud Keychain before now. Hence, you need to ensure that iCloud Keychain is active on your iPhone or iPad to use this feature.
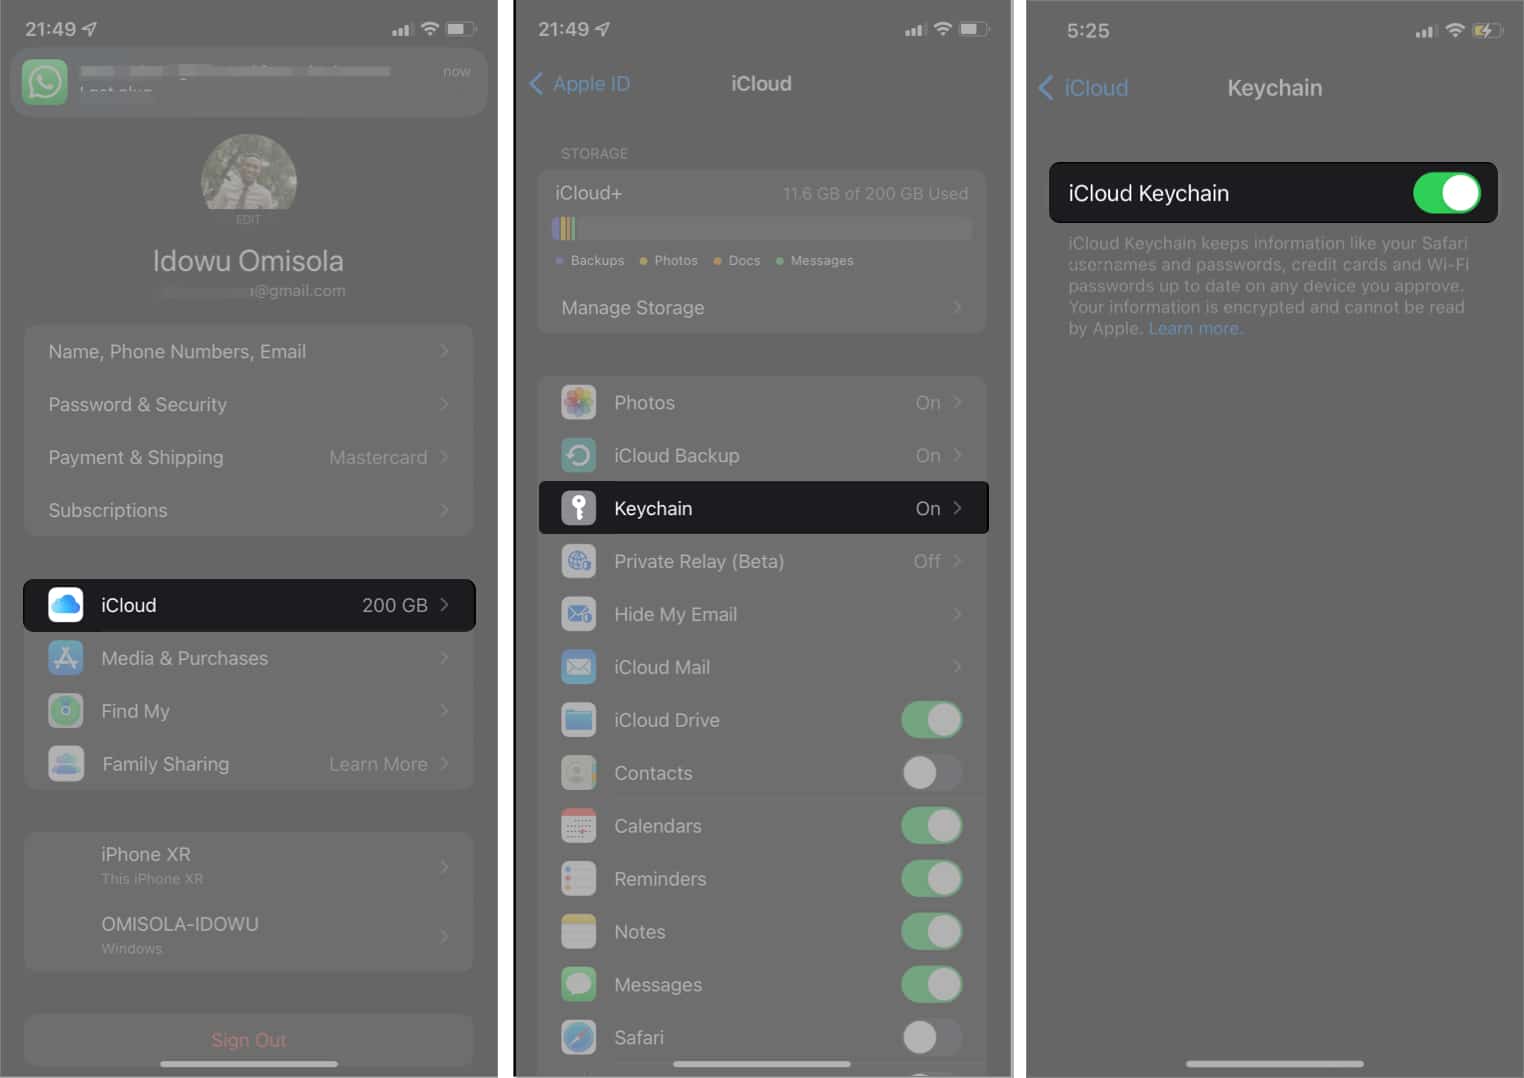
To activate iCloud Keychain:
- Open Settings on your iPhone or iPad.
- Tap the device name banner at the top.
- Go to iCloud → Keychain.
- Next, toggle on iCloud Keychain.
You might want to check out our article for a full-blown explanation of how to use iCloud Keychain.
How to add notes to iCloud Keychain entries on iPhone
Adding notes to your iCloud Keychain listings is as easy as adding passwords to the iCloud Keychain. To do this:
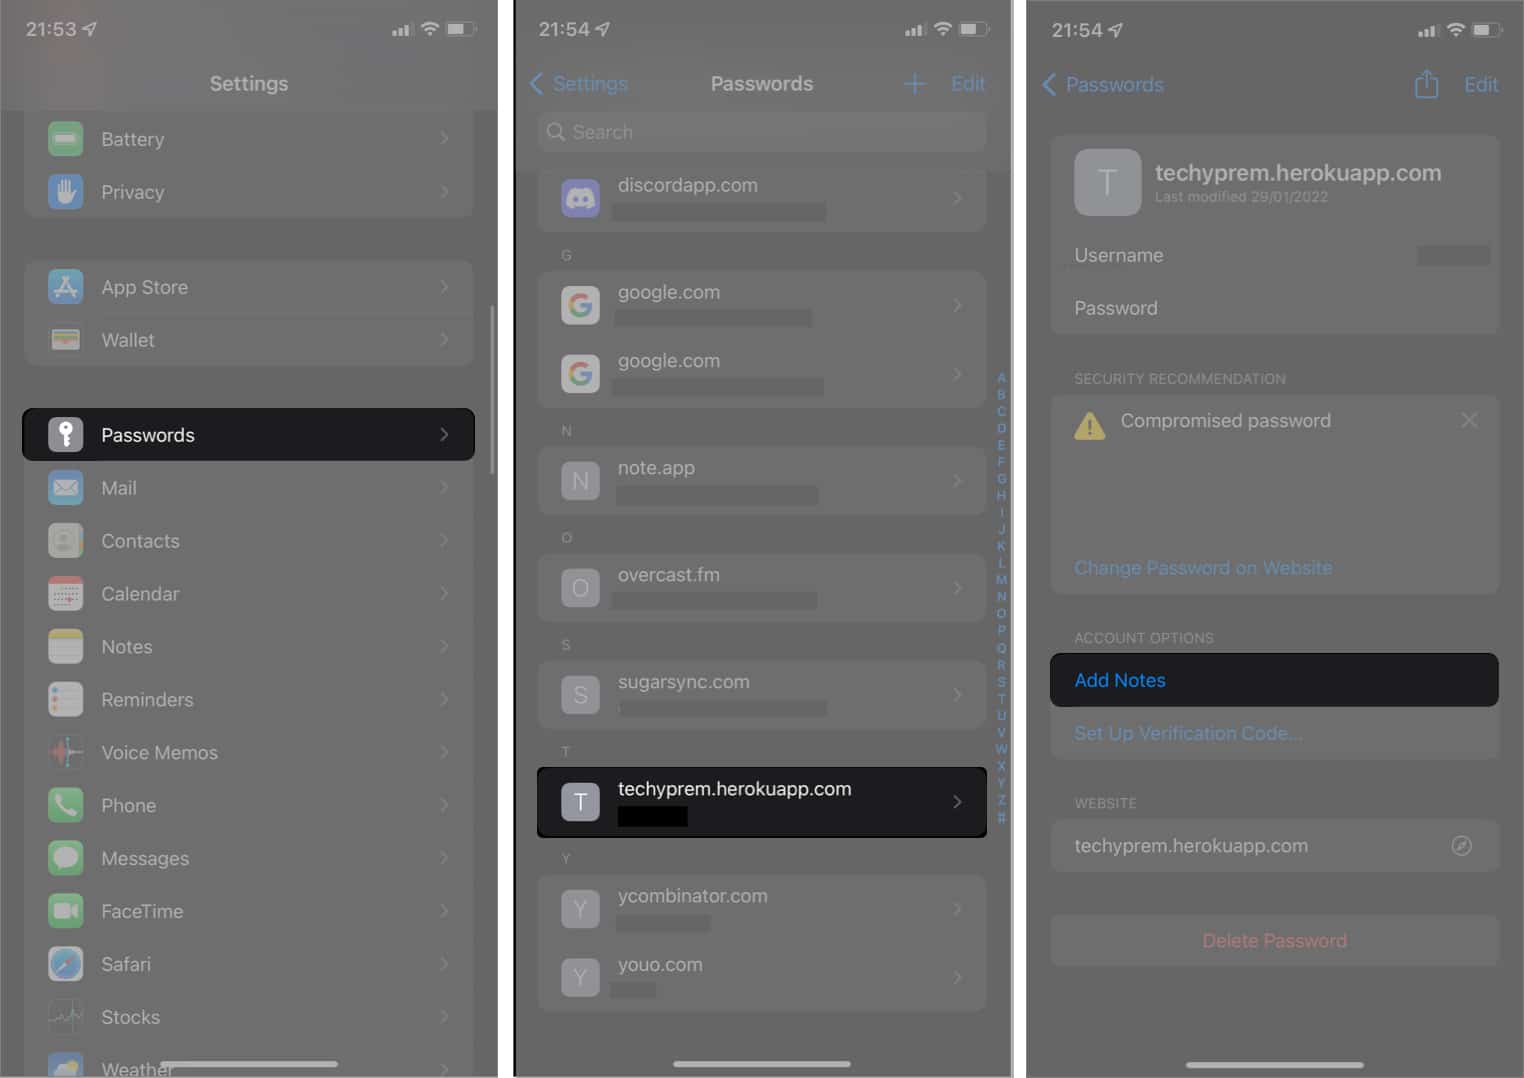
- Go to Settings on iPhone or iPad.
- Select Passwords and verify with your passcode or Apple ID.
- Choose an existing password or credential to add notes to it.
- Alternatively, tap the + icon at the top right to add a new authorization.
- Tap Done.
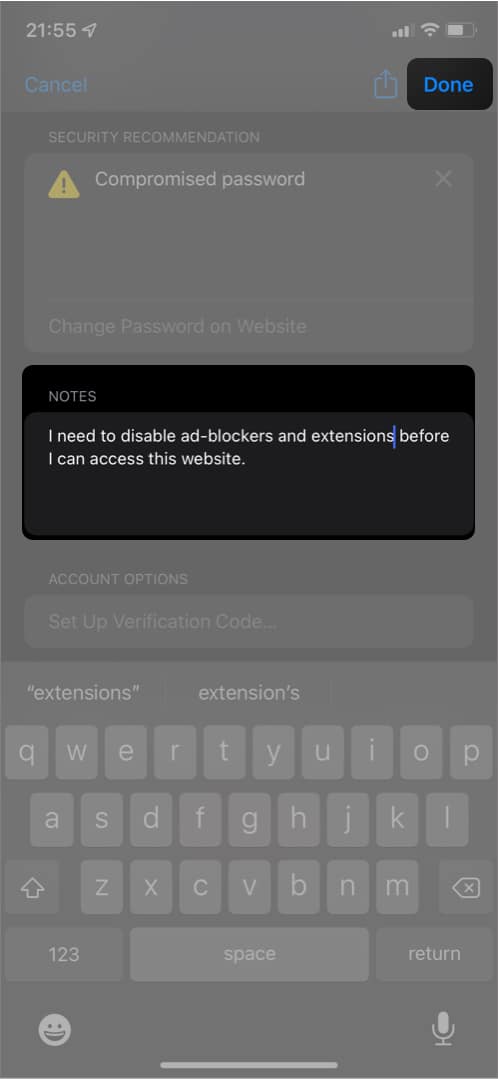
- Next, select Add Notes and input your notes for that website or app.
- Tap Done at the top right.
The next time you need to remember important points about the said website, you can come into your iCloud Keychain listings to look up what you noted about it.
That’s it!
Is iCloud Keychain Secure?
Being able to write down points you don’t want to forget about an app or a website in iCloud Keychain is, undoubtedly, valuable, as you’ve seen. However, while some people question the security of iCloud Keychain, it’s still worthy of trust than most third-party password managers.
Moreover, neither Apple nor any other third-party app knows about whatever you store in your iCloud Keychain. So this lets you manage your passwords all by yourself without depending on browser or Google-based password autofill, which is less secure as right about anyone can access your account without your knowledge.
Ultimately, iCloud Keychain requires extra authentication like Face ID or passcode before it auto-fills your password anywhere. And to access iCloud Keychain, of course, you need to provide your passcode or Face ID. Although each software has its vulnerability loopholes, I’d say iCloud Keychain is more secure than most password management apps for iOS or iPadOS out there.
Signing off!
So that’s how you can add notes to iCloud Keychain entries on iPhone and iPad. What do you think about this cool feature? Share your thoughts in the comments below.
Read more:


