Death is uncertain and is always heartbreaking. While no amount of technology can bring back the lost ones, Apple’s Legacy Contact feature can help you manage your digital afterlife. The Legacy Contact feature allows you to pick a contact who can access your iCloud data after your death.
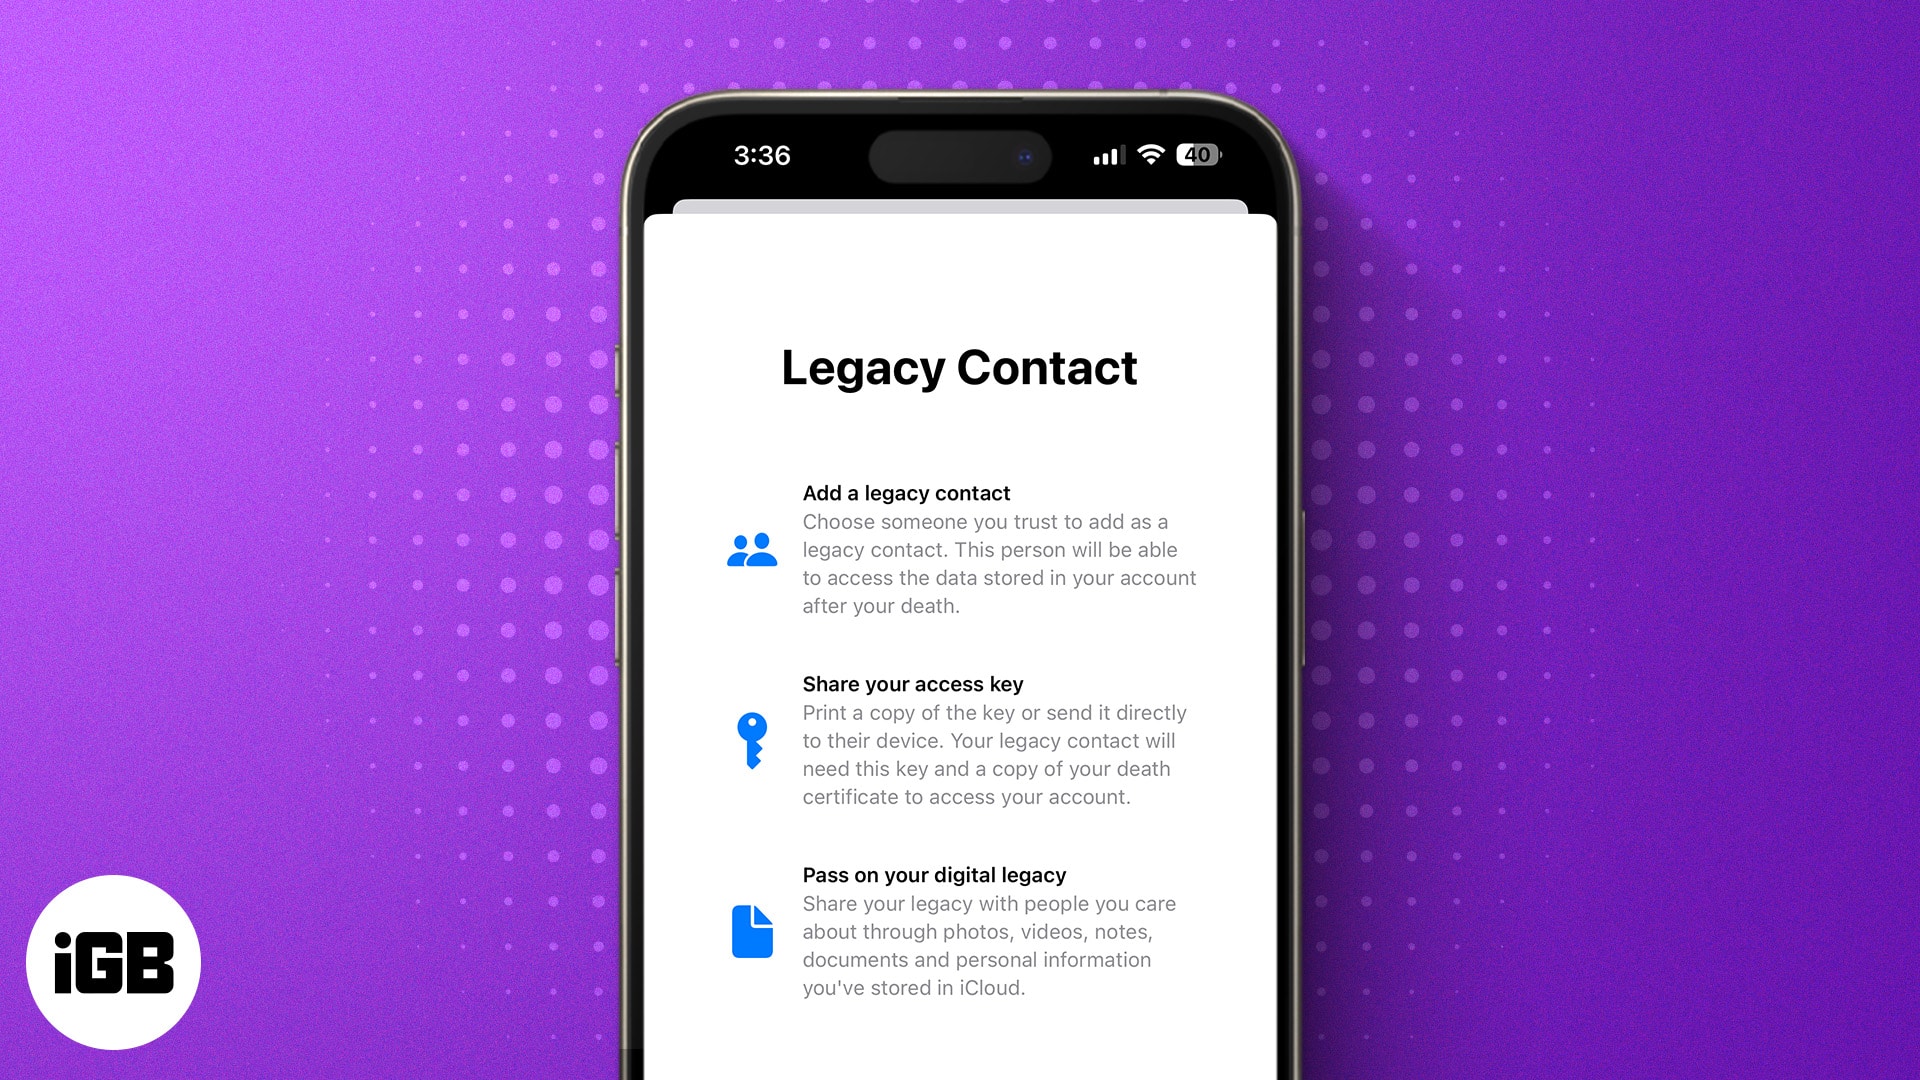
Continue reading to learn more about Apple Legacy Contact.
Table of Content
What is Apple Legacy Contact, and how it works?
Introduced with iOS 15, Apple Legacy Contact lets you choose a contact you believe is the rightful heir to your personal data, such as photos, videos, notes, and other important information, on your Apple device. So they can cherish the moments they spend with you after you are gone.
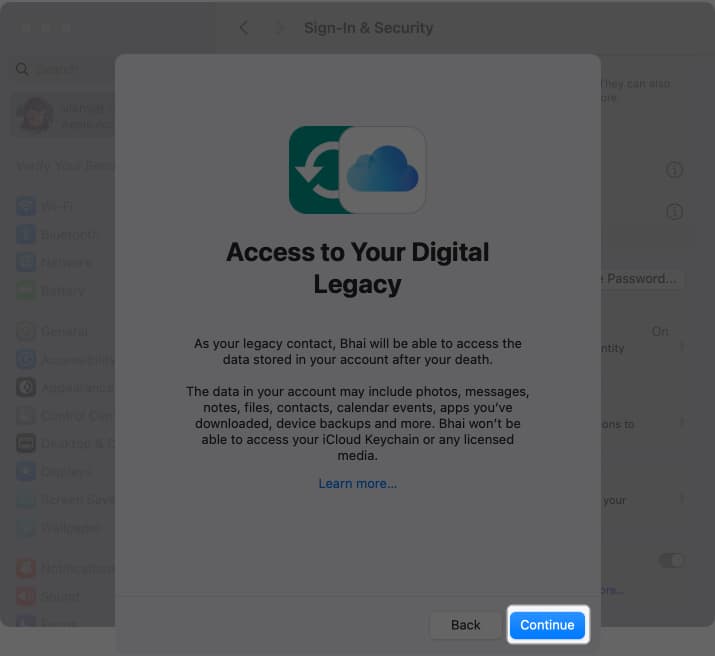
However, certain information, such as purchased subscriptions and data stored in your Keychain – such as payment information, passwords, and passkeys can’t be accessed no matter what, as even a dead person’s privacy and dignity should be honored.
Also, your Legacy Contact doesn’t need to be someone from your family; you can choose any contact you prefer, and there can be more than one contact. Additionally, having an Apple ID or an Apple device is not mandatory for Legacy Contact.
To request access to your data from Apple servers, the Legacy Contact needs to provide the following:
- The access key that was generated when you designated them as a Legacy Contact.
- Your government-provided Death Certificate.
Upon successful verification, Apple will provide the Legacy Contact with a unique Apple ID that they can set and use to access your account. Once done, your Apple ID will stop working, and the Activation Lock on any device with your Apple ID will also be removed.
Another thing to remember is that once Apple approves your Legacy Contact’s first request to access your data, they must download the data within the next three years, as Apple automatically deletes the data from its server after the said period. In the case of multiple Legacy Contacts, each contact has individual power to decide for your account, including permanently deleting all the data.
What you need to add a Legacy Contact for your Apple ID?
Like every other advanced Apple feature, there is a basic criteria that you must fulfill to be able to create a Legacy Contact for your Apple ID:
- An iPhone or iPad running on iOS 15.2 or iPadOS 15.2, and a Mac running on macOS Monterey 12.1.
- All your Apple devices must be signed in with the same Apple ID.
- Two-factor authentication enabled on your Apple ID.
- You must be over 13 years of age. (The age may vary depending on the country and region in which you live).
How to add Legacy Contact for your Apple ID on iPhone, iPad, or Mac
Being a part of the Apple ecosystem, a Legacy Contact you add on your iPhone will appear on all your Apple devices signed in with the same Apple ID. If you are not on the same Apple ID, you can find our guide on how to change your Apple ID on iPhone, iPad, and Mac, which should help.
How to add Legacy Contact on iPhone and iPad
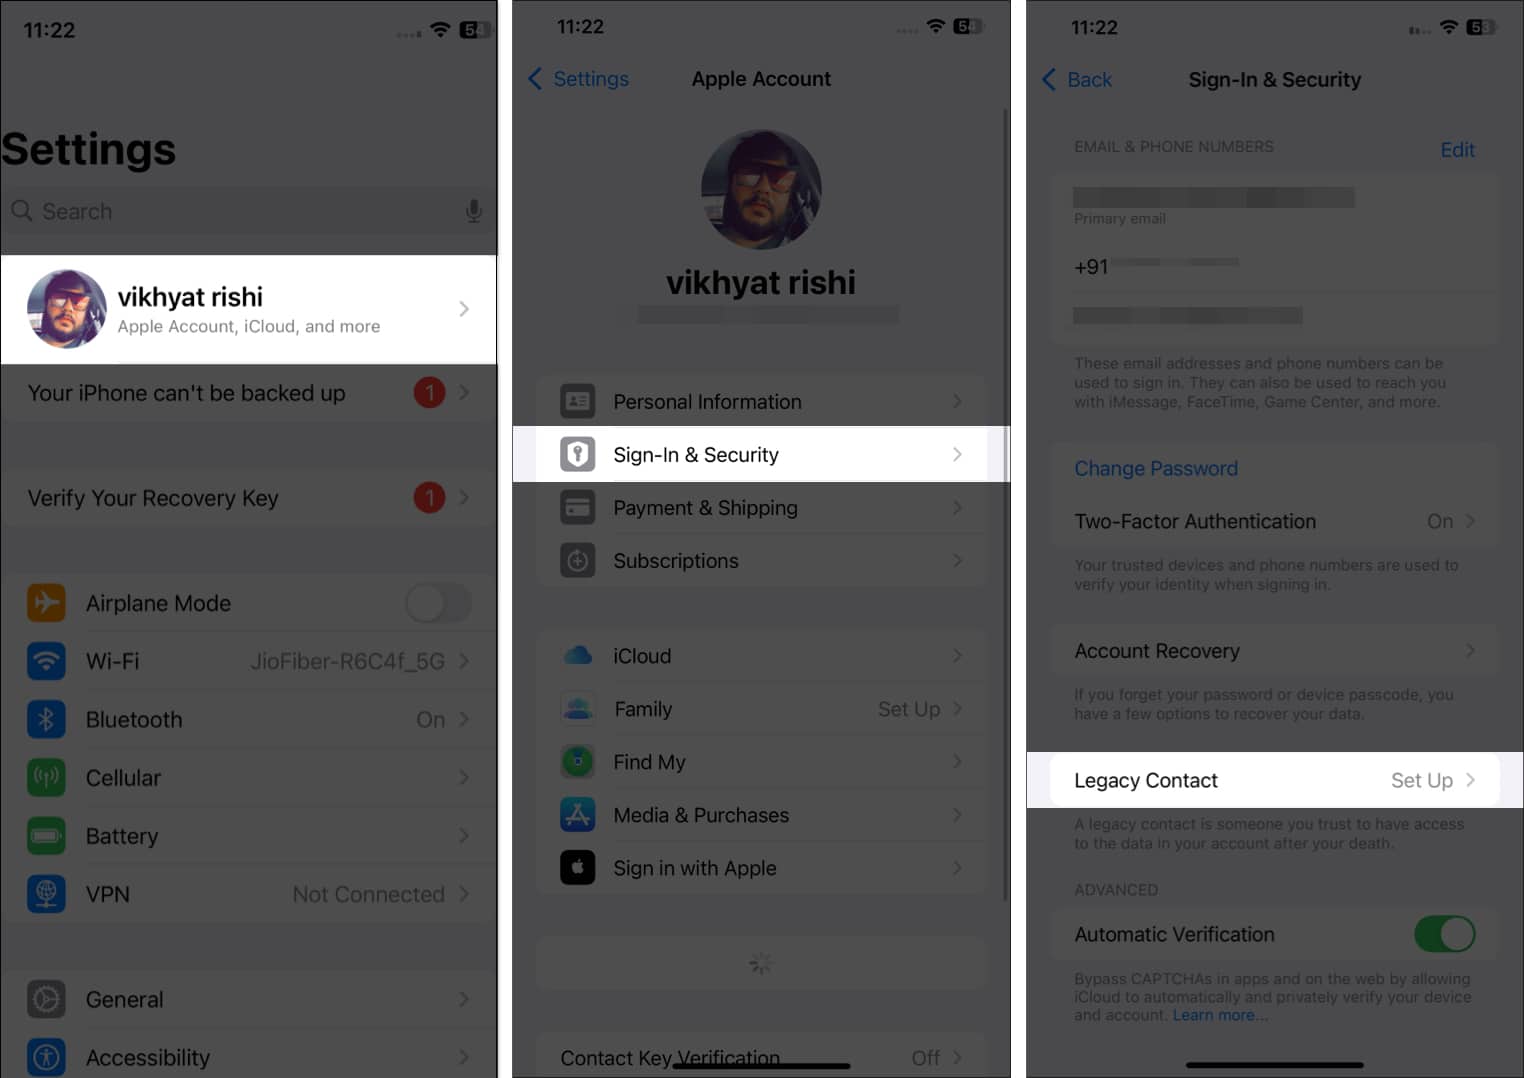
- Open the Settings app.
- Tap on your profile at the top.
- Here, tap on Sign-In and Security.
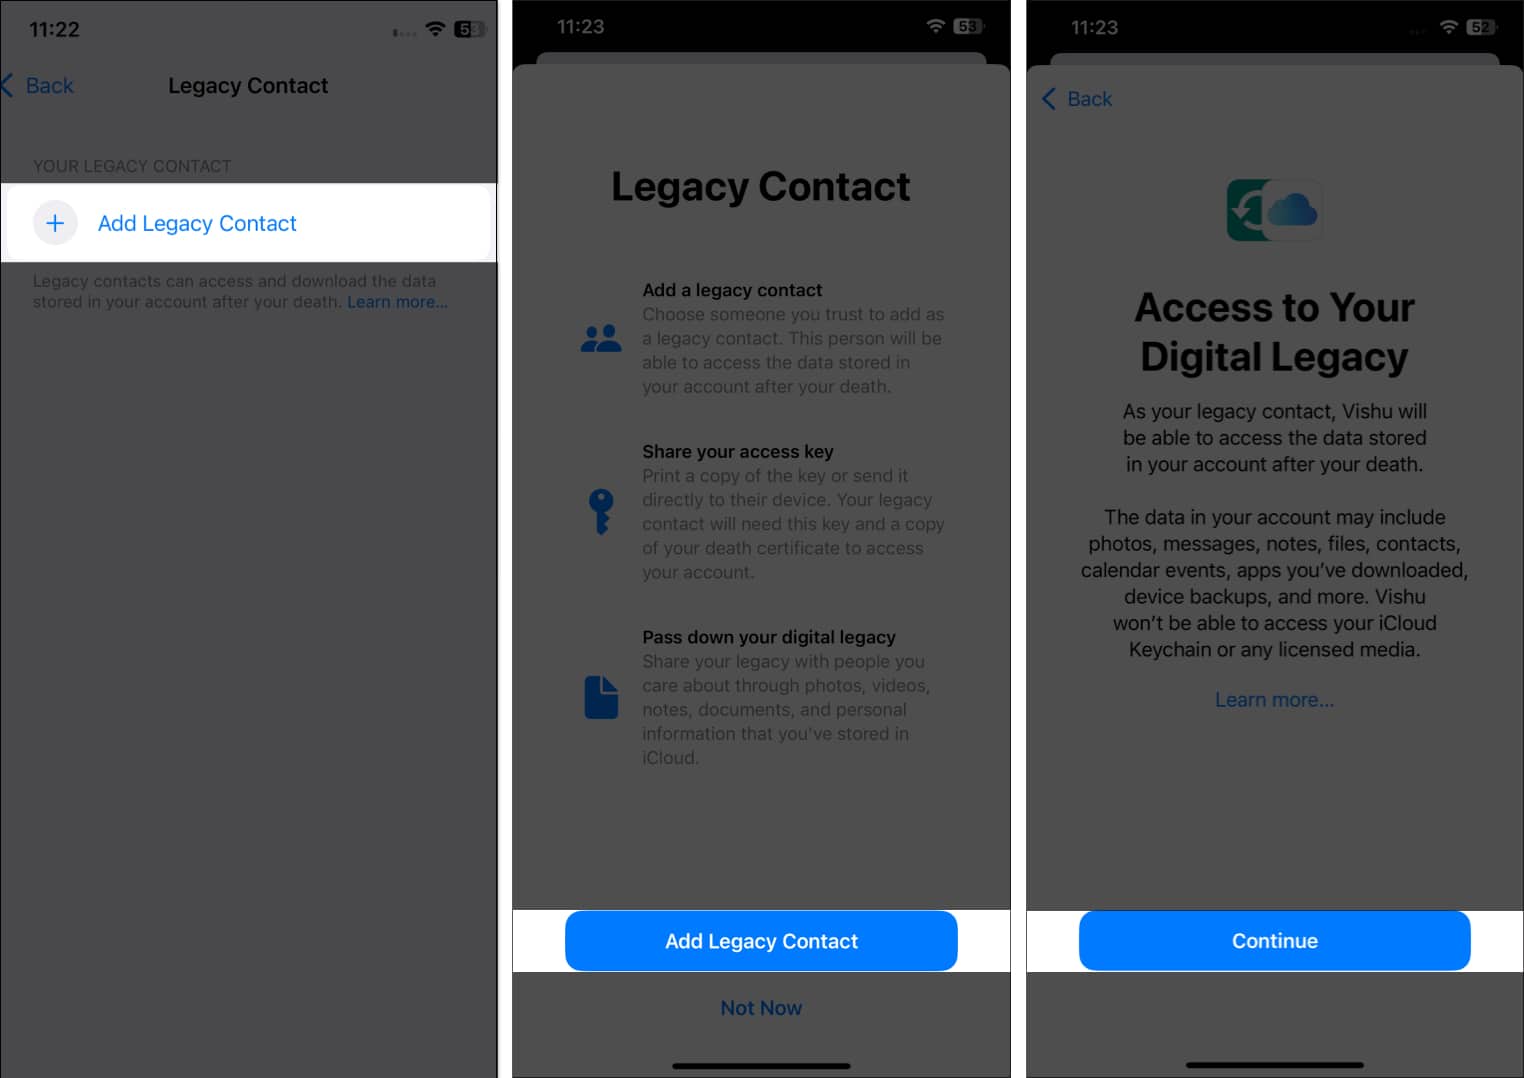
- Scroll down and tap Legacy Contact, then tap the Add Legacy Contact button on the subsequent menu.
- Again, tap the blue Add Legacy Contact button to confirm and authenticate with your FaceID.
- Then, choose the contact you wish to make your Legacy Contact.
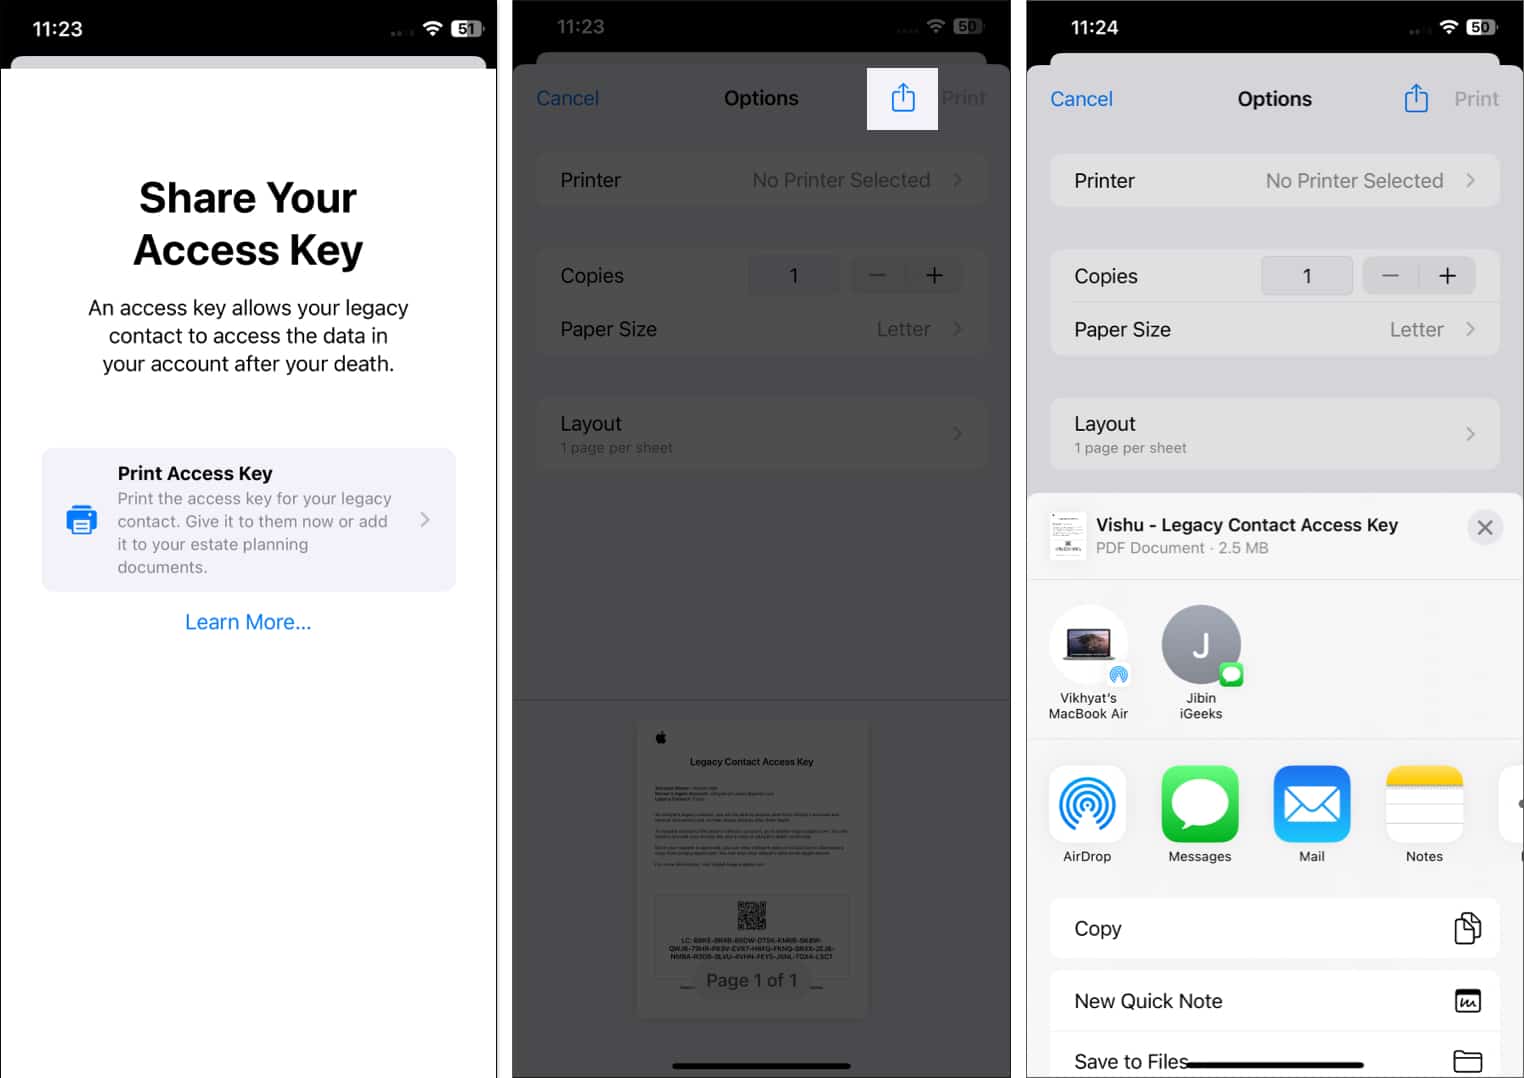
- Once done, hit Continue, and the system will generate an access key for your account.
- Tap on the Print Access Key tab.
- Then, tap the Share button to share the access key with the selected contact or save it to the Files app.
How to add Legacy Contact on Mac
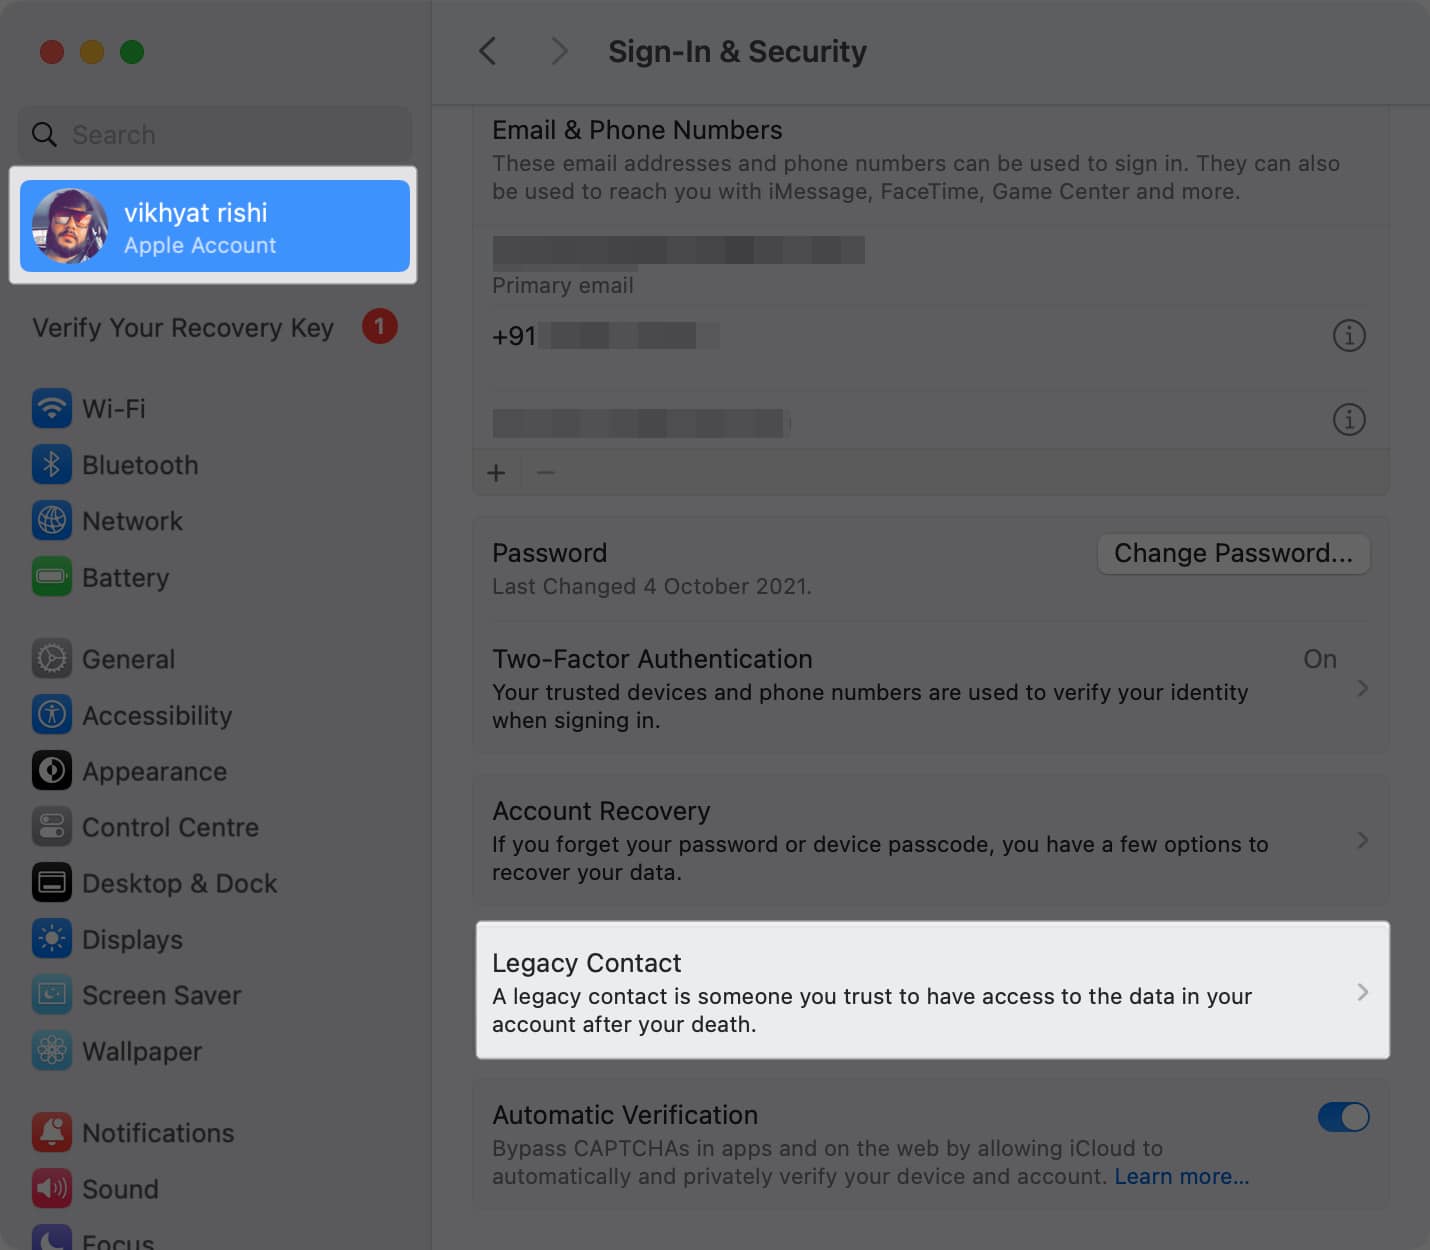
- Open System Settings on your Mac.
- Click on your profile at the top.
- Click on Sign-In & Security.
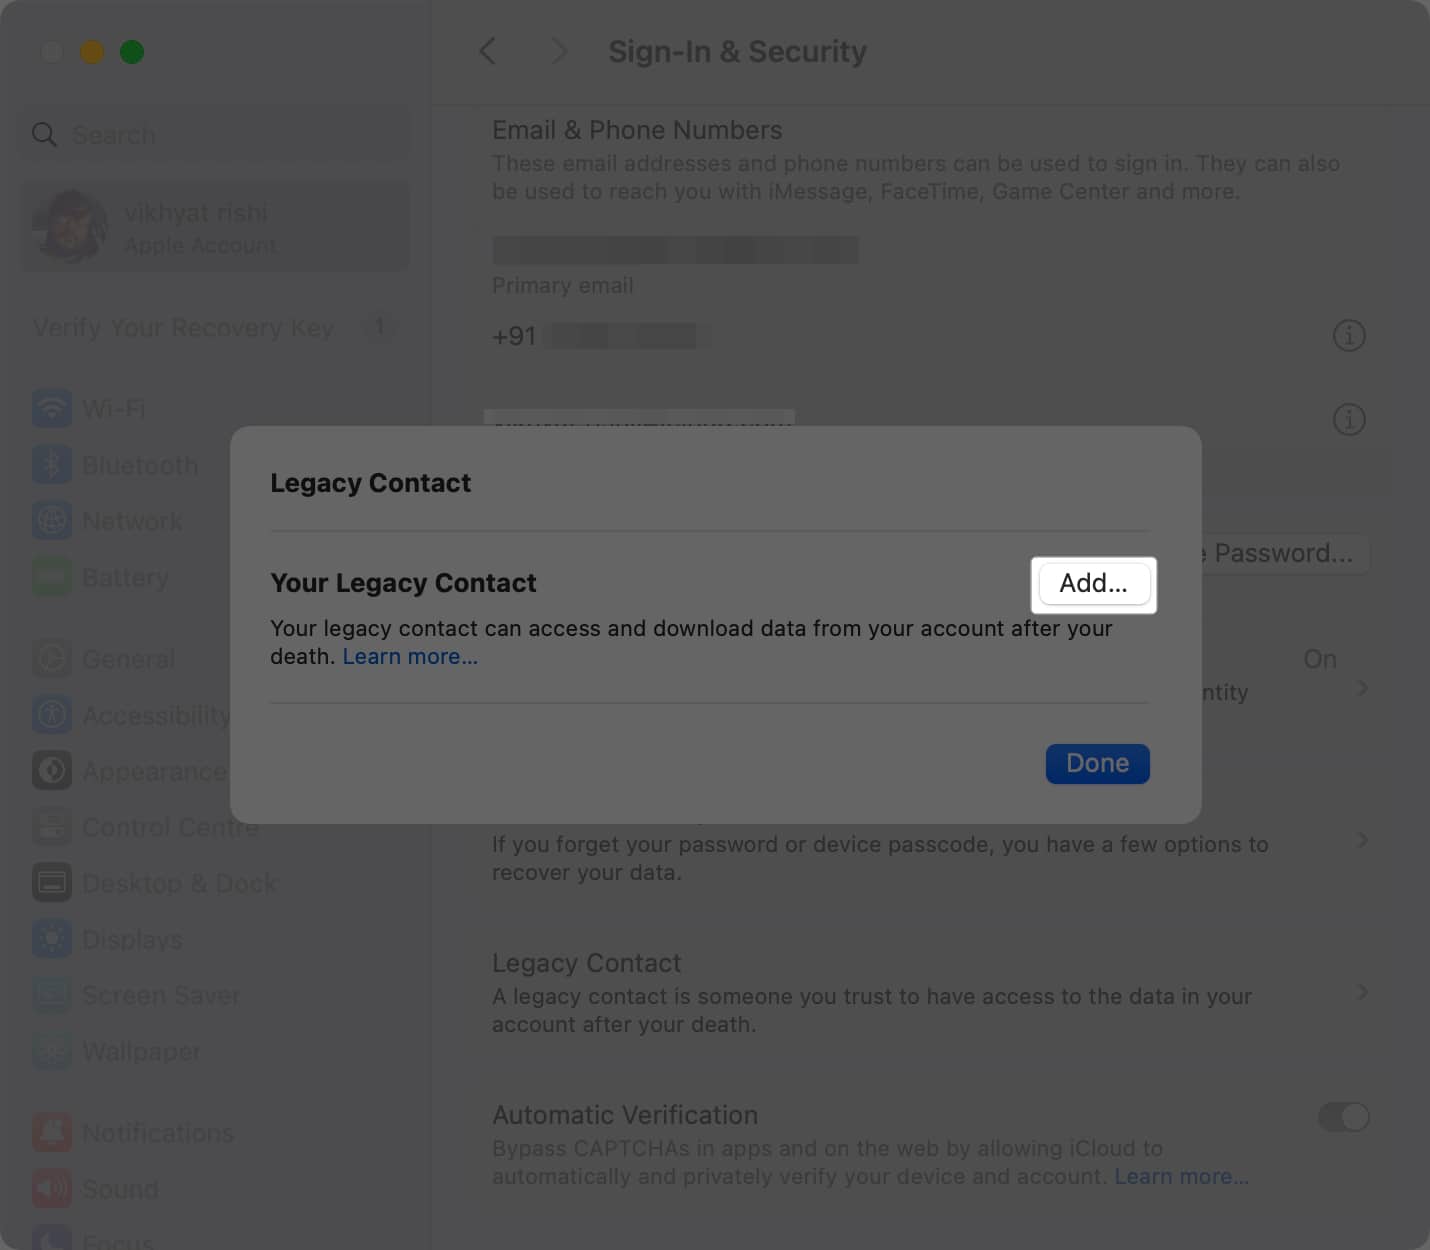
- Next, select Legacy Contact.
- Click on the Add button.
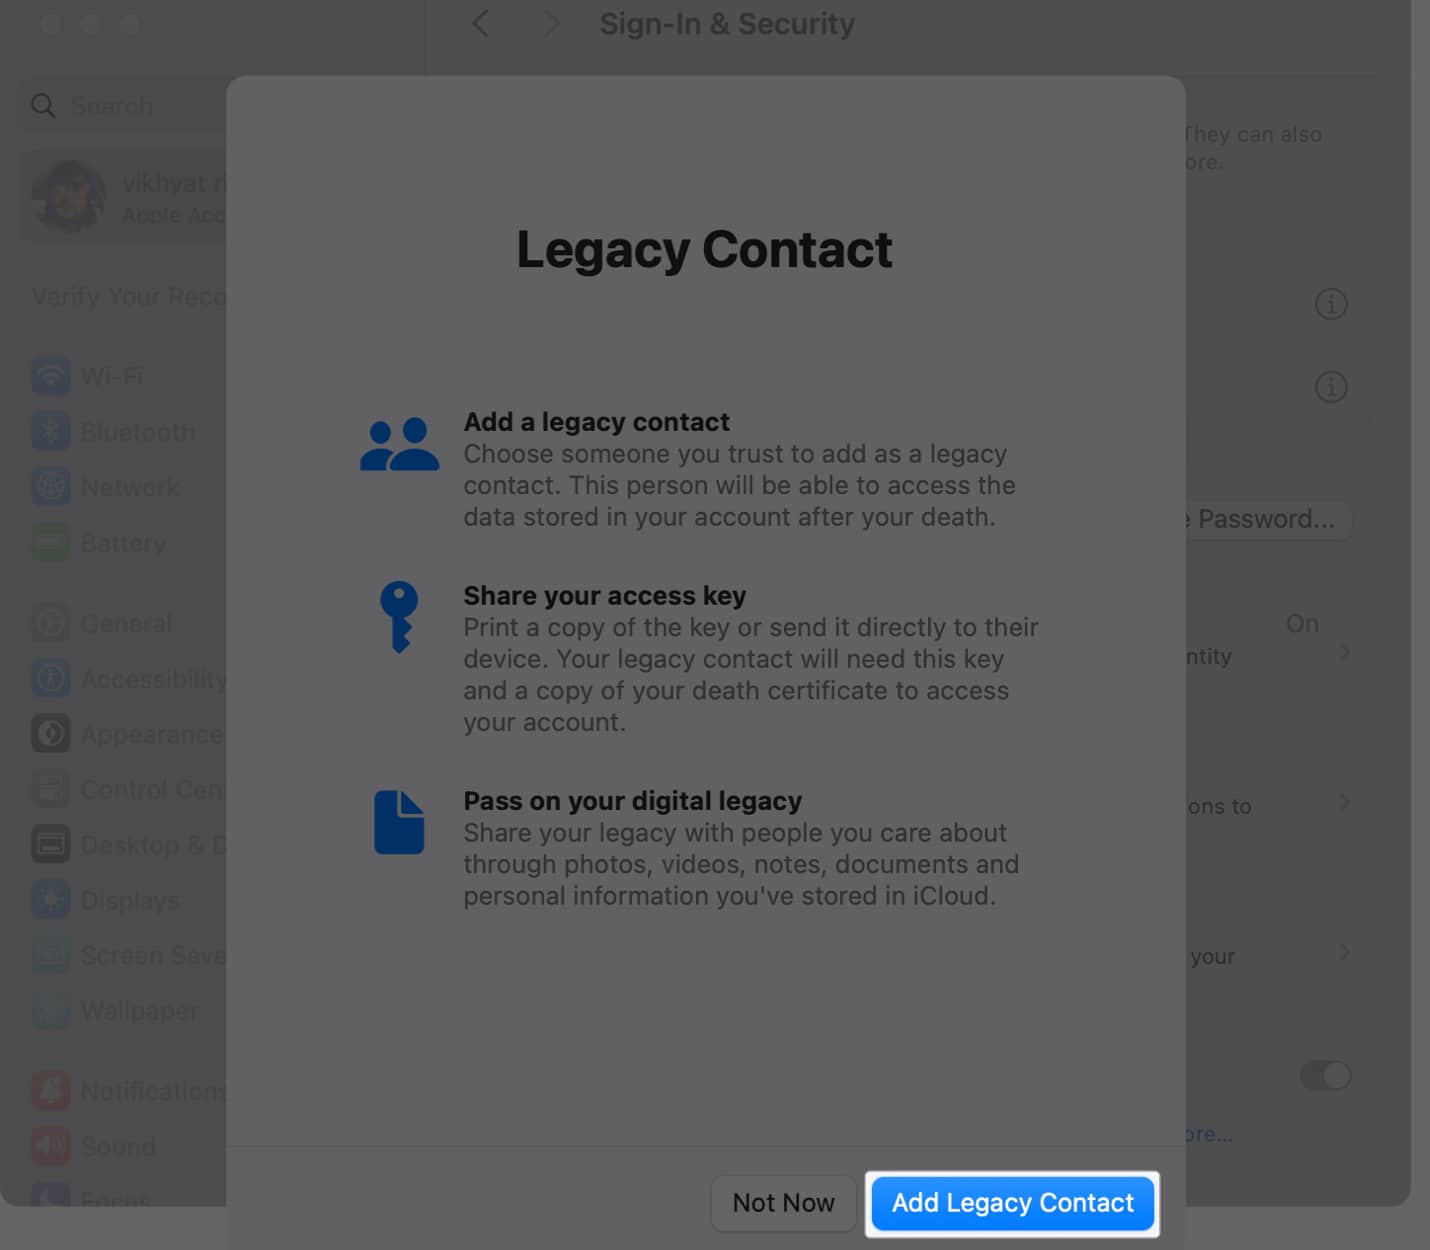
- Then, click the Add Legacy Contact button.
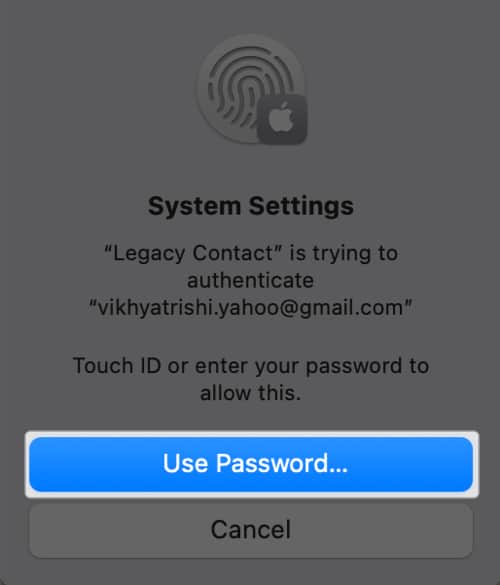
- Authenticate using the Mac’s password or Touch ID.
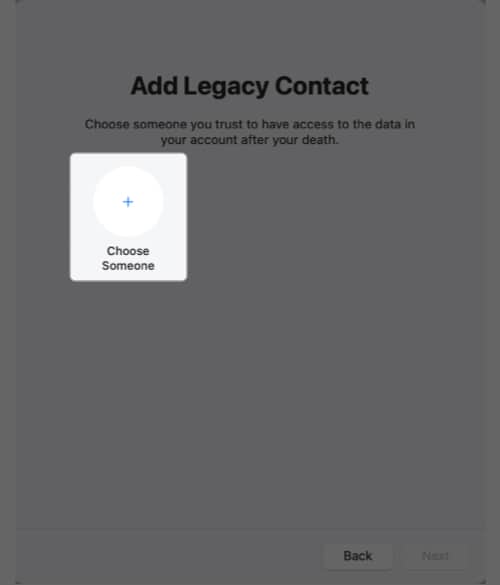
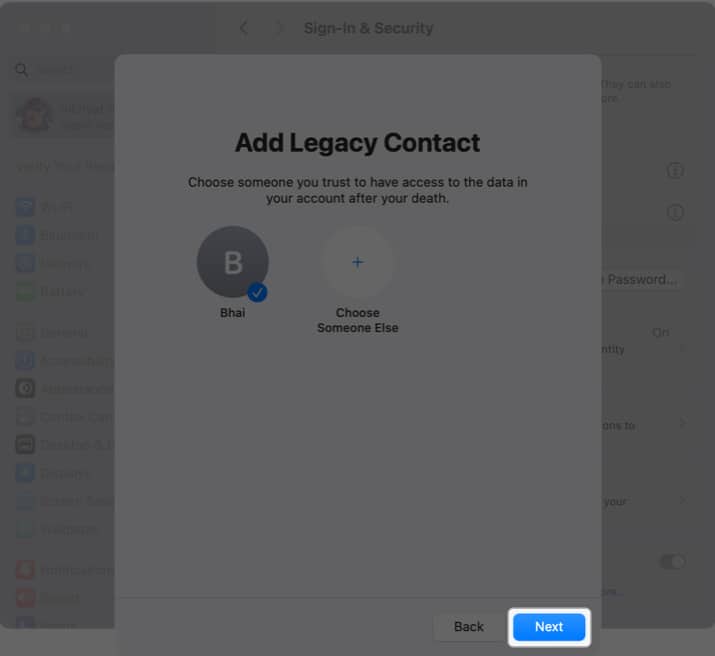
- Next, click the + button, then choose the contact you wish to make your Legacy Contact.
- Once done, click Next.
- Then, click Continue on the subsequent prompt.
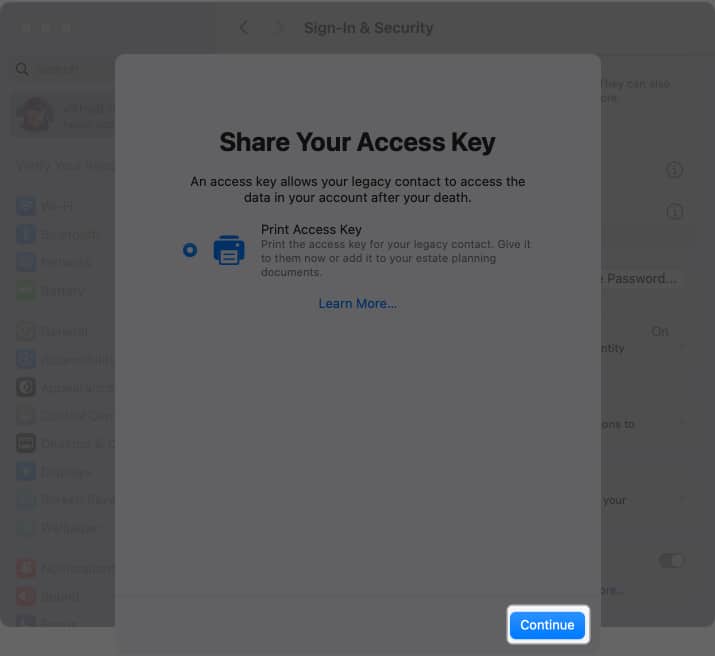
- Again, click Continue on the Share Your Access Key prompt.
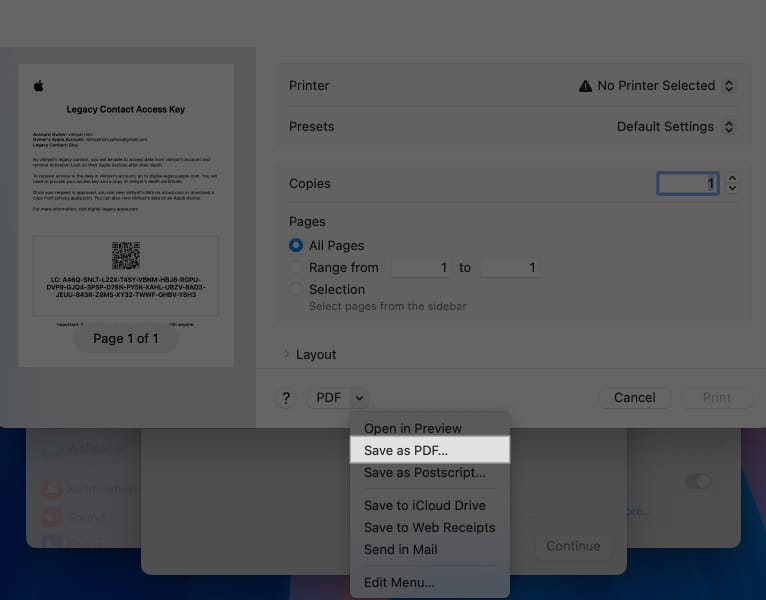
- Finally, select Save as PDF to save the access key as a PDF document on your Mac, so you can share it with the chosen Legacy Contact later.
How to add Legacy Contact if you’re in a family sharing group
If you are a part of a Family Sharing group, all the members of the group will appear when you enter Legacy Contact settings. You can choose a contact among the group or select Choose Someone Else to choose a contact other than the ones in your Family Sharing group. The rest of the process remains the same.
How to save or share Legacy Contact access key
If you did not save or share the Legacy Contact access key at the time of creating it, you can save or share it later as well:
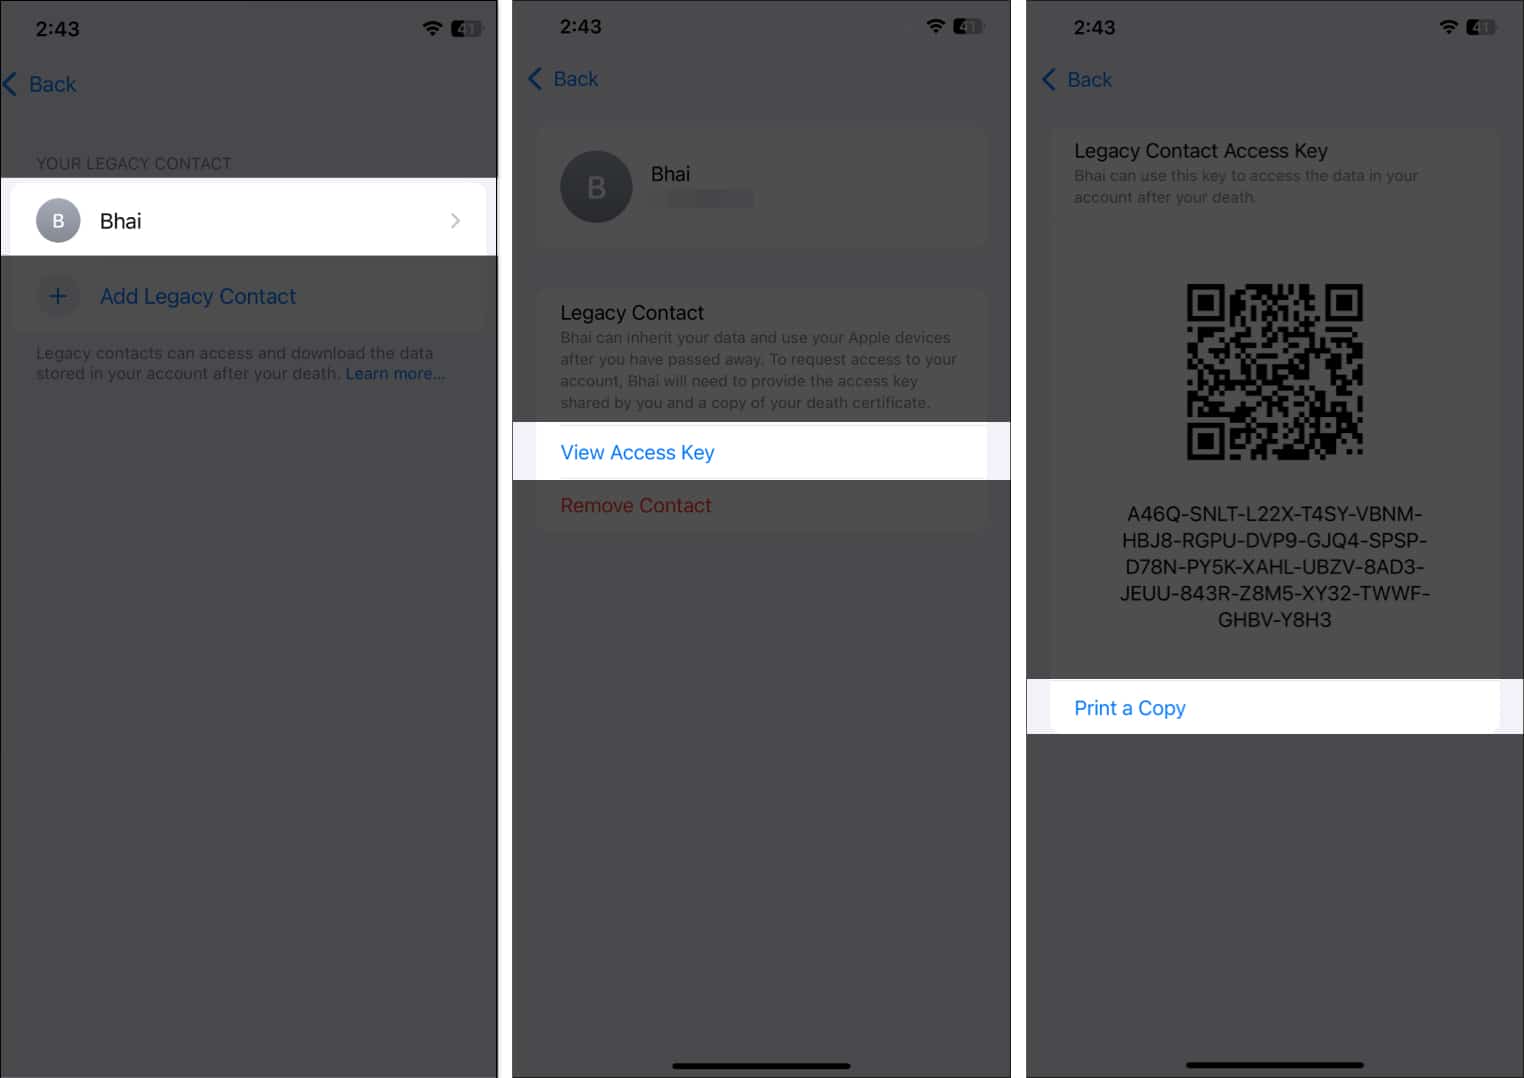
- Go to the Legacy Contact settings and select the available Legacy Contact.
- Here, tap on View Access Key.
- Tap on Print a Copy.
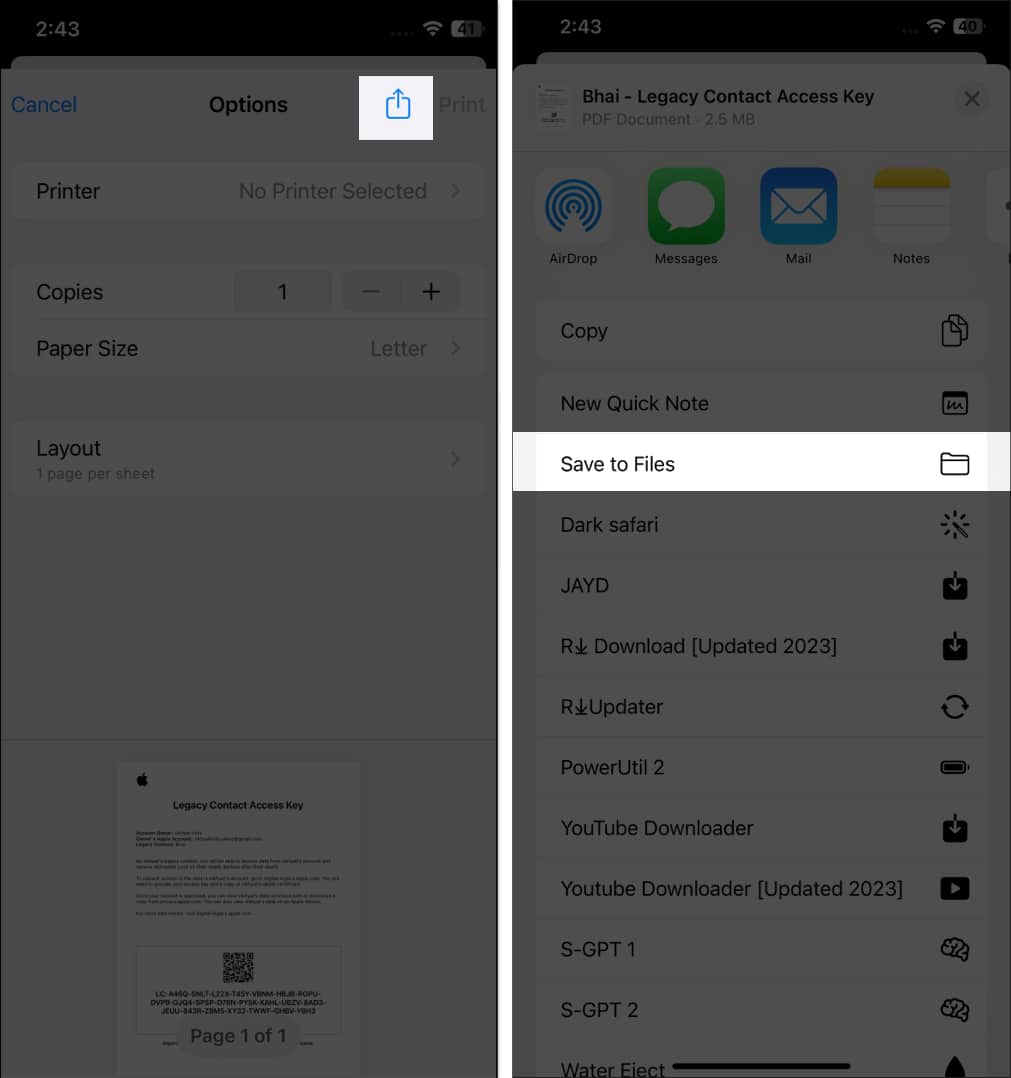
- Hit the Share button.
- Now, you can save the access key to the Files app or share it with the contact using any app that allows file sharing.
How to remove a Legacy Contact on your iPhone
Friendships and relationships change with time; the amount of trust you currently hold for someone may not remain the same in the future. That’s exactly why knowing how to remove a Legacy Contact from your Apple ID is essential.
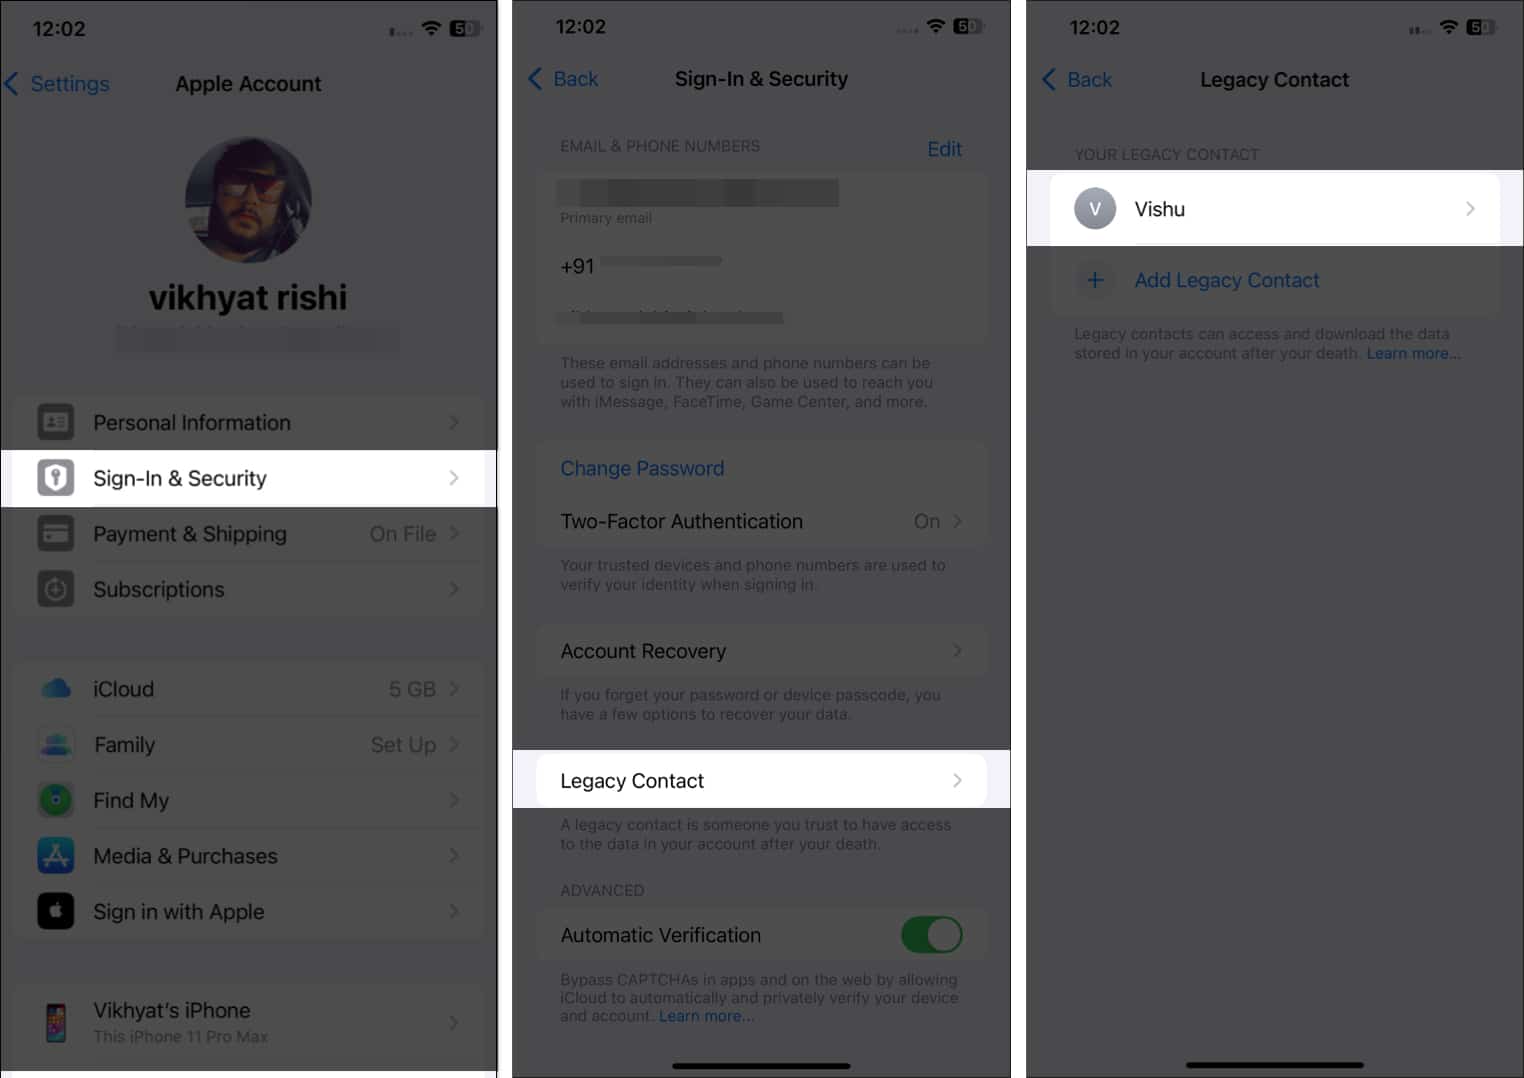
- Head to your Apple account settings on your iPhone and tap on Legacy Contact.
- Tap on the Legacy Contact you want to remove.
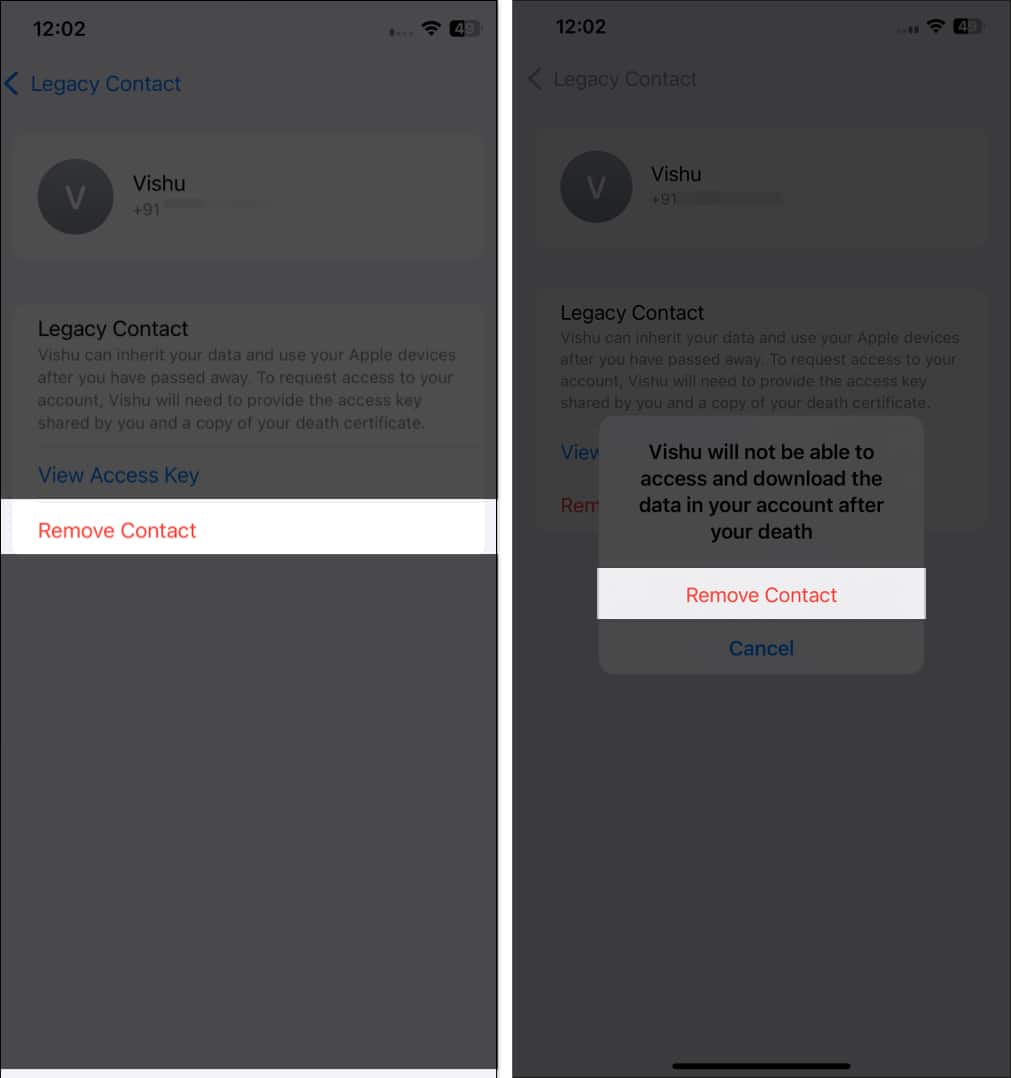
- Next, tap on Remove Contact.
- Now, again tap on Remove Contact on the confirmation prompt that appears.
What data can a Legacy Contact access?
The data your Legacy Contact can request using the provided access key depends on the data you have in your iCloud storage. You cannot allow or restrict Legacy Contact to access a particular data type; it is either none or all.
Data that a Legacy Contact might be able to access includes:
- iCloud Photos
- Notes
- Contacts
- Calendars
- Reminders
- Messages in iCloud
- Call history
- Files stored in iCloud Drive
- Health Data
- Voice Memos
- Safari Bookmarks and Reading List
- iCloud Backup
On the other hand, your Legacy Contact can not access data types such as licensed media, in-app purchases, saved payment information, and Keychain, for major security reasons, of course.
Digital afterlife sorted…
While no one wants to think of their death, Apple’s Legacy Contact ensures that you are not depriving your loved ones of the digital memories you have in your iCloud storage. Legacy Contact can also remove the Activation Lock from your devices, ensuring that your Apple devices will be used for much more than an expensive paperweight.
Unfortunately, the Legacy Contact will not be able to access the deceased person’s Apple account or data if they lose the access key.
You can choose anyone in your contact as your Legacy Contact, no matter whether or not they have an Apple ID.
Read next:

