Concerned about privacy on your Mac, which your family also uses? Why not give them some breathing room? You may accomplish this by creating a new user profile on your Mac for them. Stay tuned to learn how to add a user on Mac such that each user’s privacy is respected.
How to add a new user on Mac
Finally, to avoid file clustering and maintain privacy, you chose to provide personal space to the users using your Mac. Let us then understand how to add a user on a Mac running macOS Ventura or Monterey.
In macOS Ventura
- On your Mac, click on the Apple menu → System Settings.
- Scroll and click Users & Groups → Add Account.
- Enter your Password → click Unlock.
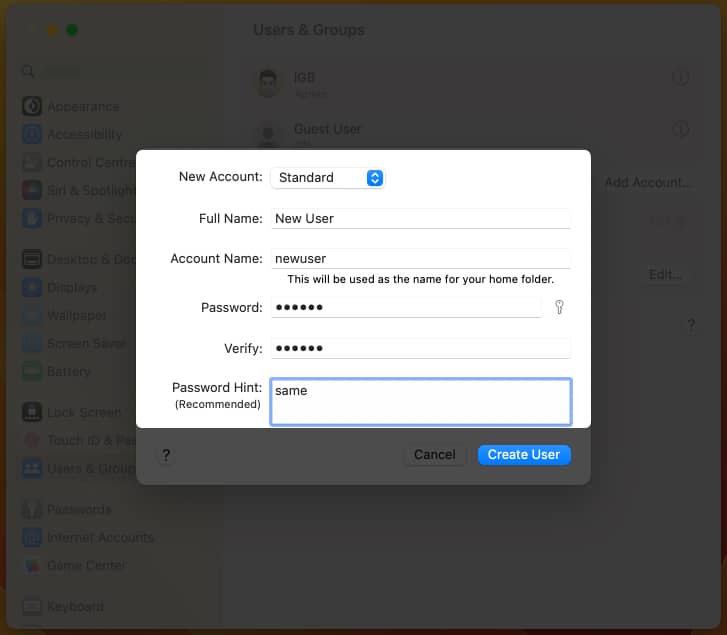
- Fill in the required details → click Create User.
You can choose between Administrator, Standard, or Sharing by changing the options available in the New Account dropdown.
To allow the user with Administrative properties, you need to click the (i) button and toggle on Allow this user to administer this computer.
As soon as you toggle on the feature, you’ll get a pop-up asking you to restart.
In macOS Monterey
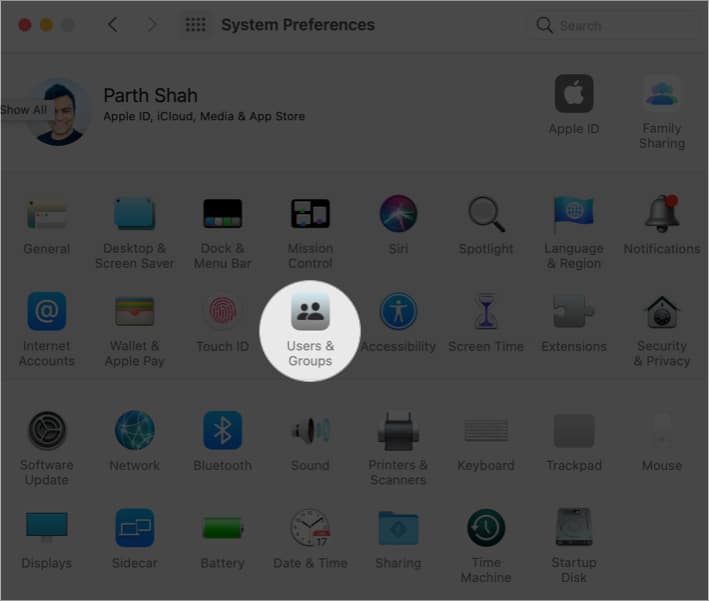
- On your Mac, choose Apple menu → System Preferences.
- Navigate to Users & Groups.
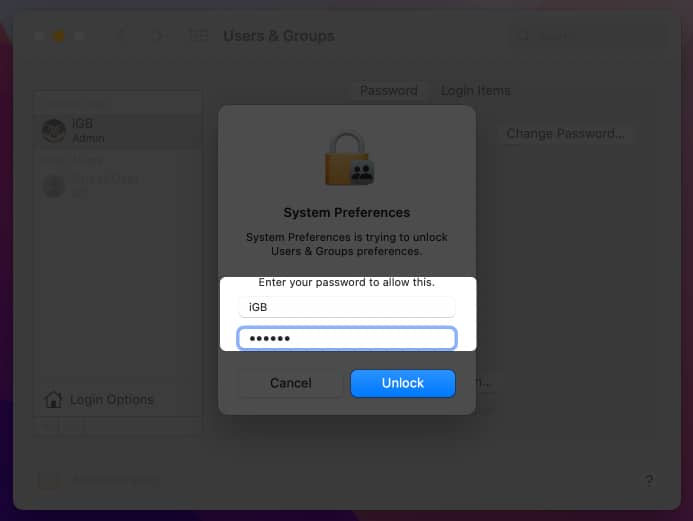
- Click the Lock icon.
- Enter your credentials and click Unlock.
- Click the (+) icon.
- Fill in the required details → select Create User.
You can view the newly created user under the Other Users area.
You may also check the Allow the user to administer this computer if you wish to give that account administrative privileges. And to provide that, you’ll be asked to restart your Mac.
Add a group on Mac
Now, let’s see how we can create a group that is accessible to specific users of the Mac.
In macOS Ventura
- Go to System Settings.
- Scroll and click Users & Groups → Add Account.
- Enter your Password → click Unlock.
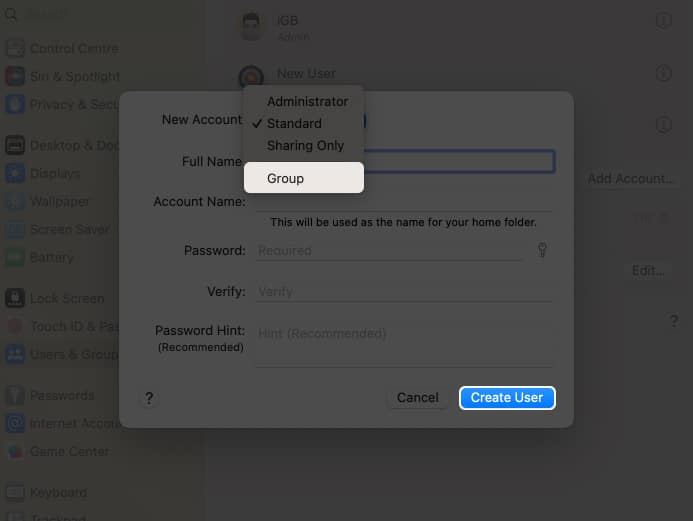
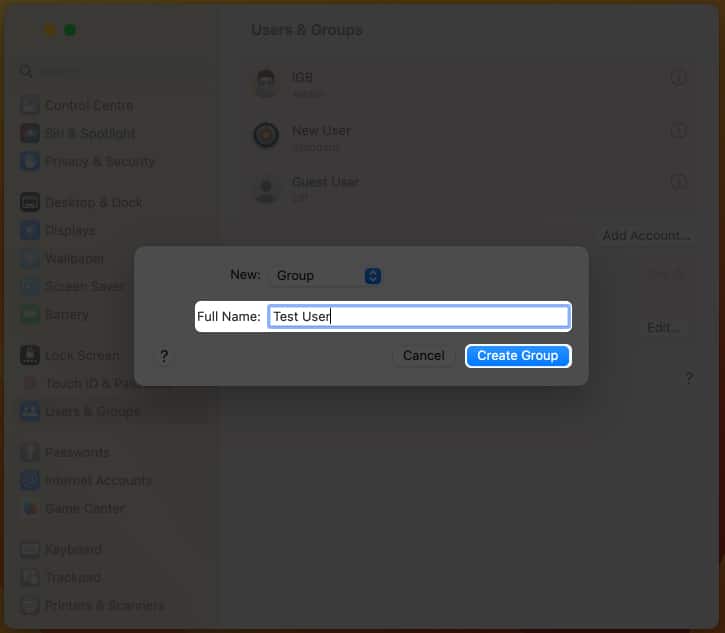
- Select Group from the New Account dropdown.
- Give the Full Name for the group → click Create Group.
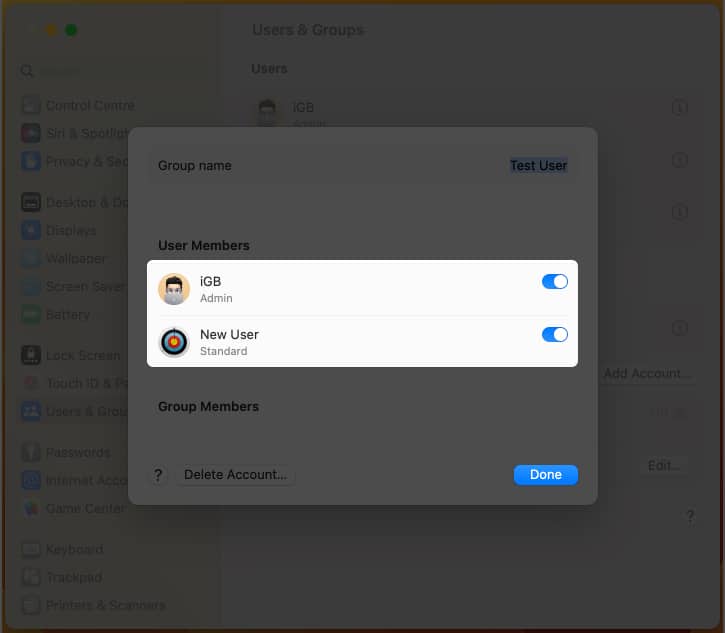
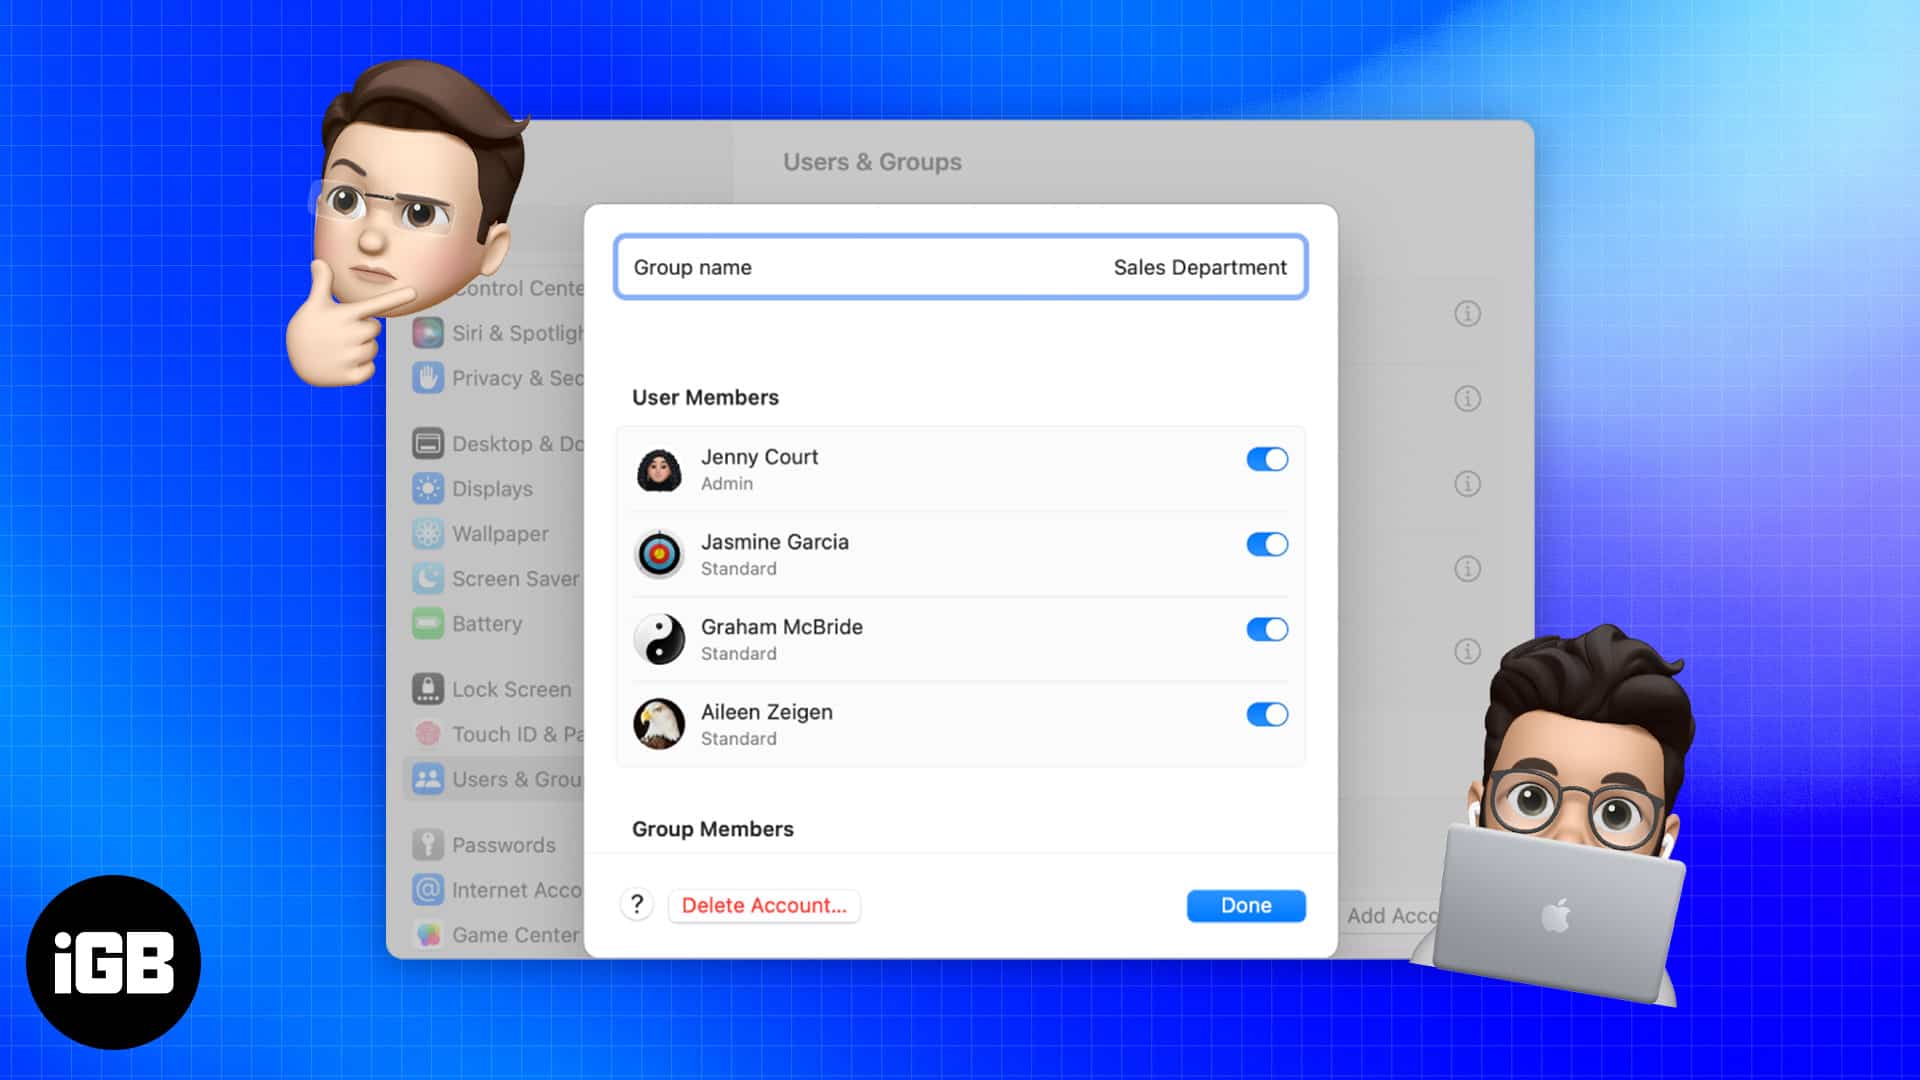
- Click the (i) button → In the User Members section, you can switch on the toggle next to the members you wish to add to the group.
- Click Done.
In macOS Monterey
- Launch System Preferences.
- Head to Users & Groups → Click the lock icon to Unlock it.
- Select Group from the New Account dropdown.
- Give the Full Name of the group → click Create Group.
- Under the Membership section, click the checkbox next to the users you want to add to the group.
How to delete a user on Mac
Stuck in a situation where your Mac is with everybody expect you. Take a chill pill. We’ve got you covered. You only need to remove a few of the users. Keep reading to find out how.
In macOS Ventura
- Open System Settings → Users & Groups.
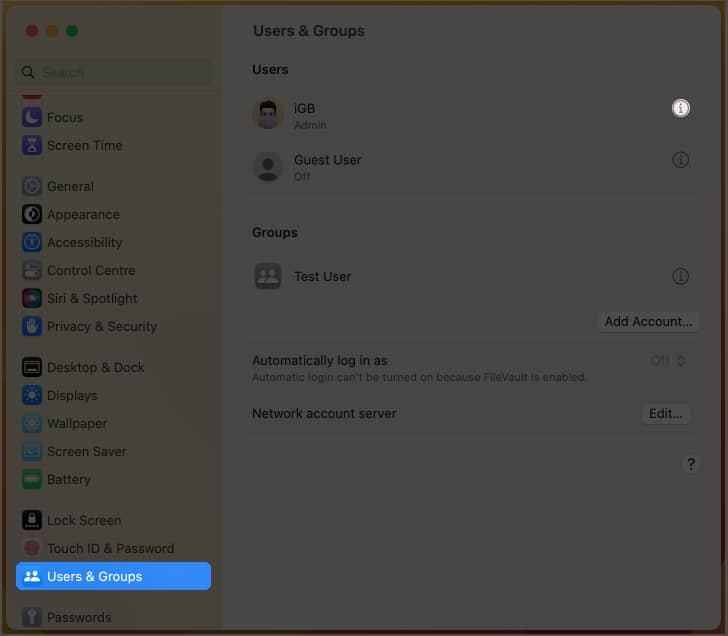
- Click the (i) button next to the user you want to delete on Mac.
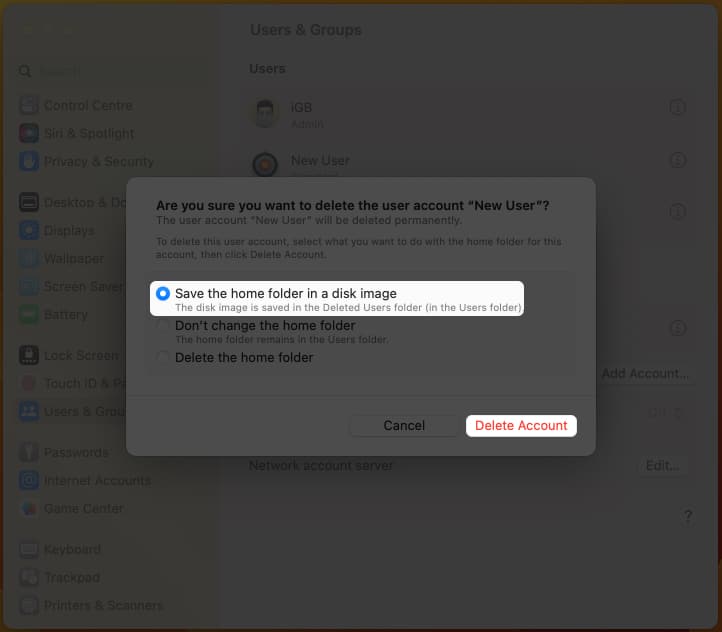
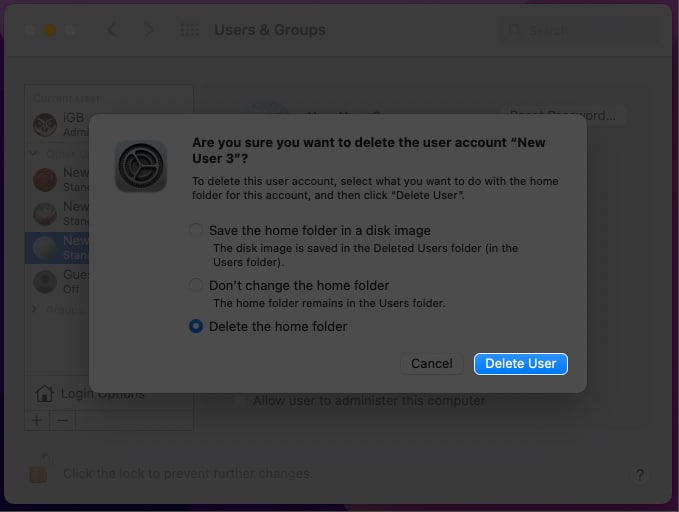
- Choose Delete Account. Now, you will have three options to choose from.
- Save the home folder in a disk image: This will save the disk image of the user you’re removing in the Deleted folder.
- Don’t change the home folder: The home folder will remain in the User’s folder.
- Delete the home folder: The user information will be deleted, and the disk space will be freed.
In macOS Monterey
- Launch System Preferences.
- Head to Users & Groups → Click the lock icon to Unlock it.
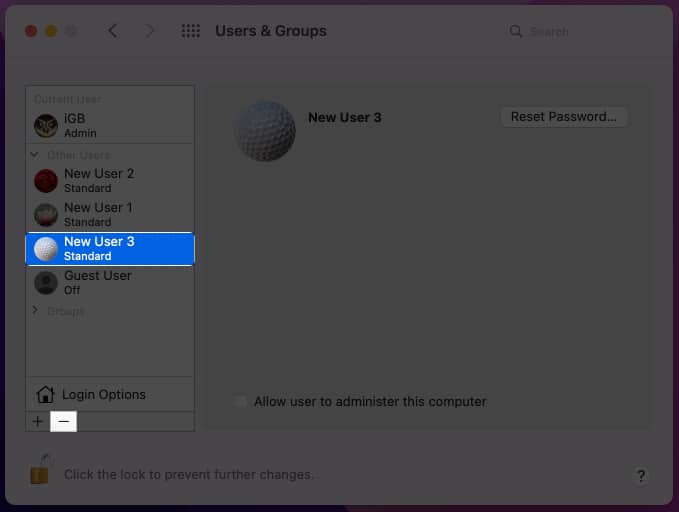
- Select a user from the Other Users section.
- Click the (–) icon and choose one of the options below.
It comes with the same options described in the remove a user on macOS Ventura section.
- Choose Delete User.
Delete a group on Mac
As part of your Mac cleaning, you might want to eliminate a few groups you made. Follow the instructions below to learn how to remove a group.
In macOS Ventura
- Launch System Settings → Users & Groups.
- Click the (i) button next to the group you want to delete.
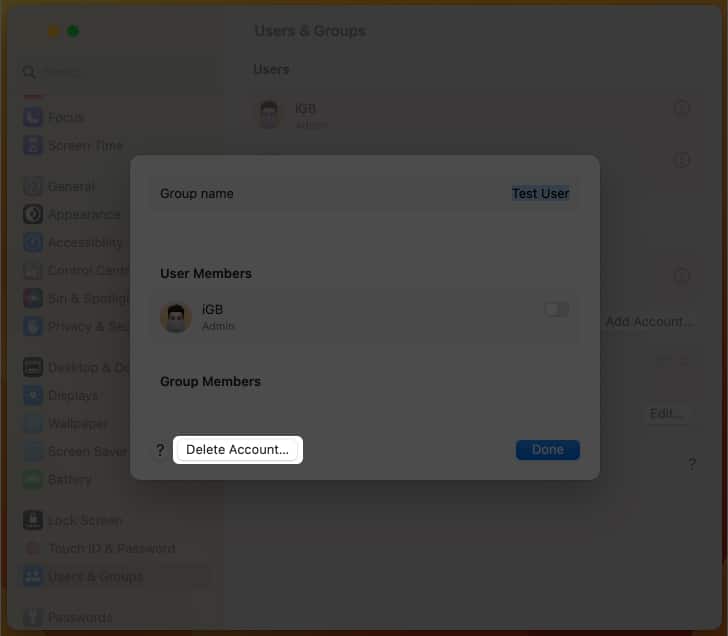
- Select Delete Account.
- Enter your Password → click Unlock.
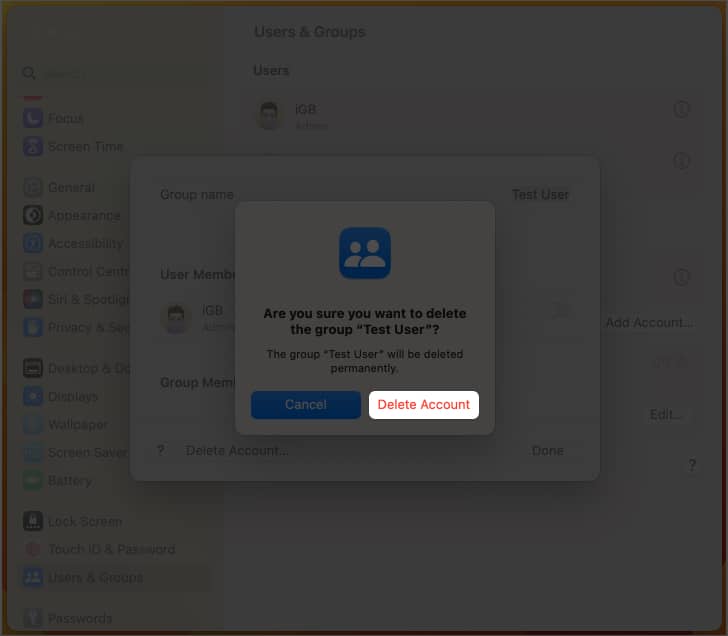
- Confirm by selecting Delete Account.
In macOS Monterey
- Open System Preferences.
- Go to Users & Groups → Click the lock icon to Unlock it.
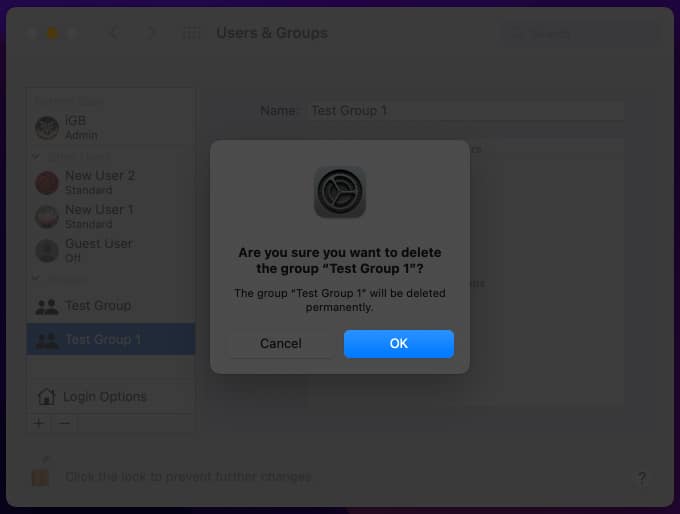
- Select the group from the group’s section.
- Click the (–) icon.
- Click OK.
FAQs
To enable the fast user switching on macOS Ventura, launch System Settings → go to Control Center → scroll down to Fast User Switching → toggle on Show in Control Center, or select one option from the dropdown in Show in Menu Bar.
A Guest User Account is required to allow a few infrequent people to log in to your Mac. To activate it on your Mac, follow the instructions in our article on how to enable a Guest User account on Mac.
Final thoughts…
Hope we’ve served you a solution for adding or removing a user/group. If you want to resolve any other issue on your Apple device, feel free to let us know below. We’ll be glad to help you out. Until next time!
Read more:

