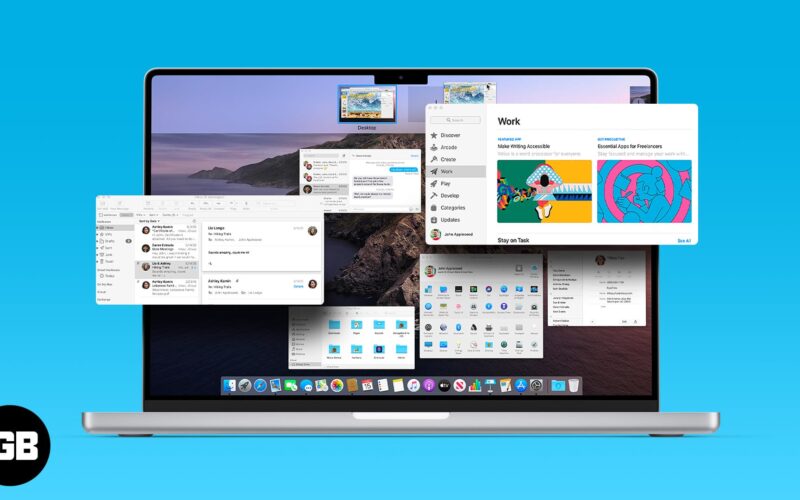
Ever wished your Mac had an iPhone/iPad-like App Switcher feature? Something that makes switching between windows a breeze and lets us see all active windows at once. While not App Switcher per se, you have the next best thing – Mission Control on Mac.
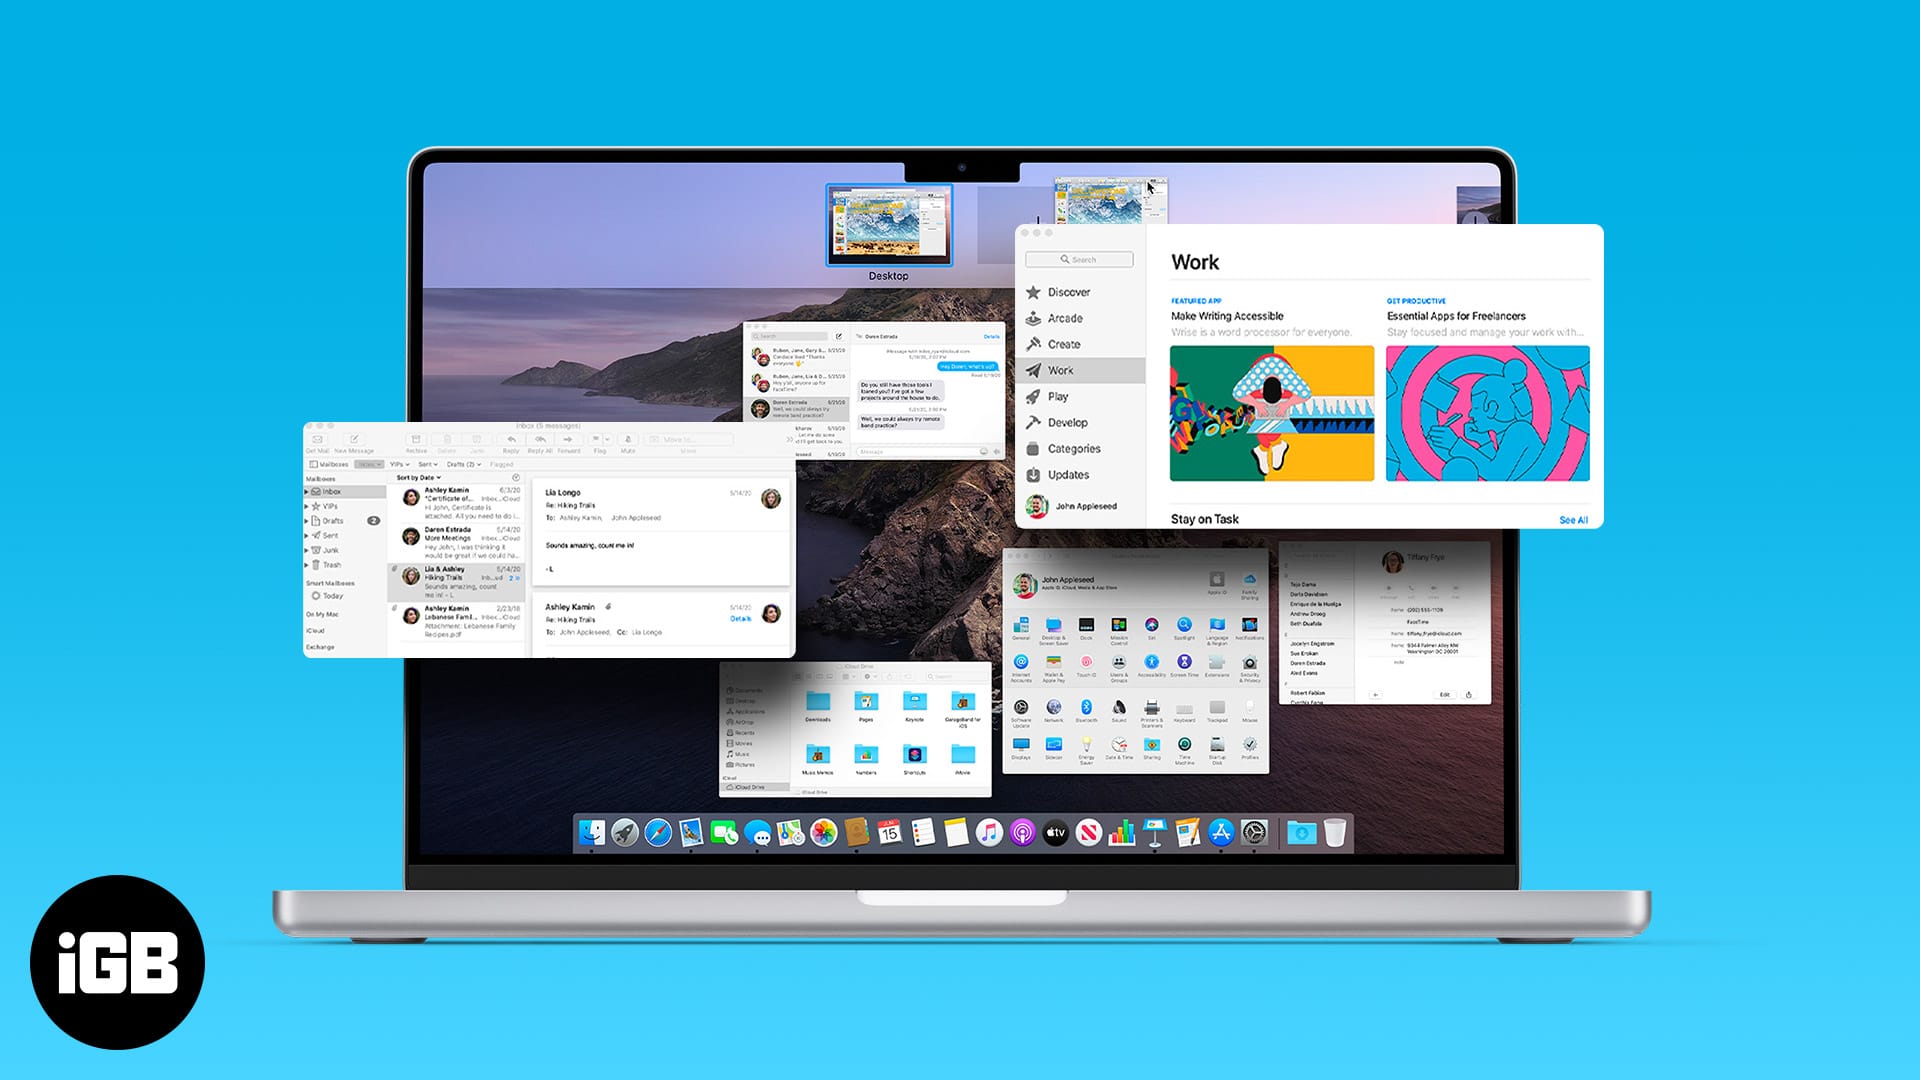
Whether you have used the setting earlier or don’t know about it yet, don’t worry; I’ve got you covered with this complete guide on using Mission Control on Mac, starting with what’s the feature all about.
- What is Mission Control on Mac, and how it helps?
- How to open Mission Control on Mac
- Master the use of Mission Control on Mac
- How to tweak Mission Control settings
- Mission Control not working on Mac?
What is Mission Control on Mac, and how it helps?
Mission Control lends you an overview of all active windows, desktop Spaces, split view, or full-screen apps. It lets you create separate and dedicated Spaces for active apps and windows.
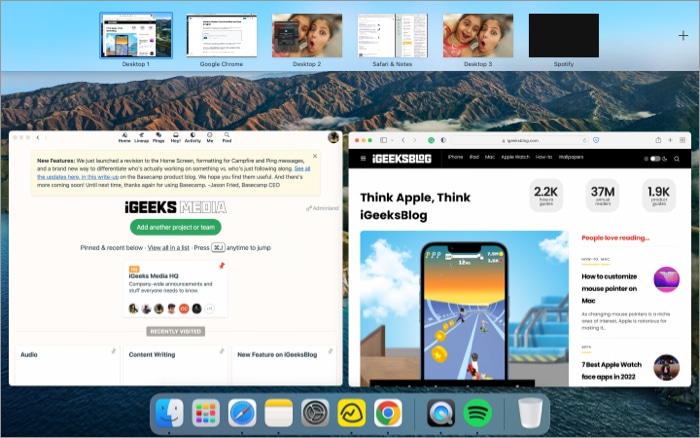
Notably, Mission Control does not show windows or apps that have been minimized. The main function is to keep the current desktop decluttered while keeping the necessary apps running in the background.
For instance, I keep the communication apps like Basecamp or Slack open on one desktop for my workflow. A separate desktop boasts my WordPress and research websites in Split View; another holds Sketch (image editor). A music/podcast app is omnipresent somewhere in the mix.
The best part is that I can switch between the active apps and desktop Spaces with superior ease.
The real App Switcher – Press Command (⌘) + Tab to reveal all active apps in a bar. Continue pressing the Command (⌘) key and press:
- Tab to move ahead (right)
- Tilde (~) to move backward (left)
Leave the command key to switch to the selected app.
How to open Mission Control on Mac
Understanding that the feature can aid any and every kind of workflow, Apple has provided multiple ways to access Mission Control. All the possible ways are lined up below, so choose your pick.
I. Via trackpad or Magic Mouse gestures
Swipe up using three or four fingers on the trackpad or double-tap the Magic Mouse with two fingers.
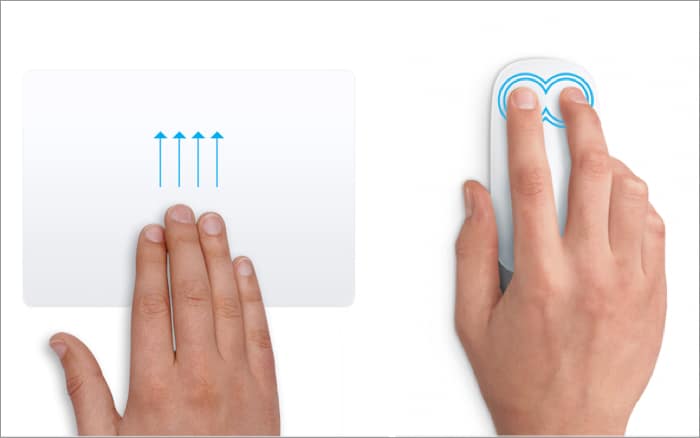
Note: You can also change the gesture assigned for Mission Control. Go to System Preferences → Trackpad → More Gestures → Mission Control.
Similarly, for Magic Mouse, you can go to System Preferences → Mouse → More Gestures → Mission Control.
II. Via keyboard shortcut or Touch Bar
Apple keyboard and Touch Bar have a dedicated Mission Control key (three rectangles of different shapes) to launch the feature in one tap; simply press F3/the Mission Control icon.
You can also press Control (⌃) + up arrow (↑) to open Mission Control on Mac.
Note: If you have turned on Use F Keys like F1, F2, etc., keys as standard function keys under the System Preferences → Keyboard, you will have to press the fn (Function) key and the Mission Control key to access it.
III. Via Launchpad or Dock
- Open Launchpad
- Click the Launchpad icon from the dock (one with multiple squares).
- Open Spotlight, search and click Launchpad.
- Go to Finder → Applications → Launchpad.
- TrackPad Gesture – Pinch your thumb and three fingers (ensure that all four digits make contact)
- Click Mission Control
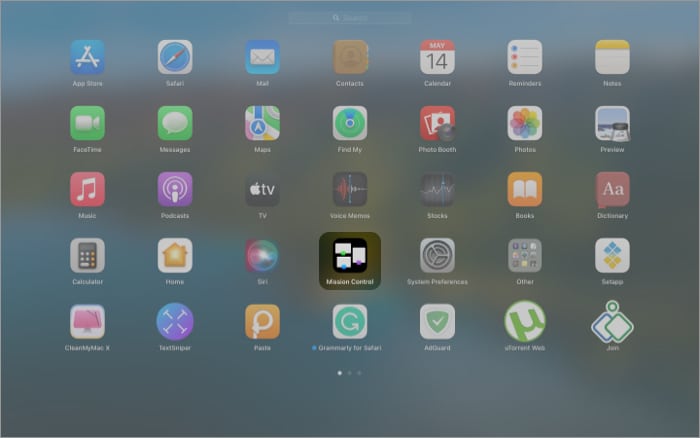
Don’t know how to use Launchpad to its full potential? Here’s our all-encompassing guide to guide you.
You can also drag and drop the Mission Contol icon to your dock for quicker access. And then, simply click the icon to access the feature.
IV. Via Hot Corners
Hot Corners are incredibly useful and helpful tools, and you should probably have them in your corner ASAP. Once you have set Mission Control as one of the Hot Corners, you have to slide the cursor to that corner of the screen, and tada!
- Go to System Preferences → Mission Control.
- Select Hot Corners from the bottom.
- You’ll find four options here, click the dropdown menu of the corner you’ll prefer.
- Click Mission Control and OK.
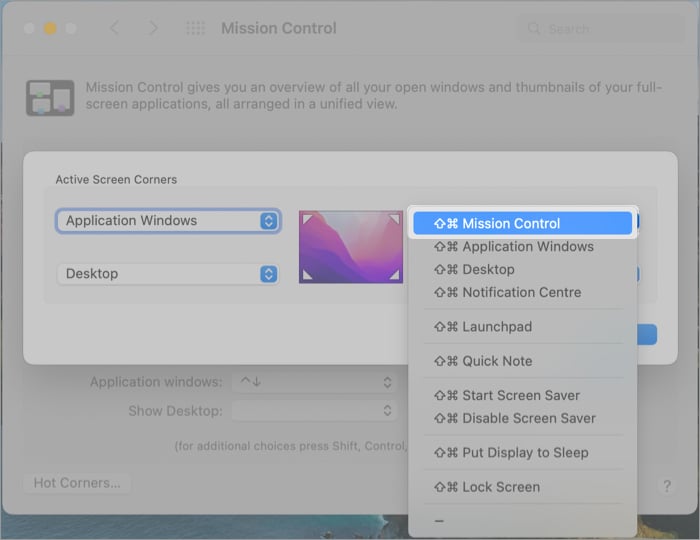
To exit Mission Control on Mac at any time:
- Press the Esc key.
- Swipe down using three/four fingers on the trackpad.
- Click anywhere on the screen.
Master the use of Mission Control on Mac
As explained earlier, Mission Control shows you all your open windows in one place. Thanks to this, you can quickly move between windows and create/remove Split View and full-screen windows, so let’s see how that is done.
Note:
- Apple refers to multiple desktops as Spaces. So, I am going to follow the same jargon.
- Also, a full-screen window automatically becomes a separate Space.
Add new Spaces/desktops
Launch Mission Control and from the top-right, click the plus icon.

Move or open apps between Spaces
Launch Mission Control, drag and drop the desired active app from one Space to another.
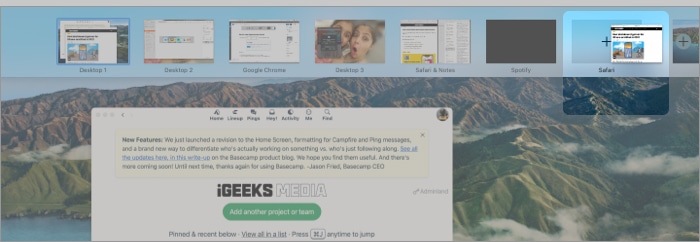
You can also,
- Drag the window towards the plus icon and open it in the new Space.
- Go to the Space you want (open Mission Control and click it) and open the app required.
Switch between Spaces with ease
One way is to open Mission Control and click the Space from the top. However, the better way to use:
- Trackpad gesture – Swipe right/left with four fingers to switch between Spaces.
- Mouse gesture – Swipe left/right using two fingers on the surface of your Magic Mouse.
- Keyboard shortcut – Use Control (⌃) + right arrow (→) or Control (⌃) + Left Arrow (←).
Create Split View windows
I am a Split View addict and rely on using a split screen on my mac more often than the traditional method. Trust me, it’s much easier.
- Make any of the windows full screen (tap the green button).
- Now, open Mission Control.
- Drag the second window over the thumbnail of the full-screen window and drop it when you see a plus icon.
You can drop it either on the left or right side.

To close a Split View or full-screen window, go to Mission Control → hover the cursor over the Space → click the minimize/maximize icon as it appears.
Rearrange Spaces
When multiple Spaces are open, you might want to reorder the Spaces to access them quickly and as per your workflow. It is quite simple; open Mission Control → click and drag the Space towards left or right accordingly.
Close Spaces in Mission Control
Hover your cursor to the desired window in Mission Control and click the cross icon.

Unlike iPhone/iPad App Switcher, you can swipe up to close all the unnecessary apps. However, I have found a decent app that helps me do that.
Mission Control Plus runs in the background and lets you close app windows from Mission Control by clicking the cross button. It also enables useful keyboard shortcuts, including ⌘+W to close the window and ⌘+Q to quit the app.
Note: This is a paid app that works flawlessly but has limited functionality. So try it out and go for it if you need it in your workflow.
Different wallpapers for different Spaces
By default, macOS will use the main desktop’s background for all additional Spaces. However, you can customize wallpapers for each Space to differentiate or stylize. Furthermore, Mac will remember the different background Spaces and their respective wallpapers, even after a restart.
- Switch to the Space you want to change the wallpaper for.
- Use secondary click and select Change Desktop Background.
Or go to System Preferences → Desktop & Screen Saver → Desktop. - In the Preferences panel, choose the preferred image.
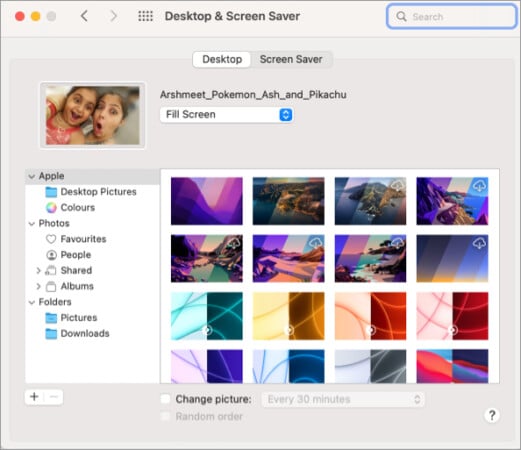
Note: You can select simple, Dynamic, or 30-minute changing wallpapers as per preference.
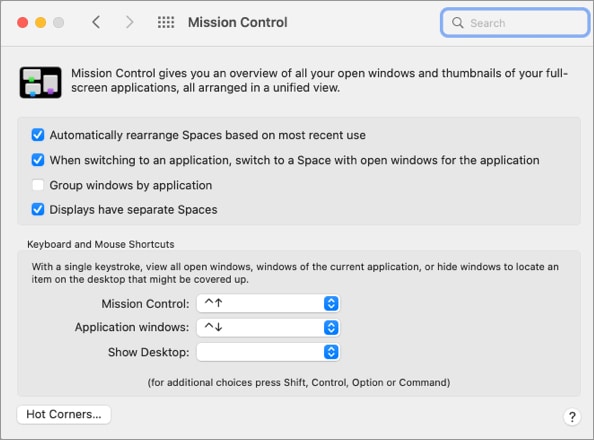
How to tweak Mission Control settings
- Go to System Preferences → Mission Control.
- Here, you get the following options:
- Automatically rearrange Spaces based on the most recent use
- When switching to an application, switch to a Space with open windows for the application
- Group windows by application
- Displays have separate Spaces
- Keyboard and mouse shortcuts
- Check/uncheck a preferred setting as per your preference.
Mission Control not working on Mac?
If Mission Control isn’t responding or opening up, here’s what you can do:
- Restart your Mac – This usually resolves the problem without a hiccup.
- Try Safe mode – Open your Mac in safe mode and see whether Mission Control is working or not. If it does, this might be a bug-related issue; run an antivirus to confirm.
- Kill Dock – The solution has worked for many users. Go to Terminal and type killall Dock. Once done, the dock should restart itself automatically.
- Check shortcut permission – If keyboard shortcuts aren’t working, go to System Preferences → Keyboard → Shortcuts → Mission Control → ensure the necessary shortcuts are checked.
- Last resort – If nothing seems to be working, call Apple Support to get the issue resolved.
Signing off…
Did this article help you make the most of Mission Control settings? Let us know if you need any further assistance; we’ll be happy to serve you.
Here are some more interesting macOS articles to surf through:

