Have you ever wanted to make a purchase but didn’t have the total amount upfront? With Apple Pay Later, you can buy what you want from a participating merchant and pay Apple back over time. Let’s take a look at what Apple Pay Later is, its requirements, and how to set it up on your iPhone and iPad.

What is Apple Pay Later?
Apple Pay Later is a service that lets you make a purchase from a participating merchant and have the total cost split into 4 installments paid over a 6-week period. Apple pays the total to the merchant, and you repay the loan amount without any fees or interest to Apple.
You can use Apple Pay Later for online and in-app purchases between $75 and $1,000 on your Apple Pay-enabled iPhone or iPad.
There is no impact on your credit when applying for an Apple Pay Later loan; however, after your purchase, your loan and payment history might be reported to credit bureaus and affect your credit.
Apple Pay Later requirements
In order to use Apple Pay Later, you must:
- Be at least 18 years of age. If you’re an Alabama resident, you must be 19 years of age or older.
- Be a US citizen with a valid physical address, not a PO box. The service is currently unavailable in New Mexico and the US territories.
- Have at least iOS 16.4 or iPadOS 16.4 installed on your device.
- Have Apple Pay set up with an eligible debit card which is required to make an Apple Pay Later down payment.
- Have two-factor authentication set up for your Apple ID.
- Have a Driver’s License or state-issued ID card in case identity verification is required.
Even if you meet all of the requirements listed above, you may not be approved for an Apple Pay Later loan due to a variety of reasons including, credit score and report, Apple Pay Later purchase history, and more.
If you want to learn more, check out Apple’s official page on how Apple Pay Later loan applications are evaluated.
How to set up Apple Pay Later on iPhone or iPad
To apply for a Pay Later loan using the Wallet app:
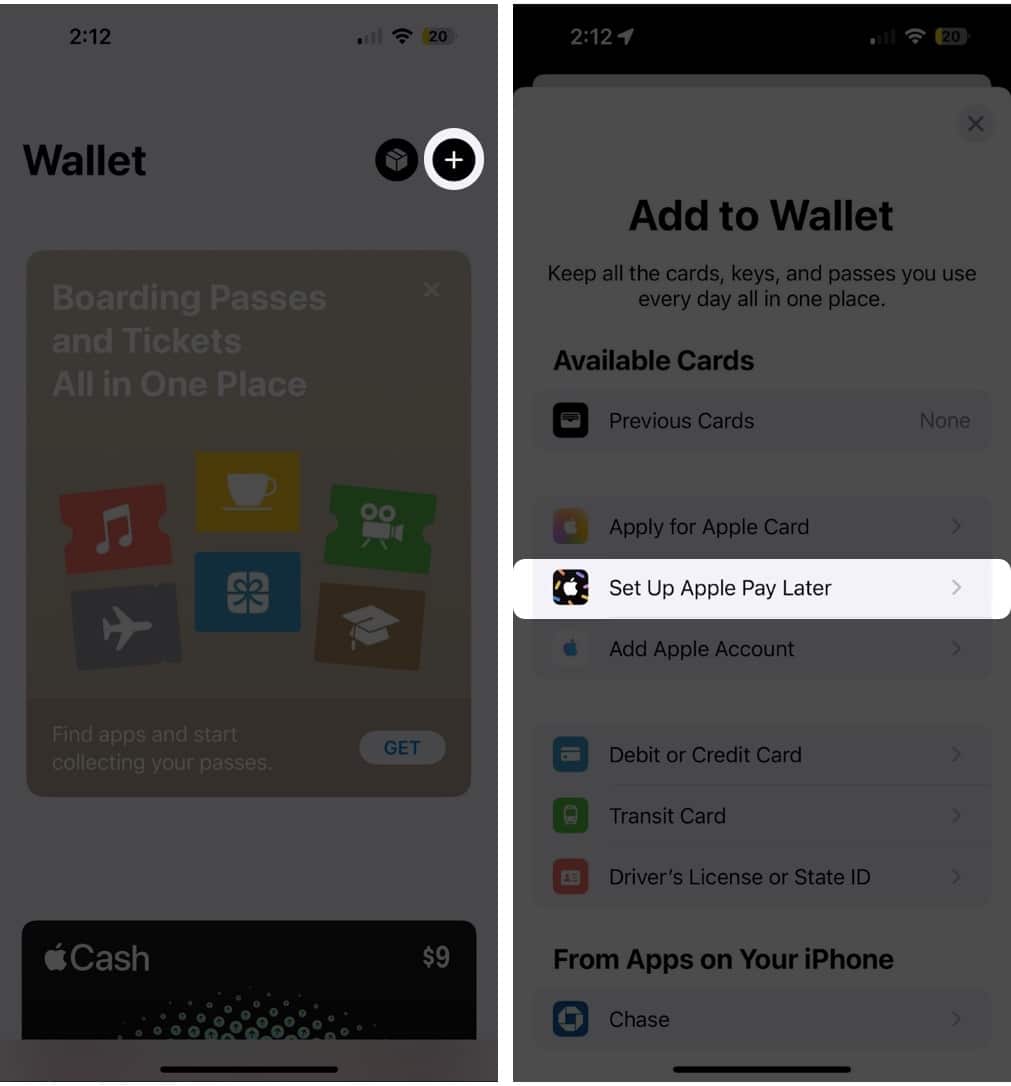
- On your iPhone, open the Wallet app. On iPad, open Settings and select Wallet & Apple Pay.
- Tap the Add button (plus sign).
If you don’t see the plus sign, tap Done in the top left corner of the screen and make sure to scroll all the way up. - Choose Set up Apple Pay Later and tap Continue. After reading about how it works, tap Next.
- Apply for the Apple Pay Later loan by entering the total amount you’re requesting, including taxes and shipping.
- Select Next and verify your name, birth date, and address.
- Confirm the information and choose Agree & Apply.
- Read through the payment plan and loan agreement, and then tap Add to Wallet.
Once you’re approved for the Apple Pay Later loan, you have up to 30 days to make your purchase. You can see the amount you’re approved for in the Apple Pay Later Available to Spend area.
You can also select Apple Pay Later directly at checkout:
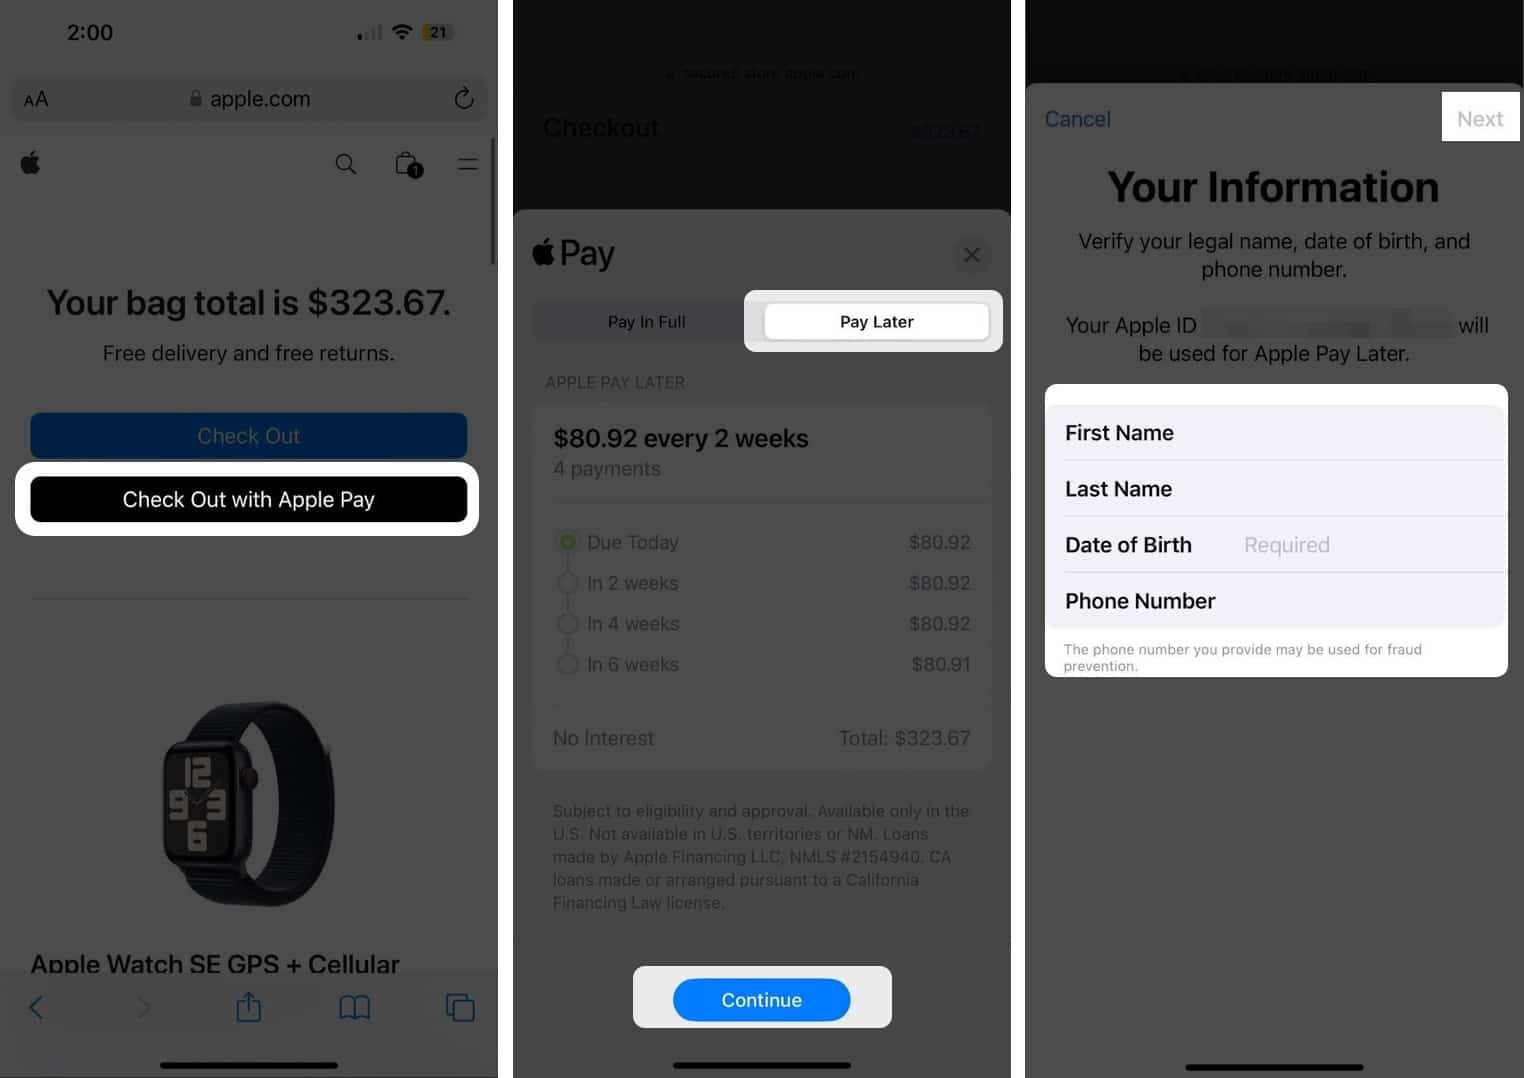
- When making a purchase on your iPhone or iPad, choose Apple Pay at checkout.
- Tap Pay Later, read the terms carefully, then select Continue.
- Some information regarding Apple Pay Later may appear. Tap Continue again.
- Fill out your personal information, then tap Next in the top right. Enter your address and zip code, then tap Next again.
- Review your personal information and check for any errors. Tap Agree & Apply.
- After you apply, you’ll need to enter or select the debit card you’ll use to make the down payment. Then, double-click your iPhone’s side button to confirm payment.
That’s all there is to it, just a few fields of info and you’re on your way to an Apply Pay Later plan.
If you have specific questions, concerns, or issues, you can contact Apple Pay Later Support.
How to use Apple Pay Later on iPhone and iPad
To use your Apple Pay Later Available to Spend amount from the Wallet app, follow the steps below.
- Select Apple Pay during the checkout process.
- Go to the Pay Later tab and tap Continue.
- Review the payment plan and loan agreement, then tap Continue or Agree & Continue.
- Choose the debit card you want to use for the down payment and follow the subsequent prompts.
- Double-click the side button and use Face ID, Touch ID, or your passcode to confirm your payment.
How to check your Apple Pay Later balance
Now that you’ve been approved for a loan, you’ll want to check how much you have left to pay off and when your account will be charged. Here’s how.
- Open the Wallet app. Tap Pay Later from the list of cards.
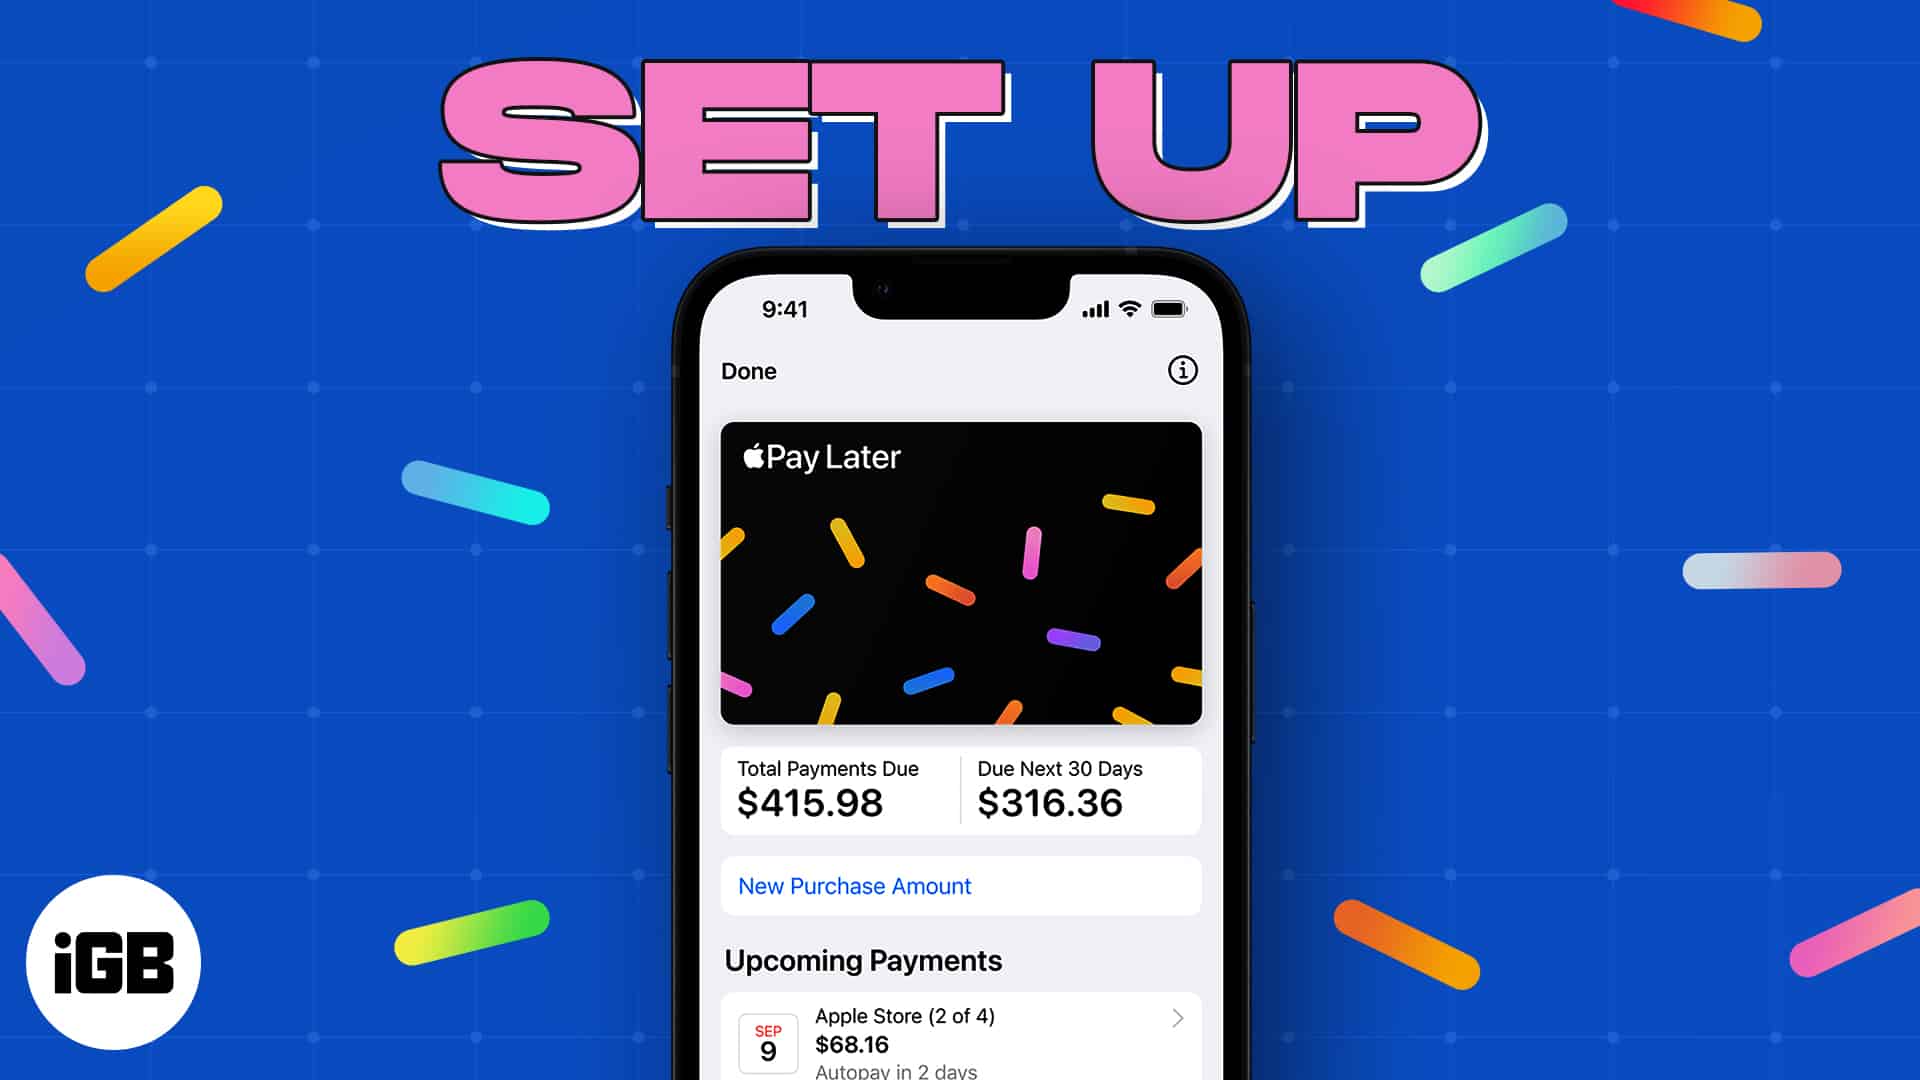
- Here, you can see your total payment due, the amount due in the next 30 days, and how much you’ve already paid.
- Under the Upcoming Payments section, tap the Pay Later plan to see more information.
You can also enable/disable autopay in this section, which is handy if you don’t want to miss a payment (or if you’d rather have full control over when the money exits your account).
A handy way to pay!
Apple Pay Later is a convenient service that can help you buy the things you want but can’t pay the total price for upfront. While technically a short-term loan, Apple doesn’t charge interest or fees, making it a handy way to pay.
What do you think, will you give Apple Pay Later a try? Let us know why or why not!
For more, look at how to set up Apple Pay on your Apple Watch to make purchases using your wearable.


