Whether they’re outdated or you no longer want to listen to them, you can easily remove unwanted purchased music tracks from your library. You can either hide or delete them accordingly from any Apple device using iTunes or the Apple Music app. If you’re interested, let me show you how to hide or delete purchased music on iPhone, iPad, and Mac.
- How to Hide or Unhide Purchased Music on iPhone and iPad
- Hide or Unhide Purchased Music on Mac
- How to Delete Your Purchased Music on iPhone or iPad
- Delete Your Purchased Music from Music App or iTunes on Mac
Before you go ahead:
If you think it’s better to hide a song than delete it, you can do so using the steps mentioned below.
- The song you hide won’t appear in your music library on all your devices running on the same Apple ID, except it is already downloaded on a device.
- If you’re a part of a Family Sharing group, other members won’t see tracks that you hide, unless they’ve already downloaded them before you hide it.
- Hiding your music doesn’t mean you’re hiding the record of the purchase. The hidden tracks can still be accessed from your purchased history.
How to Hide or Unhide Purchased Music on iPhone and iPad
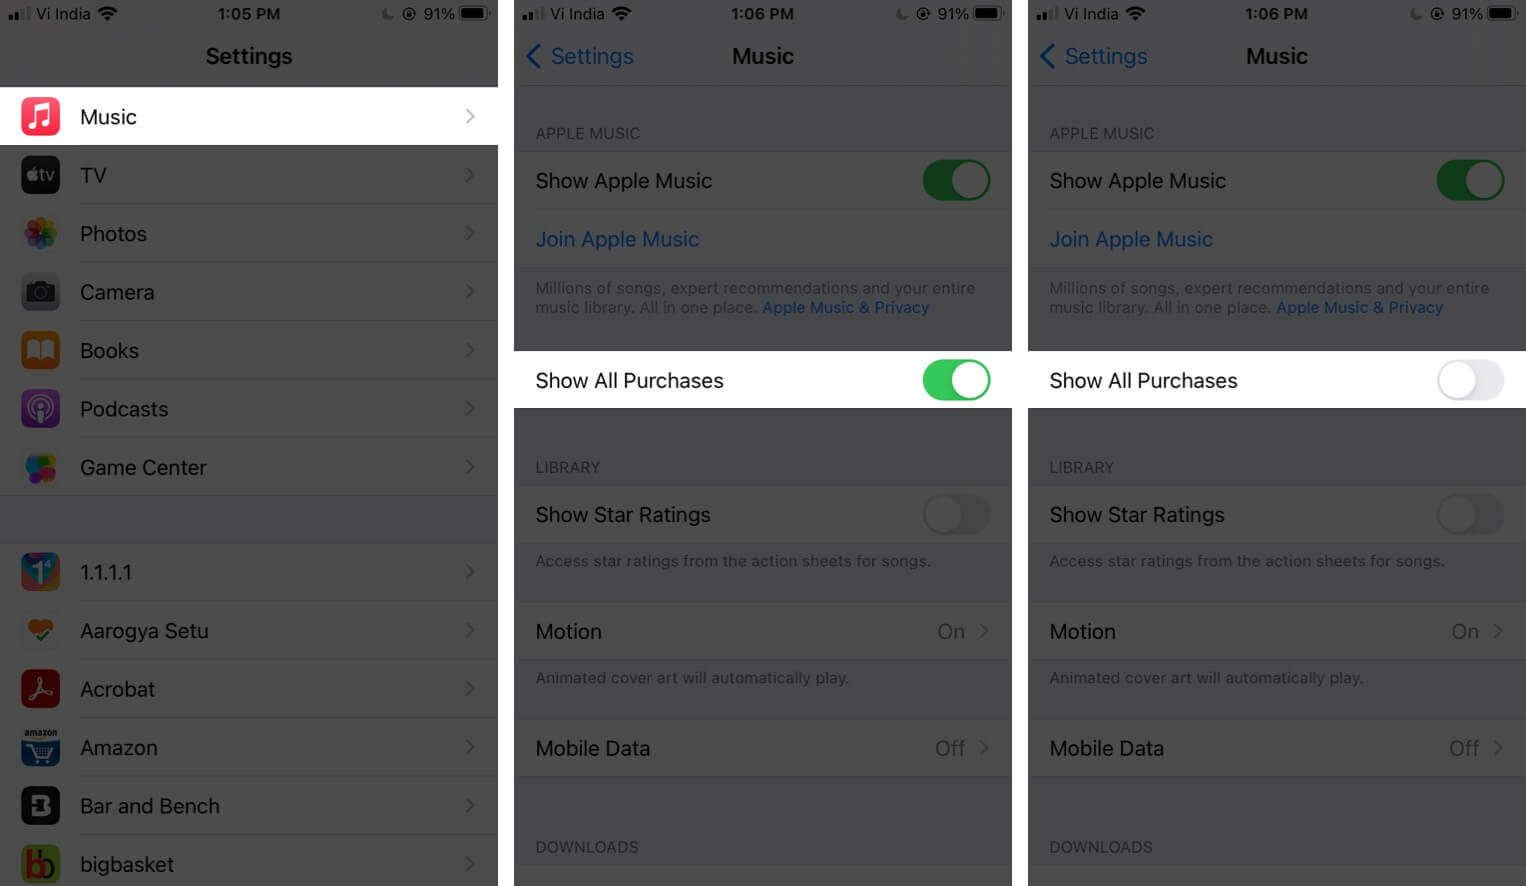
- Launch the Settings app on your device.
- Go to the Music settings.
- Toggle off Show All Purchases to hide purchased music.
All your purchased music that you have downloaded won’t appear in the Music app on your iOS device. If you wish to unhide them, just toggle on the Show All Purchases.
Hide or Unhide Purchased Music on Mac
If your Mac is running macOS Catalina or later, you can use the Music app. In macOS Mojave or earlier, you can use iTunes. Here, we have opted for the Apple Music app, which is similar to iTunes.
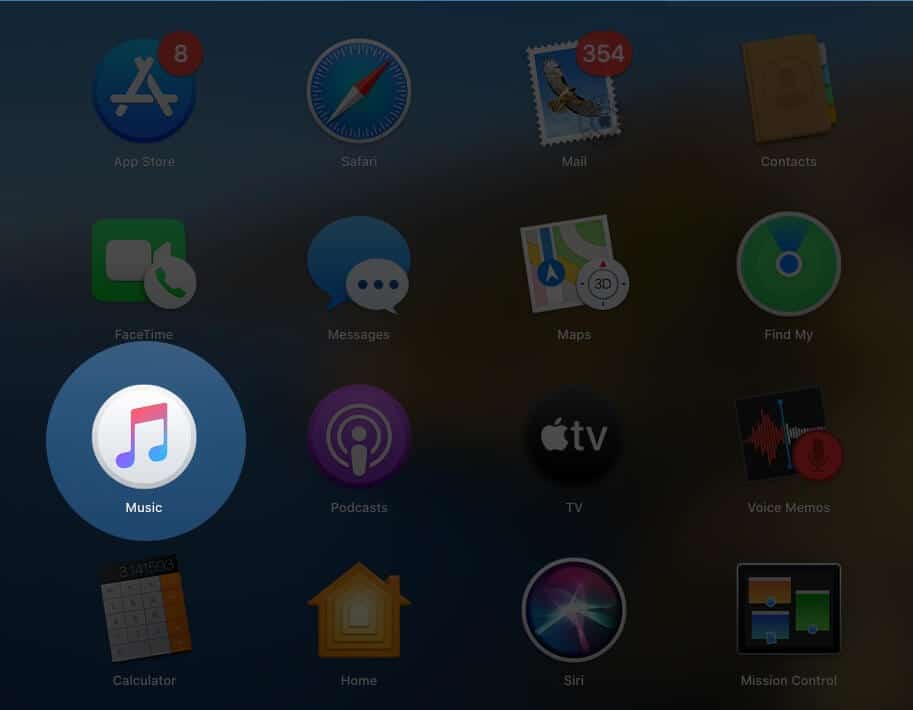
- Open the Apple Music app on your Mac.
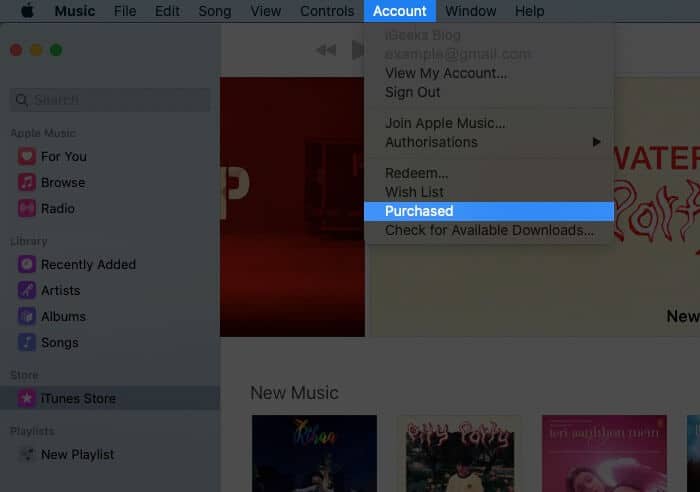
- Click on Account at the top Menu.
- Go to Purchased.Note: if you use Family Sharing, you may see Family Purchase instead of Purchased
- You’ll be redirected to the Purchased tab in the Music app.
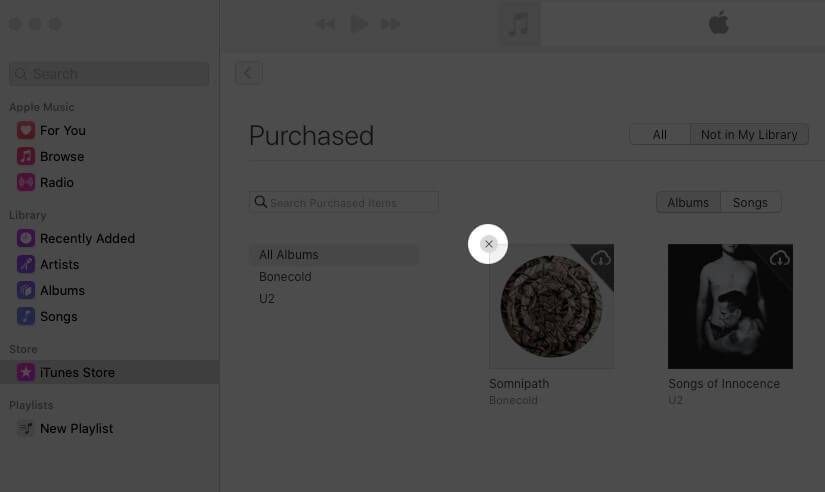
- Move the pointer to the song that you want to hide.
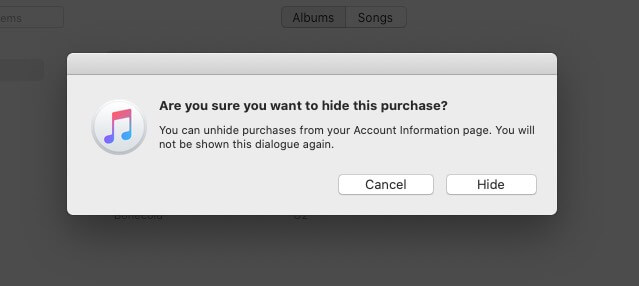
- Click on the ‘x’ icon and then click on the Hide button to confirm the action.
The song is hidden and won’t appear in your playlist. Later, if you wish to bring it back, you can do so by following the below-mentioned steps.
- Launch the Apple Music app.
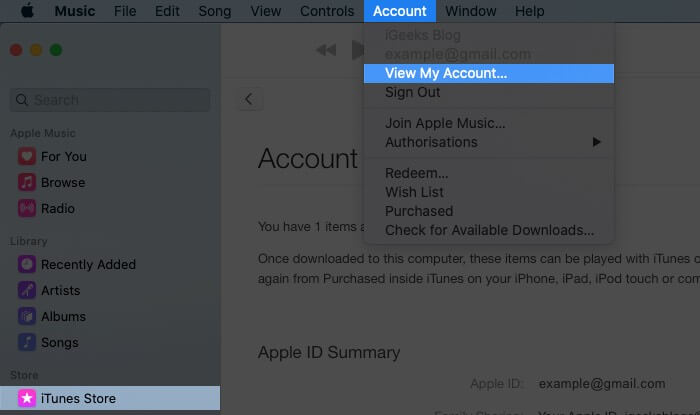
- Go to the iTunes Store tab from the left menu.
- Click on the Account from the top menu.
- Click View My Account.
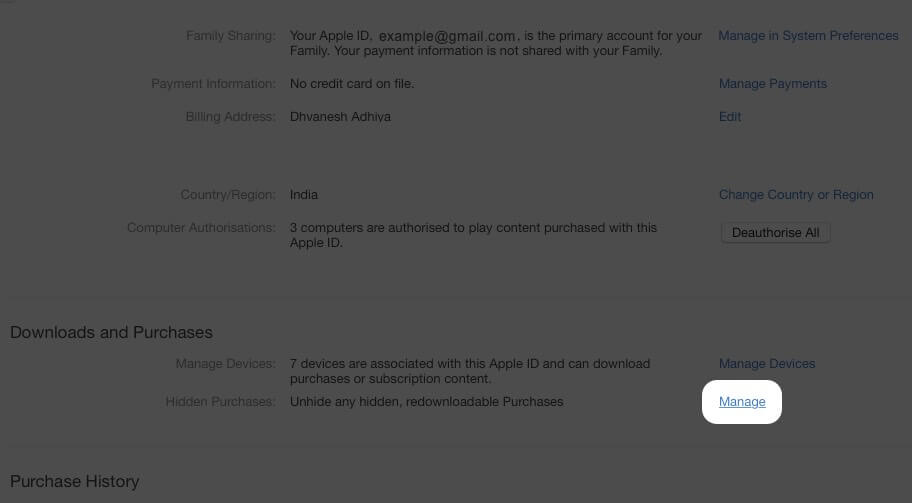
- You’ll be redirected to the Account Information page.
- Now click on Manage beside the Hidden Purchases in the Downloads and Purchases tab.
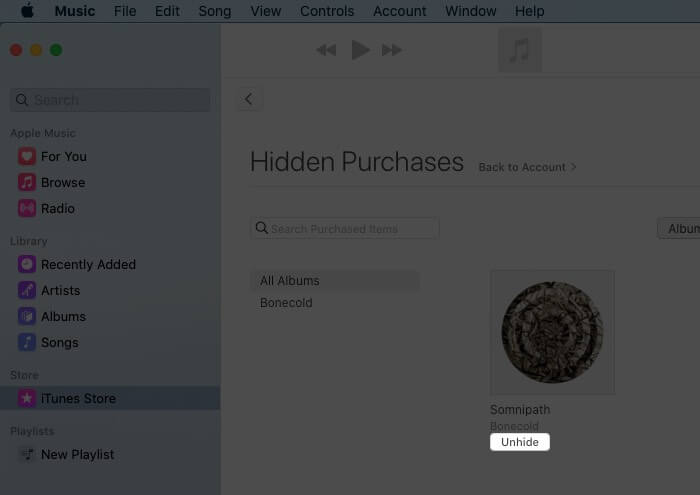
- Click the Unhide button under the song to get it back to the library.
In case you want to remove a track that you don’t want to listen to anymore, you can delete it from your device.
How to Delete Your Purchased Music on iPhone or iPad
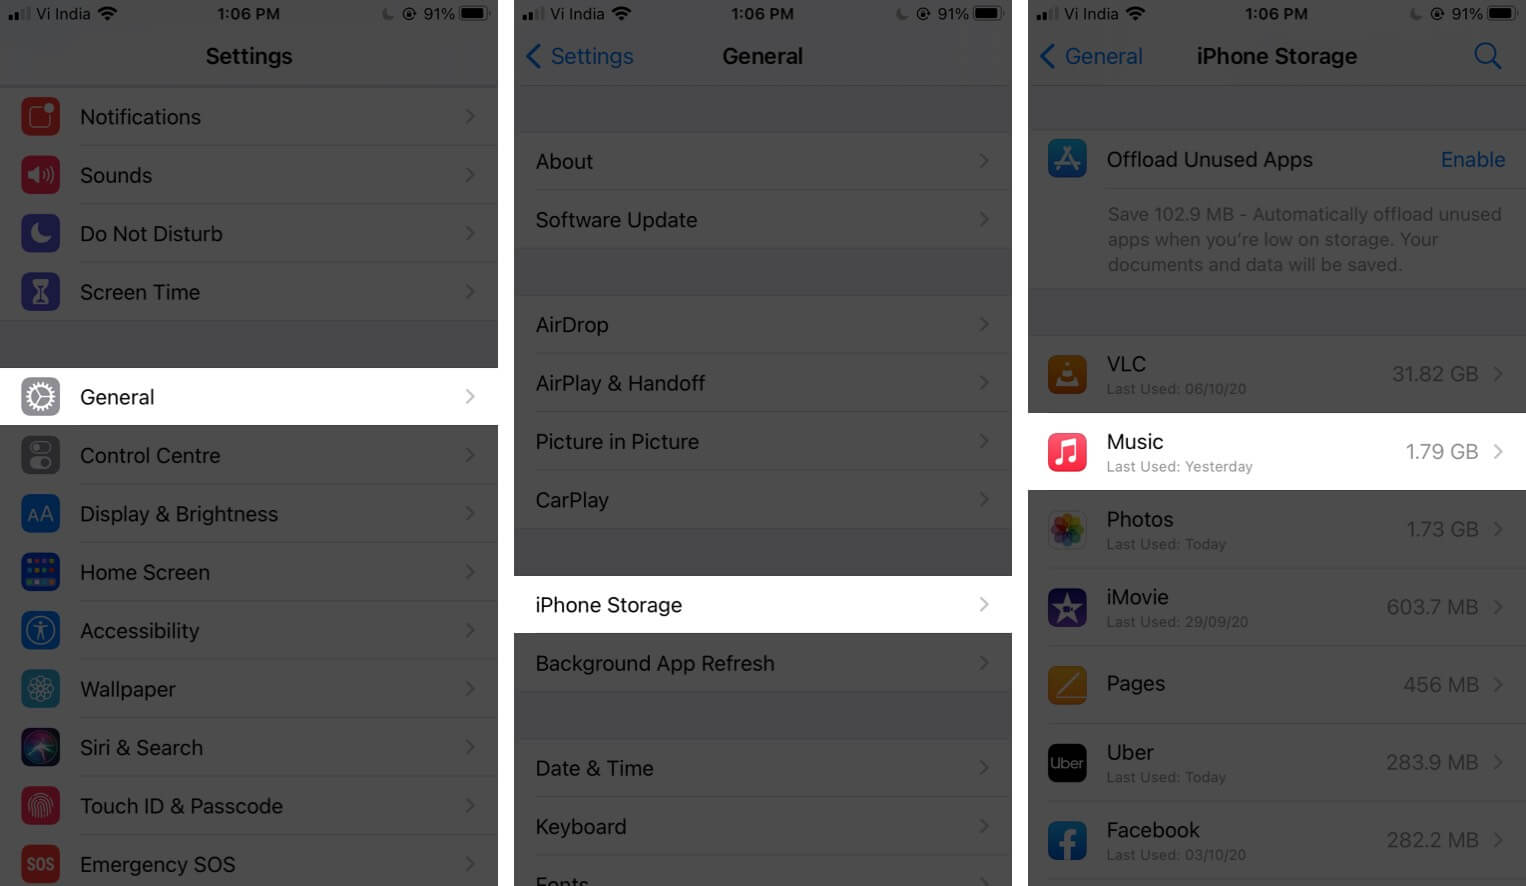
- Launch the Settings app on your iPhone.
- Tap the General settings.
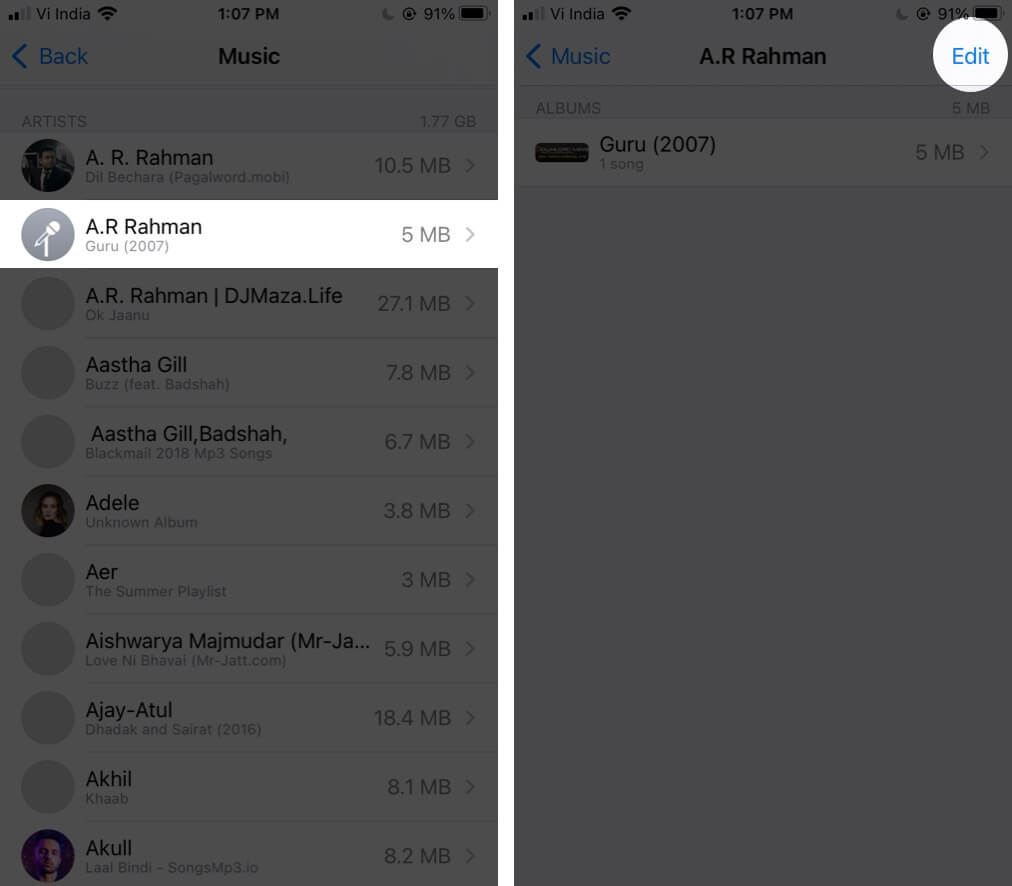
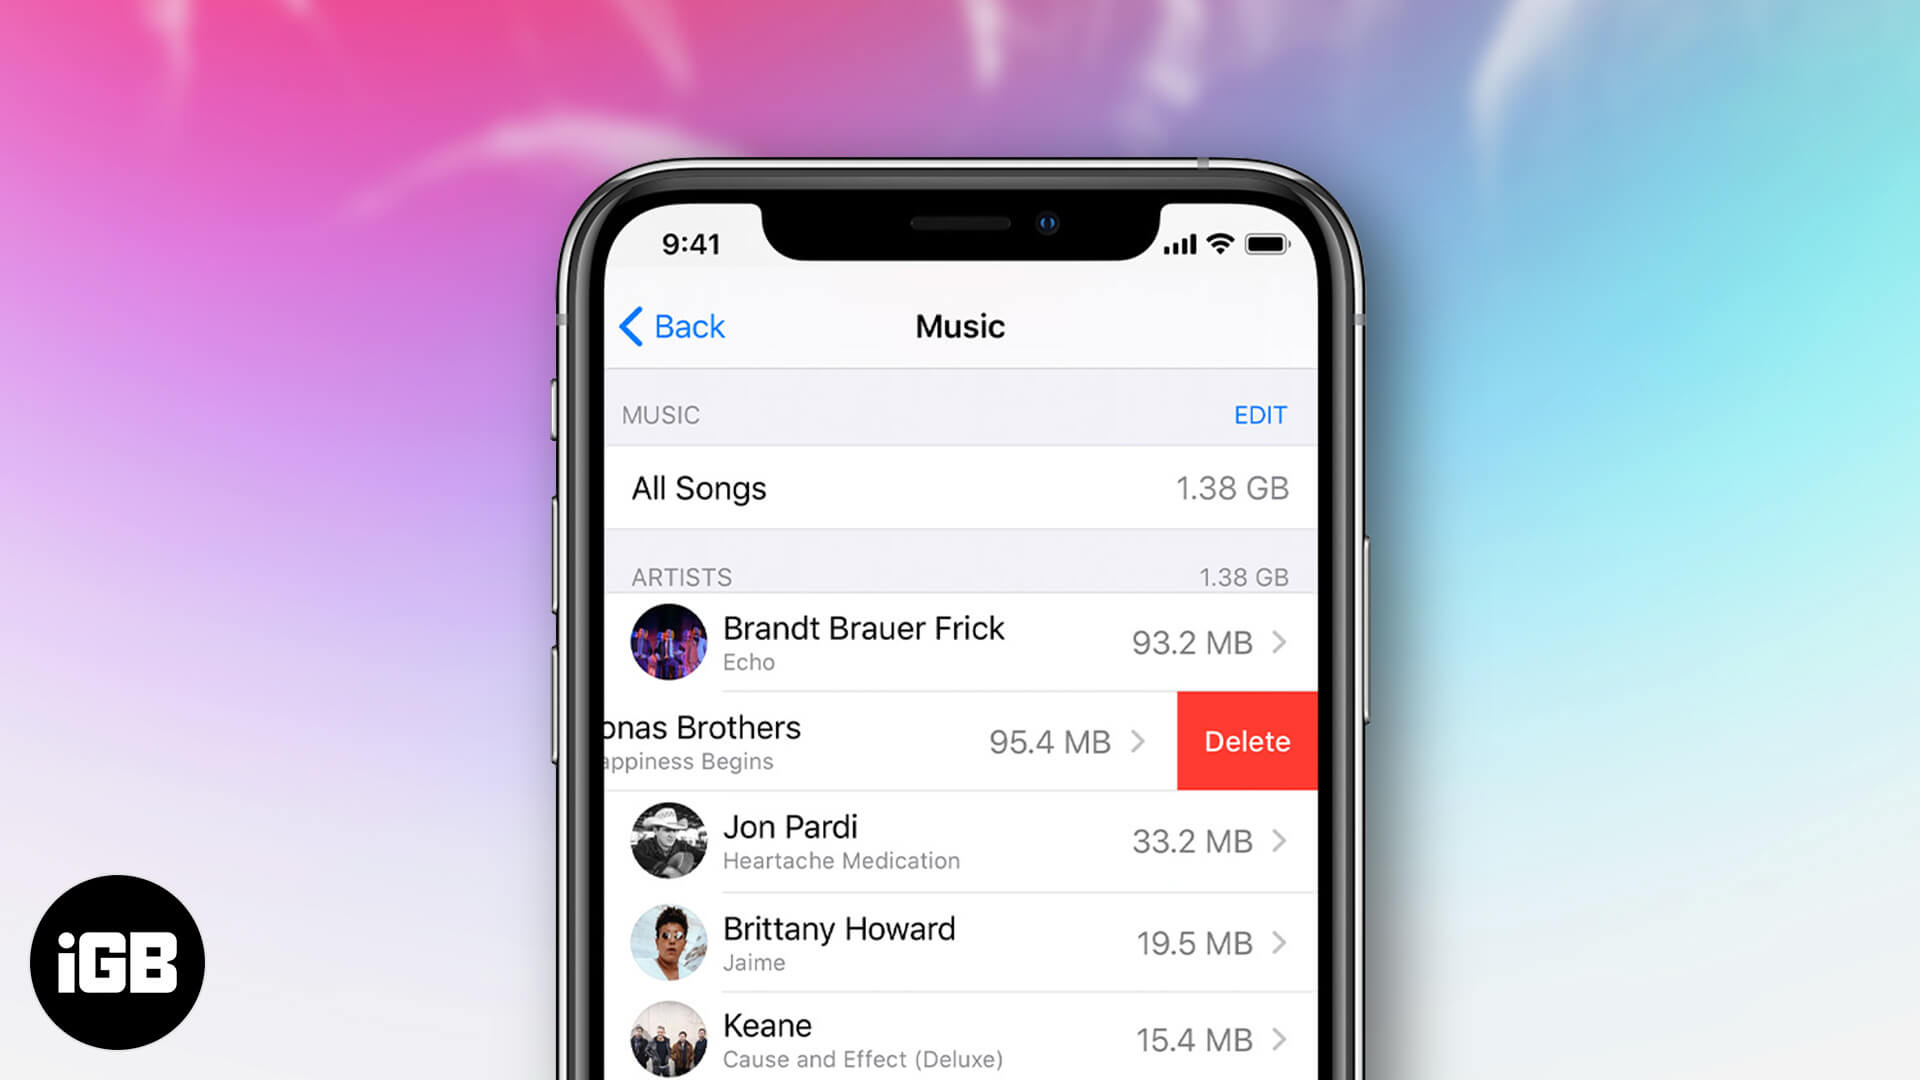
- Go to iPhone Storage and select the Music section.
- Choose the music track that you want to delete.
- Tap the Edit button.
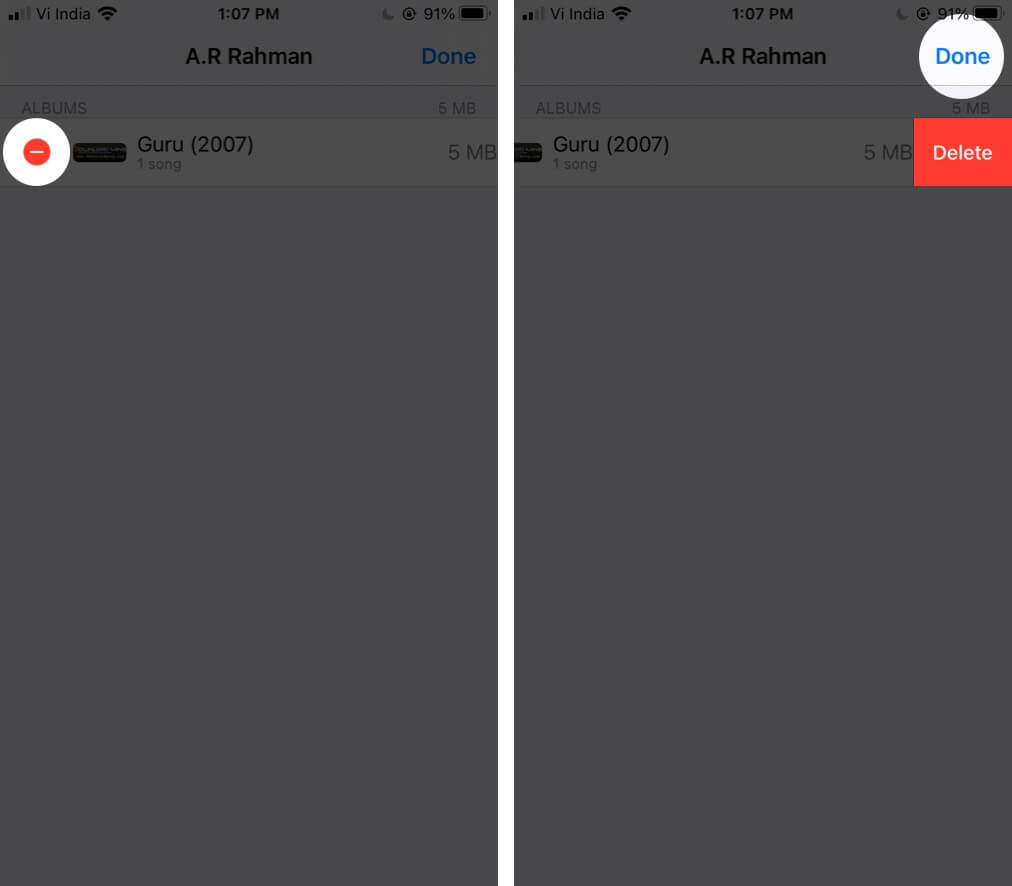
- Now, tap the ‘-‘ button and hit Done.
The song is deleted from your Apple Music library. If you want, you can remove multiple unwanted tracks this way.
Delete Your Purchased Music from Music App or iTunes on Mac
If you are using macOS Catalina or later, you can use the Music app. In macOS Mojave or earlier, you need to delete tracks through iTunes.
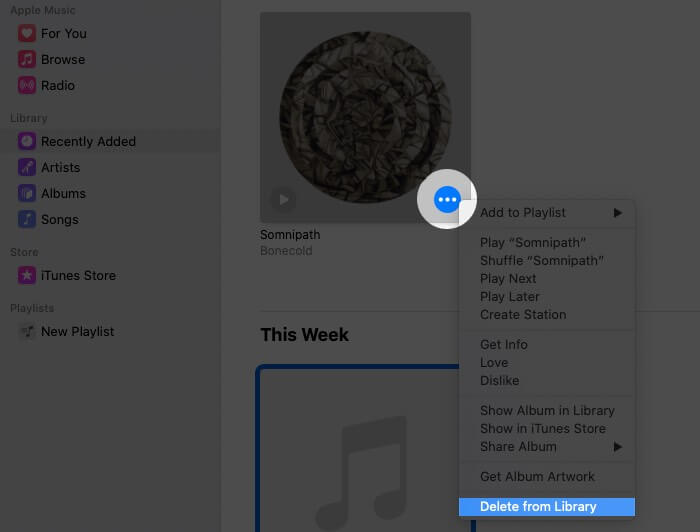
- Open the Apple Music app on your Mac.
- Move the pointer to the song or album that you want to delete.
- Click on the three-dots menu.
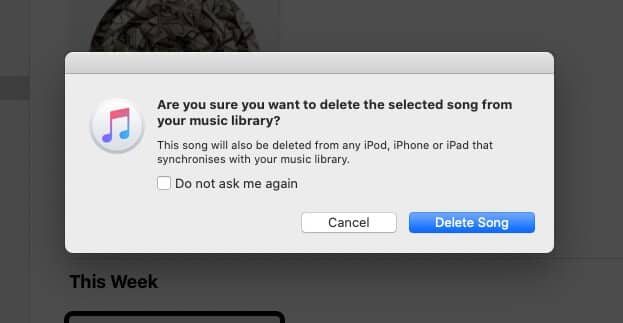
- Click on Delete from Library and confirm it.
Signing Off
Isn’t it easy to remove unwanted purchased songs and albums on your iOS device and Mac? When tracks and albums run out of trend or you get exhausted listening to them, you’re good to hide and delete them accordingly. If you want to delete all songs from Apple Music, here is a handy guide.
You may want to read these posts as well.

