FaceTime Like a Pro
Get our exclusive Ultimate FaceTime Guide 📚 — absolutely FREE when you sign up for our newsletter below.

FaceTime Like a Pro
Get our exclusive Ultimate FaceTime Guide 📚 — absolutely FREE when you sign up for our newsletter below.
I know it’s frustrating when you are in public, and the headphone jack is not working on your Mac. But you are not alone! Many users have reported this issue in Apple’s Community. In most cases, a hardware defect is the culprit. If it isn’t, I’ll show you different ways to fix the MacBook headphone jack when it stops working.
First and foremost, you must check whether your headphones are working. You can try plugging them into another device and playing music. If you can’t hear any sound, check for cable damage, as it may cause malfunction.
On a positive note, if your headphones work with other devices, you can proceed with the troubleshooting methods for your Mac.
You should always keep your MacBook clean but not neglect the ports. If dirt or debris goes inside the headphone jack port, it can accumulate and fail to recognize the plugged headphones.
You can take a plastic floss or a cotton swab to remove the dirt inside the MacBook port. Furthermore, take a microfibre cloth and clean it further to ensure no debris is left. Then, connect your headphones to the headphone jack to test it.
If you want to clean your Mac, you can check our articles:
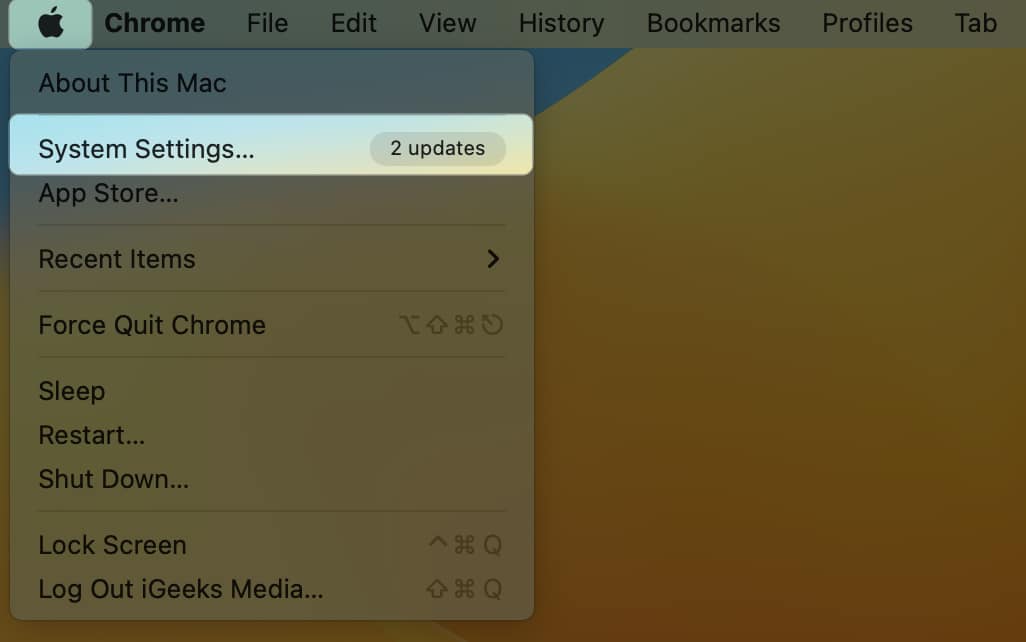
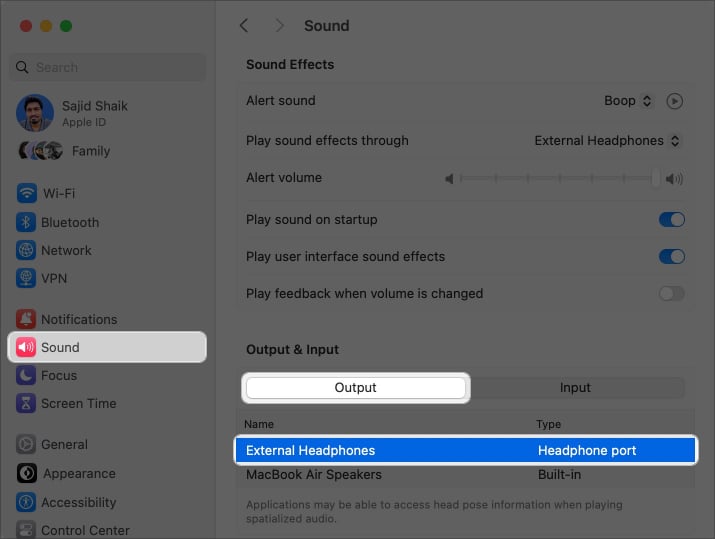
When you connect your headphones to your MacBook’s headphone jack, the output source changes automatically. If the headphone jack doesn’t connect well, your Mac may fail to change the output source. In this case, you must manually change the settings.
Method 1: From System Settings
Method 2: From System Information
If you don’t see the audio output source in System Settings, you can check whether your MacBook recognizes your headphones as an audio output source from the System Information.
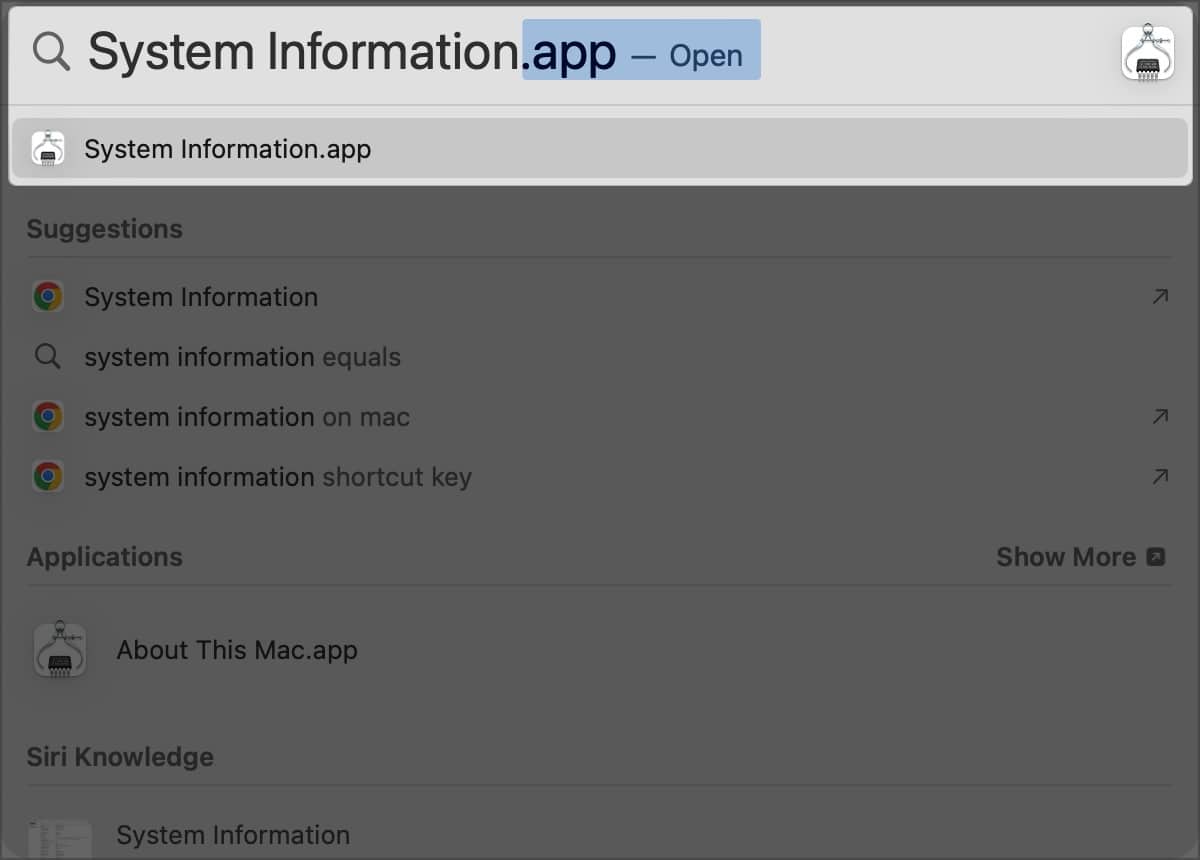

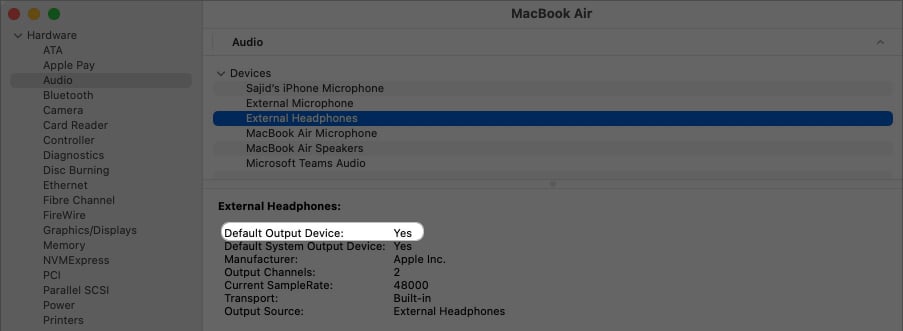
If it doesn’t show yes, either your headphones aren’t compatible with macOS, or you might require additional software. Moreover, you may visit your nearest Apple service center to get your MacBook tested.
If the output is set to external headphones, but you’re not hearing anything, it could be because of the low volume. Although it’s basic, even I forget my MacBook’s volume is low or muted sometimes.
To increase the volume of your MacBook, press the volume up (F12) button on your MacBook’s keyboard. Alternatively, you can go to System Settings → Sound → Increase the Output volume.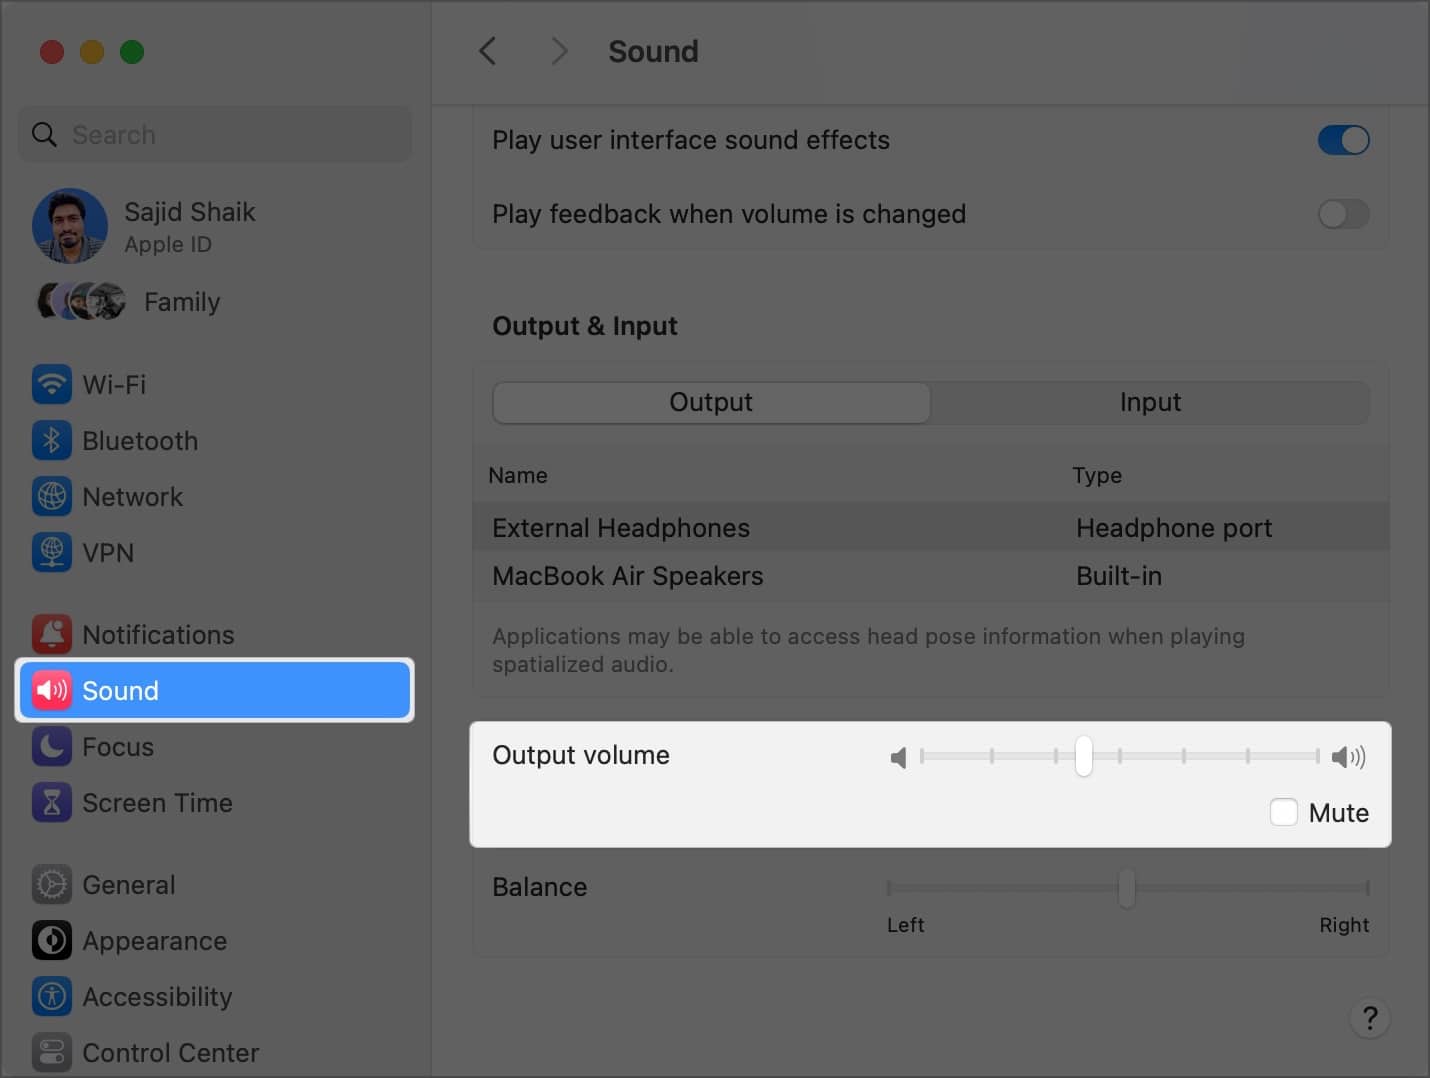
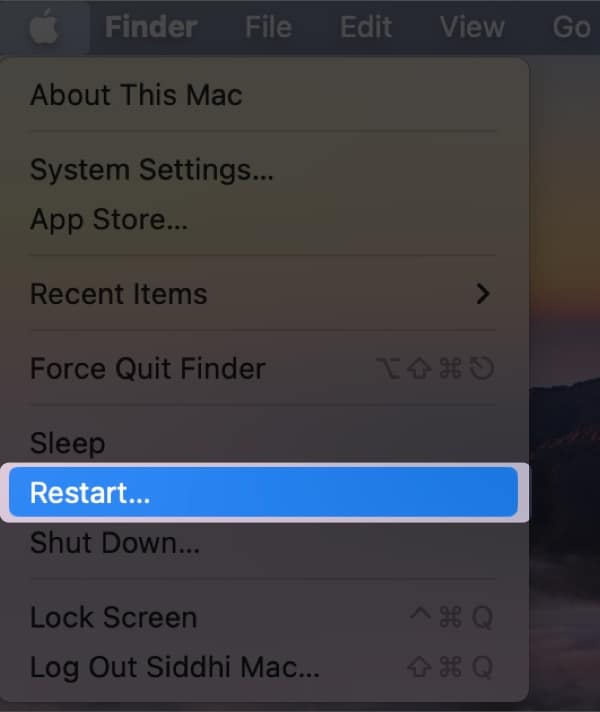
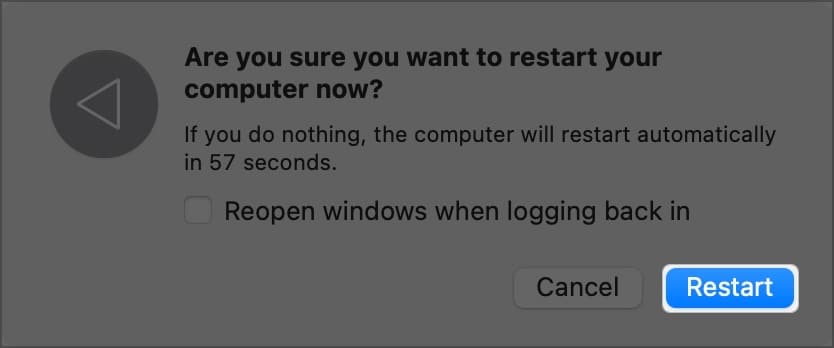
While this might sound like another basic step, a simple restart of your MacBook can fix many issues related to the headphone jack not working issues. Restarting your MacBook refreshes macOS, removing software glitches.
To restart your MacBook, follow these simple steps below:
If you’re using Bluetooth accessories, such as speakers, earphones, or headphones with your MacBook, they might interfere with the audio output source.
Turning off Bluetooth will disconnect other Bluetooth accessories, allowing you to use only your headphones with your MacBook. Follow these steps to turn off Bluetooth on your MacBook:
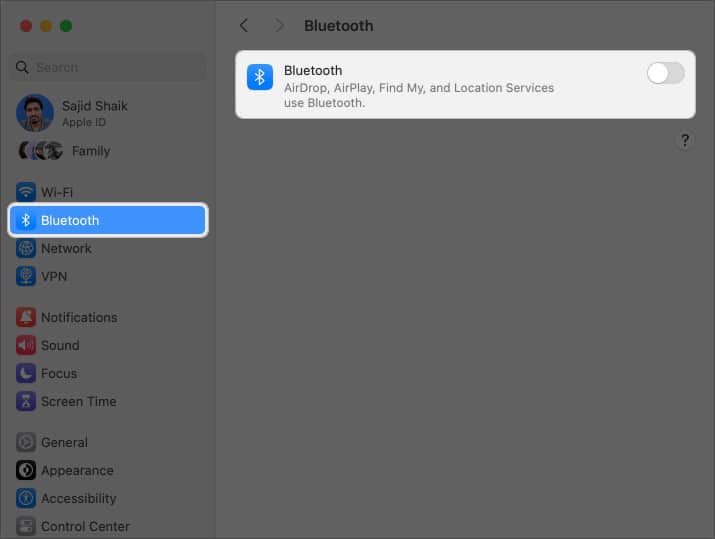
Once Bluetooth turns off, connect your headphones to the headphone jack port, and they should work.
If you aren’t hearing any sound at all or the sound is coming through your MacBook’s internal speakers, try switching to another user profile. Instead of creating a new user profile, you can enable a guest user account on your MacBook.
Switching to another user profile will re-adjust the audio output sources and fix the headphone jack issue on the MacBook.
If none of the above options worked, you might want to try some advanced options. Like Windows, macOS uses a sound controller called Core Audio. Core Audio is responsible for the audio requirements of different applications in macOS.
Because the headphone jack is a part of the audio playback, resetting the sound controller can fix it. Here’s how you can reset the sound controller on your MacBook:


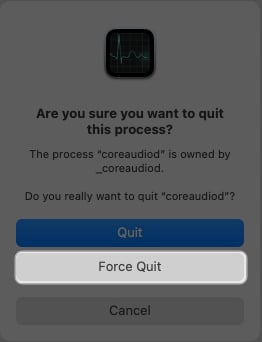
Once your Mac restarts, connect your headphone jack and check whether it works.
Last but not least, if nothing worked, it could be due to a bug in the macOS. Apple fixes these bugs with the latest updates. Plus, if you’re using developer or public betas, these issues are imminent, and you can’t avoid them.
To fix the bug, you can update macOS on your MacBook. As a result, the headphone jack and many other bugs will be fixed.
For that, go to System Settings → General → Software Update. If any update is available, install that. 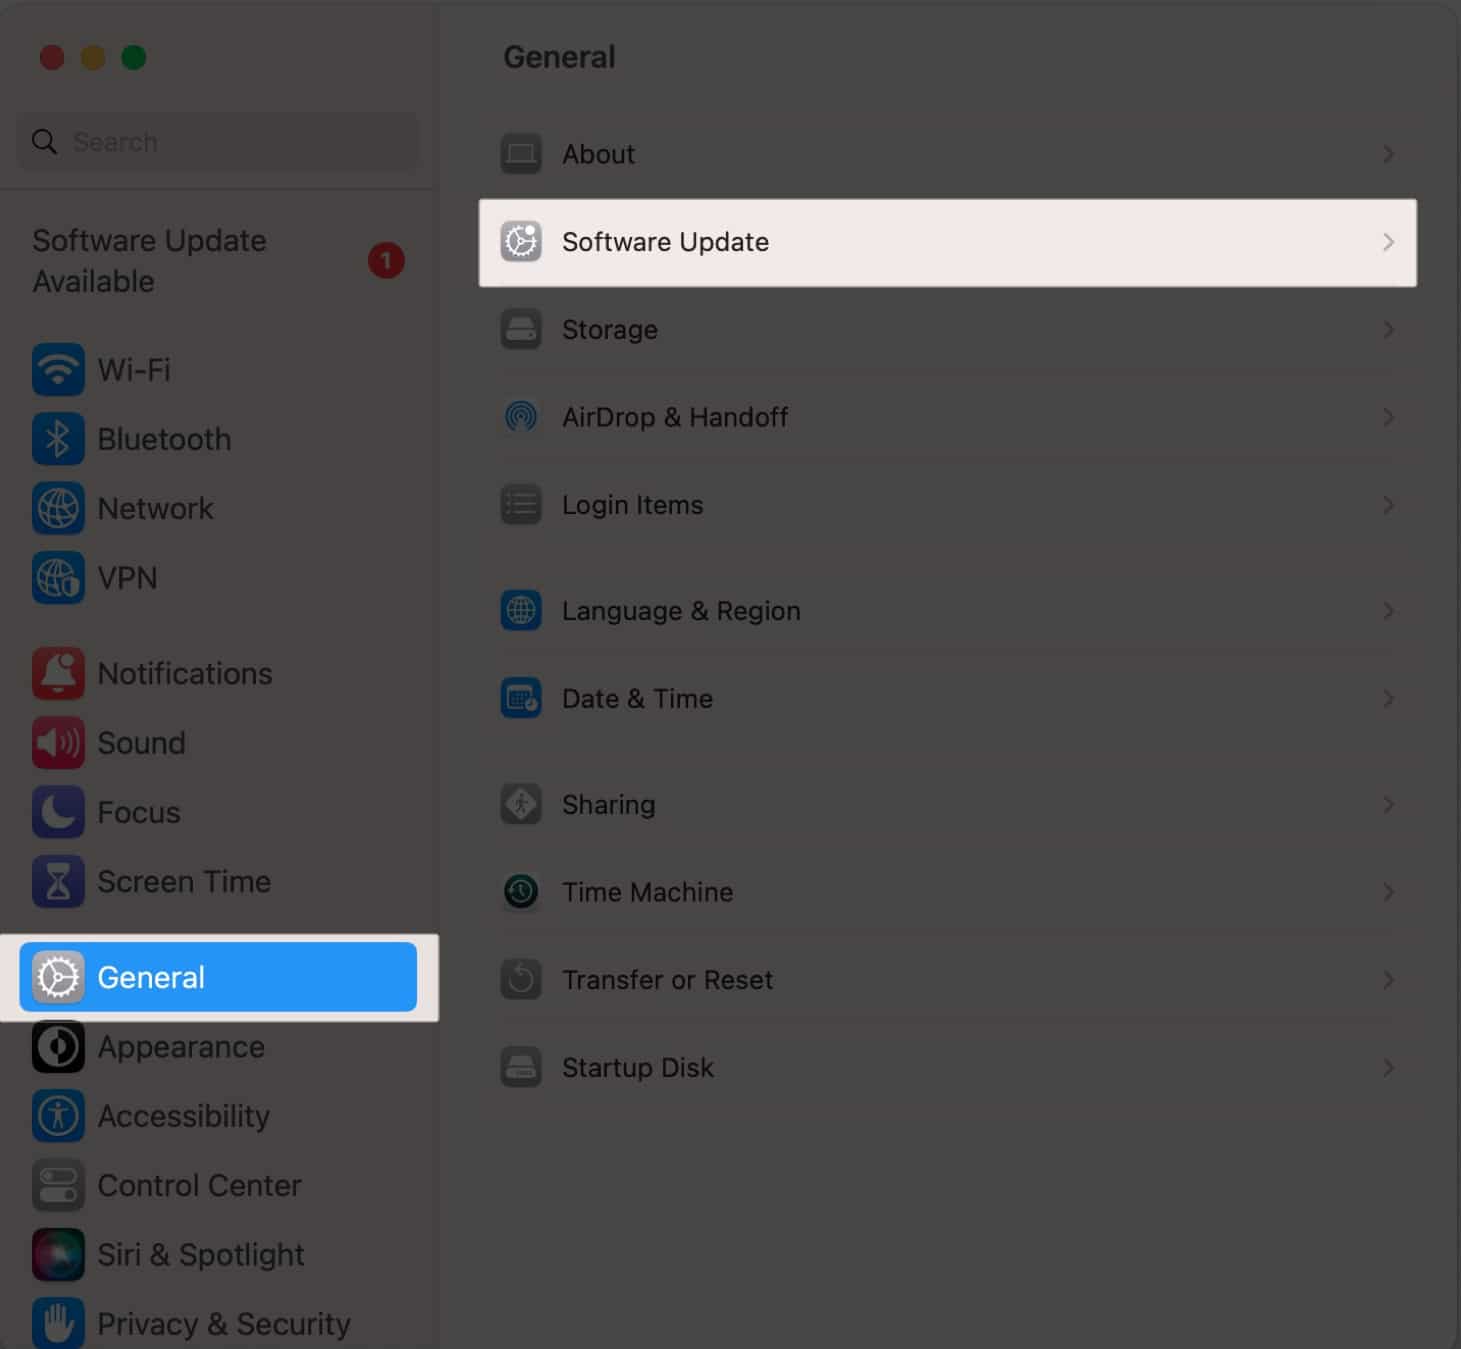
Get your MacBook headphone jack functioning again!
These were a few methods to solve the headphone jack issue on your MacBook. However, users with Intel-based MacBooks may also reset SMC or PRAM/NVRAM.
If you still face issues with your MacBook’s headphone jack, take it to your nearest Apple service center or talk to Apple support. If you have any further questions, please leave them in the comments below.
Read more: