Is your MacBook keyboard giving you a hard time? Whether it’s a few stubborn keys, a flickering backlight, or the entire keyboard acting unresponsive, there are plenty of simple fixes you can try at home before you take your MacBook to the Apple Store.
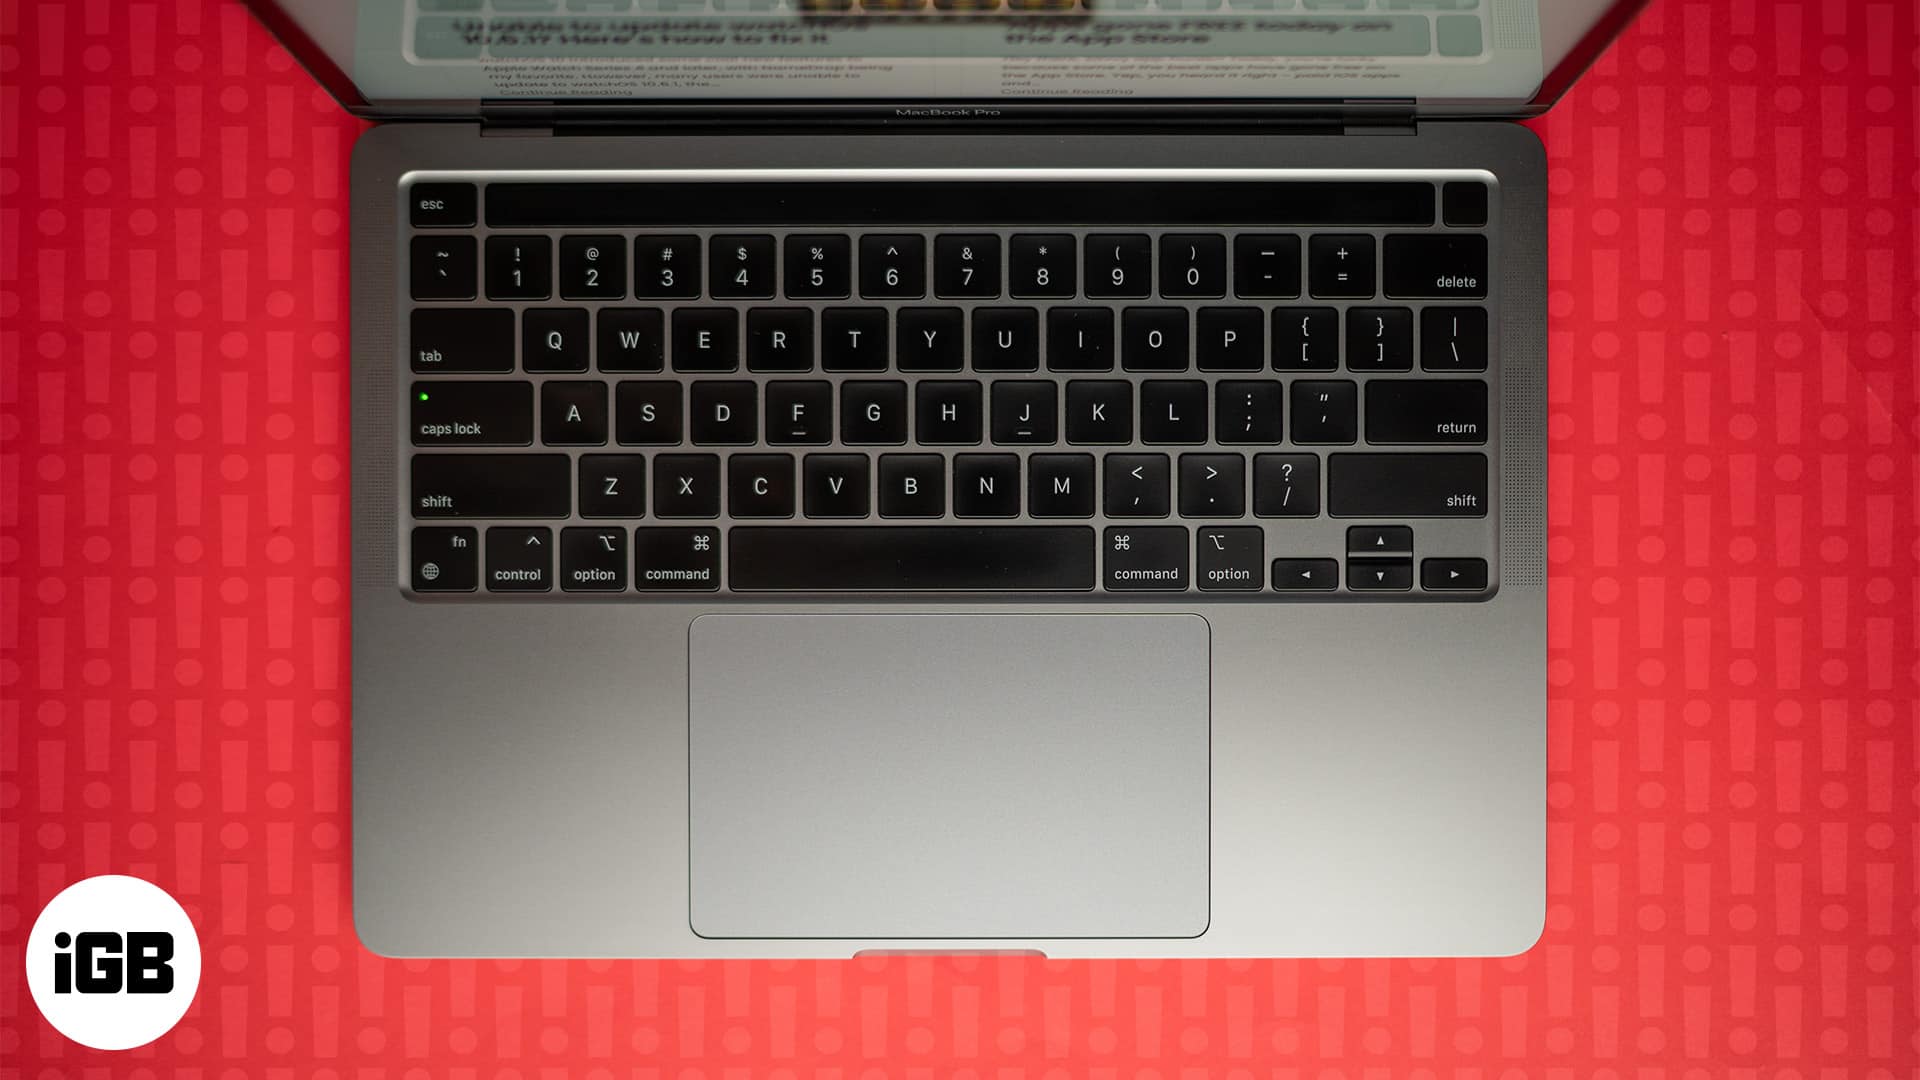
In this guide, we’ll look at why your MacBook keyboard isn’t working and check out some effective ways to troubleshoot the problem and get the keyboard working again.
Why is my MacBook keyboard not working?
There are several reasons why your MacBook Air or MacBook Pro keyboard might stop working, ranging from simple software glitches to more severe hardware issues. Here are some common causes:
- Dust, debris, or lint: Over time, dust, debris, and lint may accumulate under the keys, preventing them from registering inputs.
- Low battery: If your MacBook is running low on battery, the keyboard might stop responding.
- Misconfigured keyboard settings: If you have accidentally changed the keyboard settings, it may malfunction.
- Issue with modifier keys: Sticky or slow keys could interfere with regular typing.
- Software bugs: Sometimes, macOS might freeze or malfunction, causing the system components to not work.
- Outdated macOS: Running a very old version of macOS could lead to compatibility issues, affecting the keyboard’s functionality.
- Physical damage: If your MacBook has suffered a fall or spill, the keyboard might be physically damaged. In these circumstances, the only remedy is an Apple Genius repair.
How to fix MacBook keyboard that isn’t working
Now that you have some idea about what could have caused your keyboard to stop working, let’s look at some solutions to fix it.
1. Clean your MacBook keyboard
One of the first things you should try to fix your MacBook keyboard is cleaning it. You can use a can of compressed air to clean it. Here’s how Apple recommends cleaning the MacBook keyboard using compressed air:
- Tilt your Mac at a 75-degree angle, so it’s not vertical.
- Now, use a compressed air spray over half the keyboard or the affected keys in a left-to-right motion.
- Rotate the Mac and repeat the process on the remaining half maintaining the left-to-right motion.
Repeat the process for a more thorough cleaning, but remember to use compressed air with a straw to limit the airflow. Check out Apple’s support page for a pictorial view of each step.
2. Charge your MacBook
If your MacBook’s battery is low, the keyboard might stop responding. Plug in your MacBook and let it charge for a while before testing the keyboard again.
According to Apple, if the low battery notification isn’t appearing, you can attach an external keyboard to your Mac.
3. Restart your MacBook
It might sound too basic, but a simple restart can fix it when the keyboard is not working on your MacBook. Sometimes, software glitches or overheating might cause your MacBook to freeze, which could seem as if the keyboard has stopped responding.
To reboot your MacBook, click on the Apple menu in the top-left corner and select Restart.
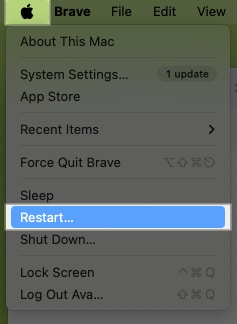
Wait for your Mac to start again, then test the keyboard.
4. Change the keyboard layout settings
In some cases, your keyboard settings could be the root of the problem. Accidental changes to your keyboard layout may result in unexpected behavior of keys. This causes a mismatch between your key inputs and shown outputs. So, quickly check and adjust these settings:
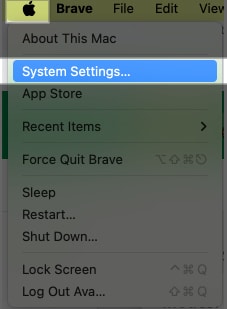
- Click the Apple menu and select System Settings.
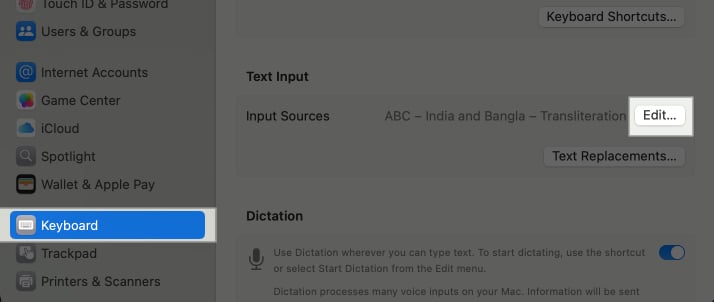
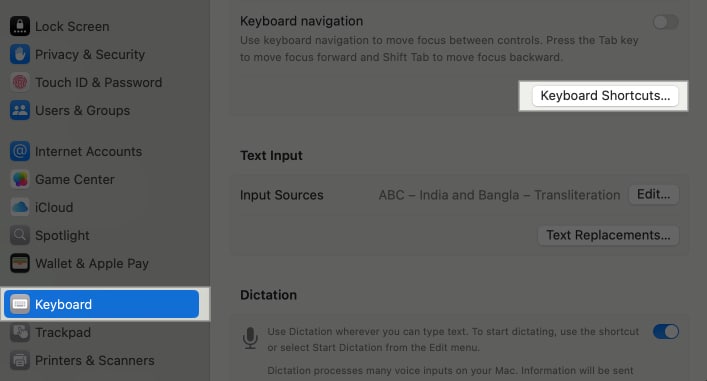
- Scroll down the left panel and select Keyboard.
- Click Edit beside Input Source.
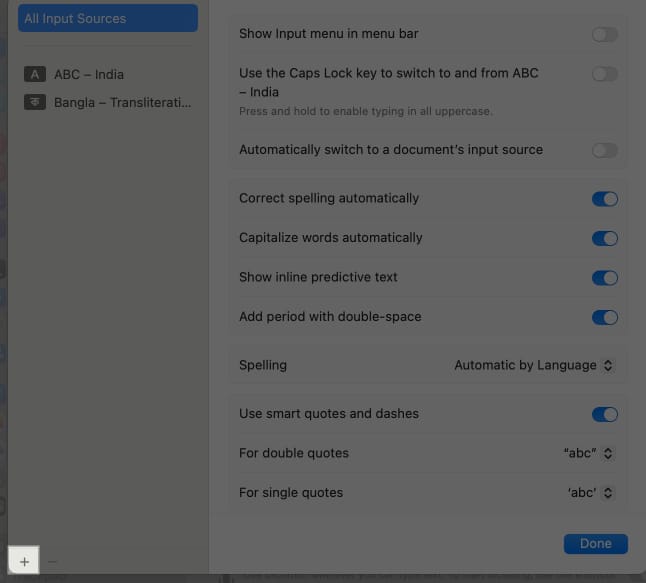
- Click plus (+) icon at the bottom.
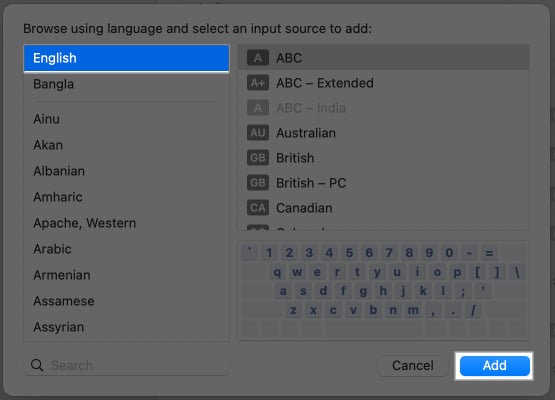
- Add the right keyboard layout for your language.
- Click Add to confirm.
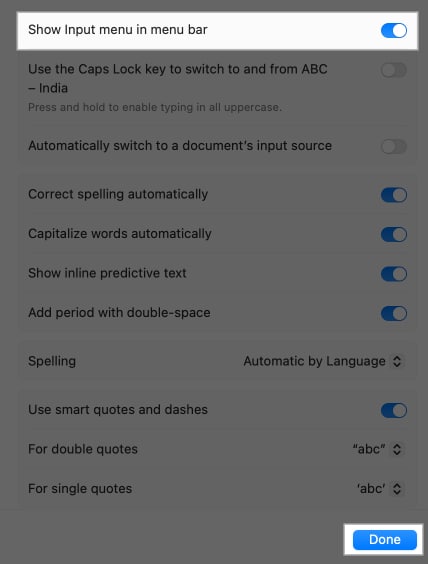
- Now, toggle on Show Input Menu in Menu Bar and hit Done.
Now, you can check which keyboard layout you are using from the menu bar and change it from there.
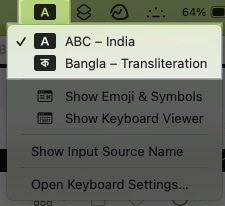
Additionally, customize other Mac keyboard settings such as Key Repeat Rate and Delay Until Repeat so that all key inputs are duly registered.
5. Check the modifier keys settings
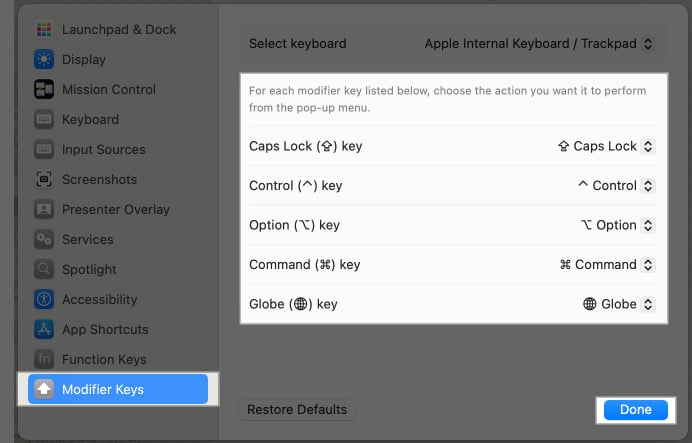
If you can type away on your keyboard but can’t perform specific tasks using keys, it might be due to incorrectly configured modifier keys. We use modifier keys such as Caps Lock, Command, Option, Control, Shift, and Globe to enter a special character or perform a shortcut.
- Go to System Settings and select Keyboard.
- Click on the Keyboard Shortcuts option.
- Now, select Modifier Keys from the left panel and adjust the settings.
- To save the changes, click Done.
You may also check the other set shortcuts and modify them as you like. After that, check if your Mac keyboard is working properly or not.
6. Disable the Slow, Sticky, and Mouse Keys features
Have you previously used any accessibility settings like Slow Keys, Sticky Keys, or Mouse Keys? This could result in problems with the keyboard. Hence, I suggest turning them off.
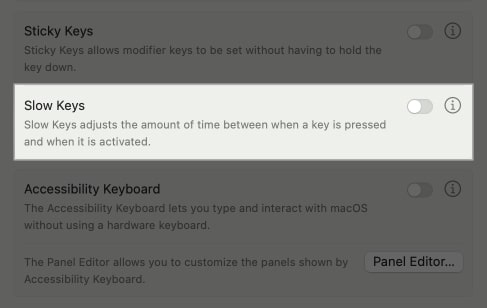
First, let’s check the Slow Keys settings. This feature delays the input registrations, so you need to press down the keys for longer. If you type quickly, your MacBook keyboard might seem like it’s not responding.
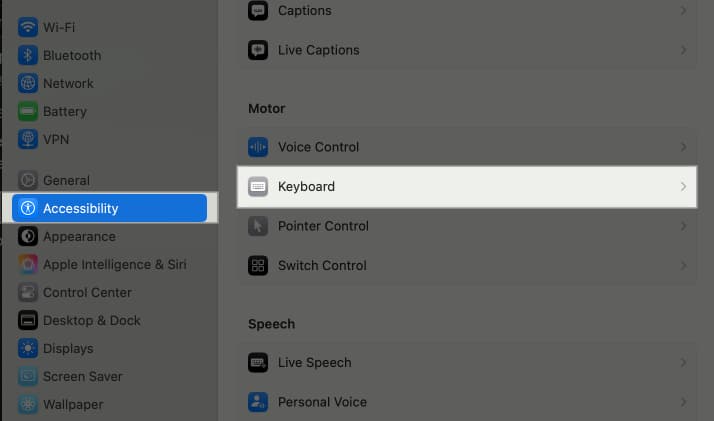
- Open System Settings and go to Accessibility.
- Scroll down and select Keyboard under Motor section.
- Ensure the Slow Keys toggle is off.
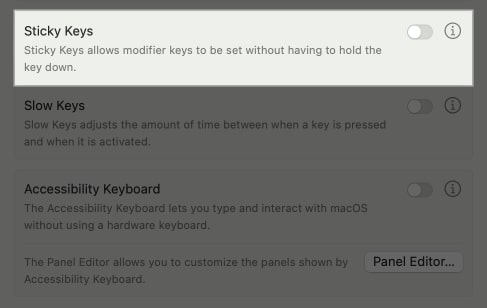
Next, the Sticky keys accessibility lets you perform keyboard shortcuts by pressing keys one at a time instead of pushing several keys at once. Therefore, it may prevent you from using keyboard shortcuts you normally do, making the keyboard appear to be not working.
- Go to Keyboard menu under Accessibility settings.
- Make sure the Sticky keys toggle is off.
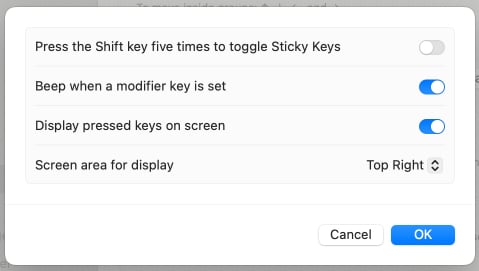
- Click the Info button next to it to check the respective settings.
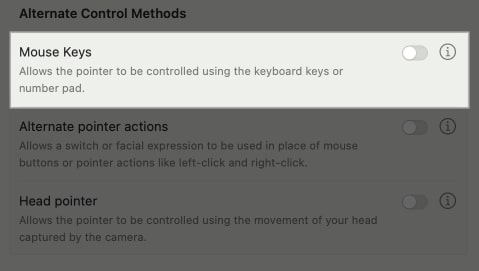
The last accessibility setting is Mouse keys, which lets you use your keyboard as a mouse. So, if this is turned on, the keyboard stops working normally.
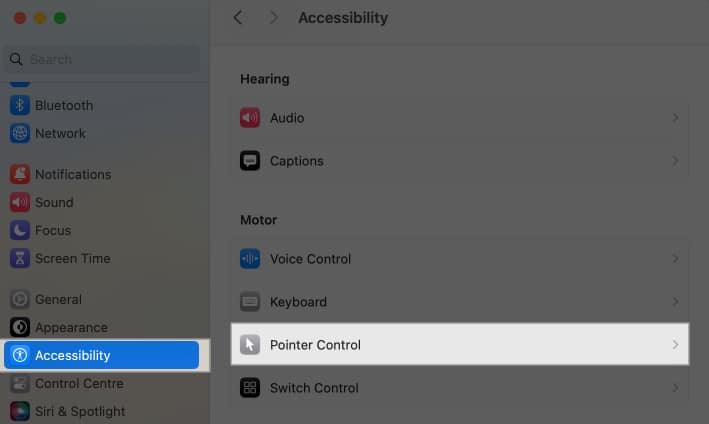
- Head to Accessibility settings and select Pointer Control.
- Toggle off Mouse Keys.
7. Update macOS
Outdated or buggy macOS may result in keyboard compatibility problems. Always confirm that your Mac has the most recent edition of macOS installed.
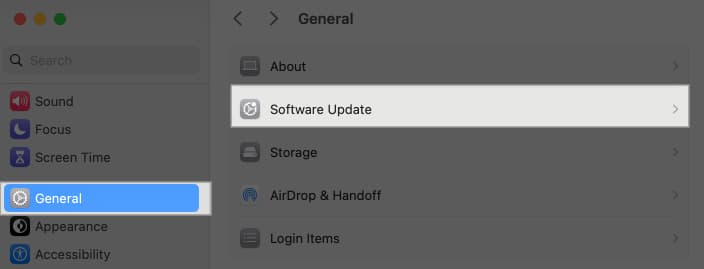
- Go to System Settings and select General.
- Click on Software Update.
- If a new version is available, download and install it.
8. Reset the NVRAM and SMC
This method is for users with old MacBook Air or Pro who aren’t able to use their keyboard. NVRAM and SMC control various hardware functions, including your keyboard. Resetting them to default can sometimes resolve issues. Here’s how to do it:
- Reset NVRAM or PRAM: Shut down your Mac, then turn it on and immediately press and hold Option+Command+P+R until you see the Apple logo disappear twice.
- Reset SMC: Shut down your Mac, then press the Left Control+Left Option+Right Shift key combination for 7 seconds. Next, press and hold the 2 key along with them for 7 seconds. Finally, release them and turn on your Mac.
I hope with these solutions you can successfully get the Mac internal keyboard back in working condition.
Solutions to fix an unresponsive external keyboard
For some people, their MacBook’s internal keyboard works well, but it’s the external keyboard that stops working all of a sudden. If this happens with you, too, it’s mostly due to a connection problem or software glitch. Here’s what you can try to fix it:
1. Check the keyboard’s battery level
For wireless keyboards, ensure the battery is charged. If your external keyboard doesn’t have a battery indicator and is not connecting to your Mac, maybe it’s time to charge it up. Plug your keyboard to charge for a few minutes or hours. If it doesn’t turn on even after charging, you may need to replace its battery.
2. Unpair and re-pair the keyboard
Most wireless external keyboards operate via a Bluetooth connection. Therefore, if your wireless Apple keyboard is not responding, check if Bluetooth is turned on and your keyboard is connected to your Mac.
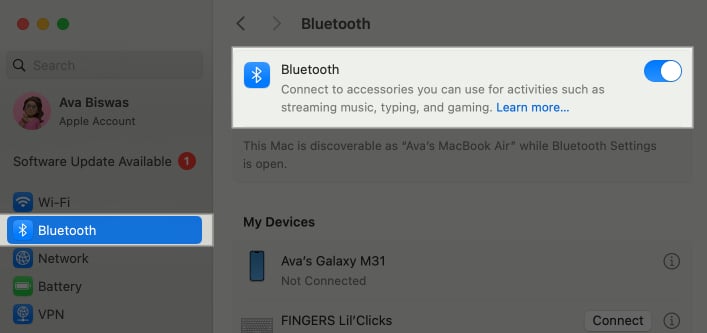
- Go to System Settings and select Bluetooth from the left panel.
- Ensure Bluetooth is enabled.
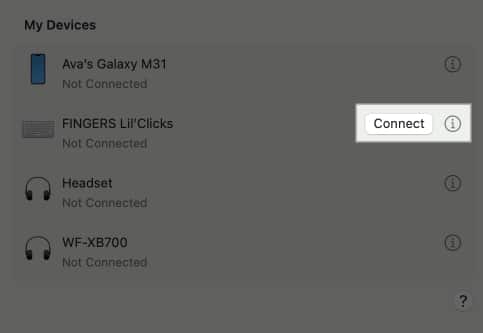
- Click Connect beside your keyboard name. The external keyboard should be turned on.
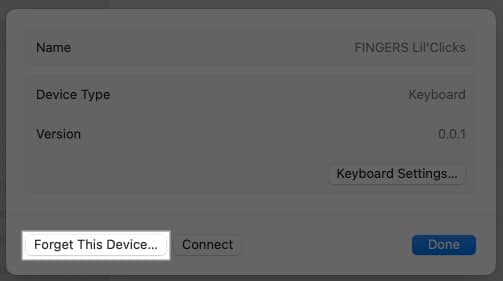
- If it doesn’t connect, click the Info button next to the keyboard name.
- Select Forget This Device.
- Now hit Forget Device to confirm.
- Now, put your keyboard in pairing mode.
- You should see its name under Nearby Devices. Click Connect to pair the keyboard again.
3. Check the cable of your wired keyboard
If you’re using a wired keyboard, ensure the cable is securely connected. You may also try a different cable or USB port if available. If the keyboard doesn’t respond, connect it to another device and see if it works.
Unfortunately, if it doesn’t work, check for physical damage to your external keyboard or get it inspected by a technician.
What to do if the MacBook keyboard backlight isn’t working?
One day I turned on my MacBook Air and found out its keyboard was not working after login. The keys were somehow responding, but the keyboard backlight was off. If you faced the same, read along with the troubleshooting methods I applied.
1. Try increasing the brightness level
The most common reason behind this issue is the keyboard backlight brightness level set to minimum. That’s why you can’t recognize it, especially in the daytime.
Use the F2 key to increase the keyboard’s brightness. Otherwise, go to System Settings, select Keyboard, and adjust the Keyboard Brightness slider.
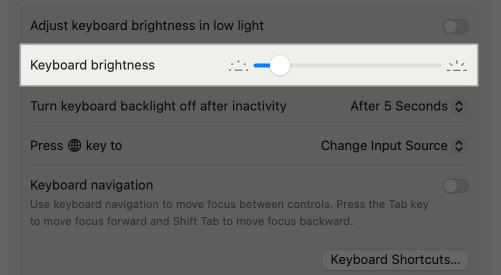
2. Disable auto-brightness adjustment
Mac has a light sensor that helps it adjust display and keyboard brightness automatically depending on ambient lighting for better user experience. However, because of this, your keyboard brightness might mess up.
So, I suggest turning off automatic brightness adjustment and controlling the backlight manually. Here’s how:
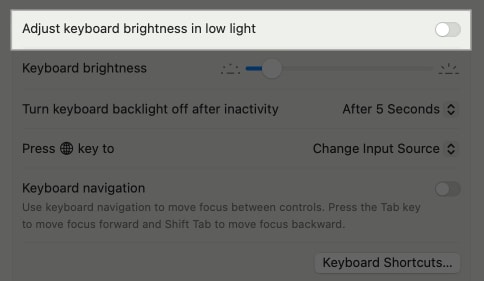
- Head to Keyboard menu in System Settings.
- Toggle off Adjust Keyboard Brightness in Low Light.
You may also extend the keyboard backlight timing using the Turn Keyboard Backlight Off After Inactivity option. However, it may lead to more battery consumption.
3. Turn off Low Power Mode
If your Mac is in Low Power Mode, it might reduce the keyboard backlight to save energy. Here’s how you can disable it:
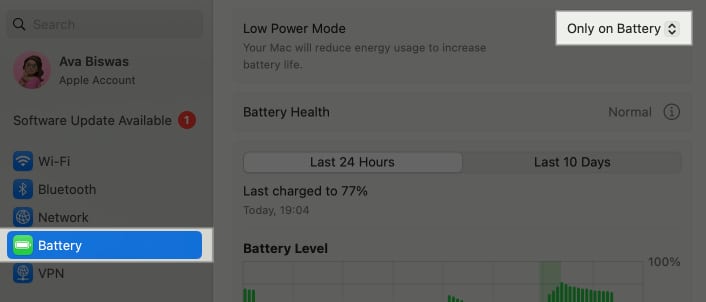
- Select Battery in the System Settings and click the drop-down menu next to Low Power Mode.
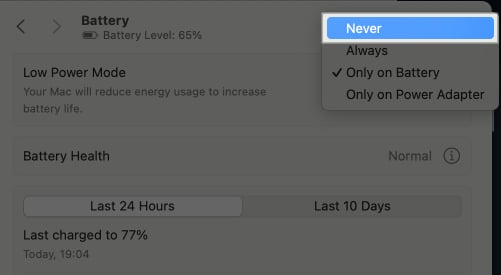
- Choose Never from the drop-down menu.
Signing off…
A non-functional MacBook keyboard can be incredibly frustrating, but with the above fixes, you should be able to identify and resolve the issue on yours. If none of these fixes work, it might be time to visit an Apple Store or contact Apple Support.
FAQs
Yes, liquid damage can severely affect your MacBook’s keyboard. If you’ve spilled water on your MacBook, our Spilled Water on MacBook guide can help.
Here are some more tricks to make the most of your MacBook:

