Are you unable to use Apple services like iCloud, FaceTime, or Messages and found that your Apple ID is greyed out in settings? Don’t panic! It is widespread. In this blog, I will share how you can fix Apple ID greyed out issue on your iPhone.

Why is Apple ID greyed out on iPhone?
You may experience Apple ID greyed out for several reasons, as a few are out of your hands. So, determine the cause of the trouble before jumping to the solutions.
- Wrong Content & Privacy Restrictions may interfere with your Apple ID.
- Screen Time settings can pause your Apple ID functions.
- Your account might be signed up under a Family Control account.
- Unstable or poor internet connection
- Another device is presently logged in with your Apple ID.
- Too many unsuccessful login attempts temporarily deactivated your Apple ID.
- Apple’s servers outage
- Incorrect date/time settings on your iPhone sync out Apple services.
- iCloud is trying to download backup apps
Now you know the most possible reasons why Apple ID is greyed out, let’s fix the issue.
1. Remove Passcode and Account Restrictions
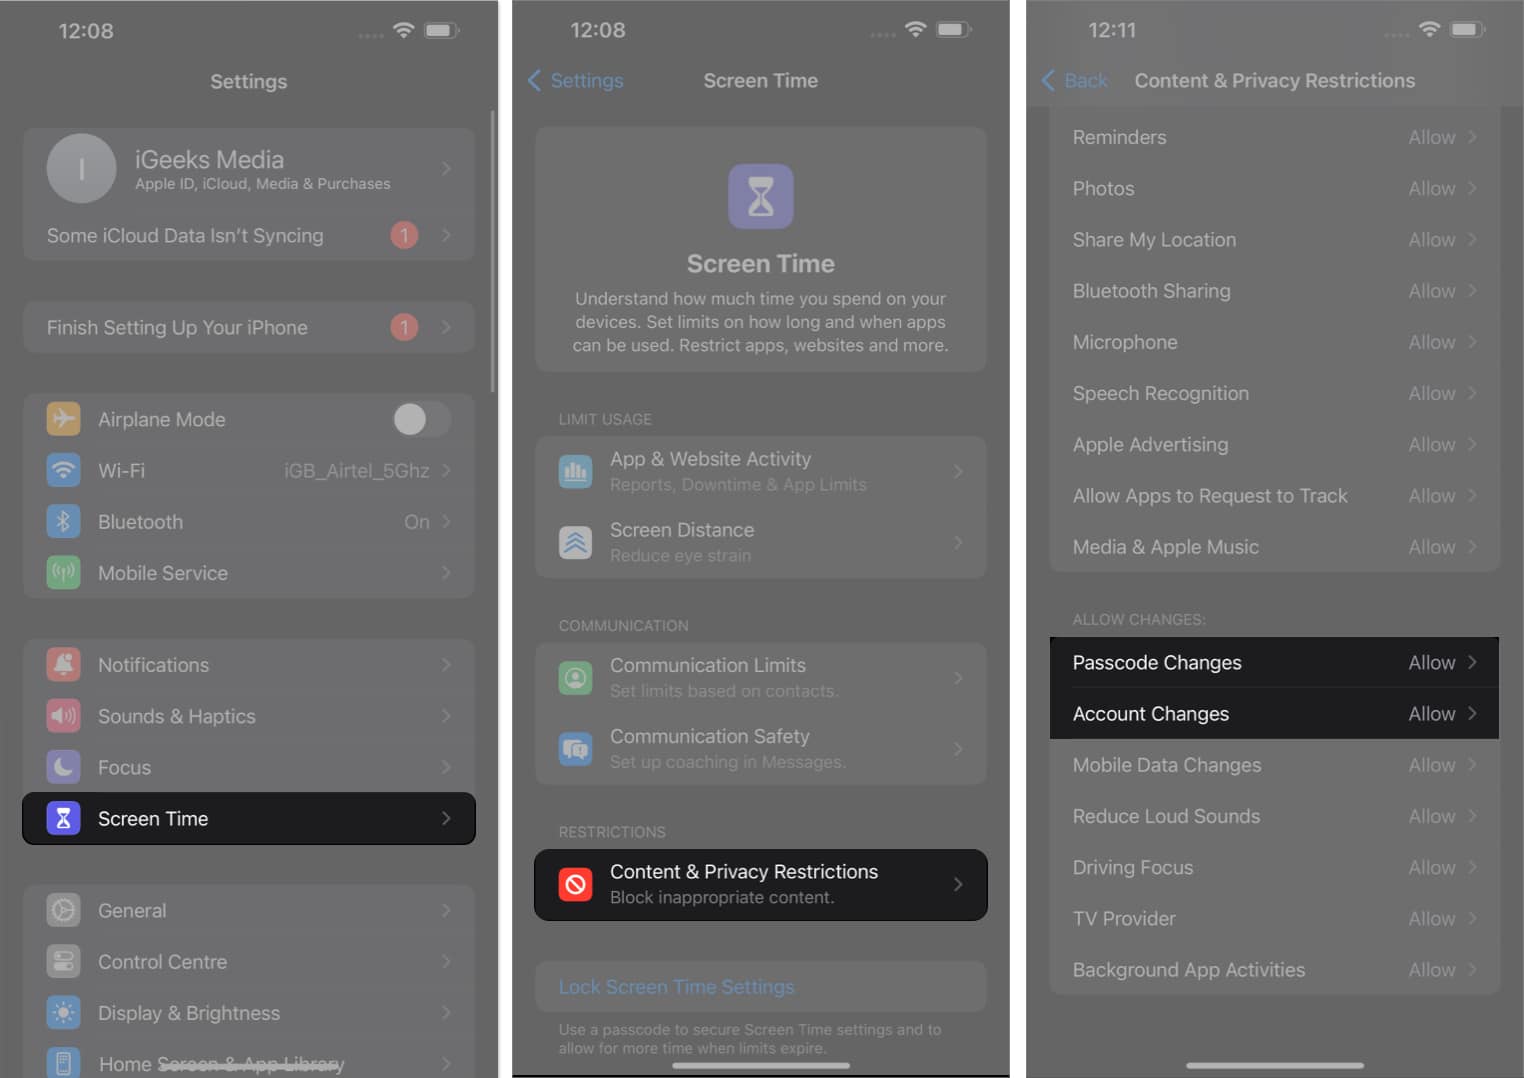
- Launch Settings → Access Screen Time.
- Navigate to Content & Privacy Restrictions.
- Ensure Passcode Changes and Account Changes are set to Allow.
By doing so, you can access your Apple ID account as usual.
2. Disable Content & Privacy Restrictions
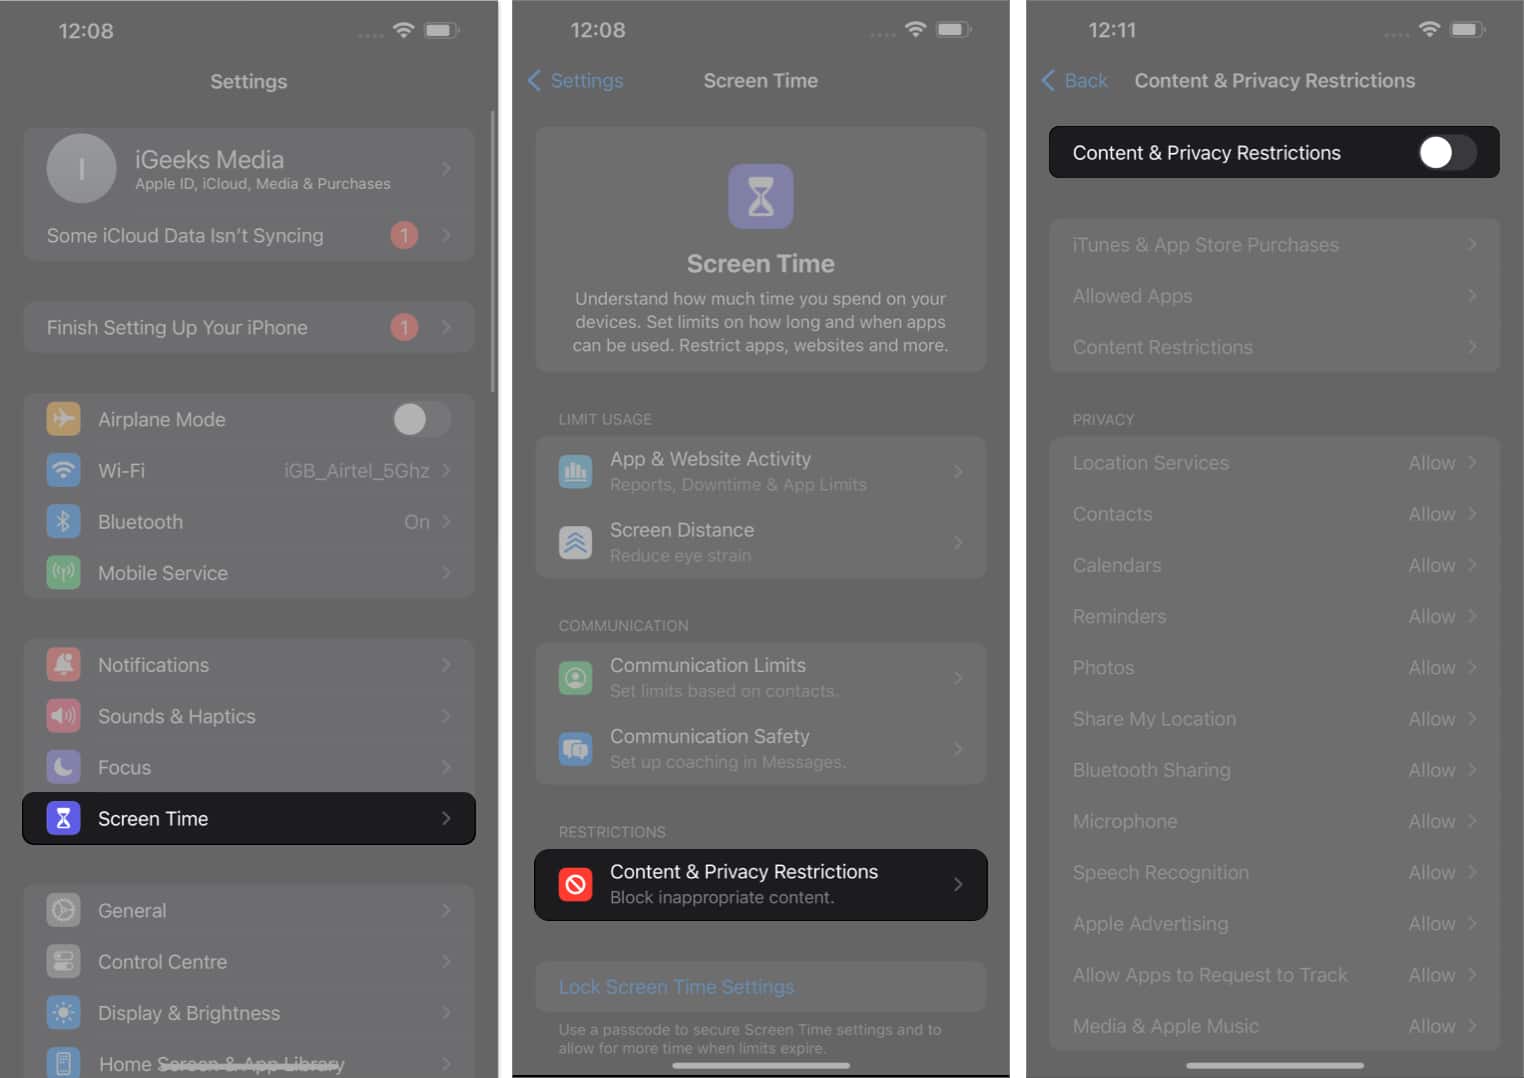
- Open Settings → Go to Screen Time → Content & Privacy Restrictions.
- Toggle off Content & Privacy Restrictions.
It will disable every applied restriction from your device, making every feature accessible like before.
3. Turn off Screen Time
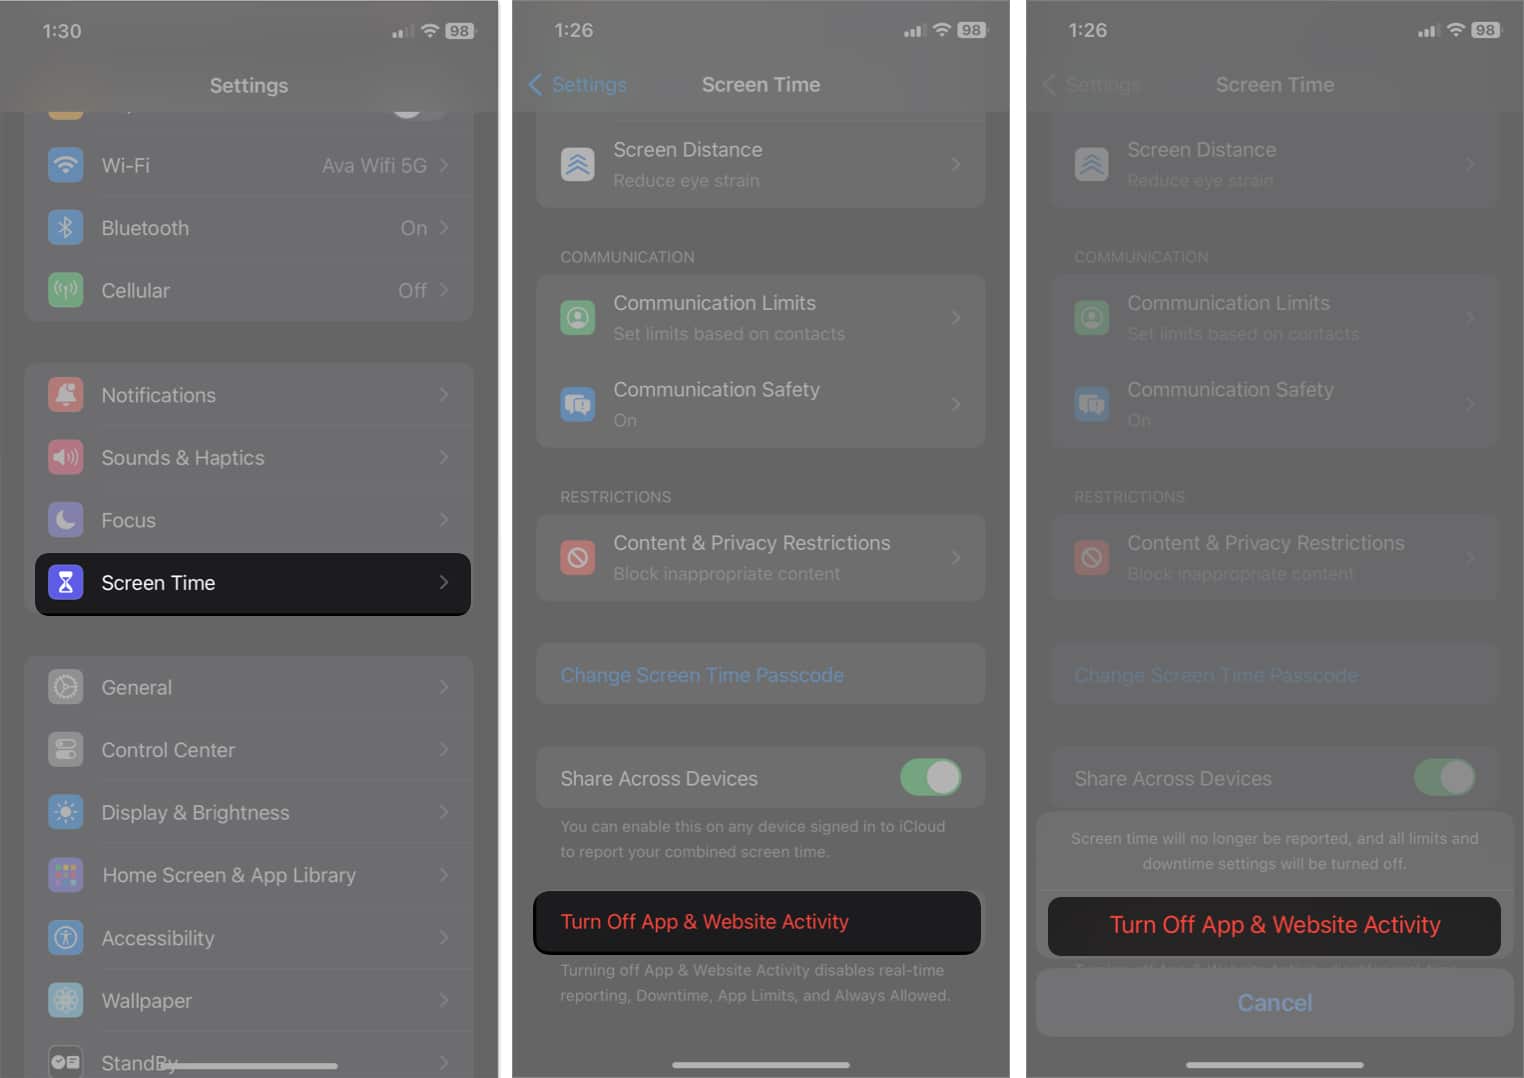
- Go to Settings → Screen Time.
- Select Turn Off App & Website Activity → Confirm by tapping Turn Off App & Website Activity.
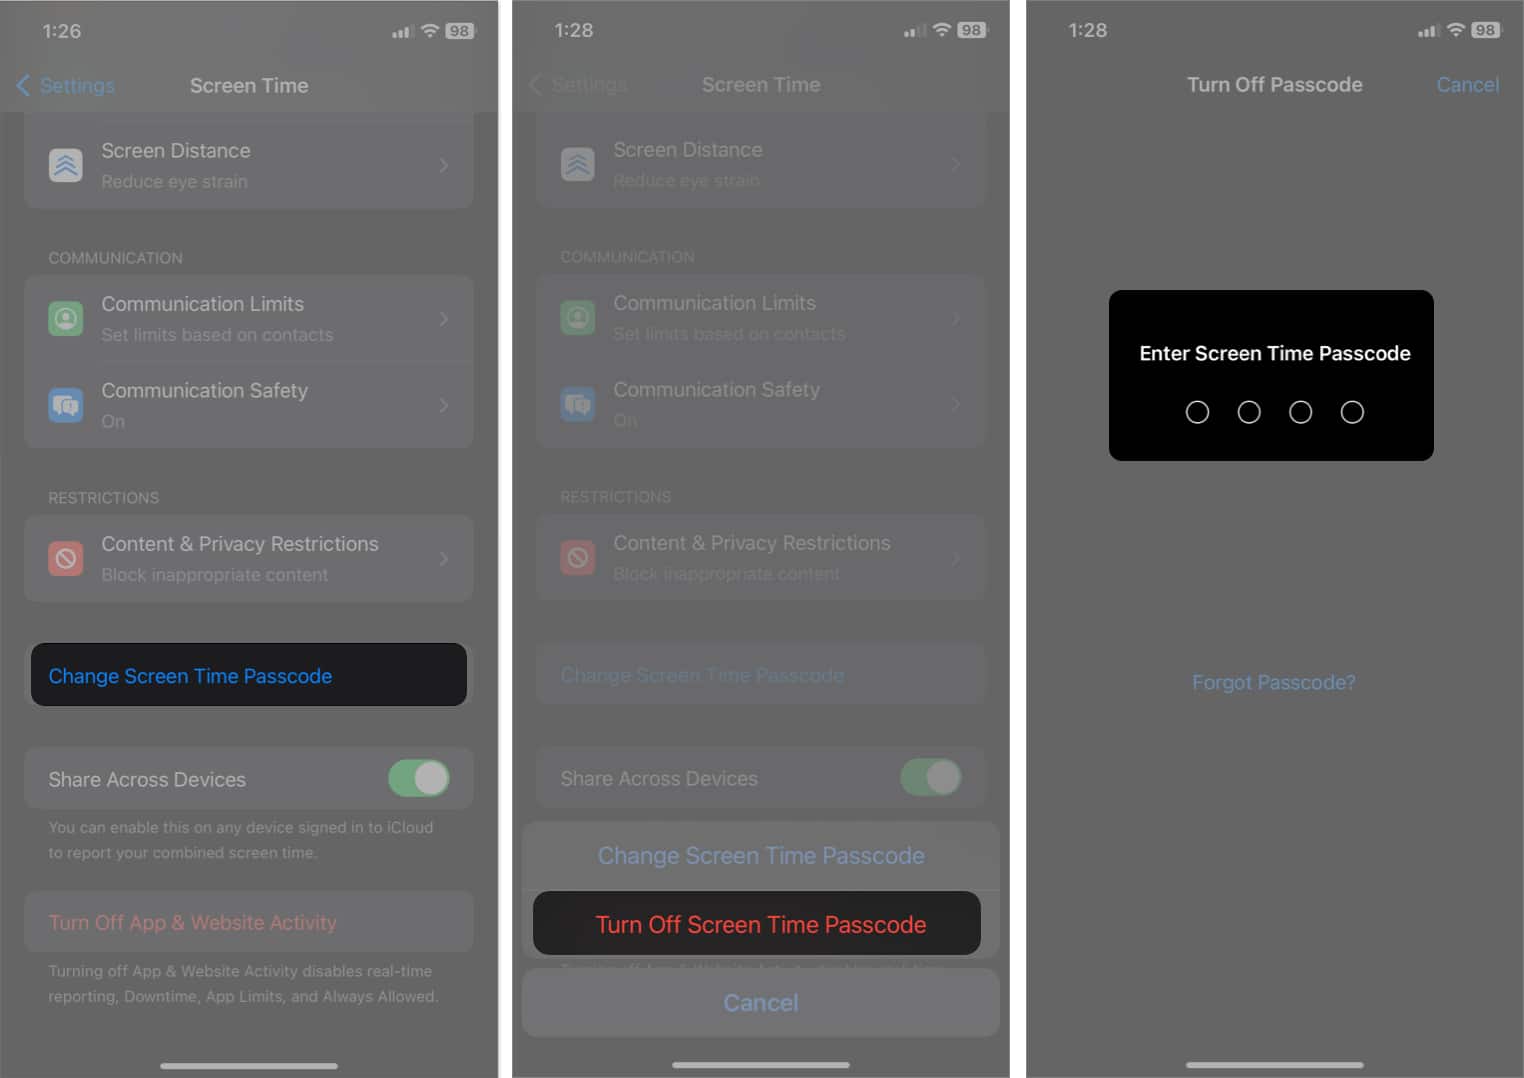
- Next, select Change Screen Time Passcode → Tap Turn Off Screen Time Passcode → Enter your passcode.
4. Look for Family Sharing settings
You may see your Apple ID greyed out on your iPhone if you are included in Family Sharing settings.
When Family Sharing is enabled for an Apple ID, the parent account can only control and change your account. You must remove your Apple ID from the Family Sharing settings to fix this issue. After that, you can enjoy uninterrupted access to all features and services linked to your Apple ID.
5. Switch from cellular to Wi-Fi
You may be unable to access your Apple ID due to an unstable internet connection. If you use cellular data, try switching to a strong Wi-Fi network. However, if the issue persists, you must reset your network settings and check if your cellular data working or not.
6. Force quit Settings app
A minor glitch can cause your Apple ID to be greyed out on your iPhone. A standard solution is to force quit the Settings app and restart it.
7. Basic fixes
- Update iOS: When encountering a greyed Apple ID on an iPhone, updating iOS is often the best solution.
- Use stable iOS: If the glitch was prompted after installing a beta update, you can always downgrade your system to the regular version.
- Check server outage: Visit the Apple Status Page and look for the green dot beside Apple ID and iCloud server to ensure they work fine.
- Reset your iPhone: Resetting your iPhone clears any glitches that may have developed in its system files.
- Contact Apple support: Contact Apple support if the issue persists after trying these basic troubleshooting methods.
Take back what’s yours!
I hope you’ve successfully fixed your greyed-out Apple ID on your iPhone. Try to find the root cause behind your issue and comply with the related solution. If you still face this issue, take your iPhone for a technical checkup. Thank you for reading. Please let me know which method worked for you in the comments below!
Read more:


