We’ve all been in a situation where we tried using WebP images and got disappointed with the result showing ‘this image format is not supported.’ While Macs can handle WebP images without any issue, the problem arises when we try to use them in our documents, mail, and messages.

Thus, it’s better to use the good old JPG, which 99% of the websites support and are less likely to return errors. If you’re wondering how to convert WebP images to JPG on your Mac and use them, here’re 5 best ways. But before that, let’s give you a small overview of WebP.
What is WebP? How is it different from JPG and PNG images?
WebP, or Web Picture, is an image file format developed by Google that can save image data both lossless-ly and lossy compression. It allows for a 34% smaller image size compared to JPG, all while retaining high-quality image data. To go into a bit of detail, let’s take a look at how WebP saves space.
We all know images are nothing but pixels stitched together. This image format saves space by ‘predicting’ what could be the color of surrounding pixels of a particular pixel. This allows one-pixel data to be used again and again in the image, thus saving space.
But enough of the color theory class, let’s take a look at how you can quickly convert WebP images to JPG or PNG on your Mac.
3 Ways to save WebP images as JPG or PNG on Mac
- Using Preview on your Mac
- Use online tools to convert WebP to JPG
- Take screenshots to save JPG image
1. Using Preview on your Mac
Apple’s macOS has a built-in image viewer called Preview. While Preview allows you to view, edit, crop, and even annotate images on your Mac, it can even be used to convert a WebP image to JPG on your Mac.
Although this process is a tedious one, it gives you granular control over the image quality. Here’s how to do it.
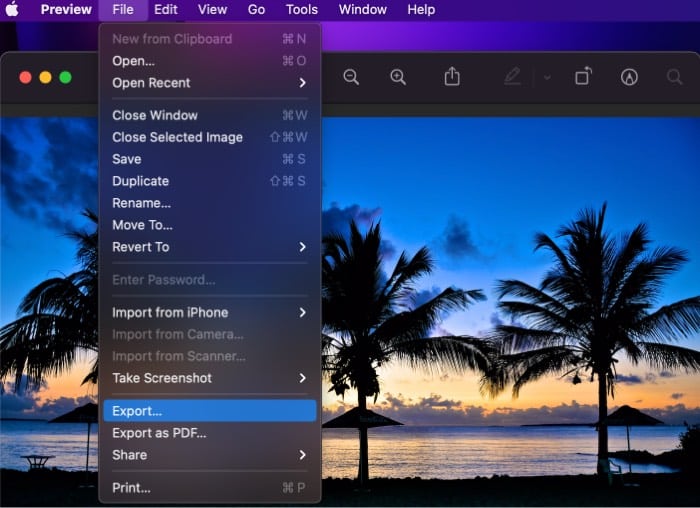
- Open the WebP image using Preview.
- Now, in the Preview’s menu bar, click File → Export.
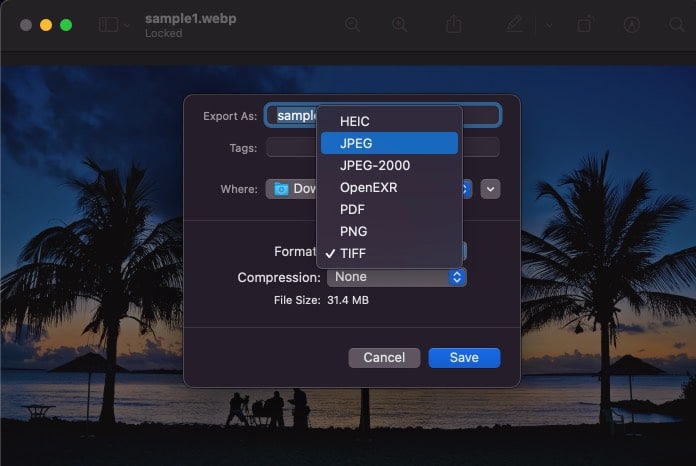
- In the window that pops up, select the image format to be exported in.
There are plenty of image formats to choose from, including JPEG, PNG, TIFF, and even PDF. - Adjust the image quality using the slider.
- Once done, click Save.
Additional tip: If you plan on using this solution to convert WebP images, head over to System Preferences → Keyboard → Shortcuts → App Shortcuts → click the + button → select Preview. In the Menu title, copy and paste ‘File → Export…’ and add keyboard shortcut as ‘Cmd + E.’
Next time you use Preview to convert WebP images, open the image and press Cmd + E to open the Export window quickly.
2. Use online tools to convert WebP to JPG
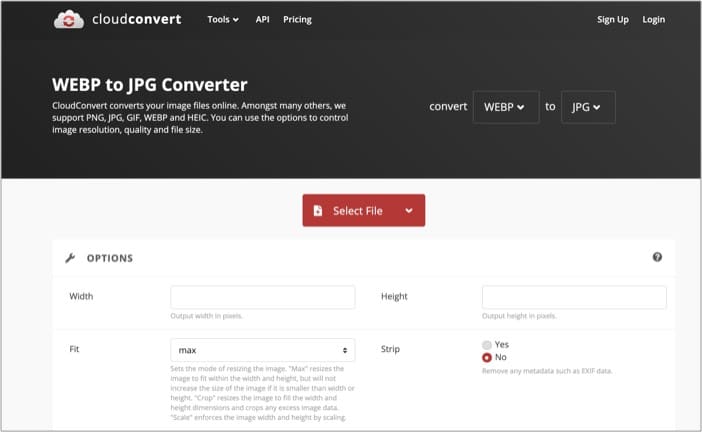
There are a lot of tools available on the web to convert WebP images to JPG. As for my choice, cloudconvert is one of my preferred options to perform this conversion.

It not only has an easy-to-use interface but also allows you to set image’s quality, height, width and lets you save images directly to Google Drive — so that you can seamlessly attach them in your Google Docs. Moreover, it’s ad-free!
3. Take screenshots to save JPG image
Well, this is not one of the ‘cleanest’ ways to convert WebP images on your Mac, but it gets the job done. Depending upon the browser you’re using, open the image in a new tab — to retain its high quality — and simply take a screenshot by pressing Cmd + Shift + 4 on your Mac’s keyboard.
After pressing the key combination given above, you’ll be presented with a cursor to select the area to be captured. Once you’re done, you can find the screenshot on your Mac’s desktop.
WebP images can protect your image files and even save some of the storage space on your Mac, but not all browsers and websites support this image extension. Using the above solutions, you can quickly convert WebP images to JPG on your Mac.
I use Chrome’s Save Images As You Want extension for quickly saving WebP images as JPG. Which tool do you prefer? Let us know in the comments section below!
Related:


