Have some urgent work, but your iPhone isn’t connecting to your PC? Don’t worry if iTunes is not recognizing your iPhone, despite multiple events because this guide will help you out.
There can be a myriad of reasons behind this issue, from an outdated OS to a bug in the system. Nonetheless, here are some simple hacks that’ll help you solve the issue and ensure that iTunes recognizes your iPhone as it should.
- Try some quick tips
- Update iTunes on Windows PC
- Update your device driver on Windows PC
- Reset the Location & Privacy setting on your iPhone
- Delete and reinstall iTunes on Windows PC
- Restore your iPhone
1. Try some quick tips
- Turn on your iOS or iPadOS, unlock and go to the Home Screen.
- Ensure that your iOS device is running the latest version of iOS.
- Go to Settings → General → Software Update. If an update is available, click Update.
- Make sure the latest version of iTunes is installed on your computer. Also, update your computer to the latest available software.
- If the Trust this Computer alert pops on your device, tap Trust.
- Unplug all the USB accessories from your computer.
- Try a different USB port to check out if it works. Also, give a different Apple USB cable a try.
- Reboot both your iPhone, Mac, and computer
2. Update iTunes on Windows PC
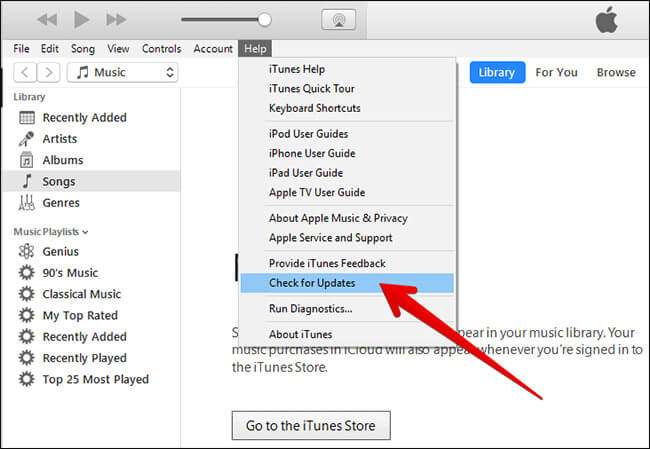
- Open iTunes on your Windows PC.
- Next, you need to select Help. Then, click Check for Updates.
- Now, follow the instructions to install the latest version of iTunes on your computer.
3. Update your device driver on Windows PC
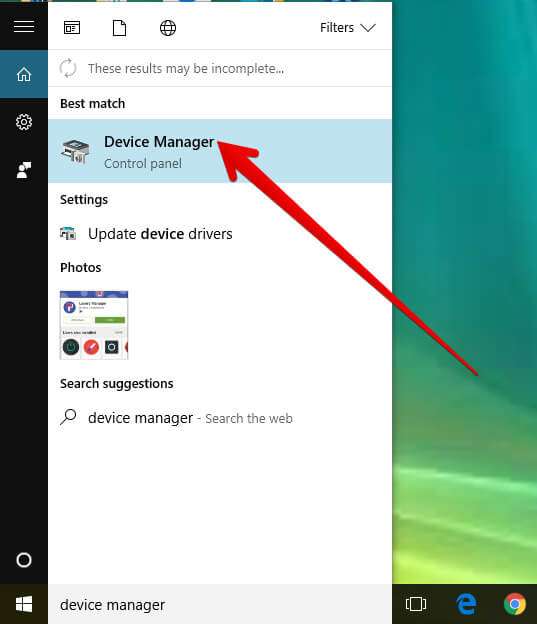
- Click on Start, type Device Manager, and select it on your Windows PC.
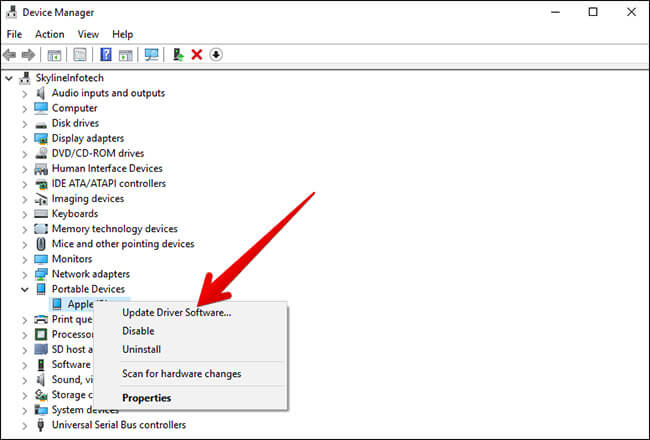
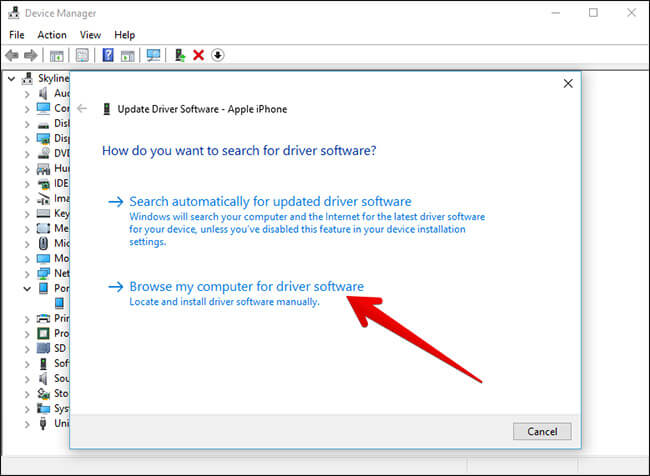
- Click on Update Driver Software.
- Now, click on Browse for driver software on your computer.
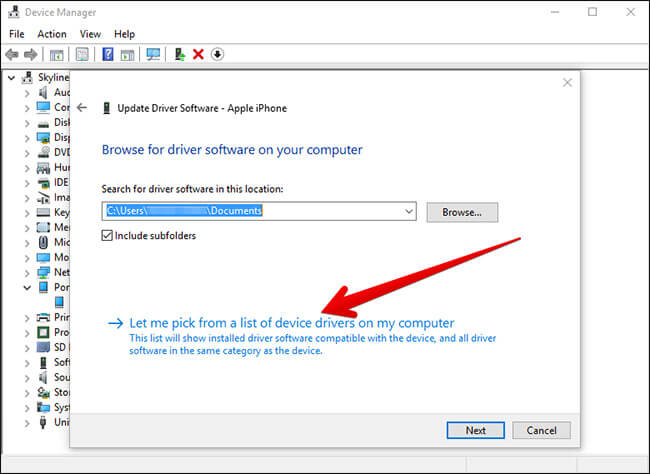
- Next, click on Let me pick from a list of device drivers on my computer.
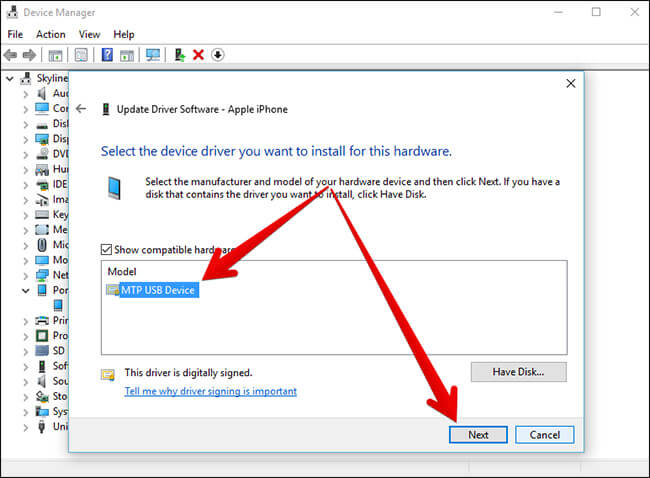
- Select the device and click on Next.
If this fails, then you need to select Have Disc or a device category → Click Next and then double click on usbaapl or usbaapl64 → In the Have Disk window, you need to click Open → Now, click Next → Finish.
4. Reset the Location & Privacy setting on your iPhone
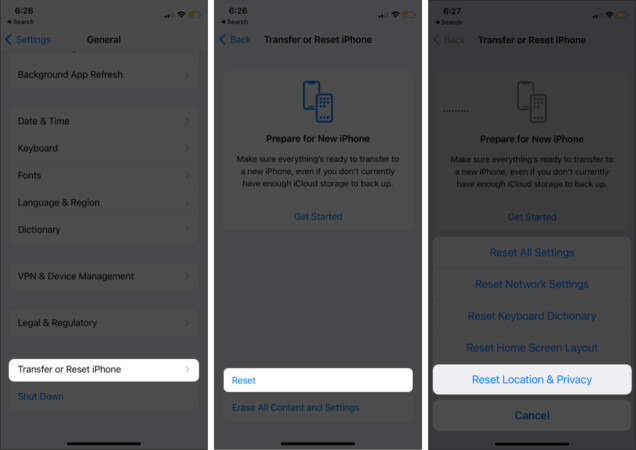
When you connect your iOS device to the computer, you need to Trust the computer. If you forgot to trust your computer, unplug your device, wait for some time and connect it again. If you are not getting the option to trust the computer, reset the location and privacy on your iOS device.
Open Settings → General → Transfer or Reset iPhone → Reset → Reset Location & Privacy.
5. Delete and reinstall iTunes on Windows PC
Open the Control Panel on your Windows PC and uninstall iTunes and its related software components such as Apple Software Update, Apple Mobile Device Support, Bonjour, Apple Applications Support 32-bit, and Apple Application Support 64-bit with iTunes.
6. Restore Your iPhone
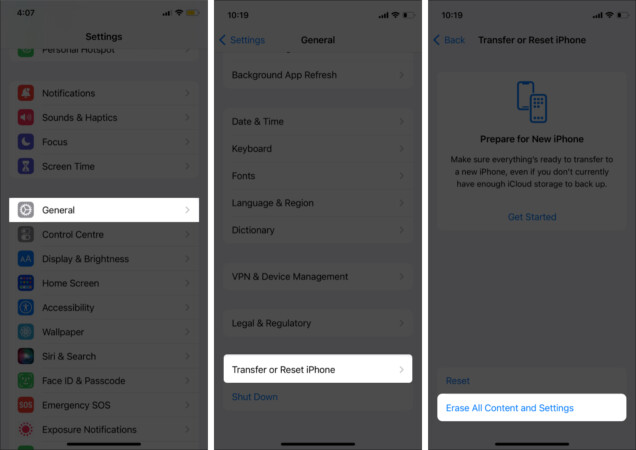
If all the above solutions haven’t clicked for you, the last resort is to factory reset your iPhone. And since you can’t connect to iTunes, you can only backup your iPhone via iCloud or other third-party cloud storage services.
To reset your iPhone, go to Settings → General → Transfer or Reset iPhone → Erase All Content and Settings → Continue → follow on-screen instructions.
Once that is done, you can restore the Phone from backup.
Hopefully, these solutions help you in fixing the problem. In most cases, it’s fixed by just updating the iOS devices, computers, and iTunes. It would sometimes be resolved just by restarting the iPhone and computer. If nothing has worked for you, it would be better to contact Apple for help.
You may want to read some other helpful posts:

