Are your iPhone or iPad backups taking up much storage space on your Mac? Finder stores your iTunes backups in a default location on your Mac. However, you may move those files to an external hard drive and back up your iPhone to a different location. In this blog, I will show you how to change iPhone backup location on Mac.
How to change iPhone backup location on Mac
You may wonder where is your iPhone backup stored on your Mac. All the backup files are hidden in a system folder named MobileSync. Besides, I strongly advise syncing the backup files to iCloud before you move its location. So, if anything goes wrong, you can still access the old backup.
- Launch Finder.
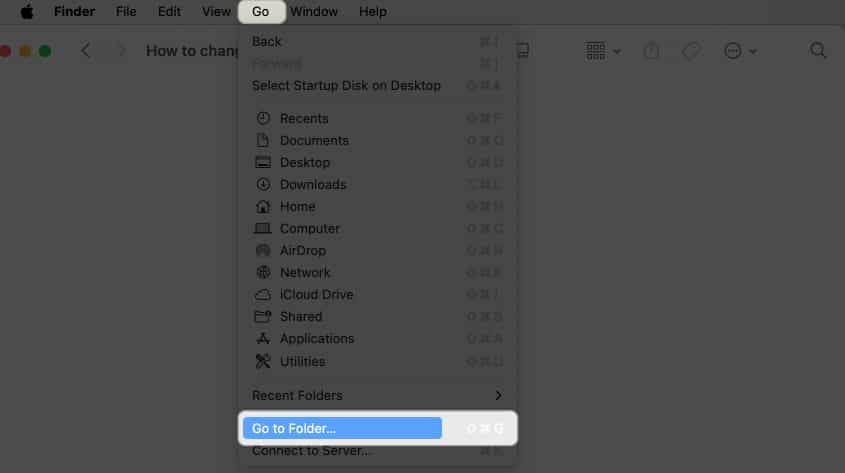
- Click Go in the menu bar → Select Go to Folder.
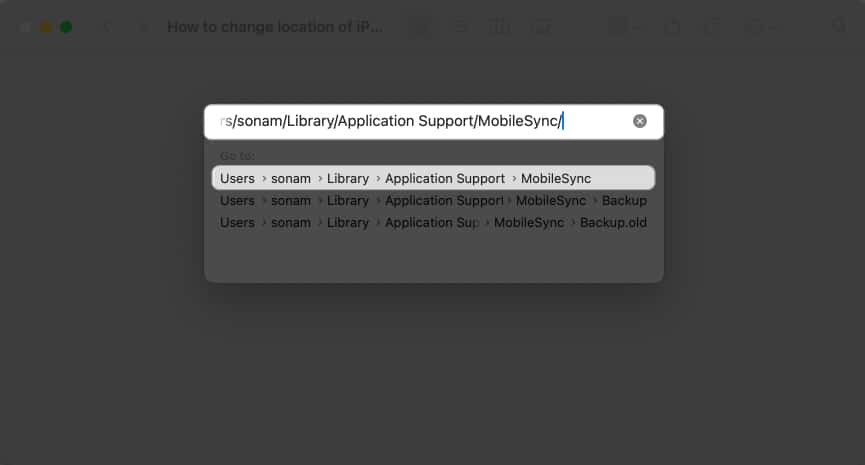
- Type
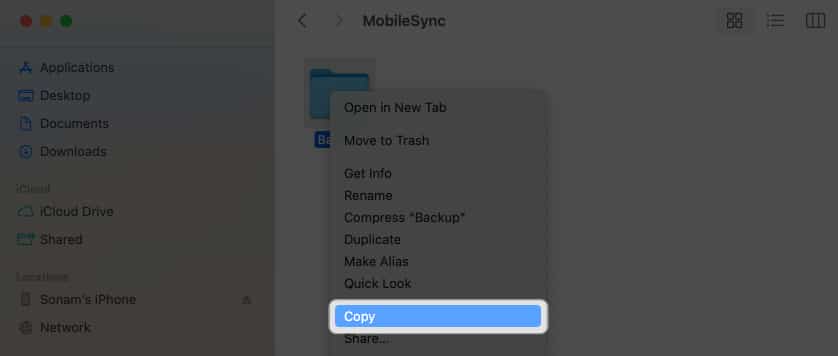
~/Library/Application Support/MobileSync→ Hit return. - Select the Backup folder → Right-click on it and choose Copy.
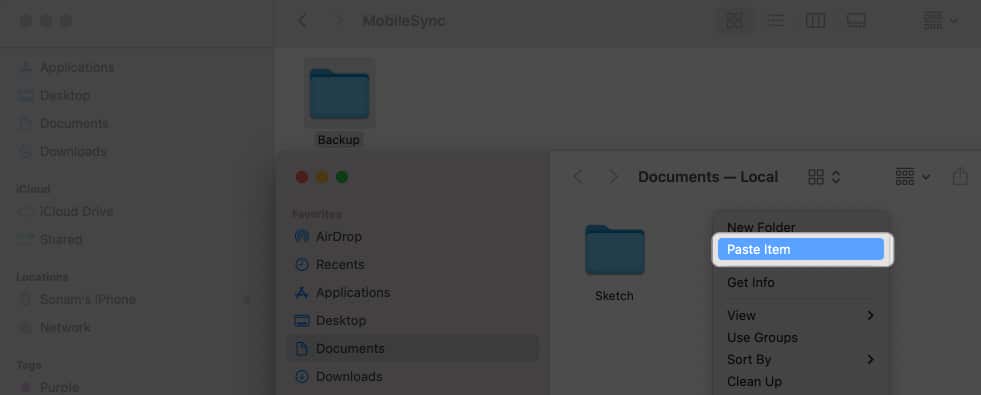
- Open another Finder window → Head to the location where you want to move the backup location.
- Right-click on the window → Choose Paste Item.
Wait for it to finish and keep the window open. - Now, go back to the original Backup folder’s Finder window.
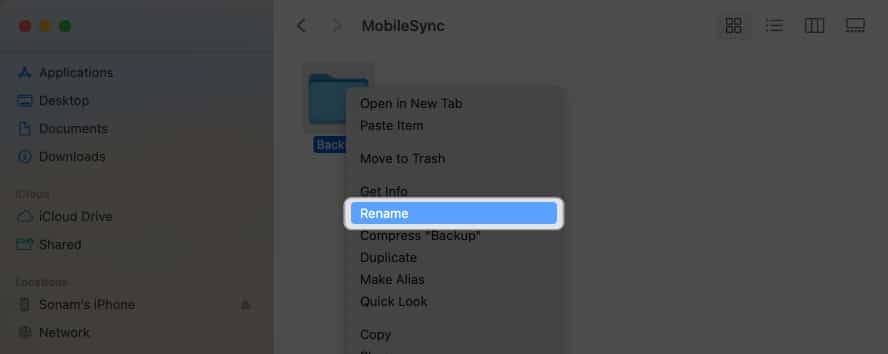
- Right-click on the folder → Select Rename.
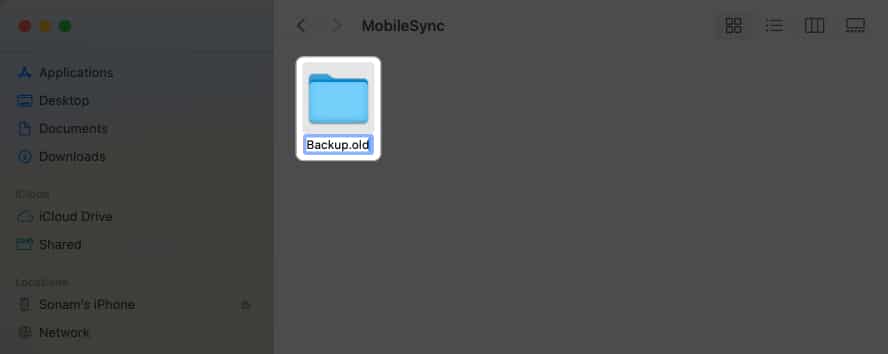
- Type the new name → Hit return.
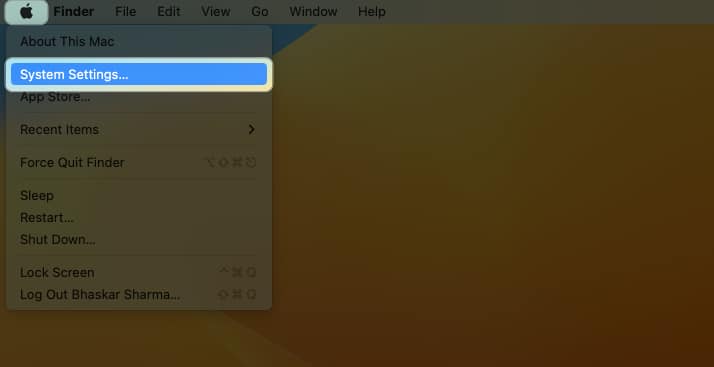
I have put “.old” at the end of the name, like Backup.old. - Click the Apple logo () → Choose System Settings.
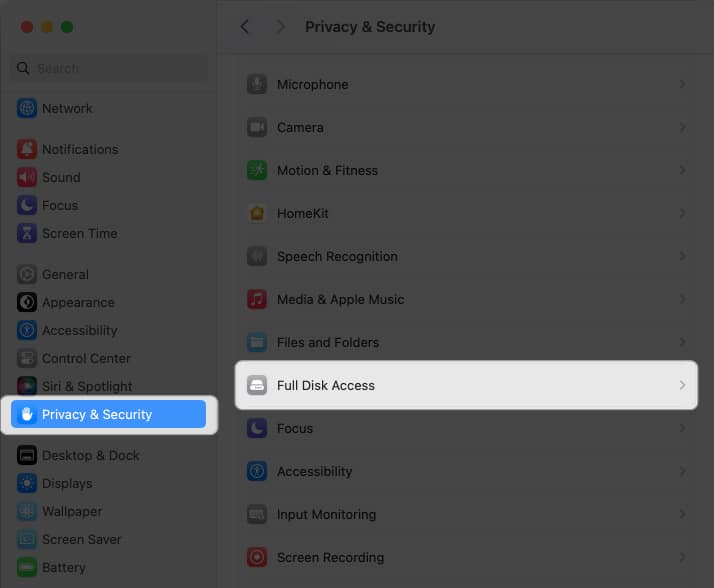
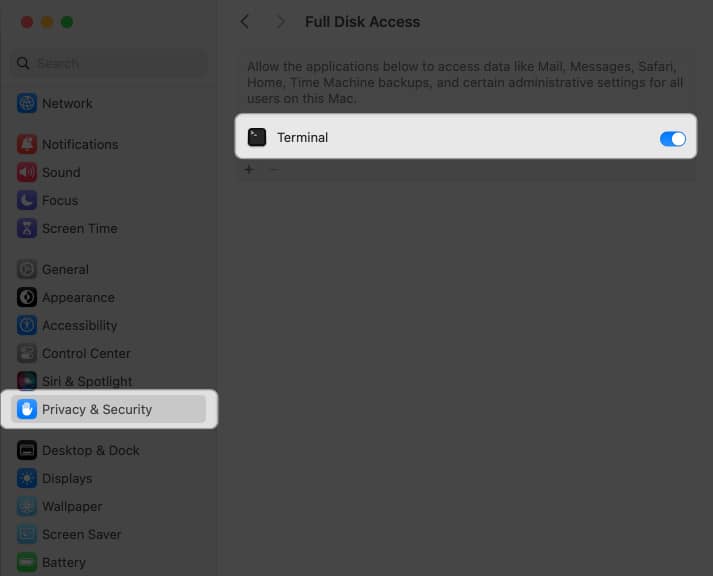
- Head to Privacy & Security → Select Full Disk Access.
- Click the plus icon (+) → Enter your Mac’s Password.
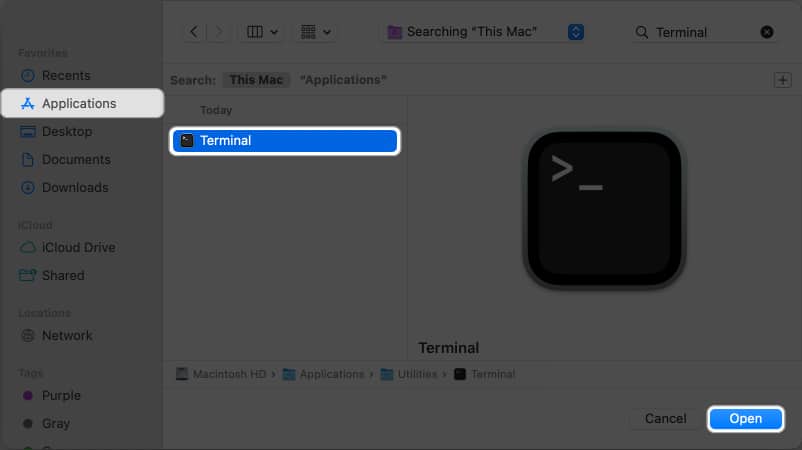
You can also scan your finger using Touch ID if it is set up. - Go to Applications → Select Terminal → Click Open.
You may find it using the Search icon. - Toggle on Terminal.
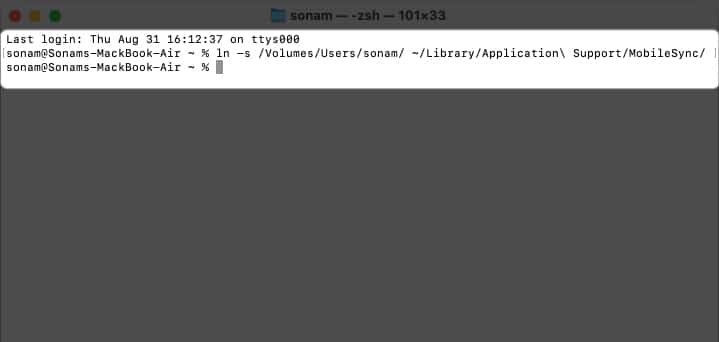
- Launch Spotlight (cmd + Space bar) → Open Terminal.
- Enter
ln -s /Volumes/Drive/Backup/ ~/Library/Application Support/MobileSync/→ Hit return.
It will create a symlink of the Backup file beside the old backup folder. - Connect your iPhone to your Mac using a USB C to lightning cable.
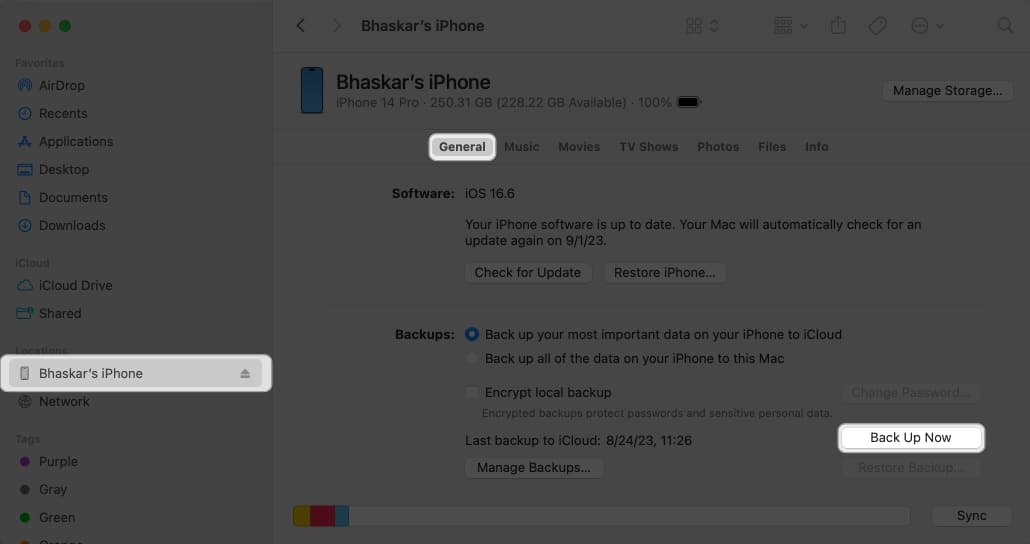
- Finally, launch Finder → Select your iPhone under Locations.
- Shift to the General tab → Click Back Up Now.
How to make a personalized file path command for your backup location
- Open Notes.
- Copy the following command:
ln -s /Volumes/Drive/Backup/ ~/Library/Application Support/MobileSync/. - Change
/Volumes/Drive/Backup/part in the command to match the location of your own Backup folder.- If your Backup folder is in Macintosh HD → Users → Backup, your new command will be
ln -s /Volumes/Macintosh HD/Users/Backup/ ~/Library/Application Support/MobileSync/. - If a location has multiple words like Macintosh HD, use a backslash and a single space like
Macintosh HD. - If your Backup folder is in an external pen drive called Bhaskar, the command becomes
ln -s /Volumes/Bhaskar/Backup/ ~/Library/Application Support/MobileSync/. - If the Backup folder is within a folder named iPhone on your pen drive, the command becomes
ln -s /Volumes/Donald/iPhone/Backup/ ~/Library/Application Support/MobileSync/.
- If your Backup folder is in Macintosh HD → Users → Backup, your new command will be
Now you know how to adjust the path in the command based on where your Backup folder is located. You’re now ready to use this command to perform specific tasks.
How to restore iPhone backup folder to its original location on Mac
- Open Finder → Click Go in the menu bar → Choose Go to Folder.
- Type ~/Library/Application Support/MobileSync → Press return.
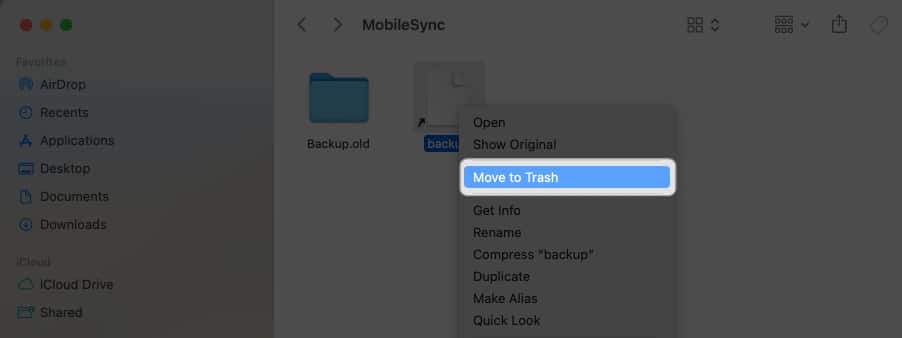
- Look for a file with an arrow icon.
- Right-click on the file → Select Move to Trash.
You can also drag and drop the file to the bin icon. - To be safe, put the current Backup folder in the default location.
Note: If you don’t do this step, a new Backup folder will be created automatically the next time you back up your device.
Now, all your upcoming iPhone backups will now go here.
How to change iPhone backup location on Windows laptop
If you’re using an iPhone alongside a Windows computer, don’t worry. You can change the location where your iPhone backup files are stored using Apple’s native iTunes application for Windows.
- Right-click on the Start → Select File Explorer.
- Go to the location where you want to move your iPhone backup.
- Right-click on an empty area → Choose New Folder.
- Rename the folder as MobileSync.
Don’t close the File Explorer. - Open a new File Explorer window.
- Go to C:UsersUserNameAppleMobileSync.
- Right-click on your current iPhone backup folder → Select Copy.
- Head back to the MobileSync folder you created earlier → Paste your iPhone backup folder.
- Rename the current iPhone backup folder to Old Backup.
- Right-click on the Start button → Click on Command Prompt.
- Type MkLink /J “C:UsersUserNameAppleMobileSyncBackup” “C:MobileSyncBackup”.
In case you installed iTunes from outside the Windows Store, type MkLink /J “C:UsersUserNameAppDataRoamingApple ComputerMobileSyncBackup” “C:MobileSyncBackup”.
Save space on your Mac!
Here’s how to create fresh backups for your iOS or iPadOS and stash them in a new spot. Shuffling backup files to another folder within your device’s insides doesn’t quite save space. Yet, if you move the iPhone backup to an external drive, you’ll lighten the load on your primary storage.
I hope the info above did the trick. If you hit a snag anywhere, please drop us a line in the comments section. I’m here to help!
FAQs
No, changing the backup location doesn’t affect the security or encryption of your backups. Finder will still encrypt your backups if you’ve enabled encryption.
Yes, changing the backup location can help free up space on your Mac’s system drive. This can be particularly beneficial if your system drive runs low on storage.
When following the correct procedures, the risk of data loss is minimal. However, it’s always recommended to have a backup of your data before making any changes to ensure you can restore it if needed.
Yes, you can change the backup location for each iOS device individually. Create separate symbolic links or choose different locations using the Finder method.
Read more:

