When you delete files on your Mac, they head straight to Trash, taking up some precious space. Emptying the Trash lets you permanently delete these files. But error messages like locked files or incorrect permissions may prevent you from doing so.

Not to worry—there are plenty of ways to get your Trash emptied and have it back to normal in no time.
Read below on how to fix different problems preventing you from emptying your Mac’s Trash. When all else fails, I’ll also teach you how to force empty the Trash using Terminal.
- Reasons why your Mac’s Trash won’t empty
- Quick ways to empty Trash on Mac
- Fixes on common issues that prevent you from emptying Trash on Mac
- How to force empty Trash on Mac
Reasons why your Mac’s Trash won’t empty
There are several reasons why you can’t empty Trash on your Mac. Here are some of the most common system errors you may encounter:
- the file is in use
- the file is locked or corrupted and needs a repair
- your disk is full
- the file cannot be deleted because of System Integrity Protection
- disk permissions need a repair
Sometimes, your system apps don’t run as smoothly because your Mac is running an outdated macOS. Try updating your OS first before proceeding to the next steps.
Quick ways to empty Trash on Mac
If your OS is up-to-date but still faces any of these issues, here are some general fixes that can help.
1. Quit and reopen Trash
Before you try more complex methods, you might first want to try quitting Trash and try emptying it again. Sometimes, internal and external issues can cause Trash to freeze.
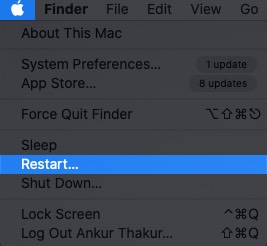
2. Restart your Mac
Restarting your Mac is another straightforward way of fixing the issue. Doing so closes the apps that may be using the files you want to delete or fixes any bugs that prevent you from emptying the Trash.
Fixes on common issues that prevent you from emptying Trash on Mac
Different system errors may require specific workarounds to delete files from your Mac’s Trash permanently. If quitting Trash or restarting your Mac doesn’t work, below are different workarounds for each issue.
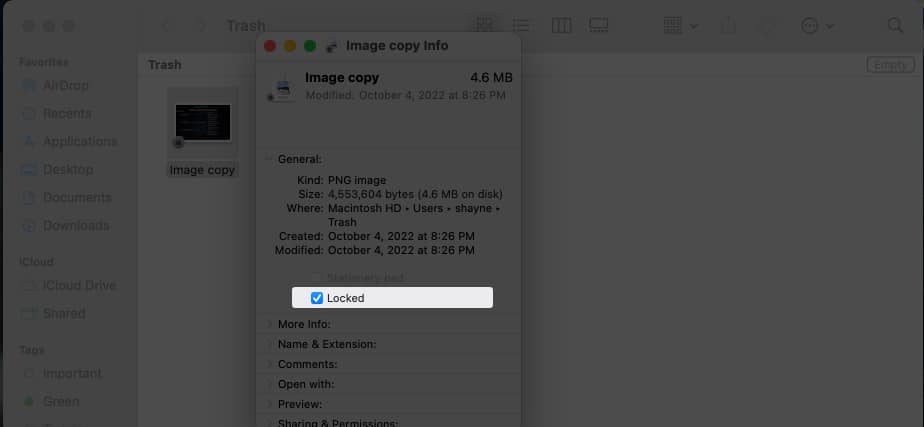
When the files are locked
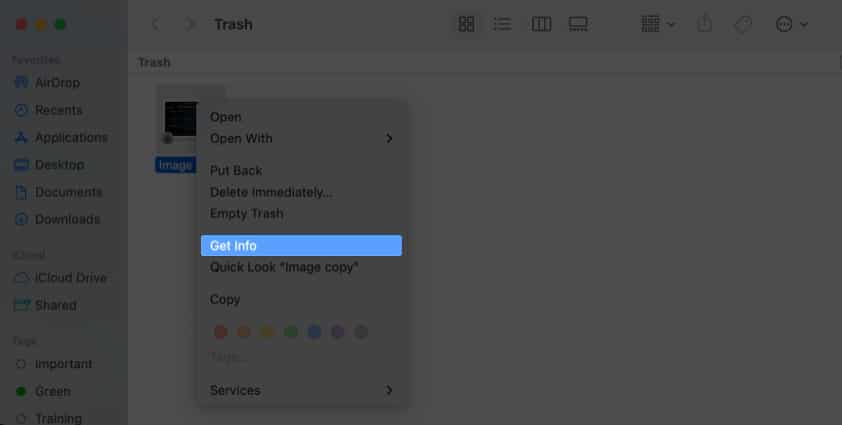
Sometimes, a file with a locked icon may prevent you from wiping your Trash clean. To fix this, head to Trash → control-click the file → choose Get Info → until the box beside Locked. You may now proceed to empty your bin.
When the file is in use
A prompt may appear telling you that a file in the Trash is still in use. It may be because an app or a background activity is actively using a file.
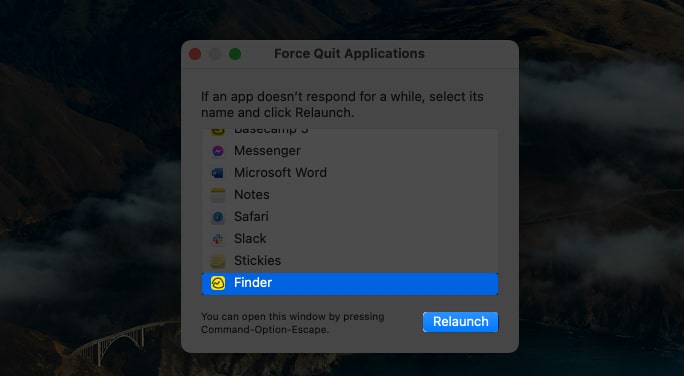
Check if any file is open in any apps on your desktop and close it first. If an app is frozen, head to the menu bar, select the app to open the drop-down menu → choose Force Quit.
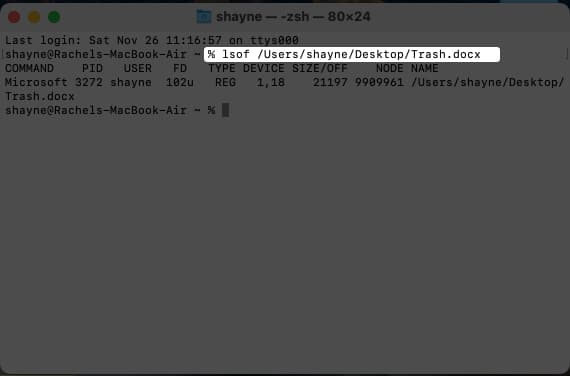
If this doesn’t work, here’s an alternative method. Be sure to position both the Trash and Terminal windows so you can see them simultaneously.
- Launch Trash.
- Press Cmd + Space to open Spotlight → type Terminal and hit Return.
- Type lsof and press Space, but do not press Return yet. Now drag the file that you want to delete from Trash. Press Return. This will list down all the files that are open and currently in use.
- Close or force quit the app.
Another method is to press Option + Cmd + Esc to open the Force Quit window. Check for any activity that may be preventing you from emptying your Trash. Select it → press Force Quit.
Is this your first time using Spotlight? Read our article on how to make the most of Spotlight.
Empty Trash with “File without Permissions”
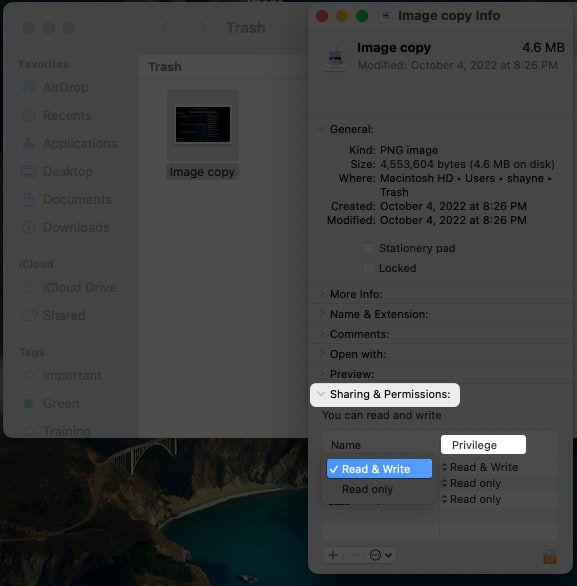
Mac won’t let you delete read-only files or those you aren’t allowed to access. This may happen if you’re not the administrator of the Mac and do not have the full Read & Write privileges of the files found in the Trash.
Don’t worry. You simply have to change the file’s Sharing & Permission settings to modify its privileges. To do this:
- Control-click the file in the Trash → Get Info.
- Click the arrow (>) beside Sharing & Permissions tab to see your permissions to the file you’re trying to erase.
- Change your Privilege to Read & Write.
When your disk needs a repair
A hard disk issue can also hinder you from emptying your Trash. You can open Disk Utility and use First Aid to check if it’s causing you problems. To do this:
- Press Cmd + Space to launch Spotlight → type Disk Utility and press Return.
- Select the hard disk containing the file you want to delete.
- Click the First Aid icon at the top of the window → choose Run in the prompt.
First Aid will notify you of any errors, but it can’t fix them. You’d need to place your Mac in Recovery Mode to be able to fix disk issues. We’ll discuss this in the next section.
When the disk is full
A hard disk issue may also prevent you from emptying your Trash. In this case, it is recommended that you place your Mac in Safe Mode before trying to empty Trash again.
Once in Safe Mode, empty your Trash again and see if the issue is resolved.
Prevents Trash because of System Integrity Protection
System Integrity Protection (SIP) is a security feature on Mac. It restricts specific folders, processes, and files from being modified. If SIP is enabled, you may be prevented from emptying your Trash.
If such is the case, you’ll need to disable SIP first before you can delete the file. To do this:
- Enter Recovery mode.
- Restart your Mac and press Command + R before the Apple logo appears on the screen.
- Once in Recovery mode, launch the Terminal. Go to Utilities → select Terminal.
- Enter csrutil status and hit Return. Doing this will let you see whether or not the SIP feature is enabled.
- If it says “enabled,” enter csrutil disable into the Terminal→ select Return.
- Quit Terminal and restart your Mac.
- Now, try to empty the Trash and see if your issue is resolved.
How to force empty Trash on Mac
There are several other ways to force empty Trash without opening the app. You may go to Finder on the menu bar and select Empty Trash → choose Empty Trash in the prompt that appears.
You may also do it from the Dock. Control-clock the Trash icon → select Empty Trash.
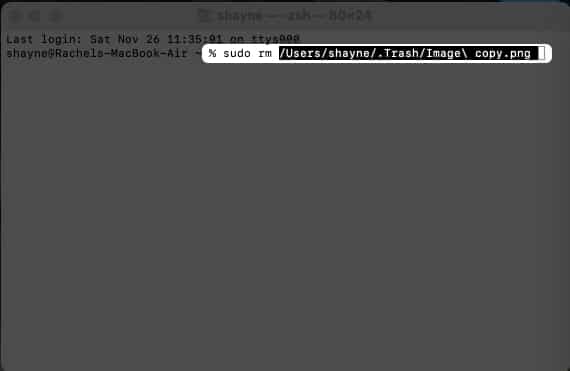
Another option is to use Terminal. This option lets you go around the errors that prevent you from deleting files in Trash, including locks and files still in use. Here’s what you need to do:
- Open Terminal → type sudo rm and press Space. Don’t press Return yet. This command lets you force-delete the file.
- Head back to Trash and drag the file you want to remove → press Return.
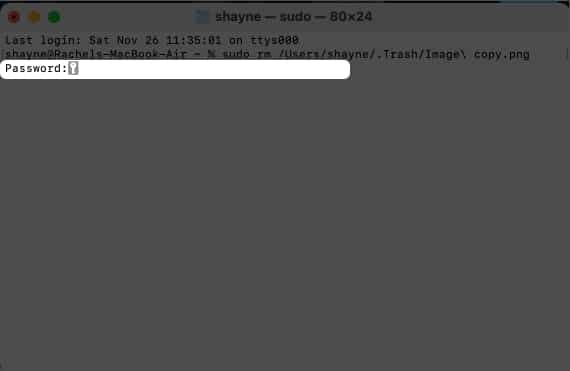
- Enter the Mac administrator’s password. Terminal’s security feature won’t let you see any characters as you type your password.
This command will immediately remove the pesky file.
Terminal isn’t just great for force-deleting files. Here are other useful Terminal commands to quickly perform essential tasks with just a few clicks.
Emptying Trash usually takes only a couple of seconds, except when there is a large volume of files to be deleted. If it takes a very long time to empty your Trash, an open, locked, or corrupted file may prevent you from permanently deleting its contents.
Select a file and press Cmd + Delete. Alternatively, select a file, go to File on the menu bar, and press hold. This will change Move to Trash into Delete Immediately.
Yes. Emptying your Trash permanently deletes your files from the hard disk. Immediately undoing the action may reverse the process. If it doesn’t work, the only way to retrieve that files is to use a recovery tool. However, it’s not 100% guaranteed that you can recover your files.
Wrapping up…
Many reasons can prevent you from emptying your Trash. Many of these issues are solvable with a few simple steps, while others may require advanced troubleshooting.
Using the tips mentioned in this article, you should be able to safely and securely empty your Trash. Just be sure to back up important files before deleting them from your Mac. Good luck!
Read more:
- How to Restore Missing Downloads Folder to Mac’s Dock
- Best Mac data recovery software
- How to add or delete users on Mac
- How to clear System Data on Mac


