There you are, about to make an important call when your iPhone suddenly flashes the dreaded “Call Failed” message. Your heart sinks, and frustration kicks in. What went wrong?
Don’t worry—you’ve landed in the right place! Below, I’ve listed quick and easy ways to fix the “Call Failed” error on iPhone, so you can get back to your conversation without a hitch.
Why does my iPhone keep saying “Call Failed”?
When your iPhone keeps showing a “Call Failed” message, it usually means the device couldn’t maintain a connection with the cellular network. This could be due to a wide range of issues—from a weak signal to software bugs or SIM card problems.
Common reasons why your iPhone says “Call Failed”:
- Poor cellular reception: If you’re in an area with low or no signal, your call might not go through.
- Network congestion: High traffic on your carrier’s network can lead to temporary connection drops.
- SIM card issues: A damaged or improperly inserted SIM card can block outgoing calls.
- Software glitches or outdated iOS: Bugs and outdated system software may affect call performance.
- Call settings misconfigured: Features like Airplane Mode, Do Not Disturb, or call blocking may interfere.
- Carrier-related problems: Service disruptions or unpaid bills can lead to call restrictions
How to fix “Call Failed” on iPhone: 14 Proven solutions
Before diving in, try calling the number again—it might have been a one-time issue. If that doesn’t help, follow these steps:
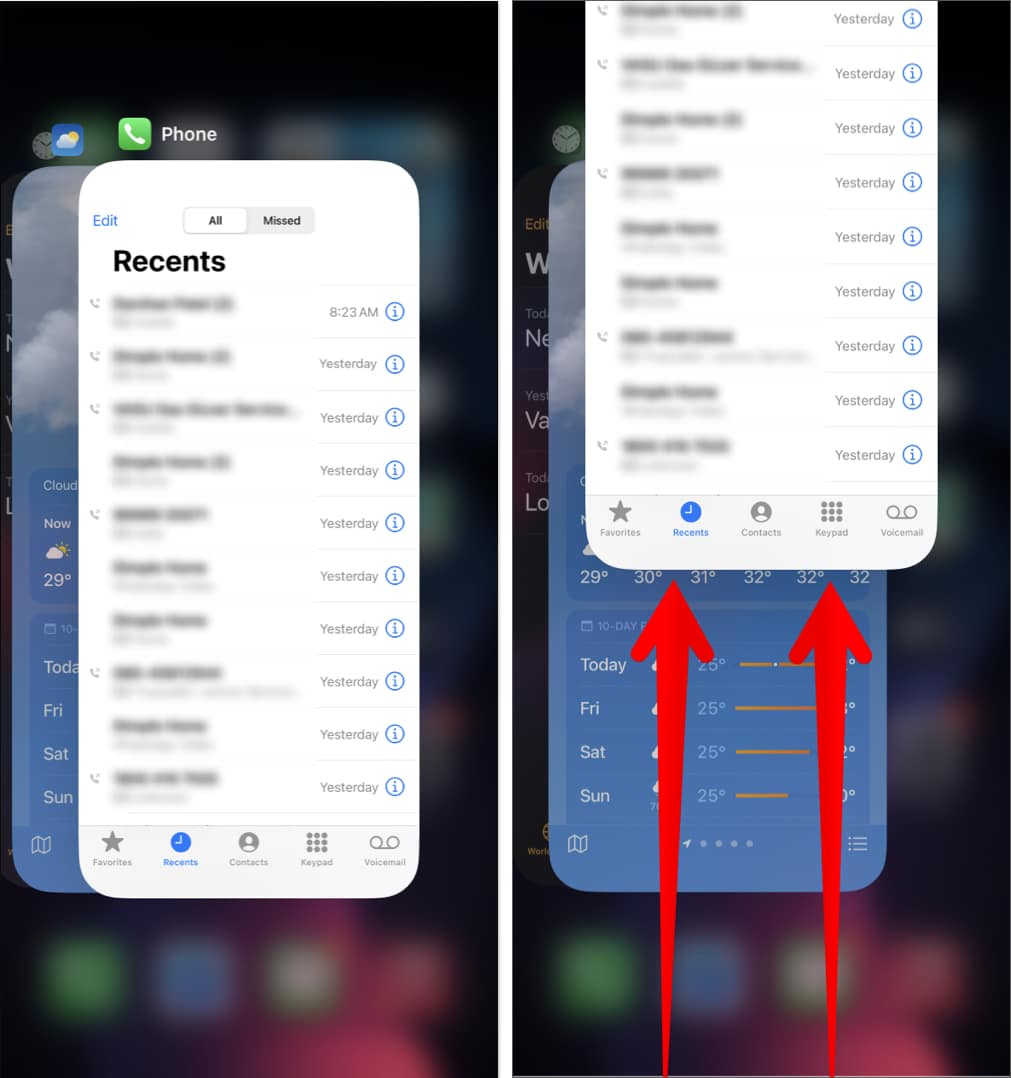
1. Force close the Phone app
Start by force closing the Phone app. This simple trick can eliminate app-related glitches:
- Swipe up from the bottom of the screen to open the App Switcher.
- Swipe up on the Phone app to close it.

- Reopen the app and try making the call again.
2. Check your Cellular signal
If you’re in a low-signal area, try moving to a different spot. To refresh your network connection:
- Open Control Center (swipe down from the top-right).
- Toggle Airplane Mode ON → wait a few seconds → turn it OFF again.
3. Force restart your iPhone
Rebooting your iPhone can fix temporary software bugs:
Follow our step-by-step guide to hard reboot your iPhone
4. Turn off Wi-Fi calling
Wi-Fi calling can sometimes conflict with mobile calls:
- Go to Settings → Cellular → Wi-Fi Calling.
- Toggle off Wi-Fi Calling on This iPhone.
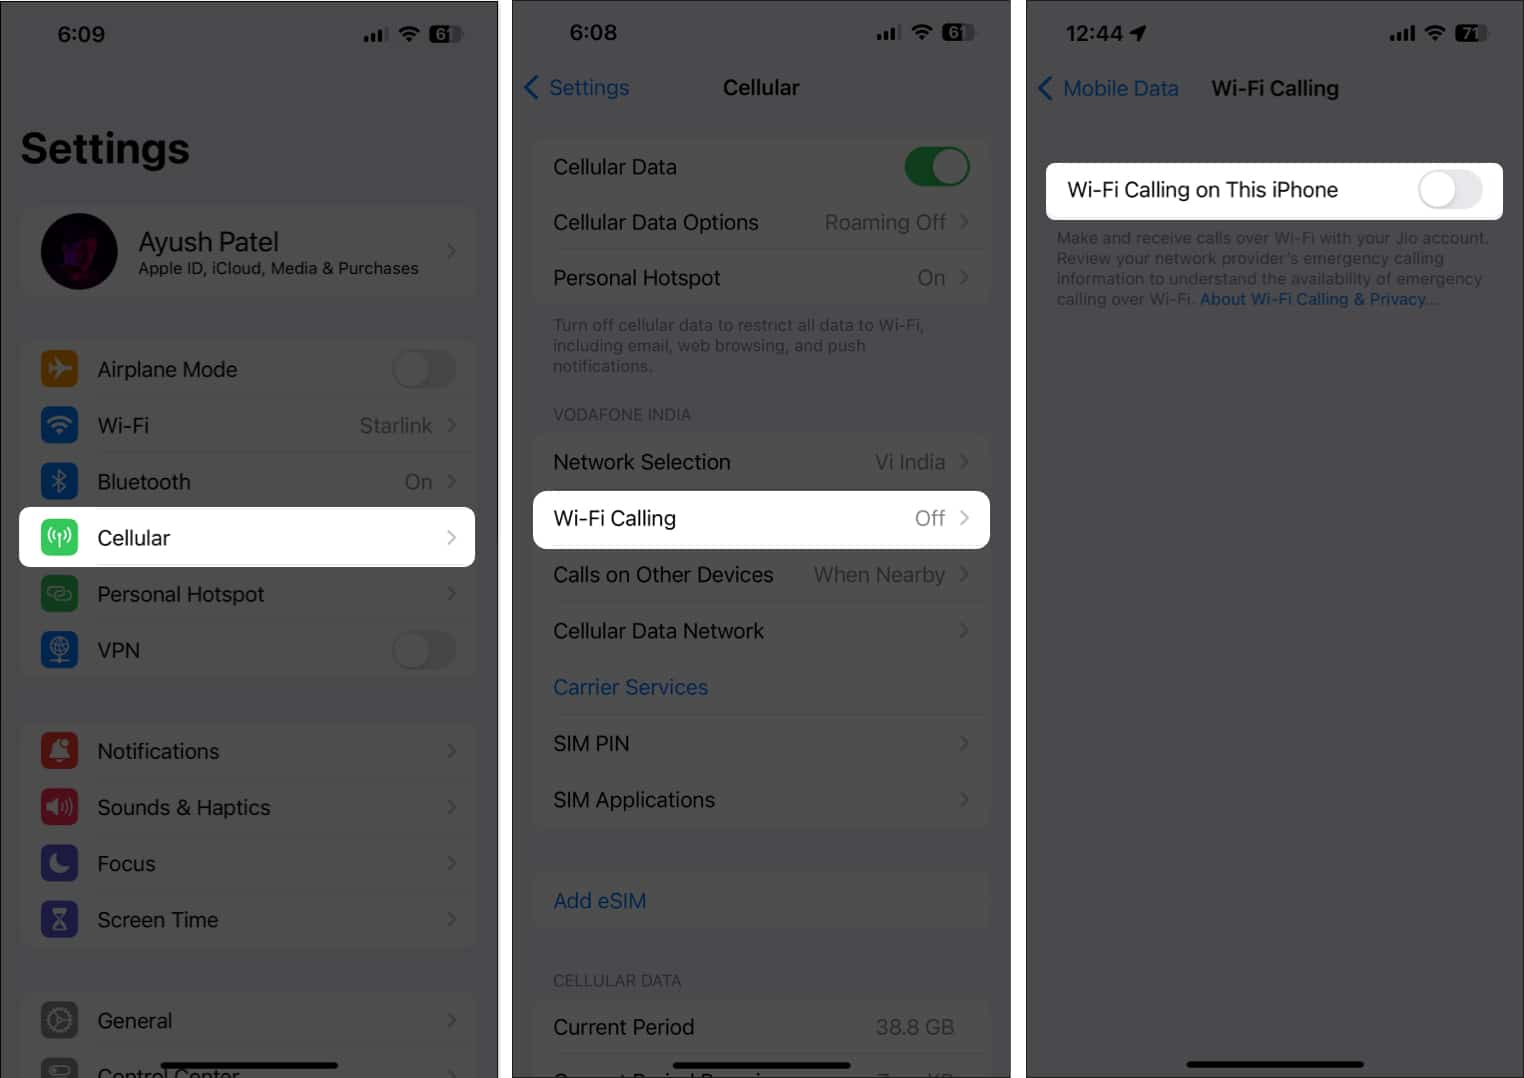
You can also find it under Settings → Phone → Wi-Fi Calling.
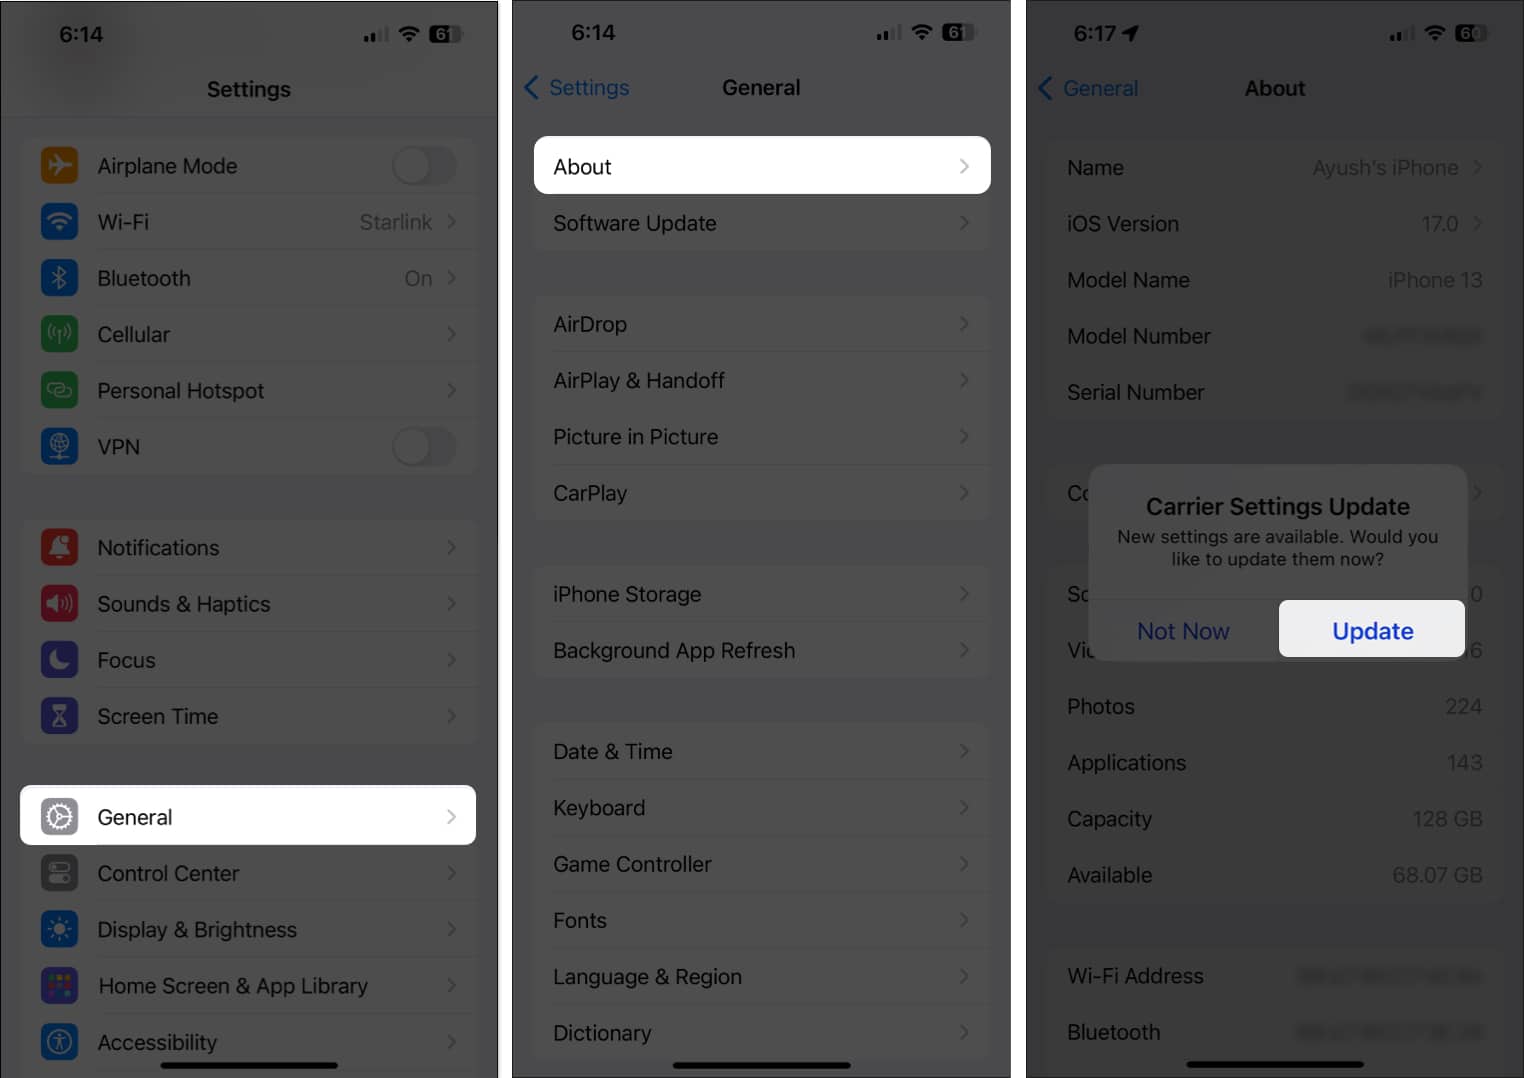
5. Check for carrier settings updates
Installing the latest carrier update can improve call connectivity:
- Go to Settings → General → About.
- Wait a few seconds. If an update is available, you’ll see a prompt to install it.
6. Enable automatic network selection
Let your iPhone automatically choose the best available network:
- Go to Settings → Cellular → Network Selection.
- Toggle on Automatic.
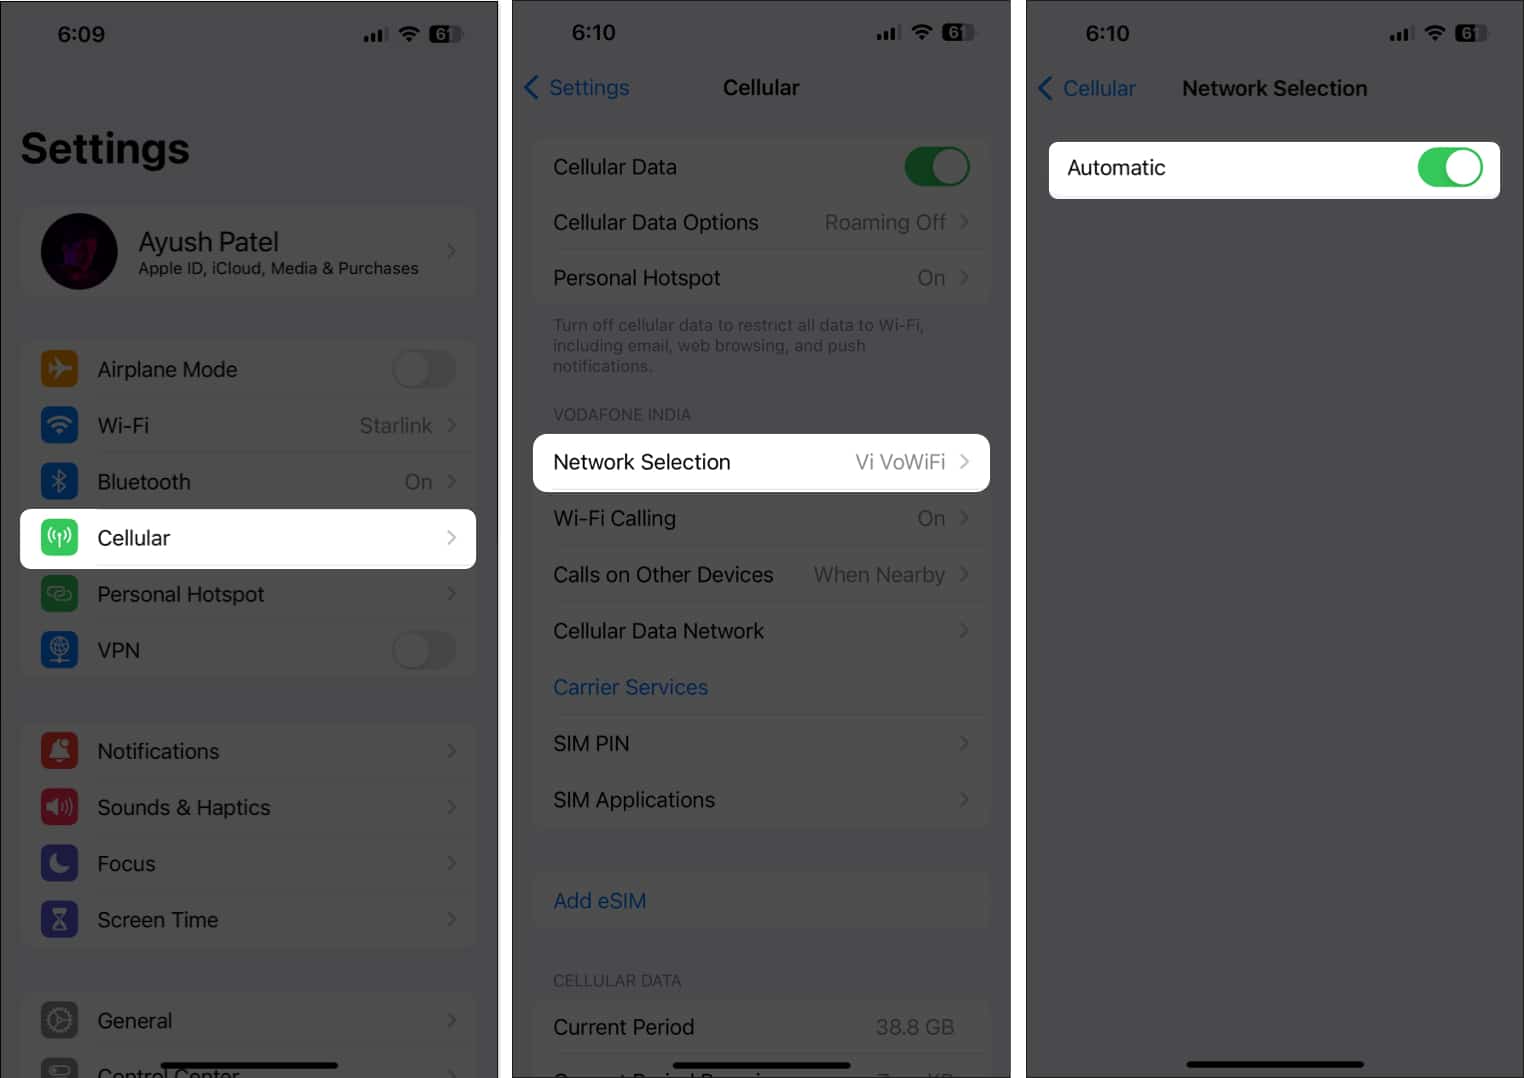
Already enabled? Try disabling it briefly and choosing a network manually, then switch it back to automatic.
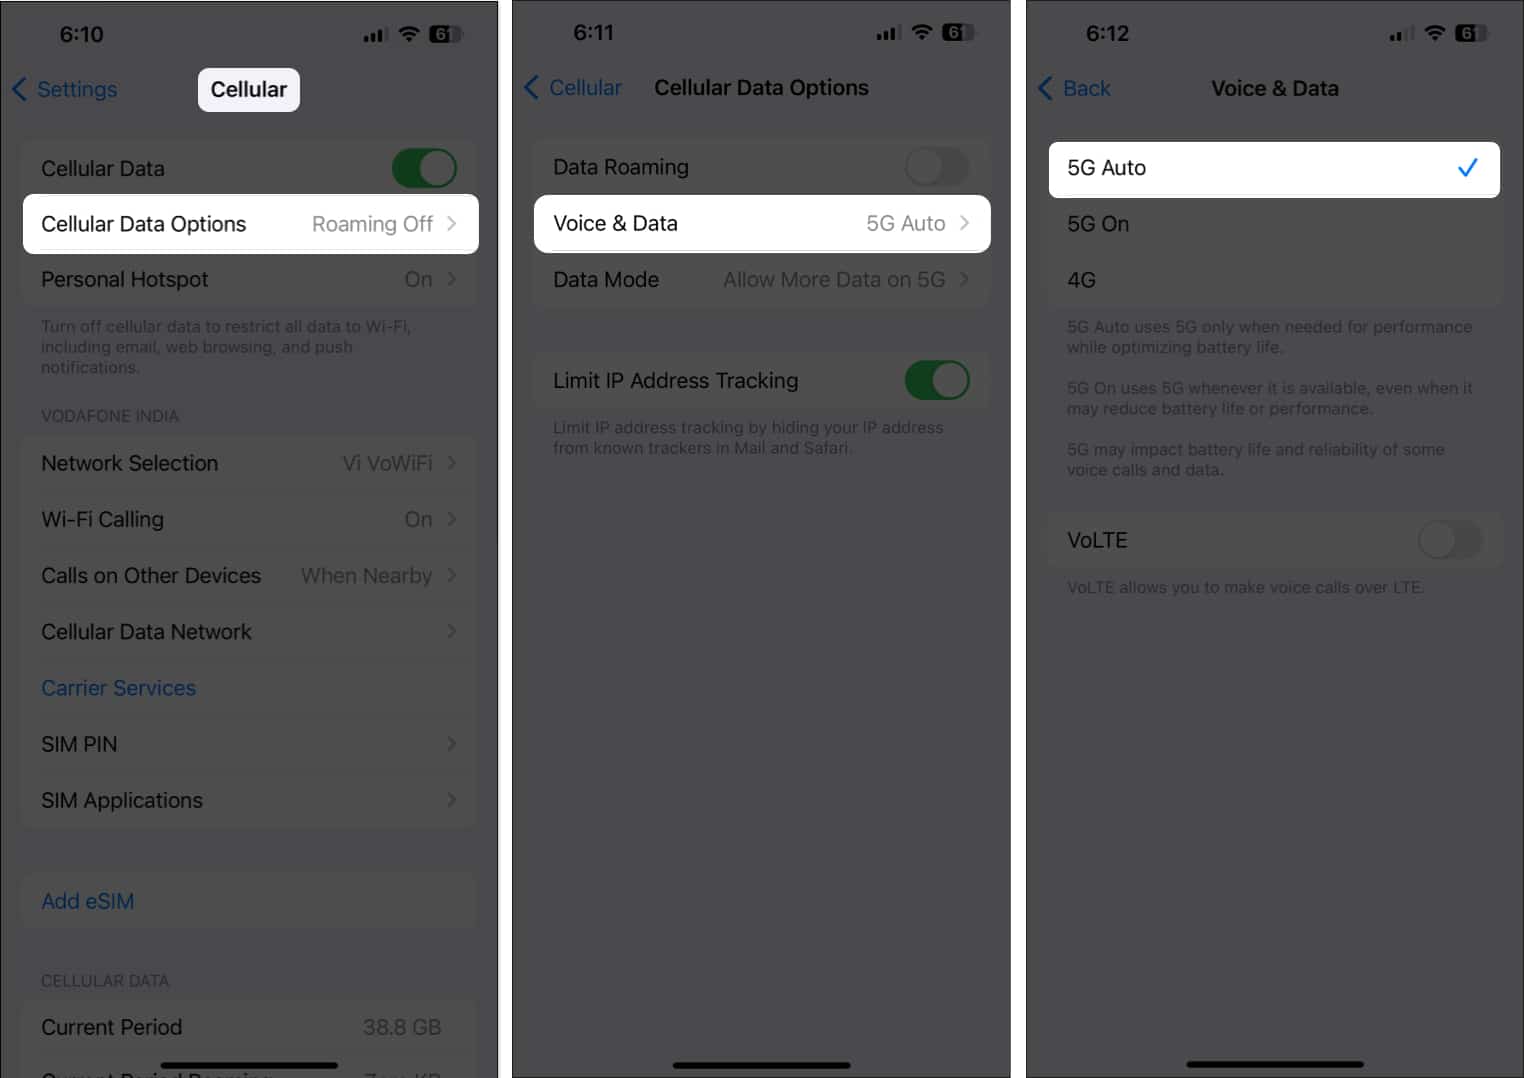
7. Select the correct network mode
Using the wrong network type can cause call drops:
- Go to Settings → Cellular → Cellular Data Options → Voice & Data.
- Choose 5G, 4G, or LTE, depending on what your carrier supports.
- Disable VoLTE if you’re using older network types.
8. Dial *#31# to reset call settings
You may have accidentally hidden your caller ID. To reset:
- Open the Phone app → tap the Keypad.
- Dial *#31# and hit the Call button.
- A confirmation message will appear—tap Dismiss.
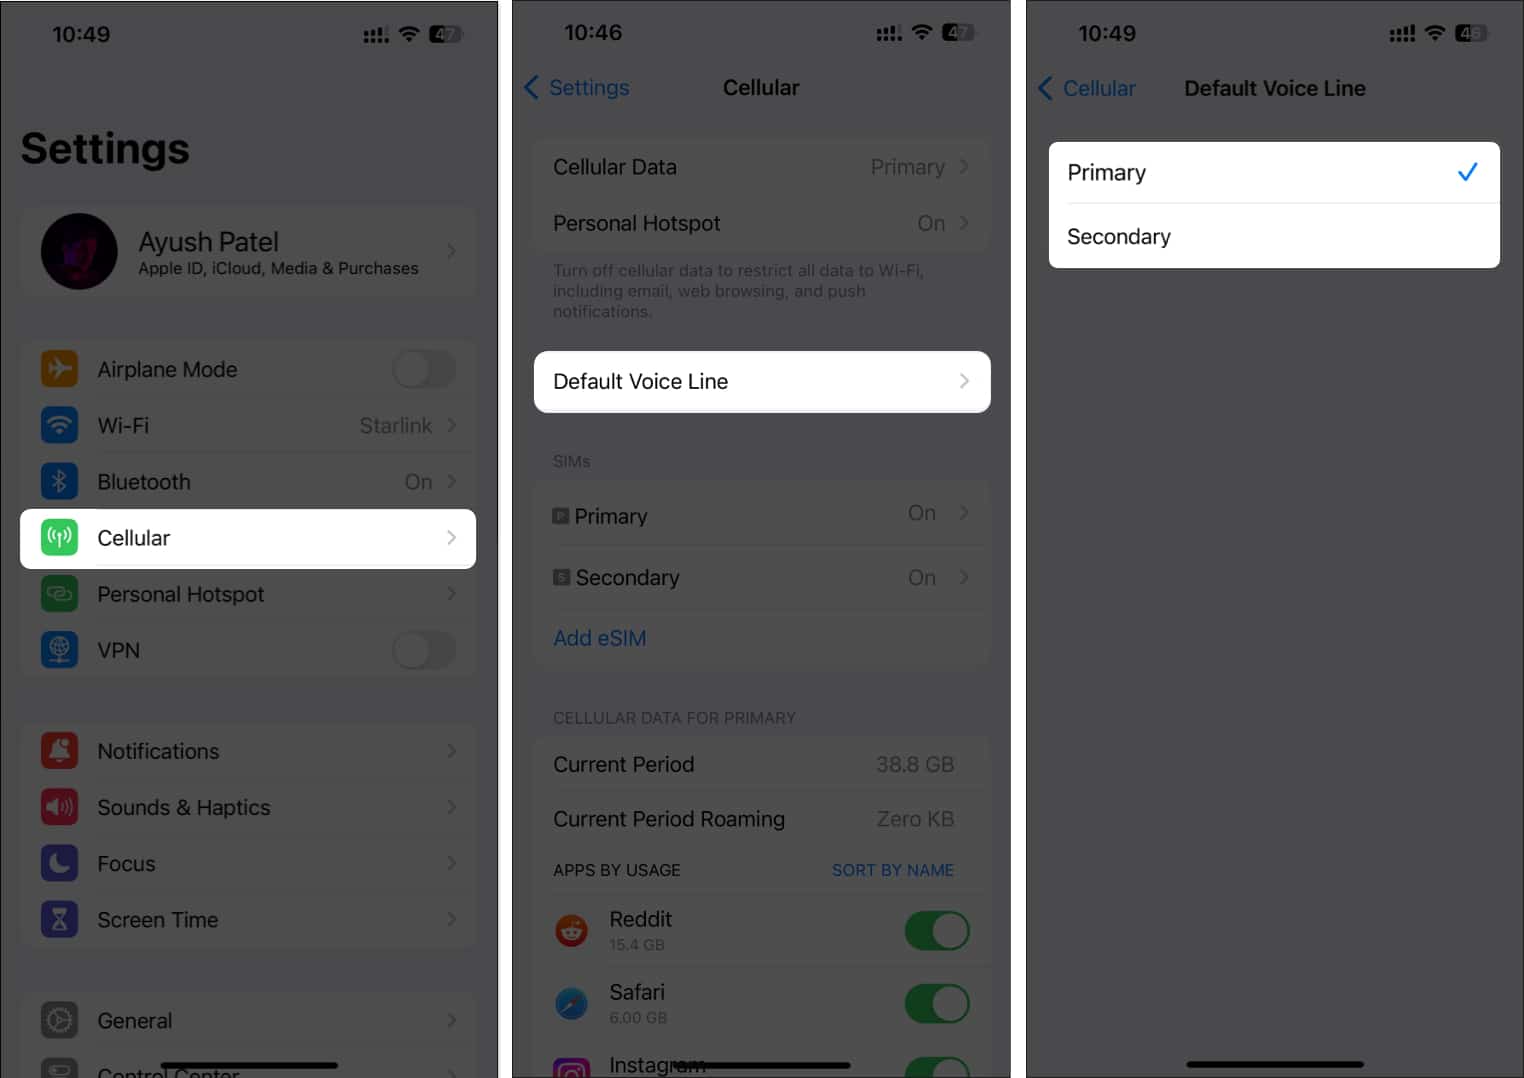
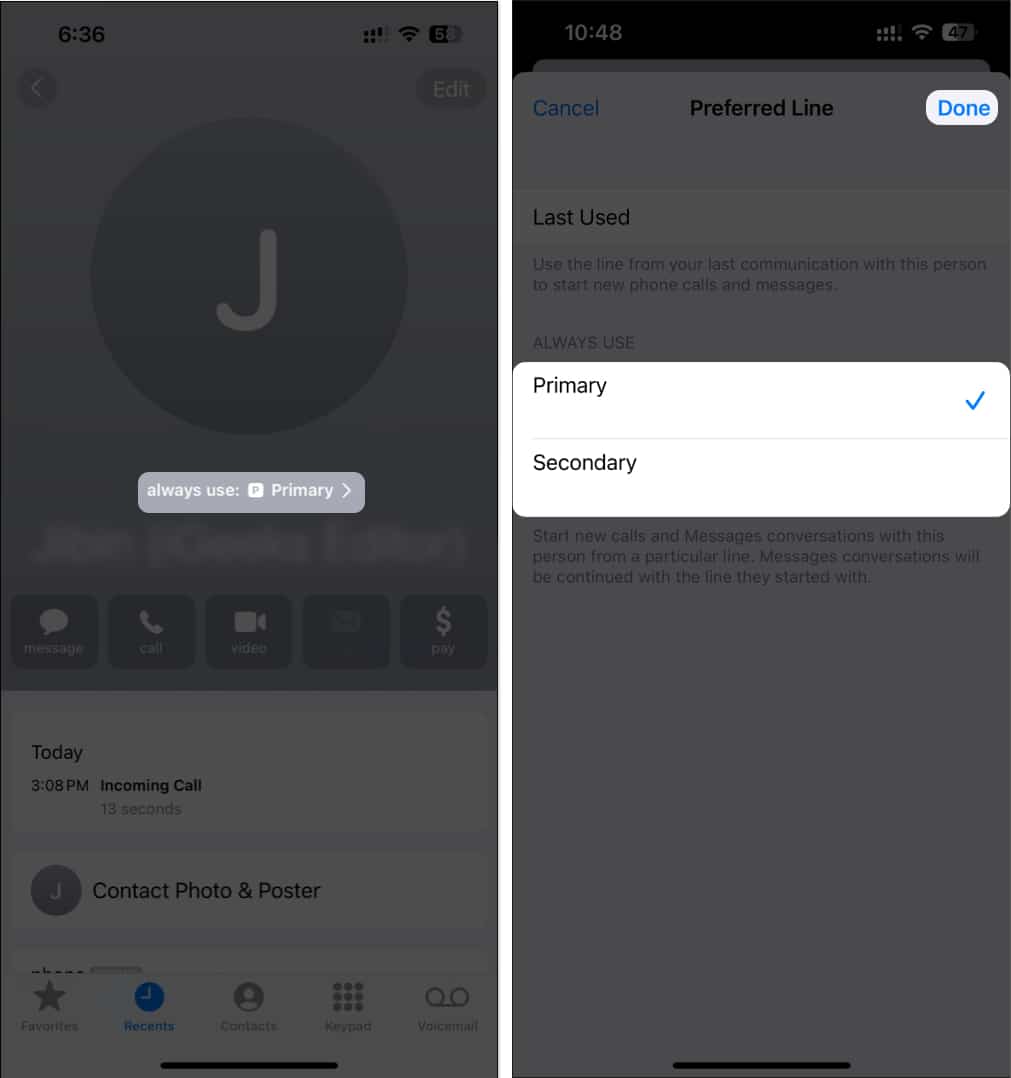
9. Check your SIM settings
Using dual SIM? Make sure you’ve selected the correct one for calls:
- Go to Settings → Cellular → Default Voice Line.
- Choose the appropriate SIM for making calls.
To set a default SIM for specific contacts:
- Open a contact in the Phone app.
- Tap always use → select your SIM → tap Done.
10. Remove and reinsert the SIM
If you haven’t taken out your SIM in a while, try this:
- Use the ejector tool to remove the SIM.
- Wipe it gently with a soft cloth.
- Reinsert the SIM card securely.
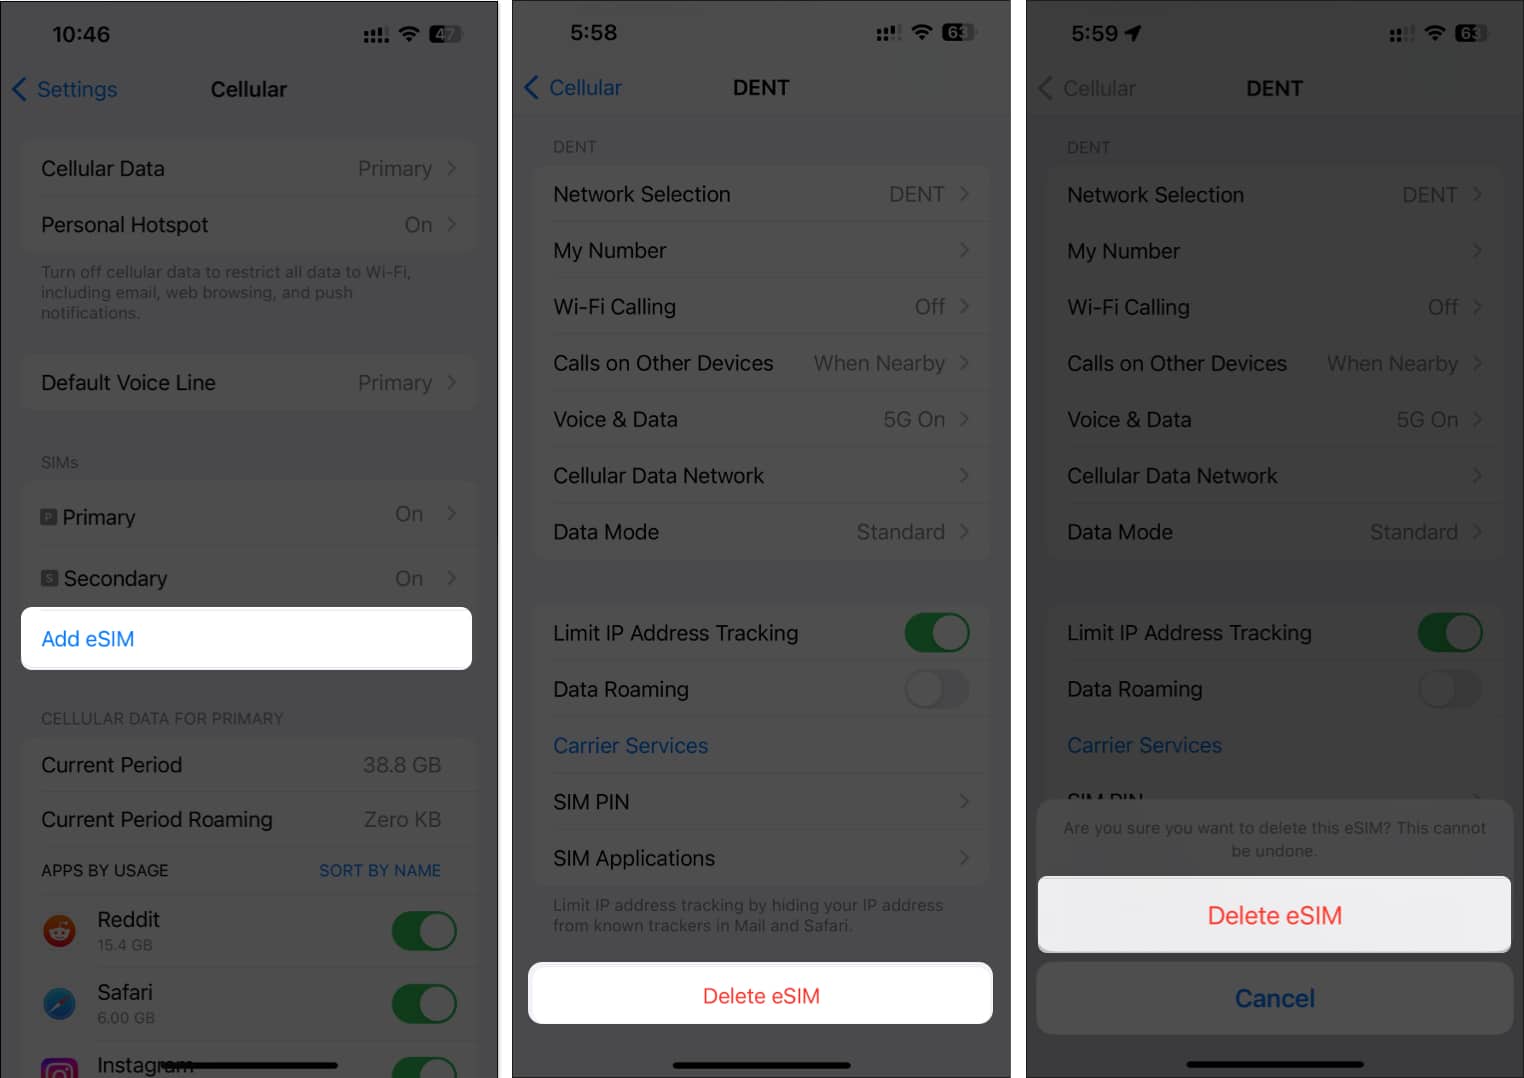
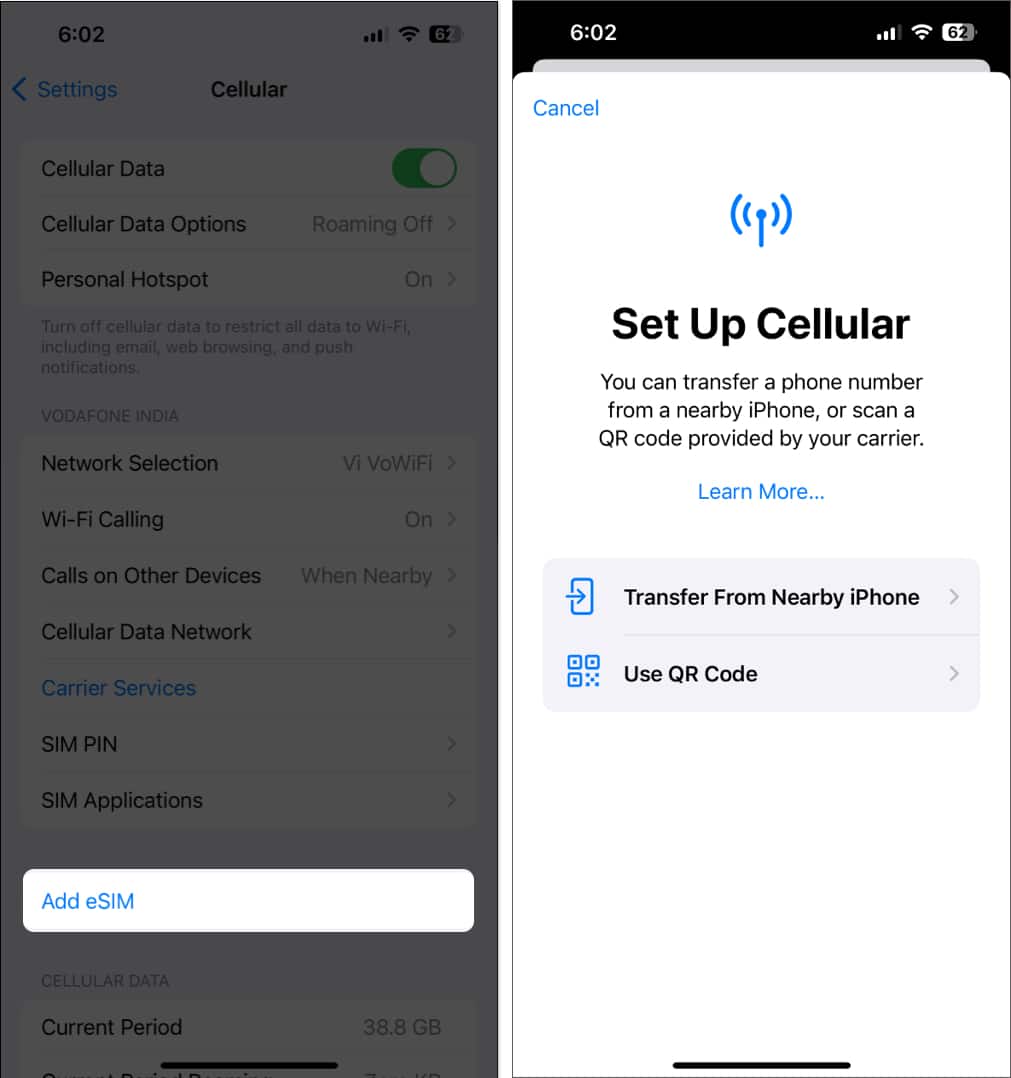
For eSIM users:
- Go to Settings → Cellular.
- Tap the eSIM → select Delete eSIM.
- Then, tap Add eSIM to set it up again.
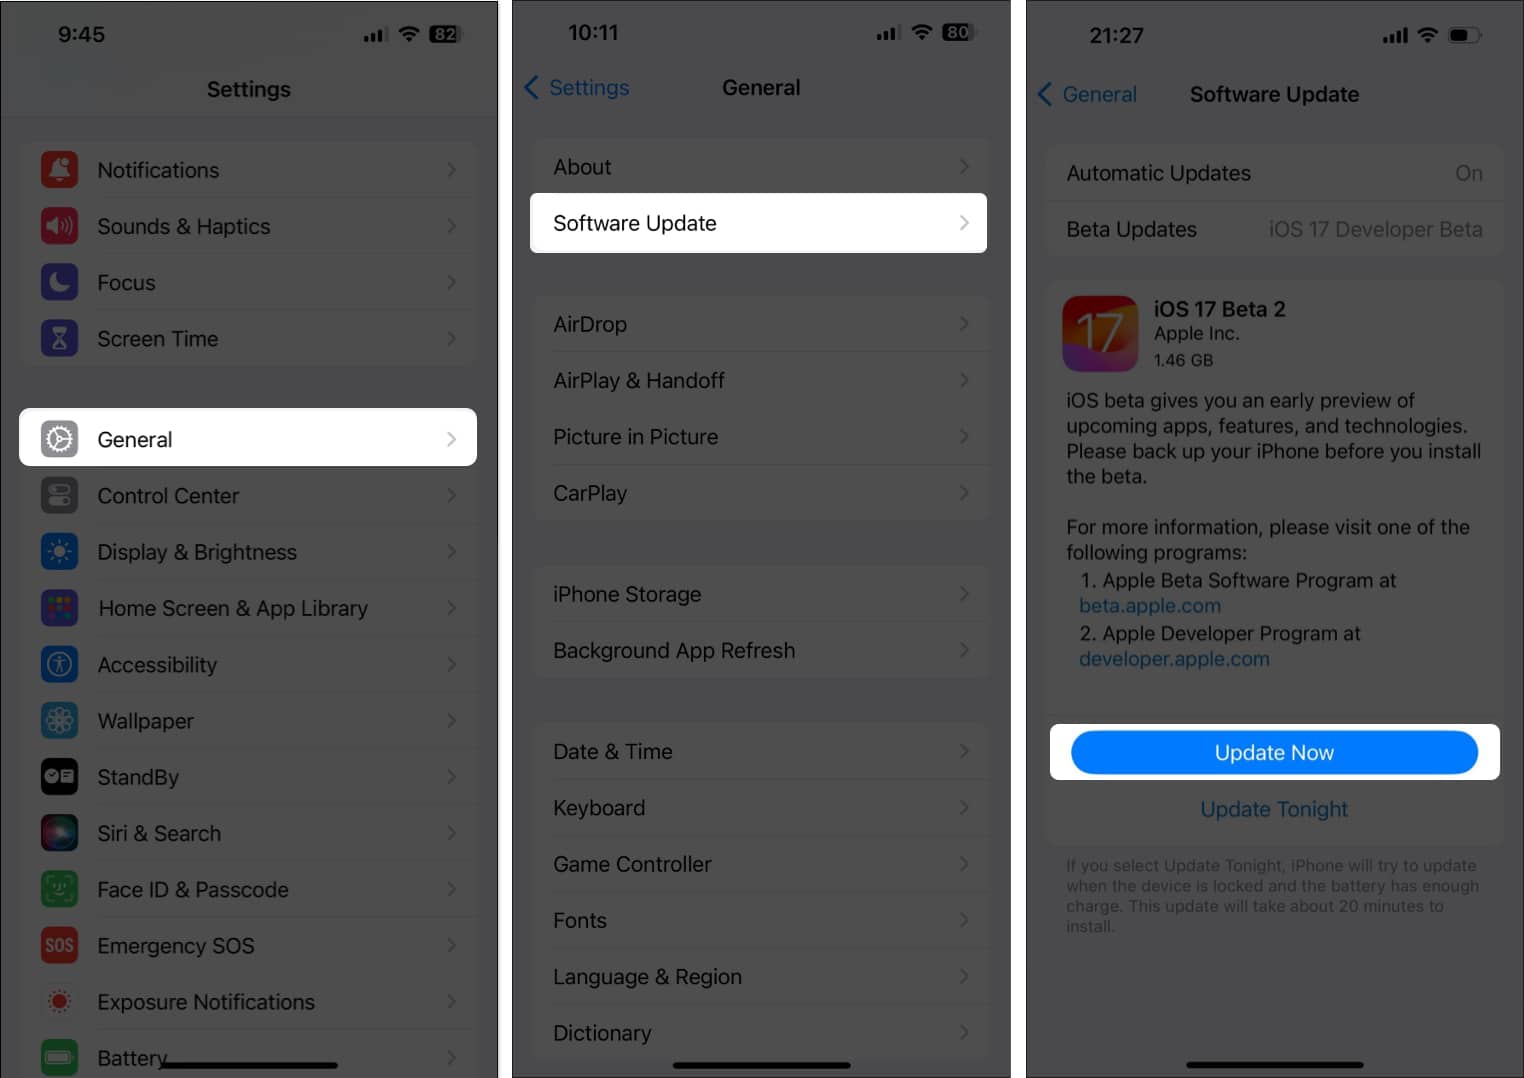
11. Update your iPhone
Keeping your iOS version up to date can resolve many bugs:
- Go to Settings → General → Software Update.
- Tap Download and Install if an update is available.

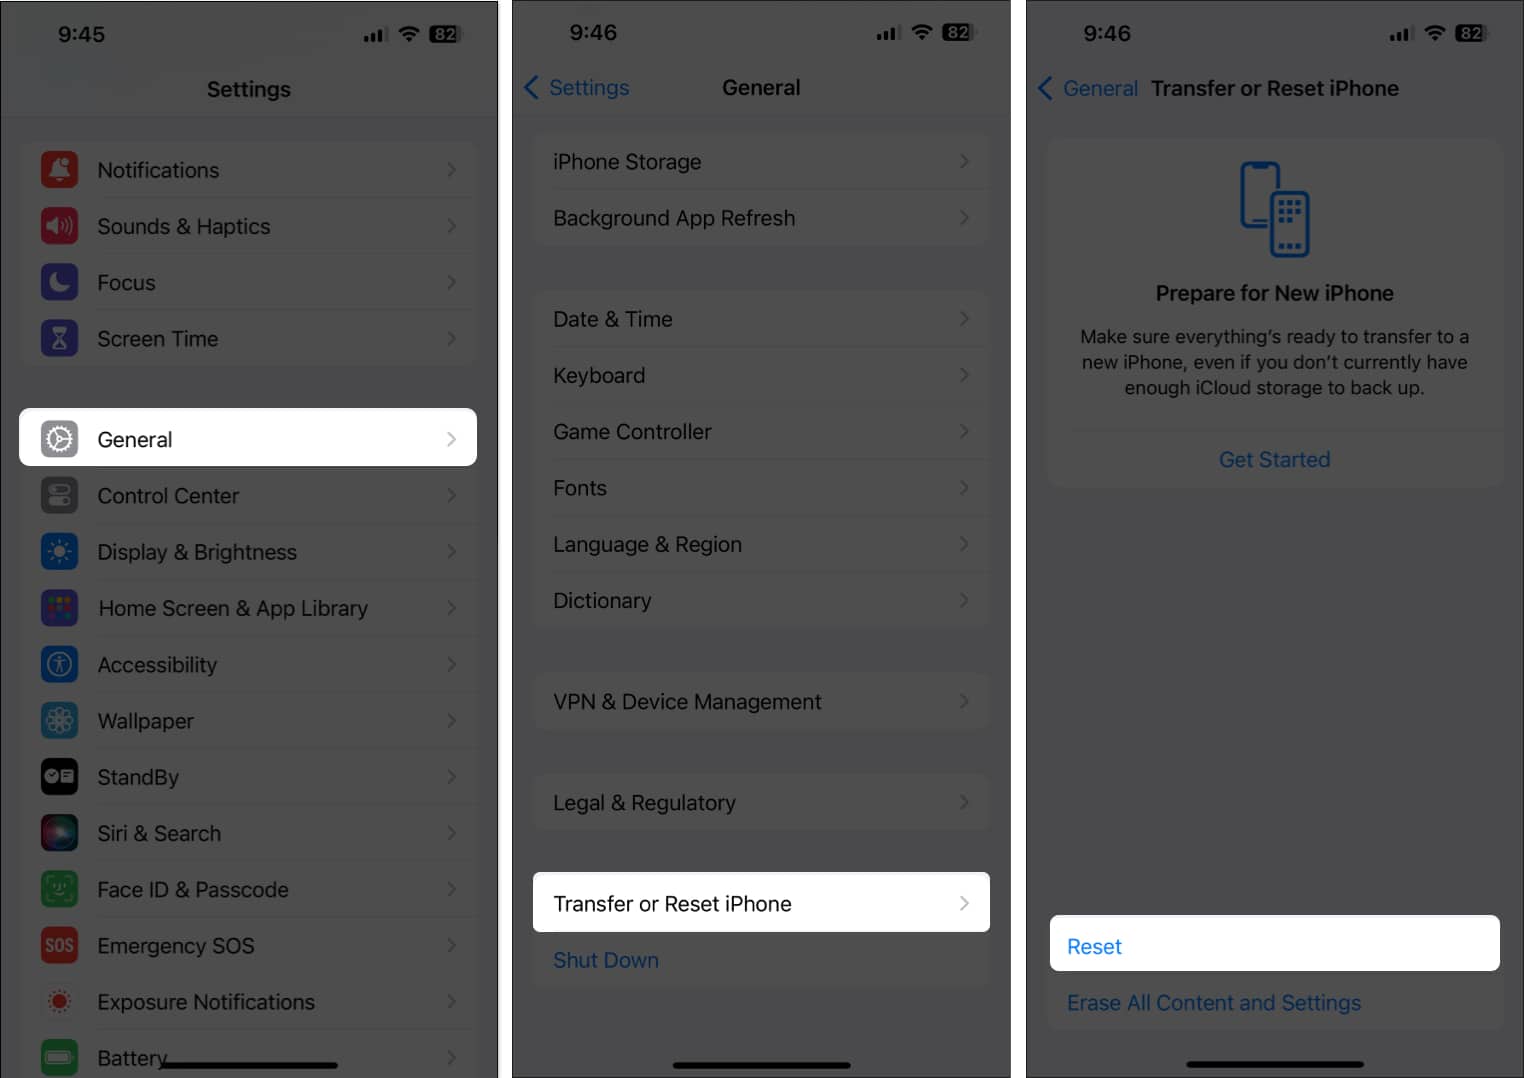
12. Reset Network Settings
This will reset all network-related configurations:
- Go to Settings → General → Transfer or Reset iPhone.
- Tap Reset → Reset Network Settings.
- Enter your passcode → Confirm reset.
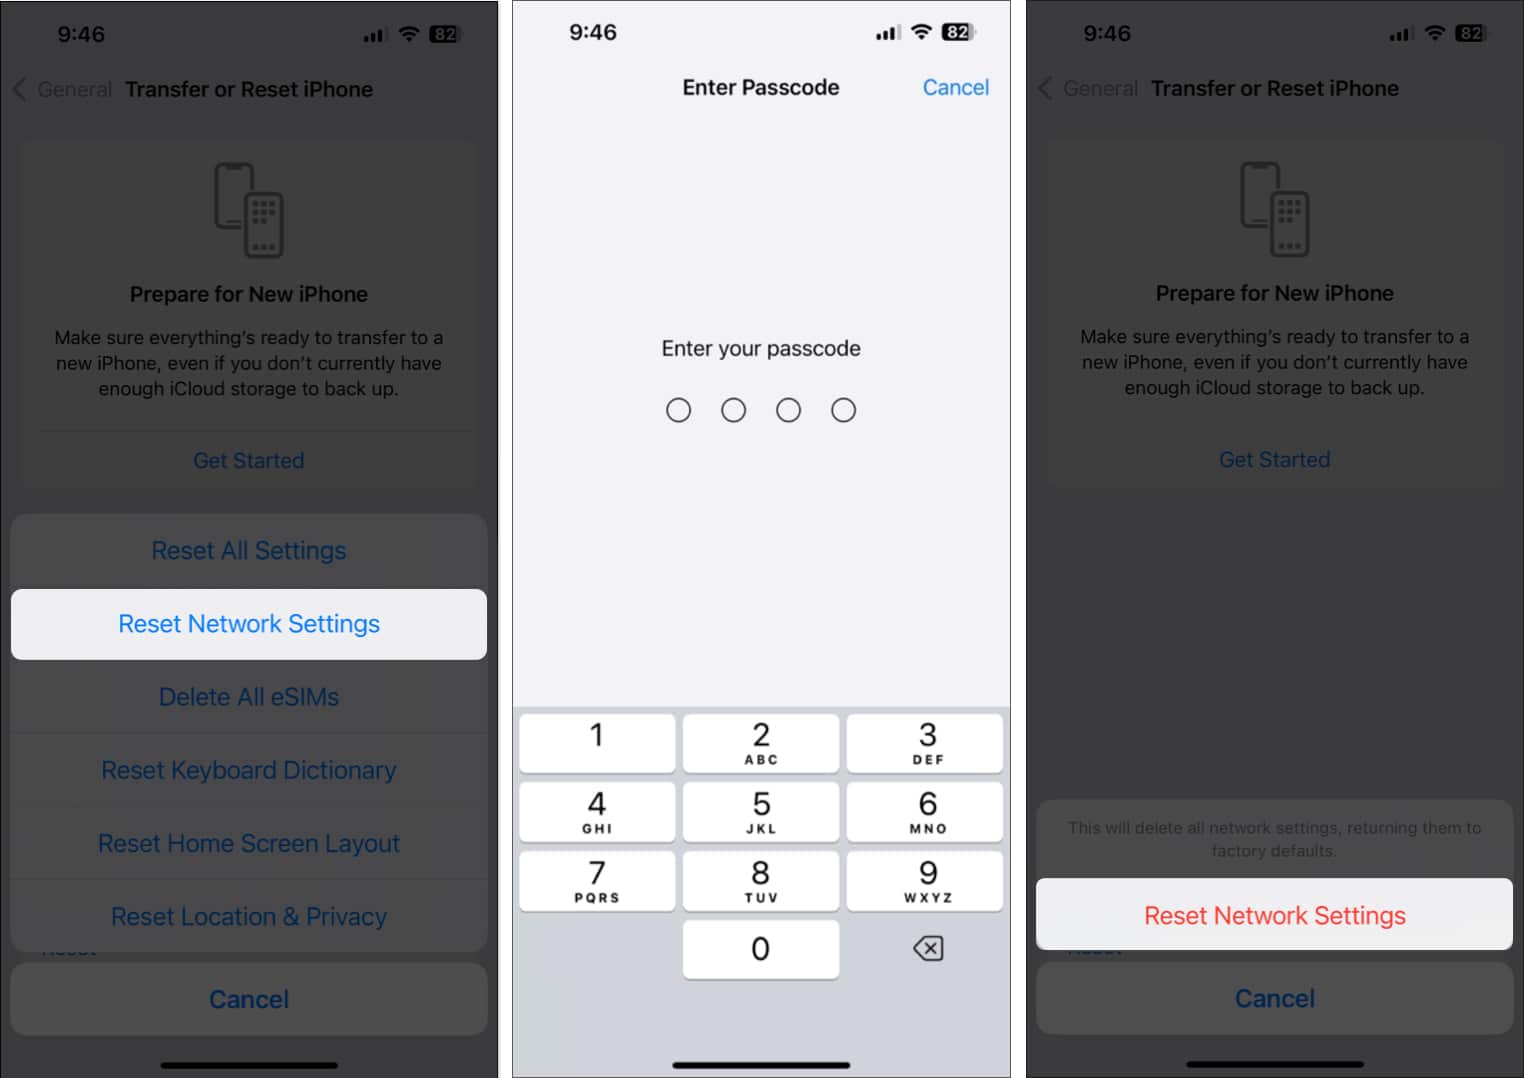
Note: This will erase Wi-Fi passwords, Bluetooth pairings, and VPN settings.
13. Check if you’re been blocked
A call that fails instantly could mean the other person blocked your number. Try calling a different contact, or read our guide on how to tell if someone blocked you.
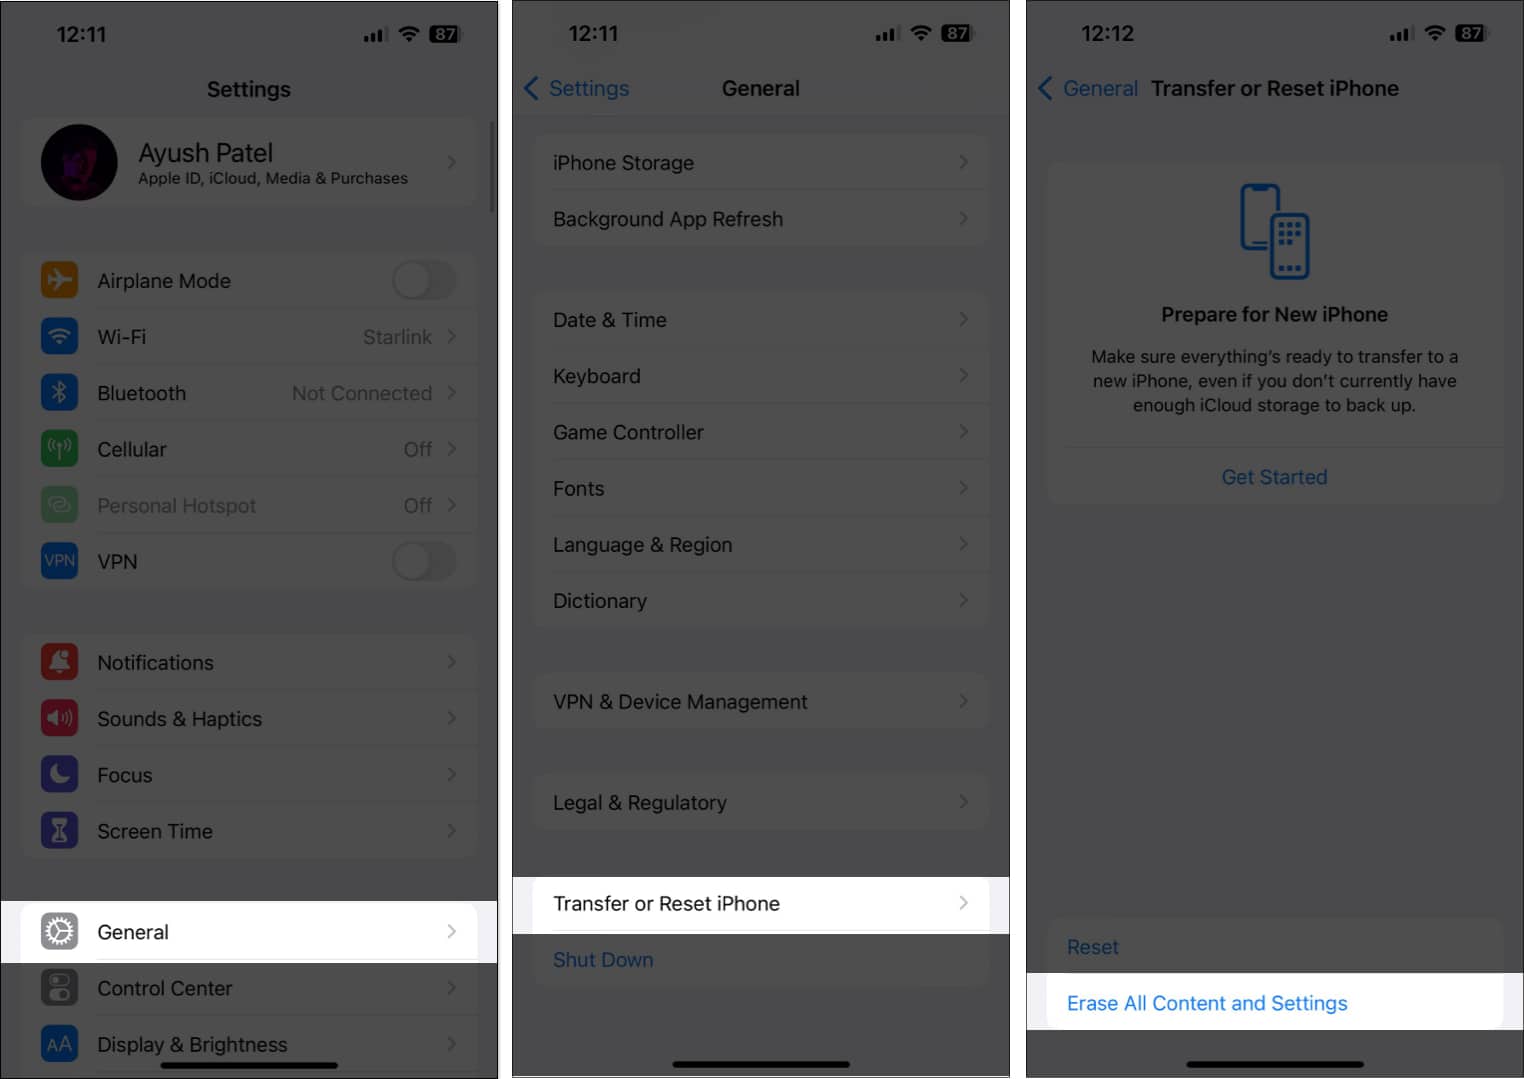
14. Factory reset as a last resort
Only do this if all else fails:
- Back up your iPhone using iCloud or Finder.
- Go to Settings → General → Transfer or Reset iPhone.
- Tap Erase All Content and Settings.
- Tap Erase All Content and Settings.
- Follow the on-screen steps to restore.

Video: 7 Ways to Fix Call Failed on iPhone
Still seeing “Call Failed”? Contact your carrier
If none of the above fixes helped, reach out to your mobile service provider. They can:
• Check for outages in your area.
• Replace a faulty SIM card.
• Ensure your plan is active and has no pending bills.
Still stuck? Contact Apple Support and book a Genius Bar appointment to check for hardware issues.
Wrapping up…
There’s nothing more frustrating than your iPhone refusing to make a call when you need it the most. Hopefully, one of these 14 fixes for the iPhone “Call Failed” error helped you out.
Which solution worked for you? Let us know in the comments!
FAQs
This could be due to network congestion, SIM card issues, software bugs, or incorrect settings like a blocked number or hidden caller ID.
Yes. A damaged or malfunctioning SIM can interfere with call connectivity.
Yes, updating to the latest iOS version can resolve known bugs and improve overall performance.
Explore More :

Regards for helping out, good info .
Thank you for this comprehensive guide! I’ve been dealing with the “Call Failed” error for weeks, and your solutions are easy to follow. I appreciate the detailed steps for resetting network settings—it worked like a charm!