AssistiveTouch is another excellent accessibility feature of iOS 16. It provides shortcuts to essential tasks like locking the screen, opening the app switcher, etc. Therefore, it’s a great aid if you have trouble navigating or pushing the buttons. But what to do if AssistiveTouch is not working on your iPhone? Don’t worry; the fixes in this article have got you covered!

- Turn AssistiveTouch off and on
- Reset AssistiveTouch
- Adjust AssistiveTouch opacity
- Restart your iPhone
- Reset all settings
- Update your iPhone
1. Turn AssistiveTouch off and on
AssistiveTouch is effectively refreshed when turned on and off. So, there is a high probability that the feature will appear and function better.
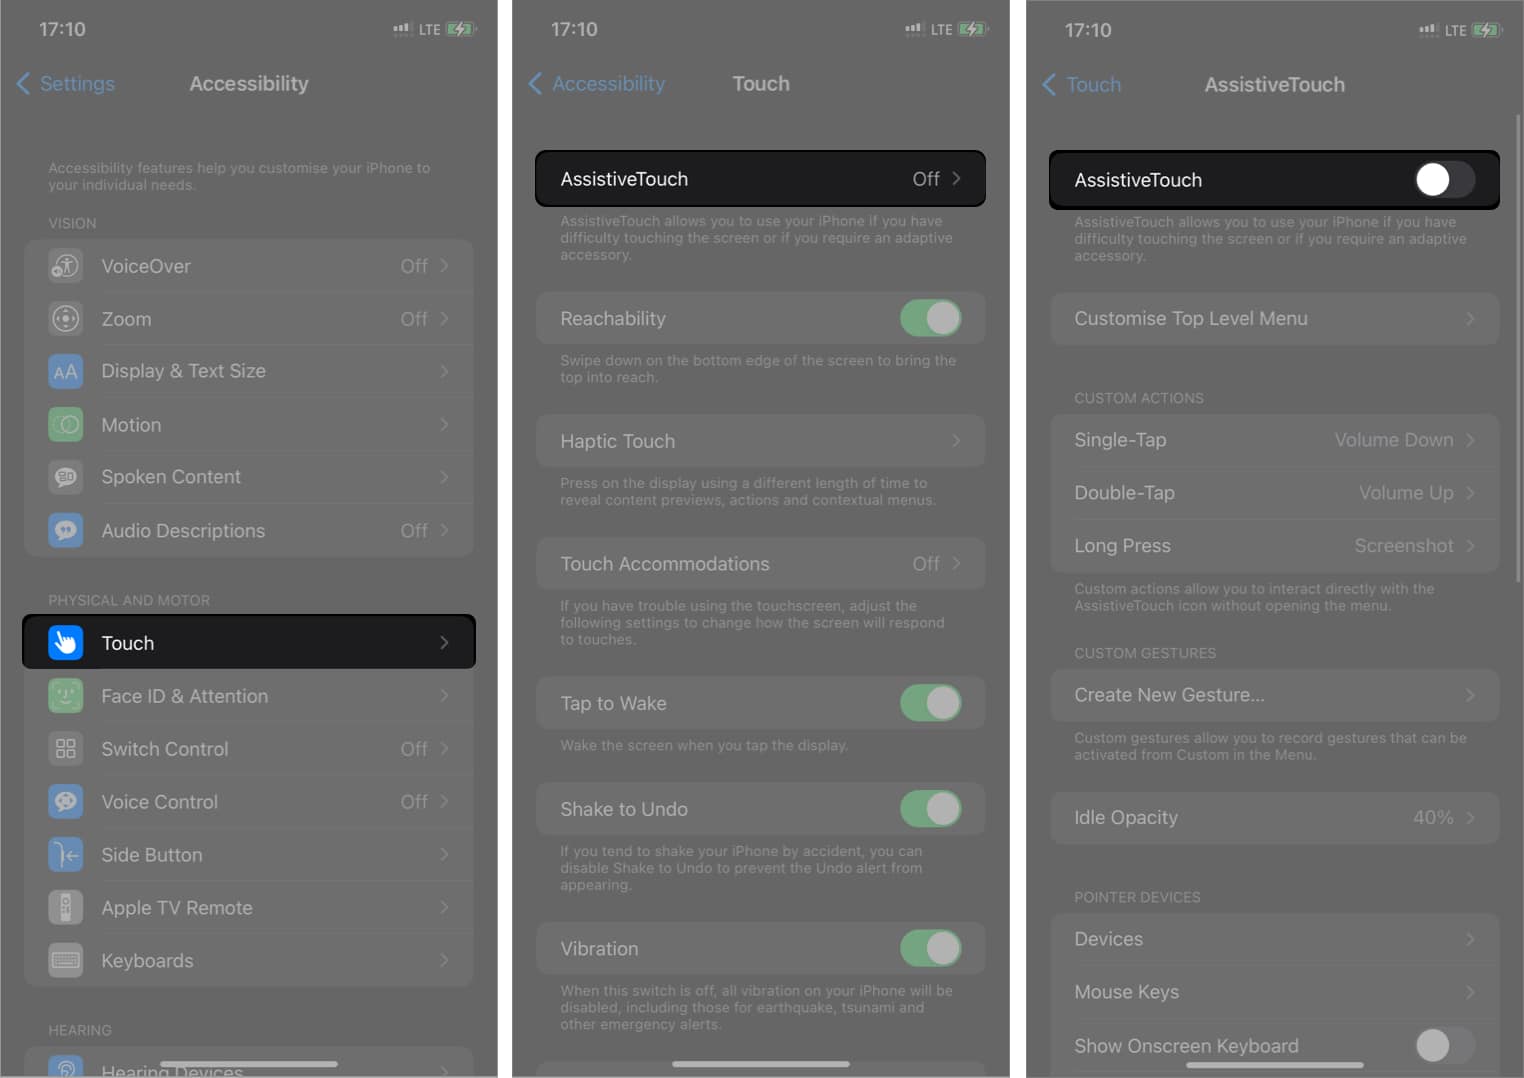
- Open Settings → Accessibility
- Select Touch → AssistiveTouch.
- Toggle off AssistiveTouch.
- Wait for a few seconds and turn it on again.
2. Reset AssistiveTouch
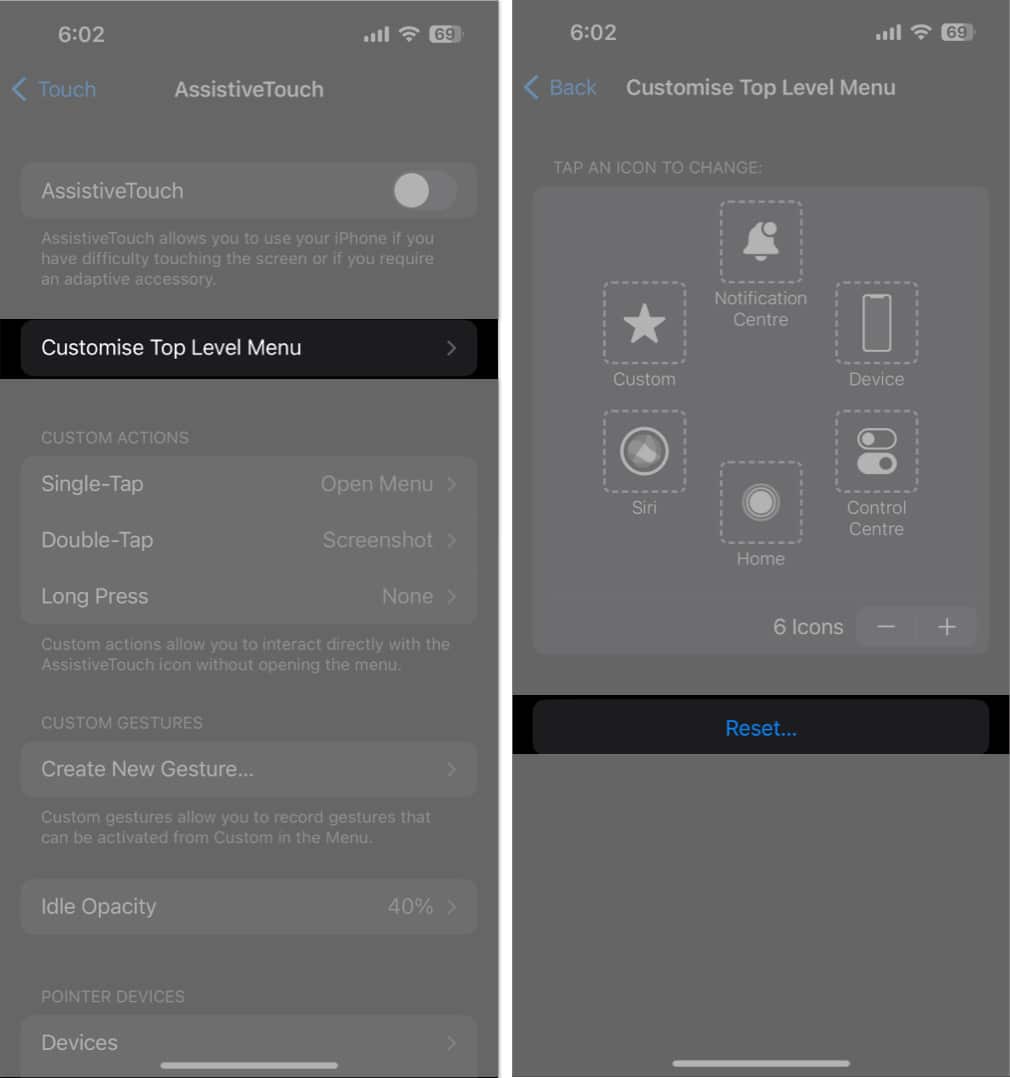
If AssistiveTouch is not moving after the updated switching, it’s conceivable that you changed this feature’s settings unintentionally. The AssistiveTouch menu will, by default, just activate Siri and do nothing else if all the features are disabled.
In this situation, you may reset the AssistiveTouch to make it functional again. It clears the button’s primary menu, resolving all issues.
- Go to Settings → Accessibility → Touch → AssistiveTouch.
- Select Customize Top Level Menu.
- Tap Reset.
3. Adjust AssistiveTouch opacity
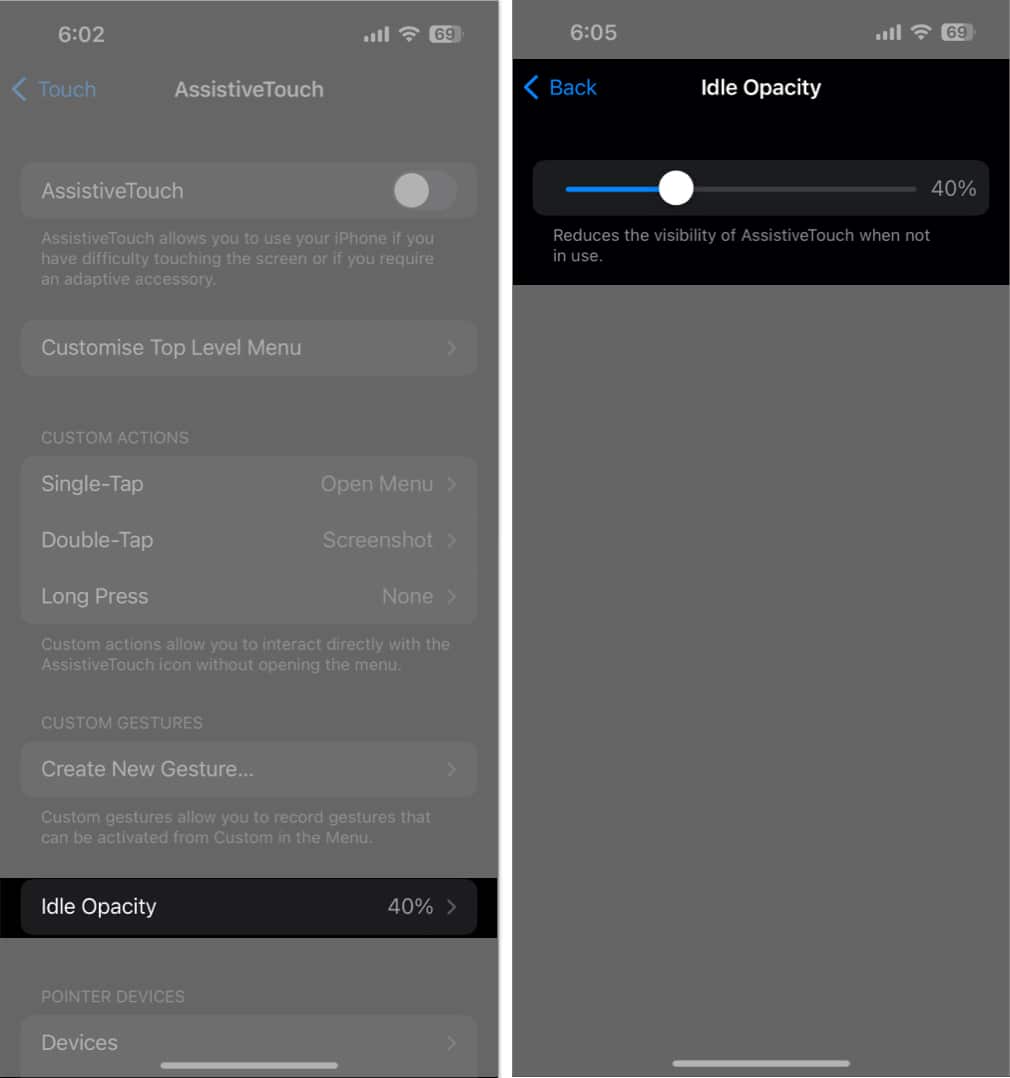
The lower opacity of the AssistiveTouch ball can cause it to disappear. So, you must increase the visibility of the button to use it properly. We advise a minimum opacity level of 40% for persons with normal vision.
- Navigate to Settings → Accessibility → Touch → AssistiveTouch.
- Tap Idle Opacity.
- Move the slider to increase visibility as per your liking.
4. Restart your iPhone
Restarting your iPhone is the primary step to fix AssistiveTouch not working issue in iOS 16. It eliminates all the momentary problems, glitches, and system issues. Try executing a forced restart if just restarting your device doesn’t work.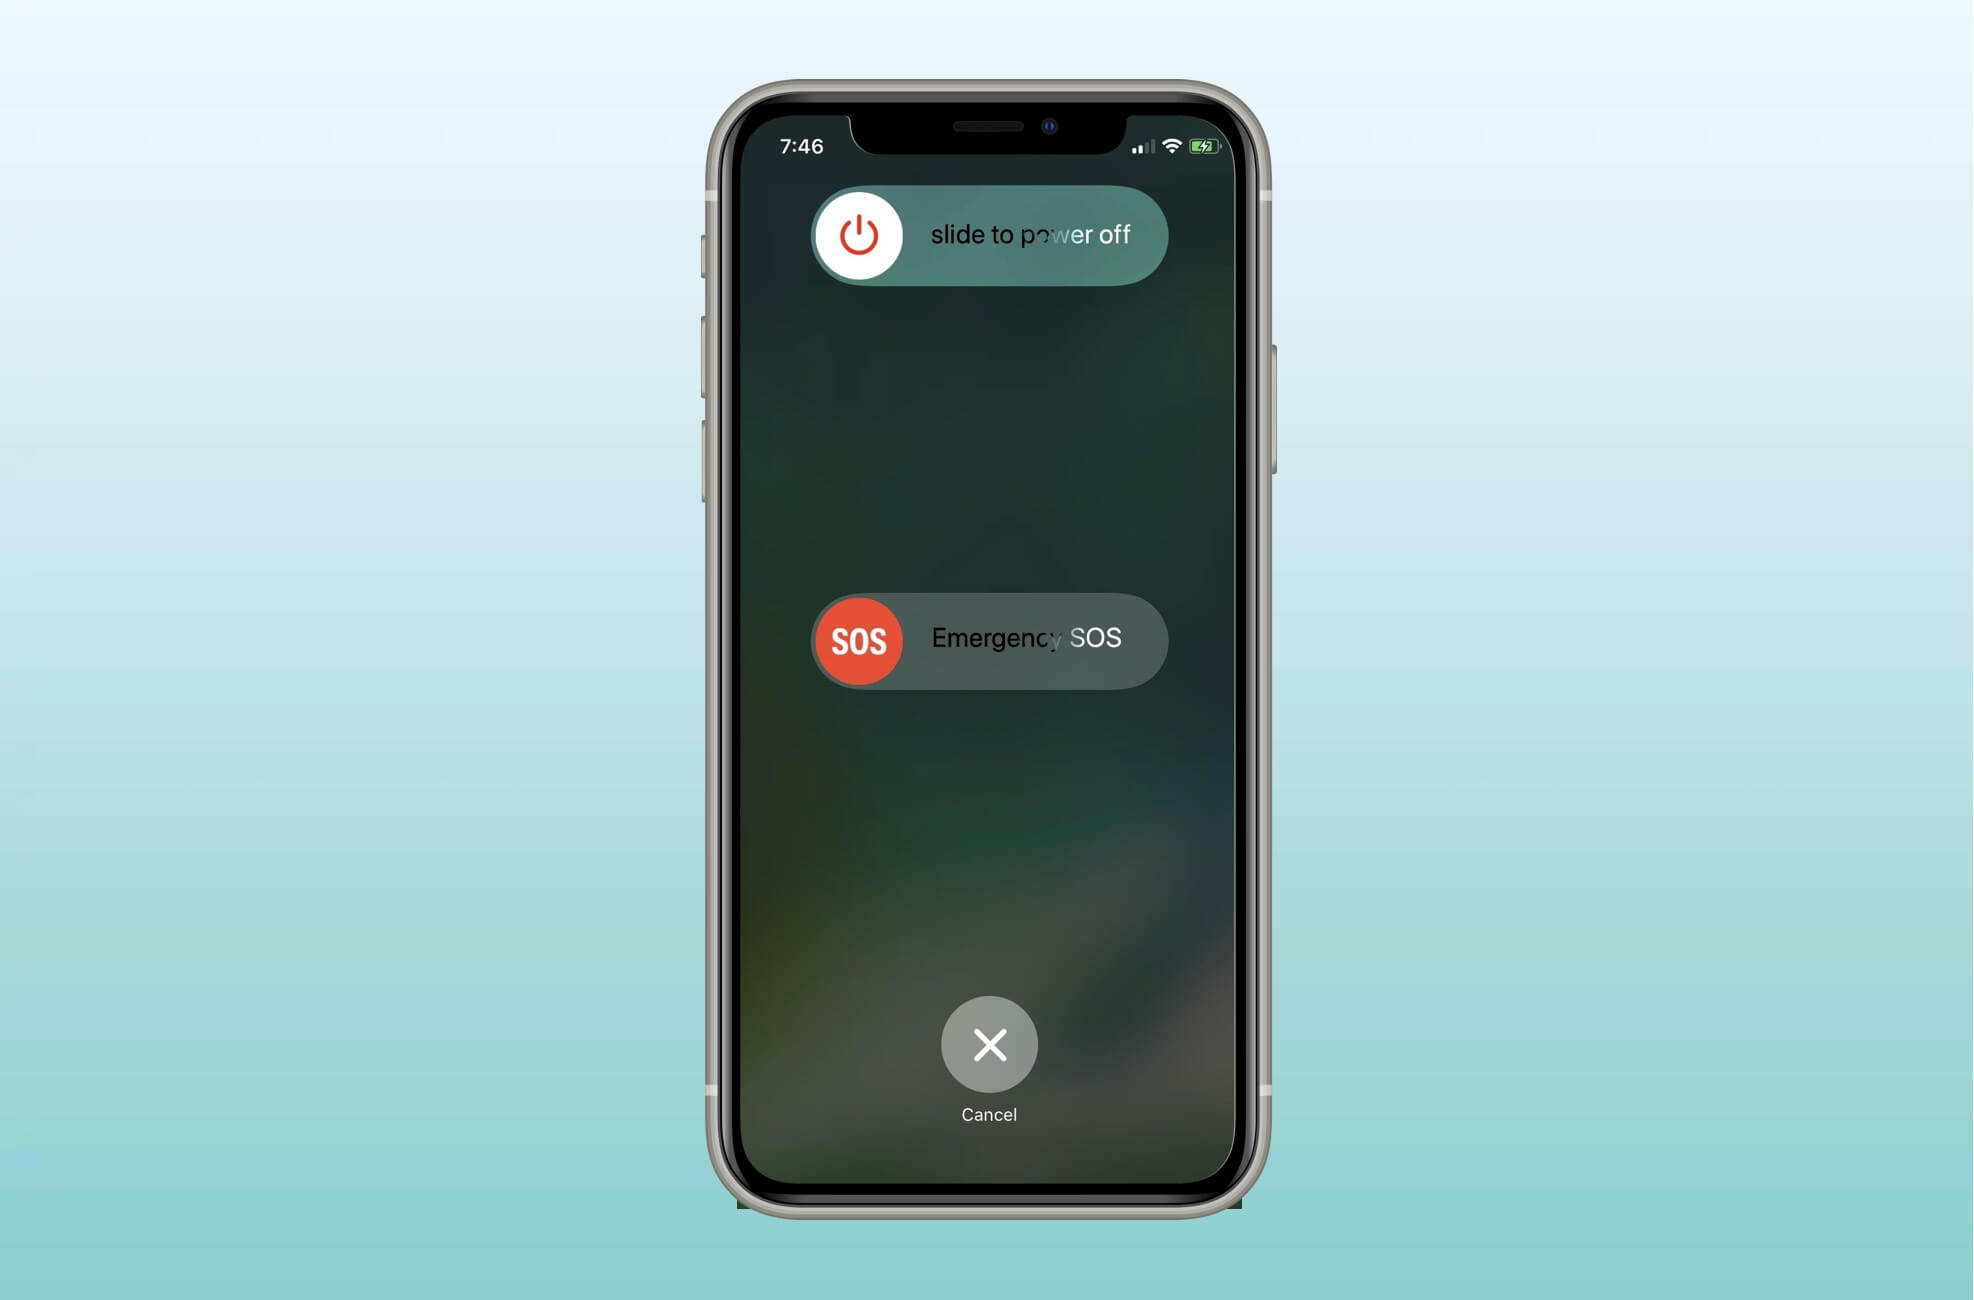
5. Reset all settings
It may happen any display settings overlap with AssistiveTouch functions. So, it’s a good idea to reset all settings of your iPhone and get to the default options. And don’t worry! Your data will not be deleted at all.
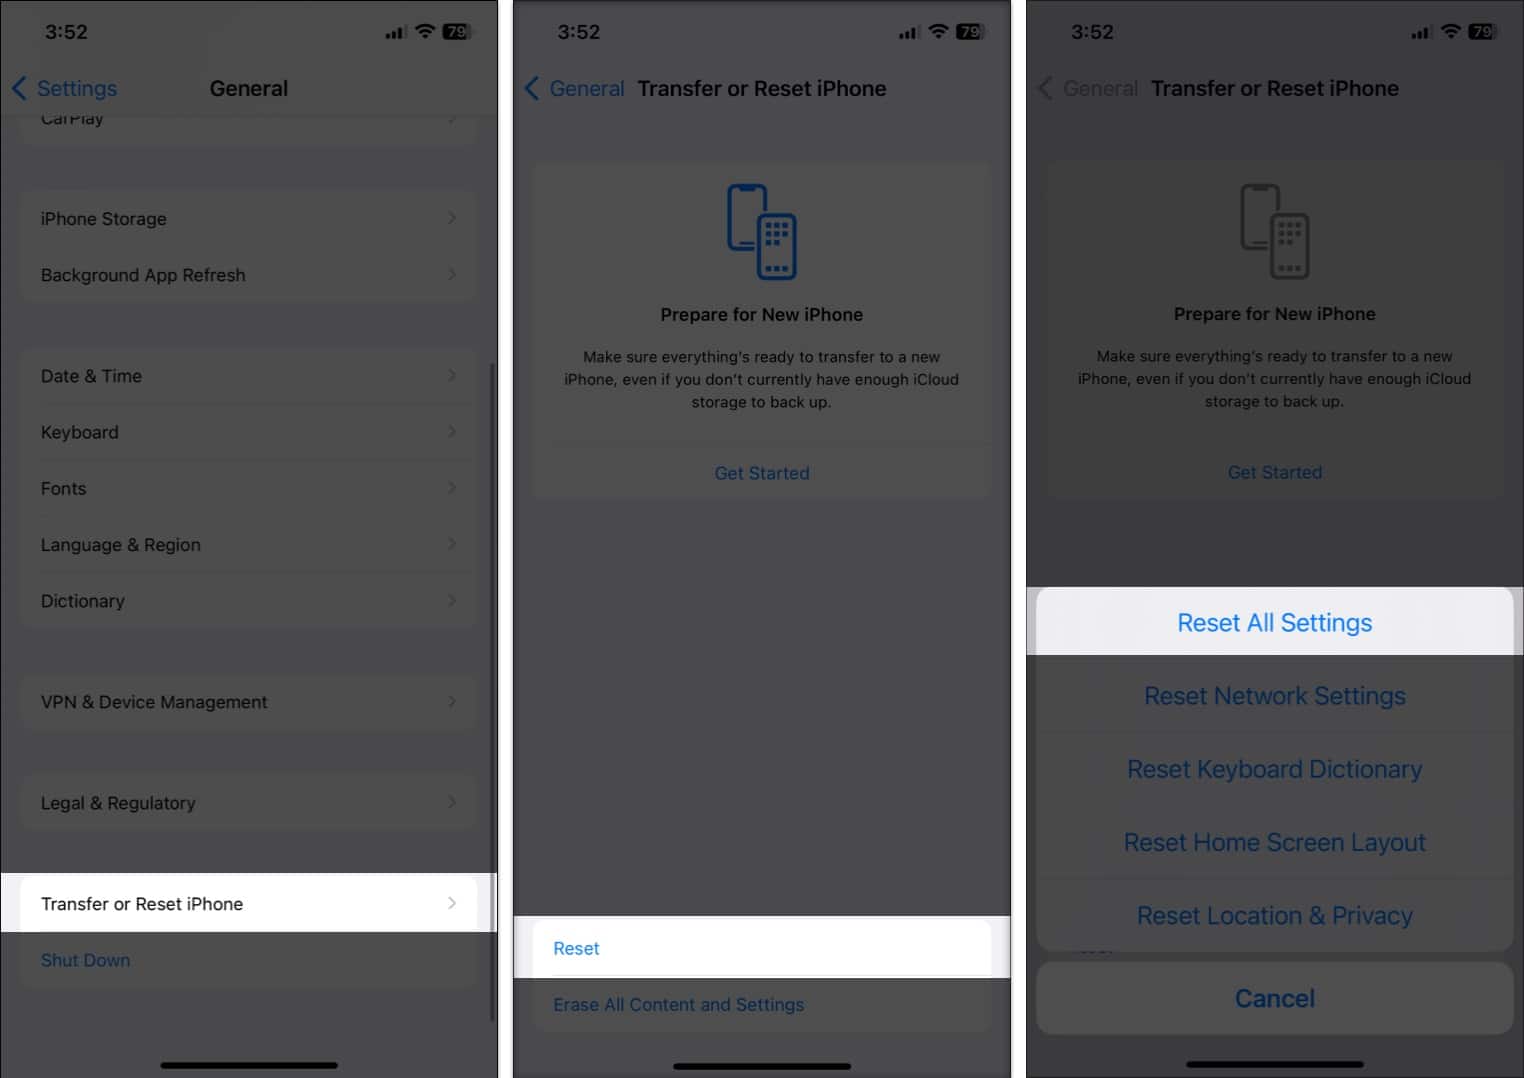
- Open Settings → General.
- Select Transfer or Reset iPhone.
- Tap Reset → Reset All Settings.
- Enter your passcode.
- Confirm by tapping Reset All Settings.
6. Update your iPhone
If your iPhone is running an obsolete iOS version, you may encounter multiple problems. So, make sure you always use the most recent iOS version.
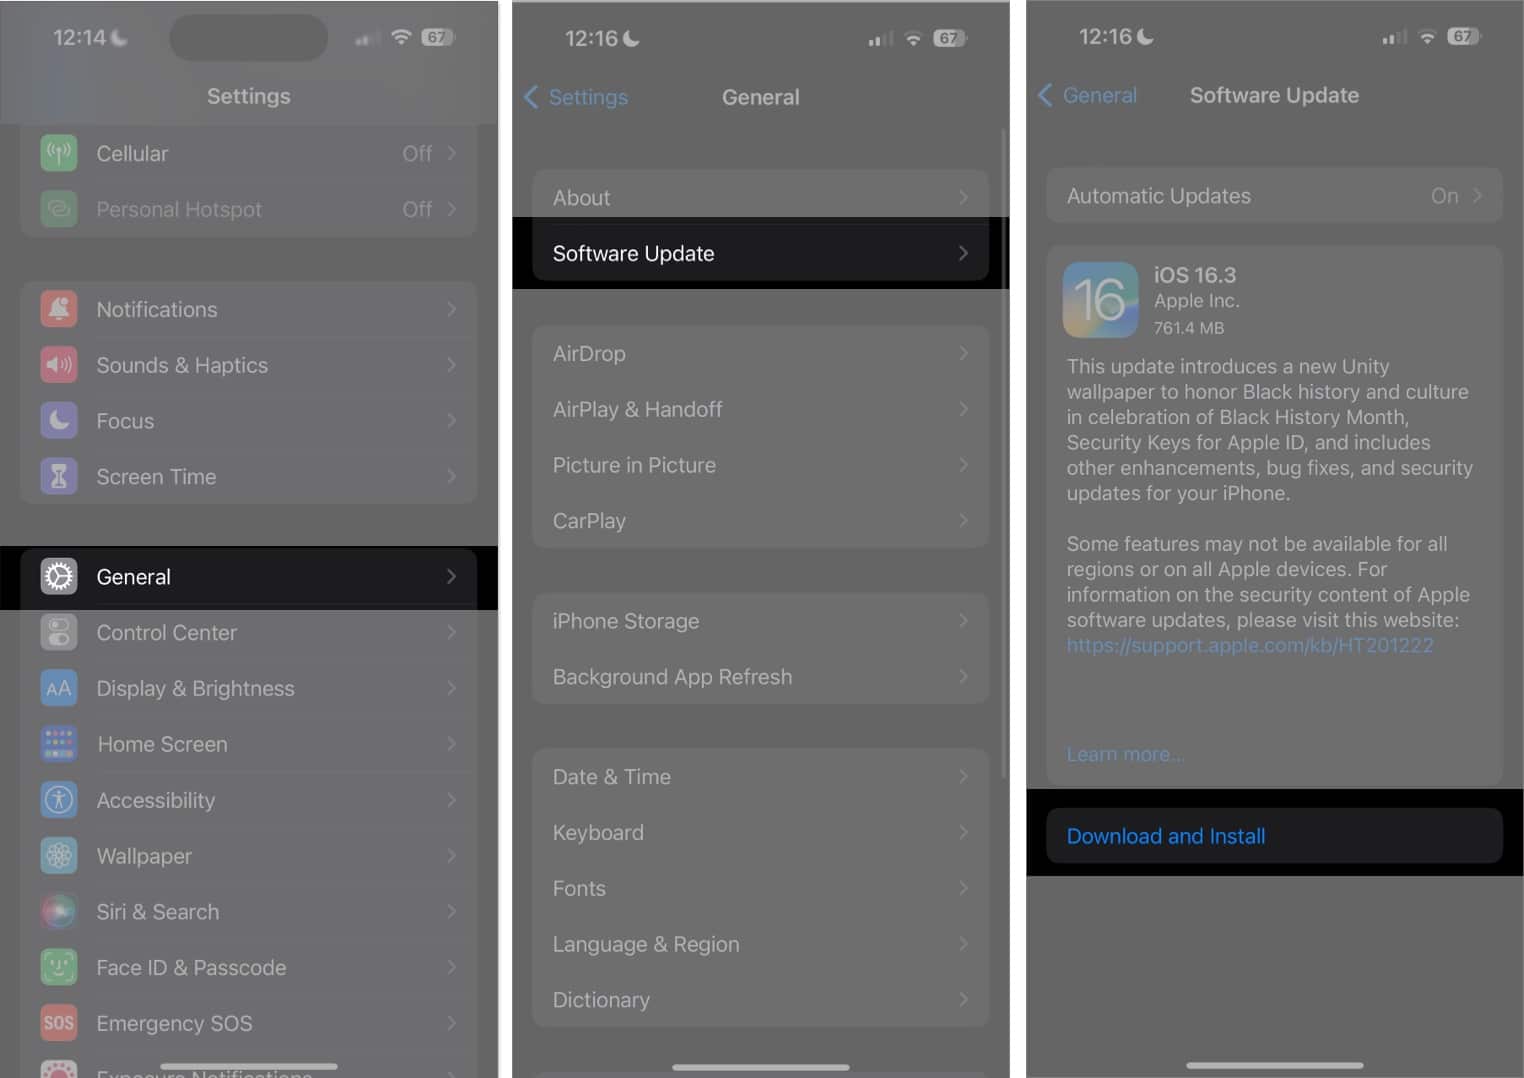
- Go to Settings → General → Software Update.
- Tap Download and Install if any pending updates are available.
Also, toggle on all functions under the Automatic Updates section.
Get the assistant back!
Facing AssistiveTouch not working on your iPhone issue can be a frustrating experience, especially if you rely on it for accessibility purposes. However, with the troubleshooting steps outlined in this blog, you should be able to fix it and get your AssistiveTouch up and running again.
Your touchscreen can become unresponsive if you have a thick screen protector. So, you may get a high-quality screen protector. If nothing works, you may contact Apple Support.
Explore more…

