Apple Watch is a multipurpose tool. It comes at a justifiable price if it meets your needs. But an Apple watch that isn’t responding to touch is just a dull paperweight. If you are facing this issue where the Watch doesn’t display the pretty face you’ll set, here are eight fixes to help resolve your problem.

- Charge your Apple Watch
- Change the charging cable
- Turn off Screen Curtain
- Disable Power Reserve mode
- Force restart your Watch
- Update your Apple Watch
- Erase your Apple Watch
- Contact Apple Support
1. Charge your Apple Watch
It might seem petty, but your Apple Watch might just have run out of battery. As a general rule, you should check your Apple Watch battery life. If your Apple Watch is displaying a red bolt, it’s indicating that the battery needs charging. Plug it in to charge and wait for around half an hour before you try to turn it on.
When you start charging, check for a green bolt. It is a sign that your Apple Watch is charging. Remember to wait for a while before turning on the device.
If your Apple Watch is still not turning on after charging it with a couple different chargers, try out the next solution.
2. Change the charging cable
If your Apple Watch is not charging, it might be because your charging cable is damaged. You need to check if the charging cable is working as intended. Try switching between power bricks and charging cables. Moreover, always ensure you use Apple MFI-certified accessories.
3. Turn off Screen Curtain
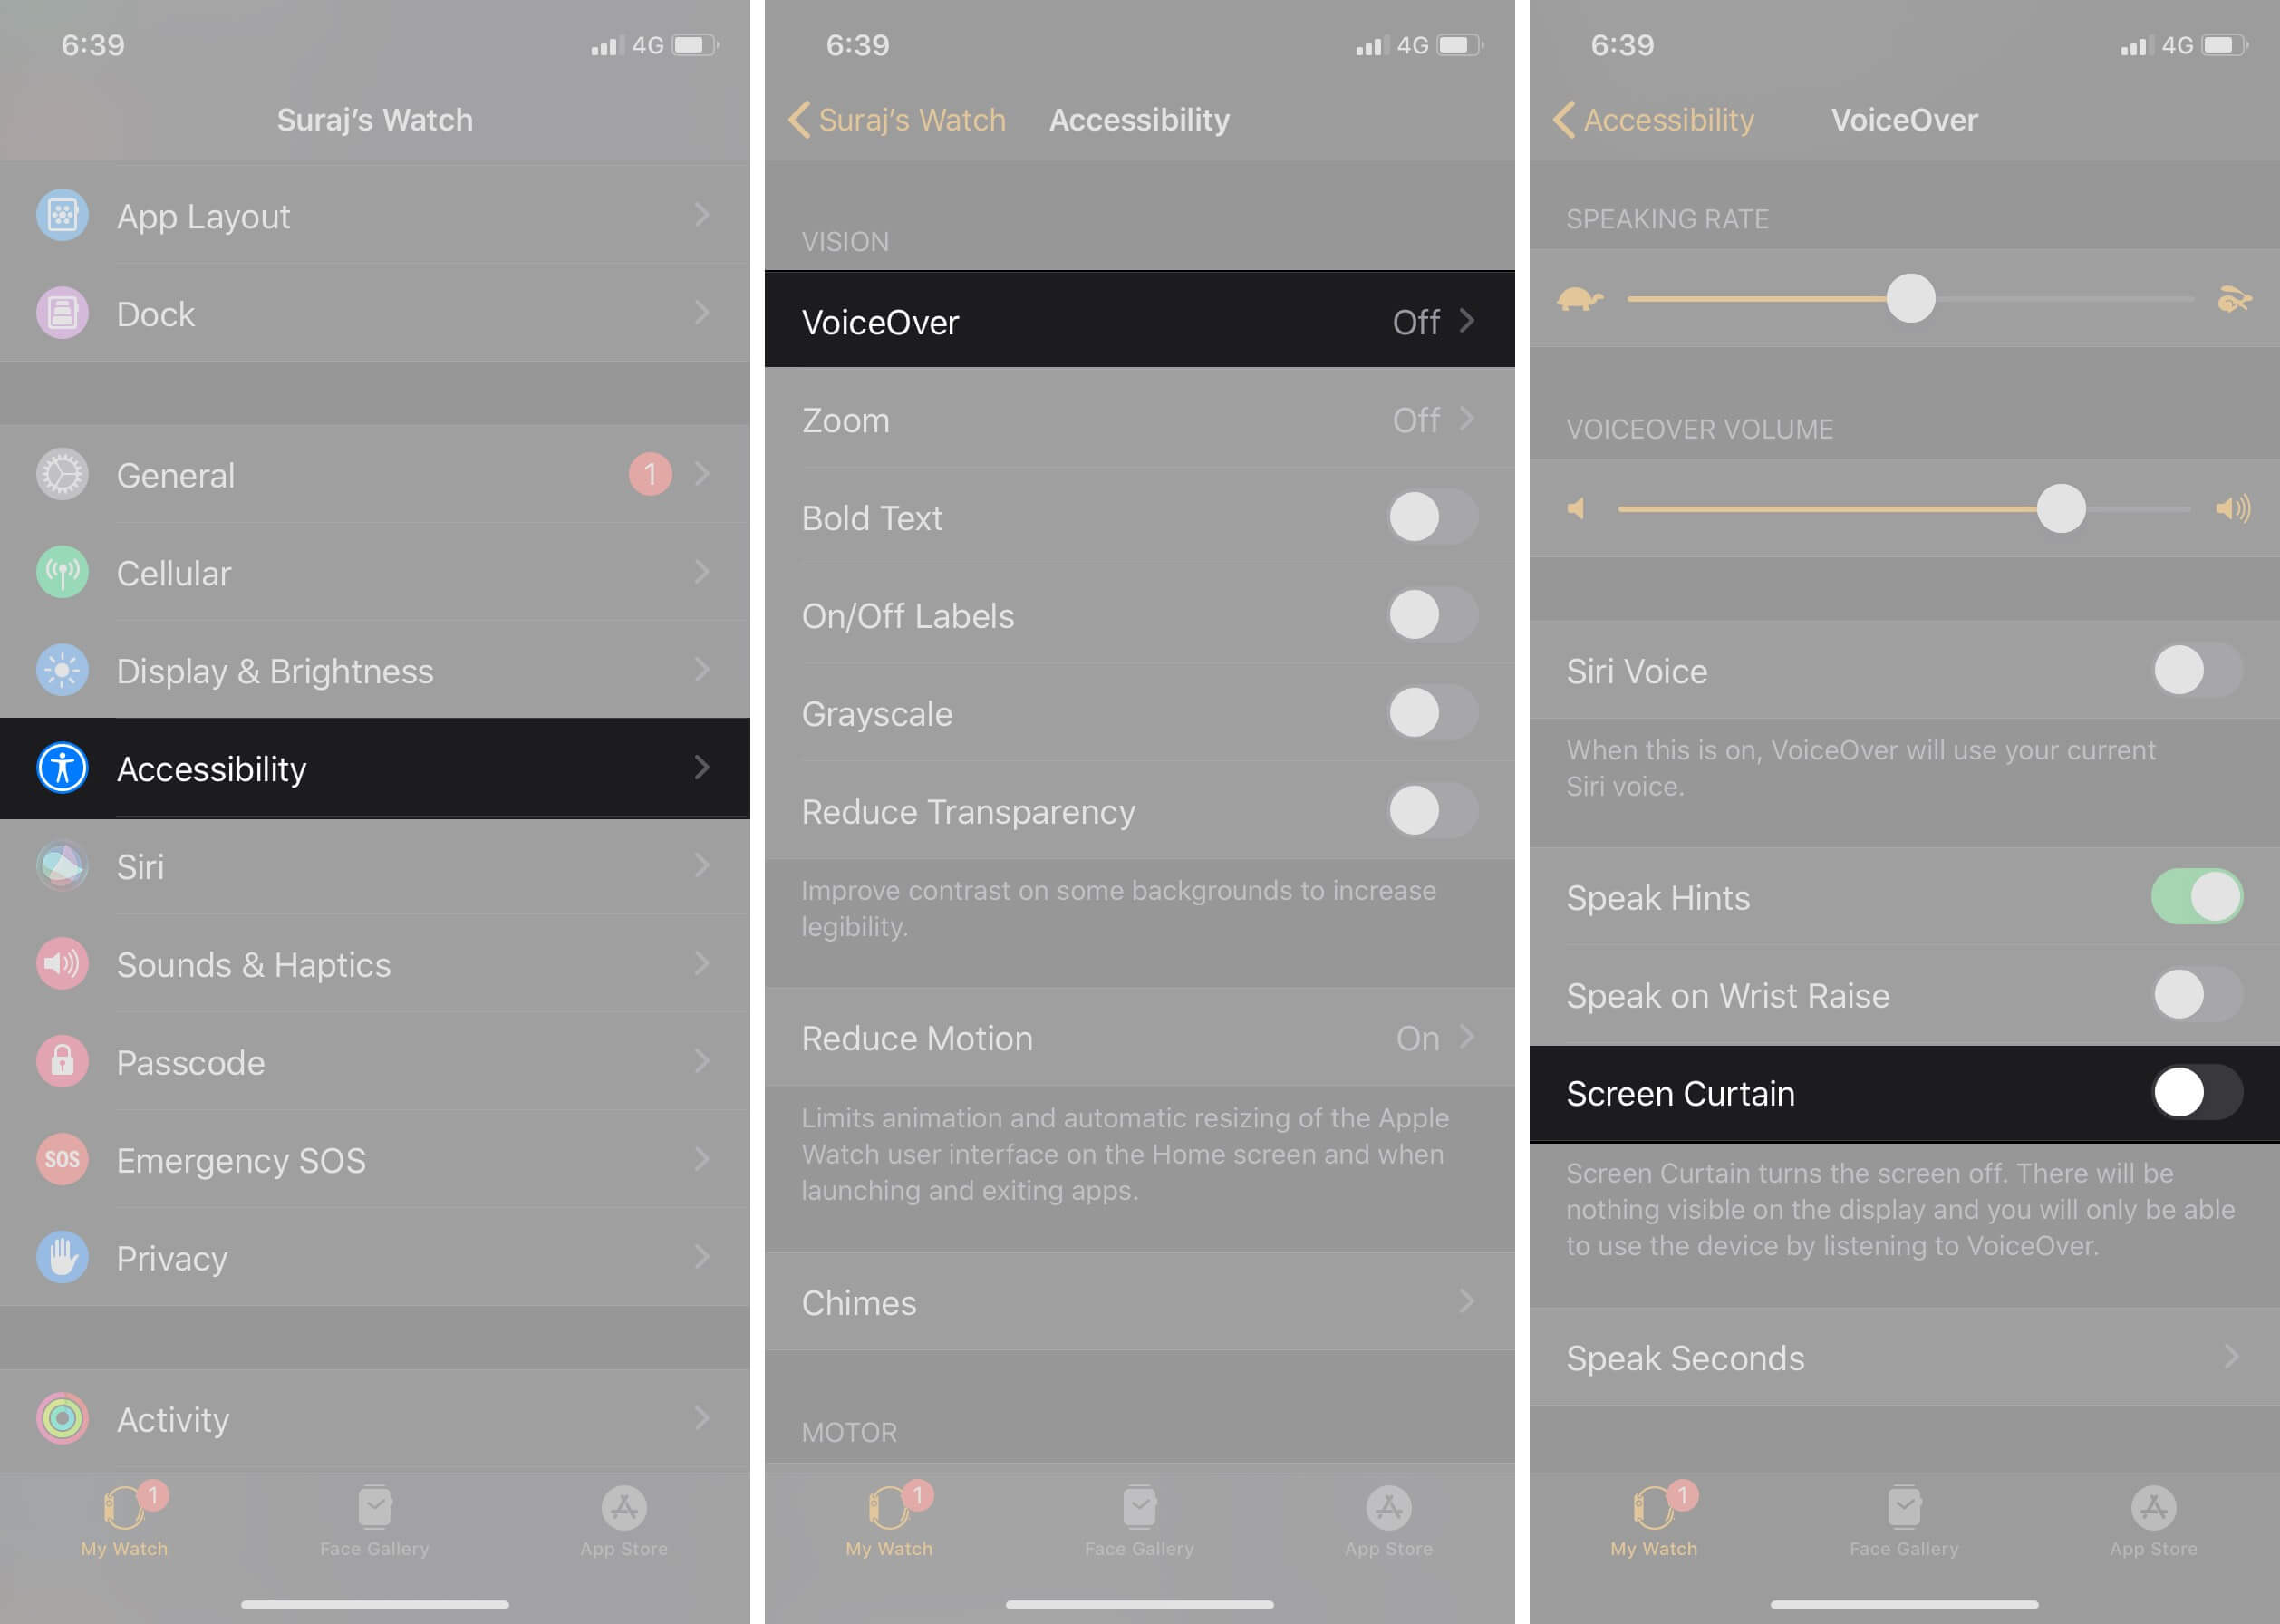
Screen Curtain allows you to turn off the display for added privacy. You can only navigate your device using VoiceOver. If you’ve accidentally turned on this feature, turn it off. Follow the steps below to do so:
- Open the Watch App on your iPhone.
- Navigate to Accessibility → VoiceOver.
- Toggle off Screen Curtain.
4. Disable Power Reserve mode
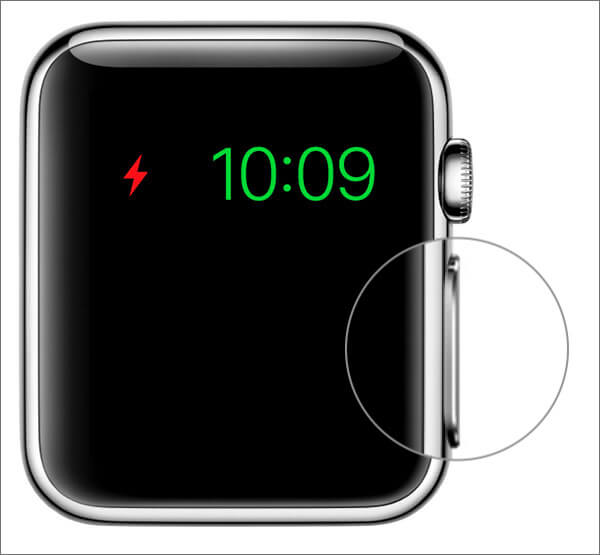
Power Reserve mode turns off all your Apple Watch features and just displays the time. It is a possibility that you must’ve turned this feature on and have forgotten about it. Disabling the Power Reserve mode might help fix your Apple Watch.
To turn off Power Reserve mode, press and hold the side button. That’s it!
5. Force restart your Watch
Force restarting deserves more credit than it gets, as it helps resolve several bugs and issues. If you have never force restarted an Apple Watch, follow these steps:
- Press and hold the Digital Crown and Side Button for 15-20 seconds.
- Release the buttons once the Apple logo appears on the Watch.
Now, check if your Apple Watch is working fine! If not, move on to the next fix.
6. Update your Apple Watch
If you haven’t updated your Apple Watch for a long time, updating to the latest watchOS version might help fix the problem. Here’s how you can use your iPhone to update your Watch: Go to the Watch app on iPhone → General → Software Update → Download and Install.
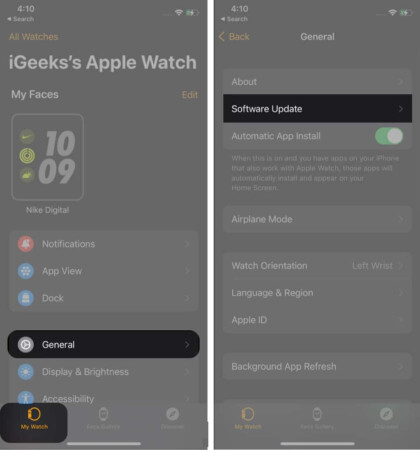
Note: Updating your watch via iPhone might take around an hour. Additionally, don’t remove your watch off the charger, close the Watch app, or turn off/restart your iPhone or Watch during the process.
7. Erase your Apple Watch
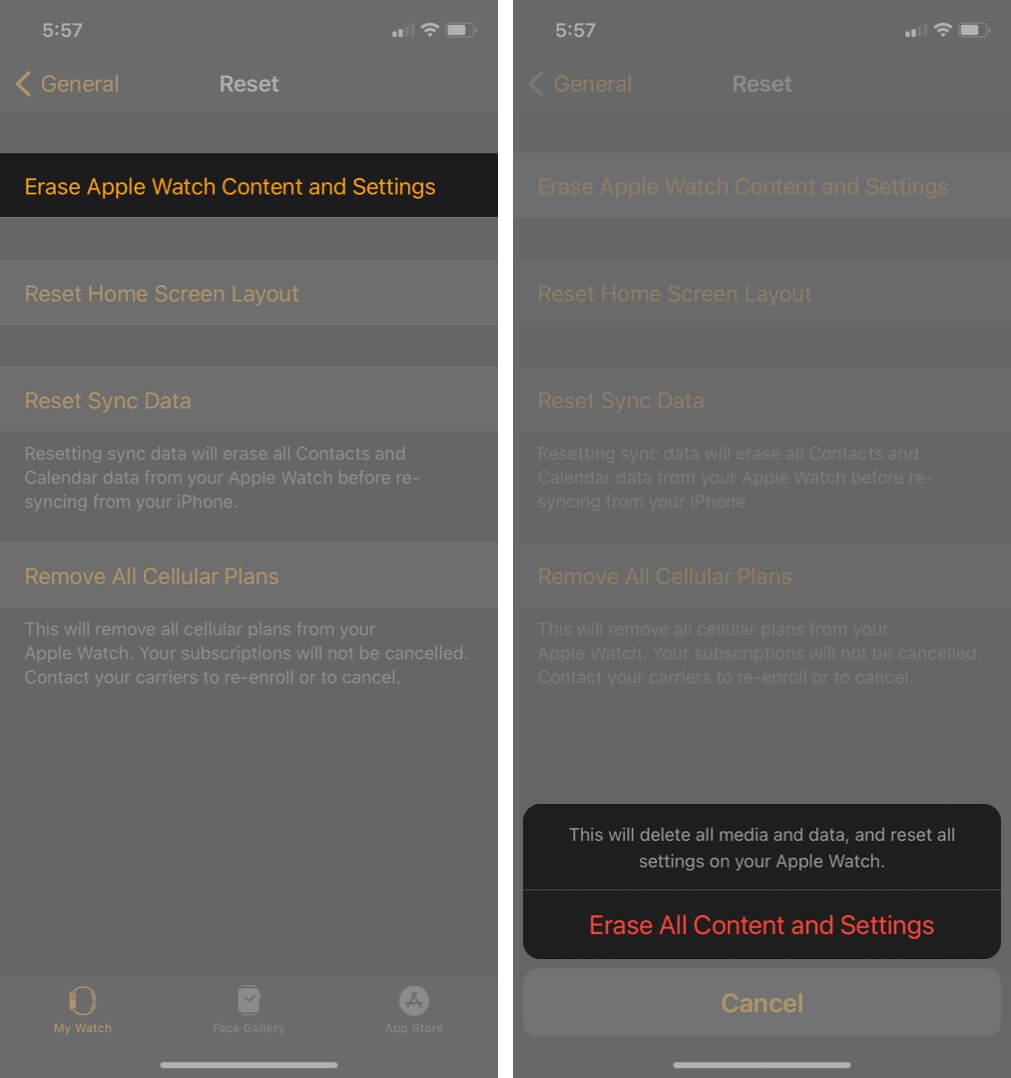
Resetting a device is an age-old method used for troubleshooting devices. And, it works. However, it should be the last resort as it deletes all your settings and data. Follow the below steps to erase your Apple Watch:
- Open the Watch App on your iPhone.
- Select General → scroll down and tap Reset.
- Tap Erase Apple Watch Content and Settings → Erase All Content and Settings.
Once done, re-pair the watch with your iPhone. It should be up and running!
Note: Don’t restore the backup because if that created the issue in the first place, restoring it would only replicate the problem!
8. Contact Apple Support
If your Apple Watch still doesn’t turn on, unfortunately, it might be a hardware issue. Hence, contacting Apple Support should be your last resort. If your device is under warranty or you have AppleCare Plus, you need not worry.
That’s it!
We hope these steps helped you fix your unresponsive Apple Watch back to life. Let us know in the comments which step worked for you or if you resolved your issue following some other method.
Read more:

