Safari, the default web browser for Apple devices, has always been lacking in one way or another, often losing users to its competitors. However, in an attempt to bring back lost users and improve its user base, Safari now offers the ability to create profiles. Thanks to this feature, you can easily organize your browsing experience by creating separate spaces to serve different workflows.
If you are someone like me, the prospect of keeping things organized may pique your interest. So here’s an in-depth guide explaining how to create and use a Safari profile on iPhone, iPad, or Mac.
What are Safari Profiles?
Safari Profiles is a new feature that allows you to create instances of Safari on your iPhone, iPad, and Mac that work independently from each other. If you have multiple accounts for a single web service, you would know that it can become a headache to frequently switch between accounts according to the task at hand. However, with Safari profiles, you won’t have to worry about this, as you can have a separate profile for your Accounts.
Similarly, you may have separate requirements from Safari at work versus when you are at home. In that case, you can have a separate Work and Personal profile with its own set of browser extensions, history, Tab Groups, and bookmarks.
In addition to the examples mentioned above, you can also have separate profiles for guest users or for researching multiple things at once. This makes it super useful for keeping different web activities separate. Moreover, if you are using the same Apple ID across multiple devices, then every Safari profile will be automatically synced with them via iCloud.
How to create a profile in Safari on iPhone and iPad
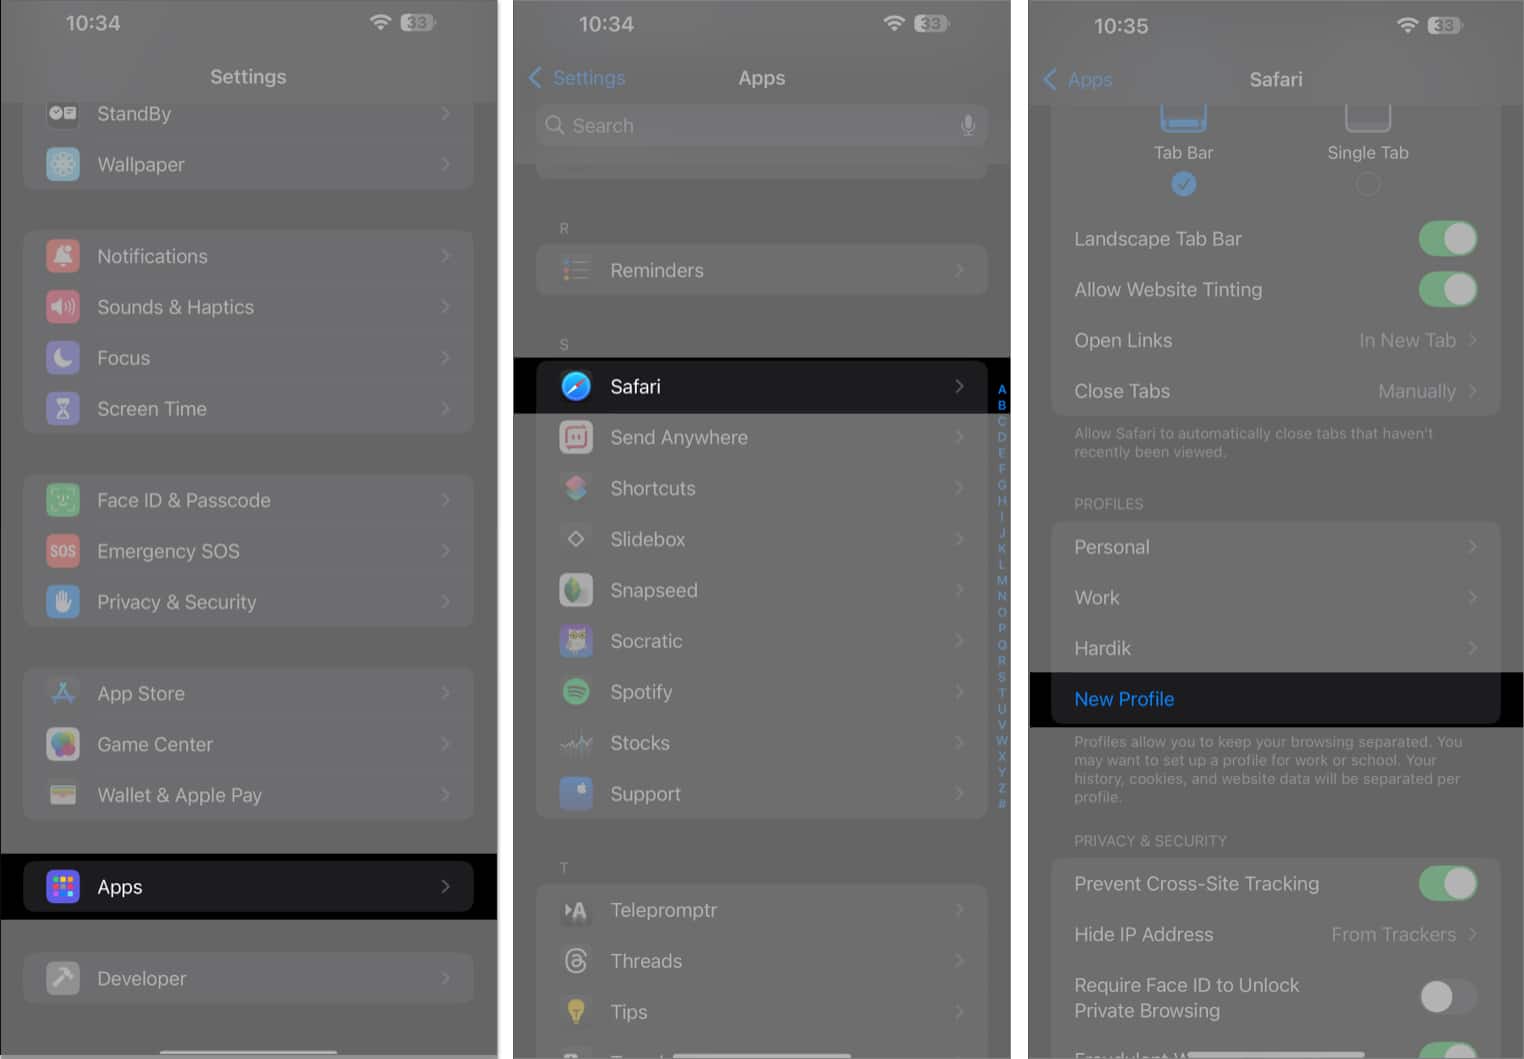
- Open the Settings app.
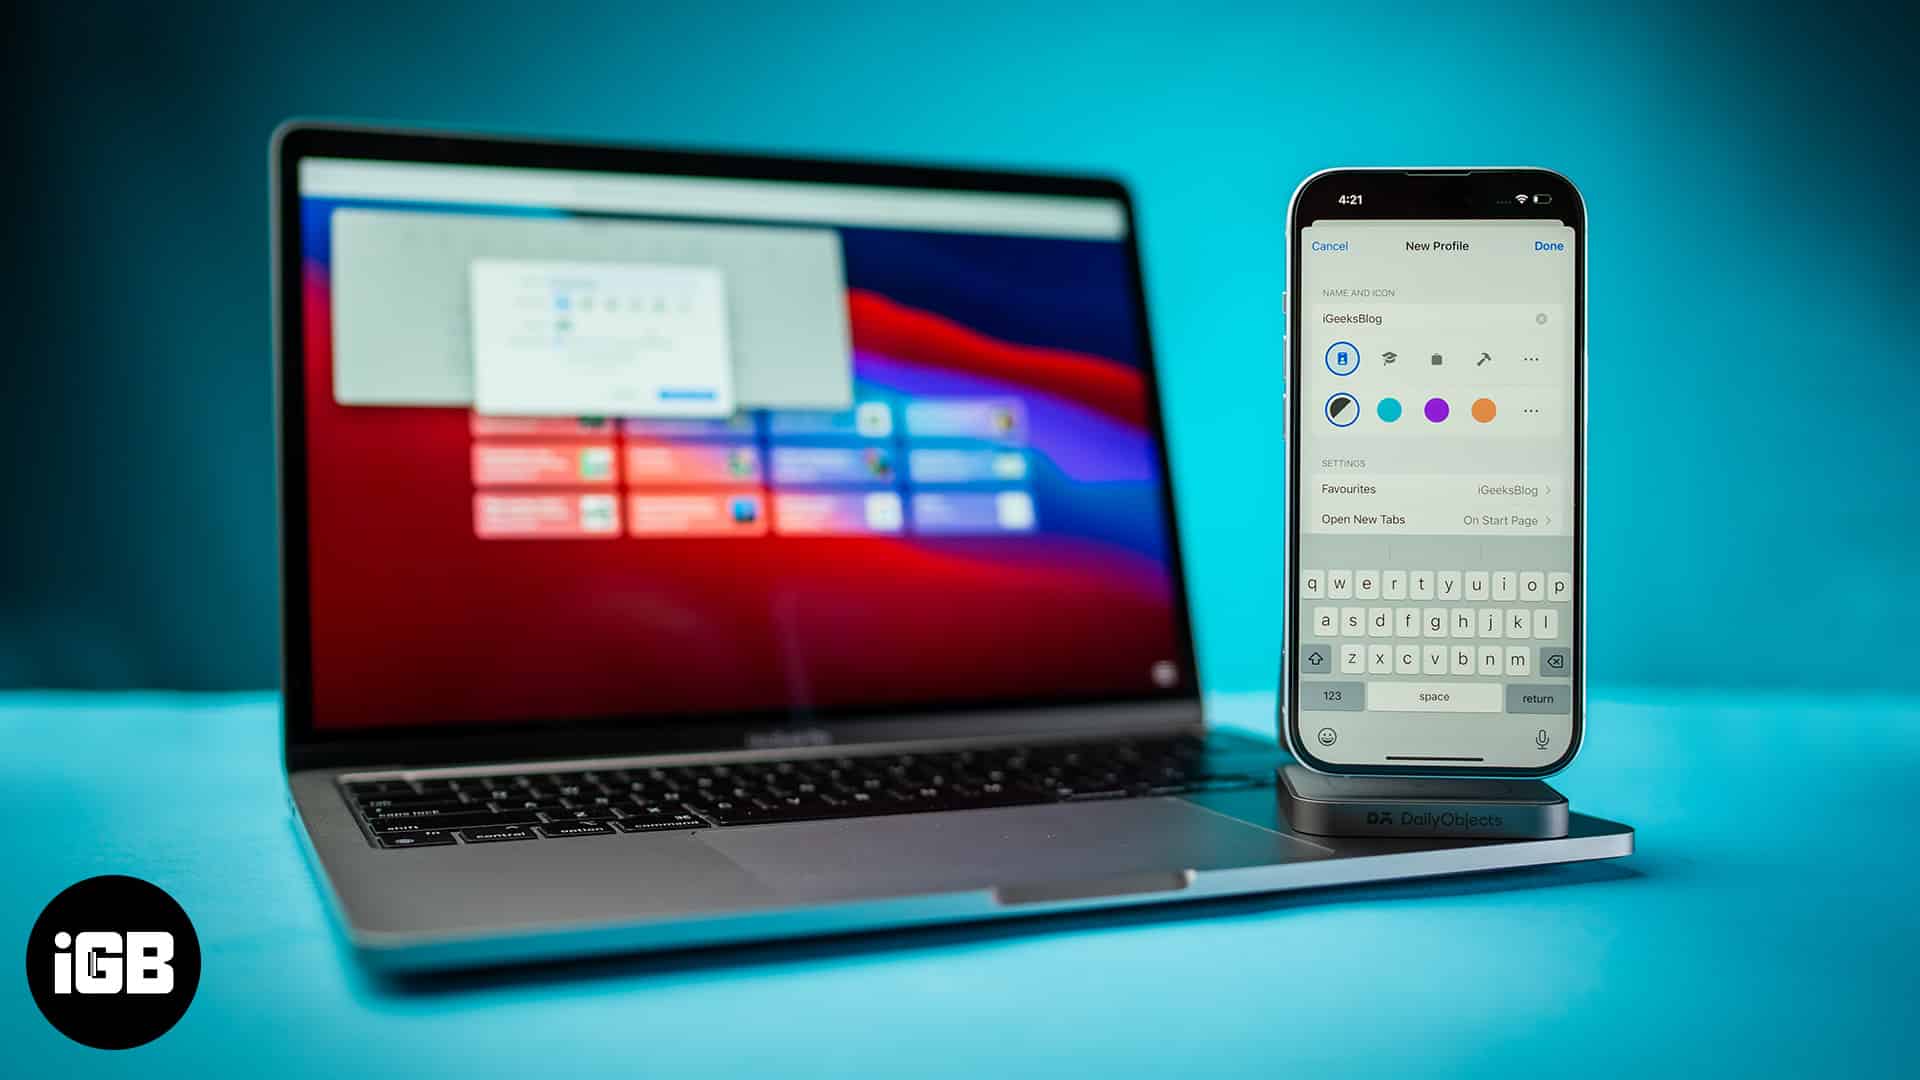
- Select Apps → Scroll down and tap Safari → Then tap New Profile.
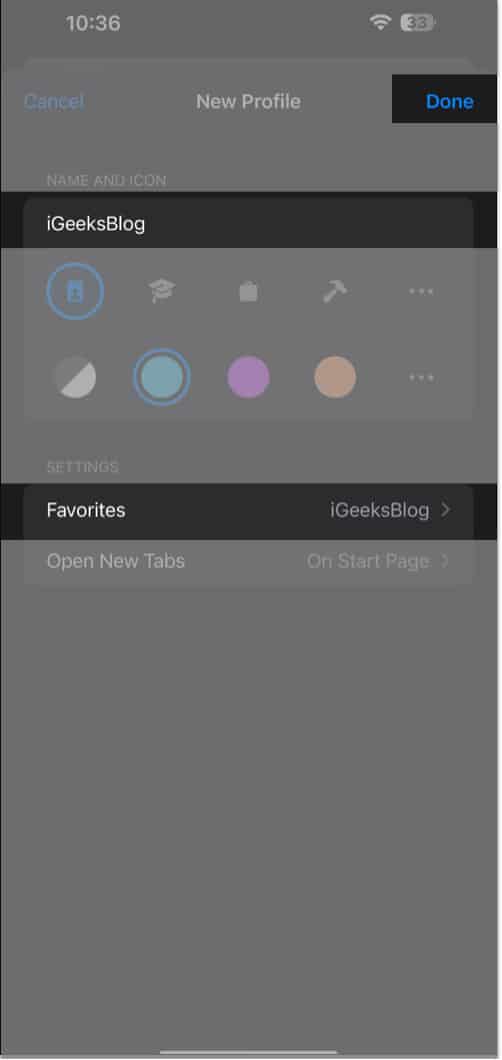
- Add a name for the profile → Select a logo and color code.
You may tap the three dots icon to get more logos or colors. - Tap Favorites and select your preferred favorites folder.
- Once you are done configuring the Profile, tap Done.
How to switch between profiles in Safari on iPhone and iPad
Once your Profile is set up, you can easily switch between profiles with these steps:
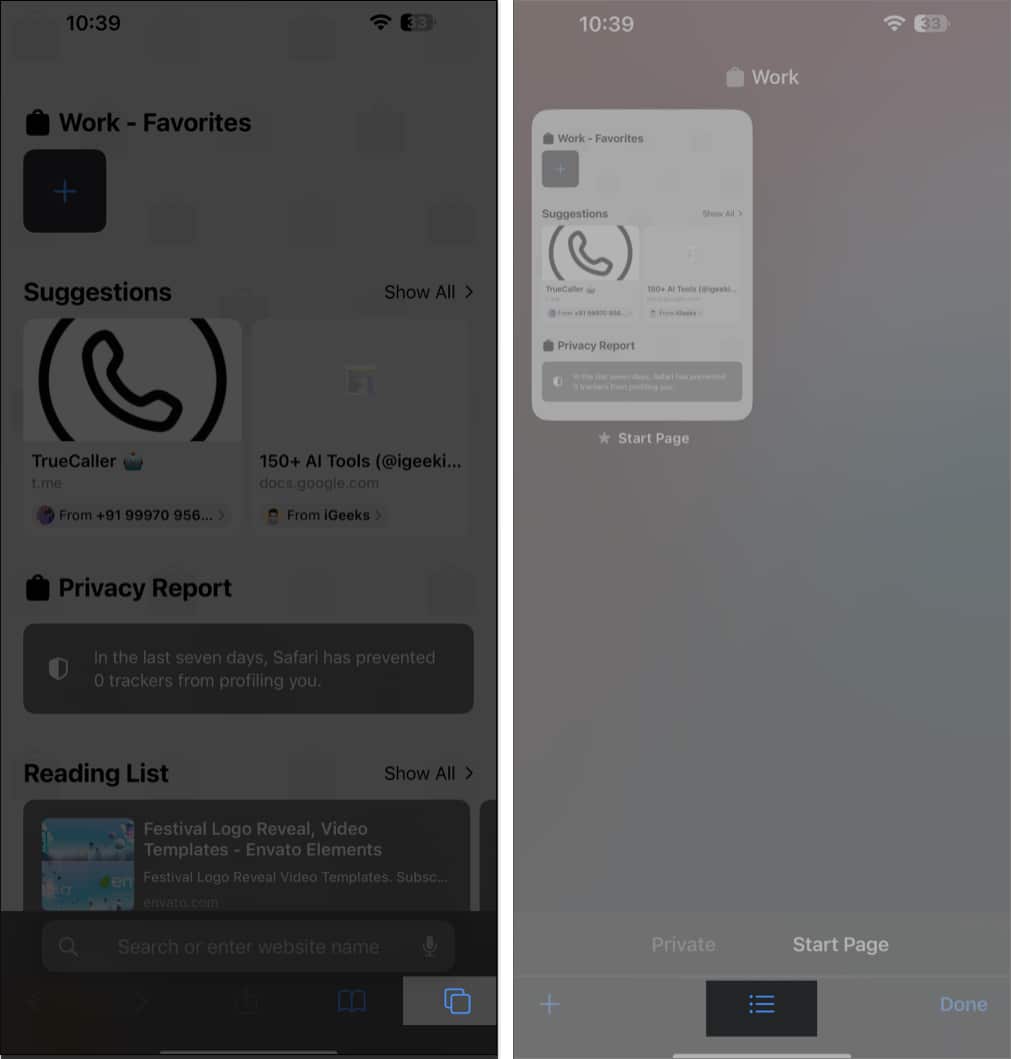
- Locate and open Safari.
- Tap the Tabs icon at the bottom right corner.
- Now, tap the Hamburger menu found on the toolbar.
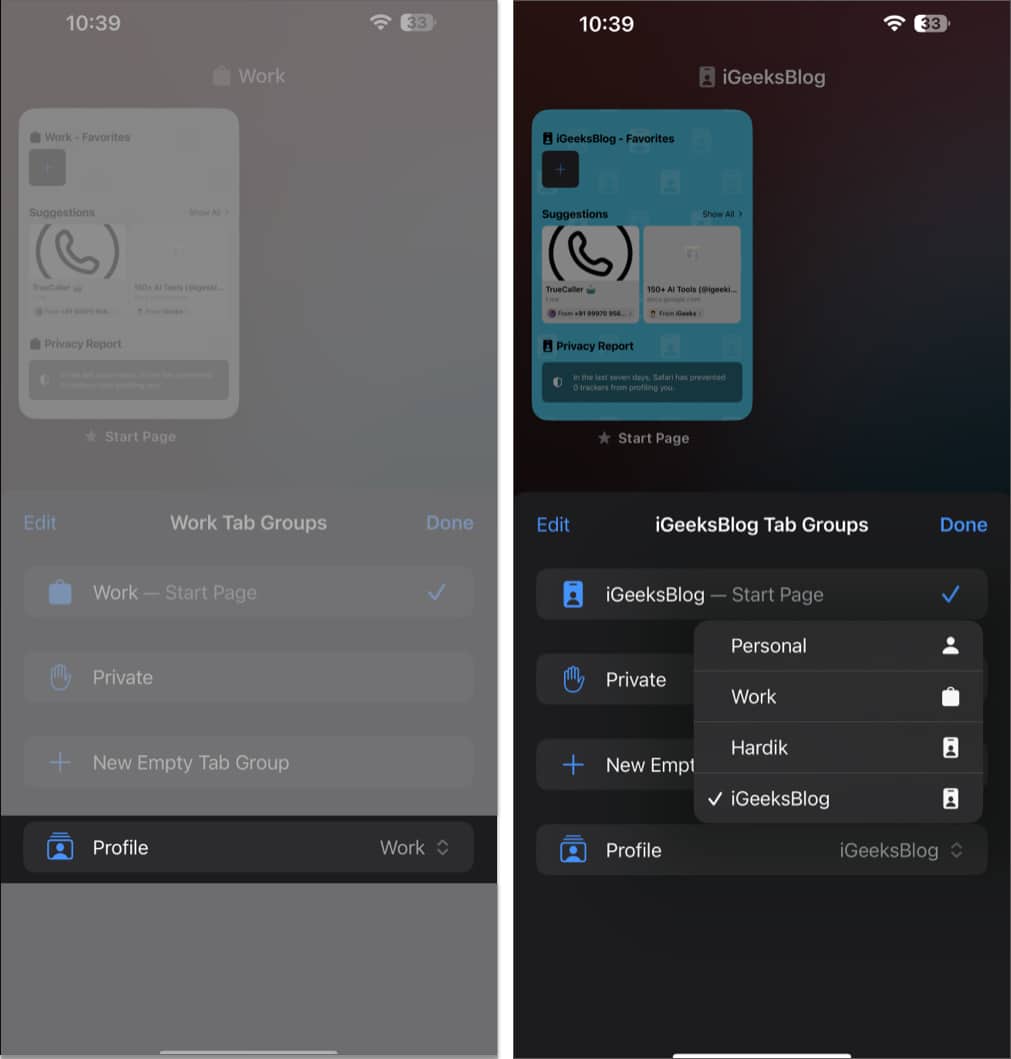
- Tap Profile → Select a Profile you wish to use.
How to delete Safari profiles on iPhone and iPad
So now, if you want to delete any unnecessary or mistakenly created Safari profile, follow these steps:
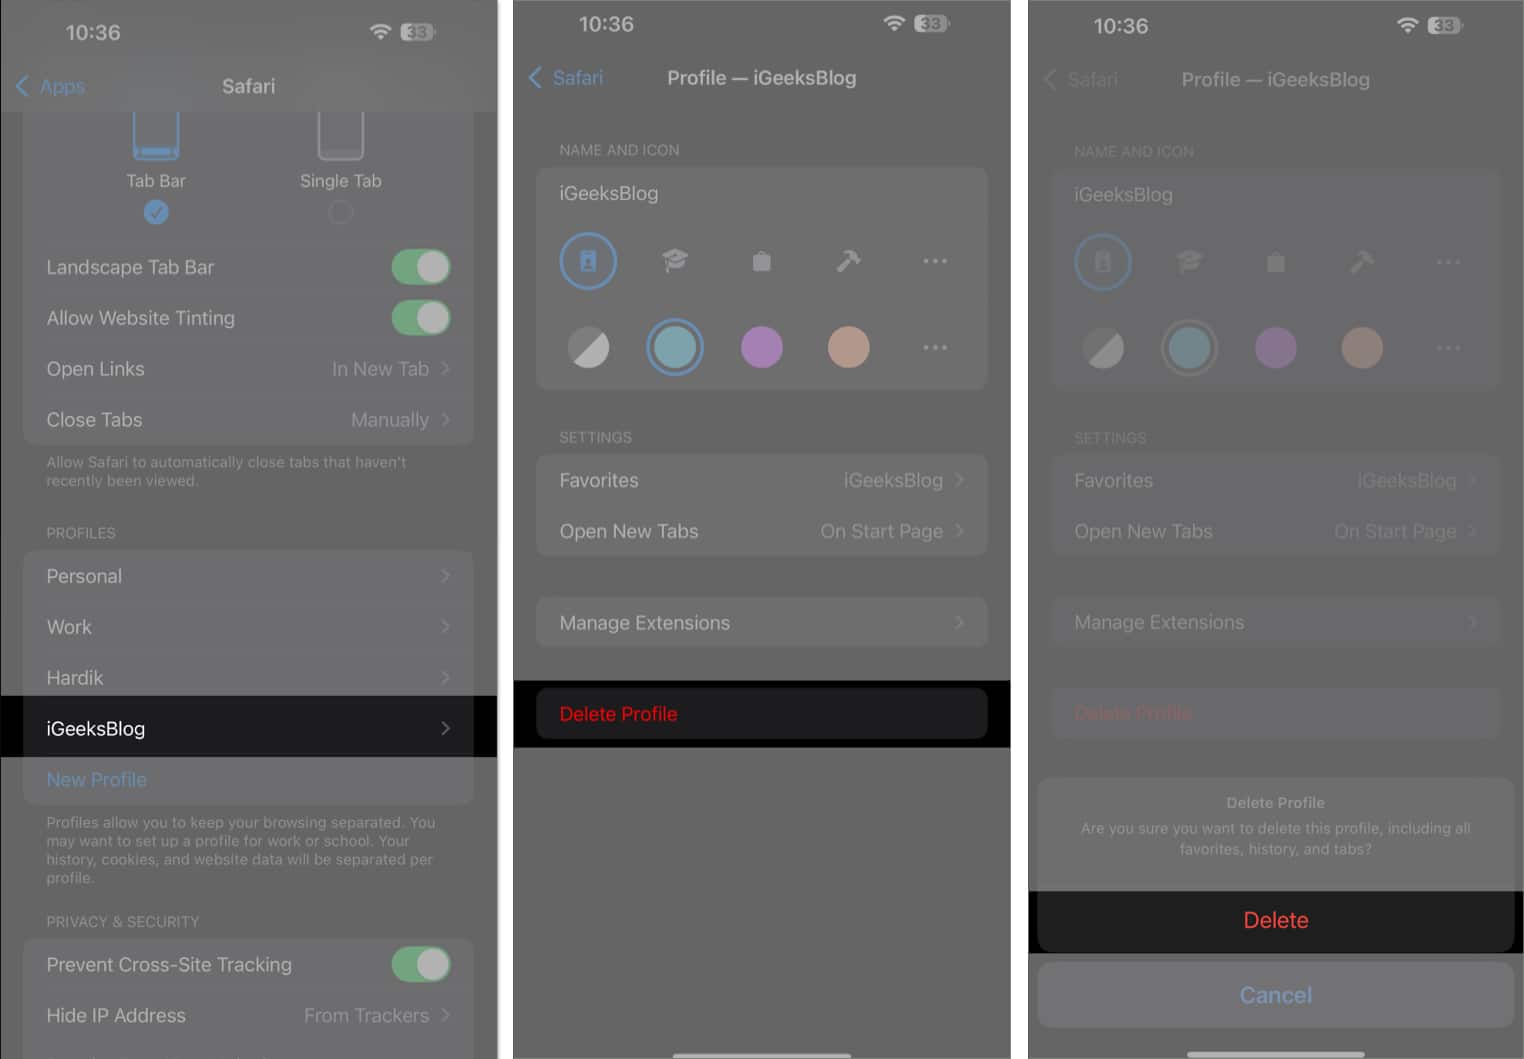
- Open the Settings app and tap Apps.
- Select Safari → Then select the Safari Profile you want to delete.
- Finally, tap Delete Profile → Delete to get rid of the Safari profile.
How to create a profile in Safari on Mac
- On your Mac running macOS Sonoma or later, open Safari.
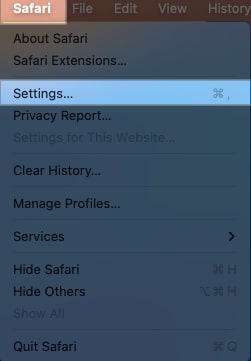
- Click Safari from the menu bar → Then, Select Settings.
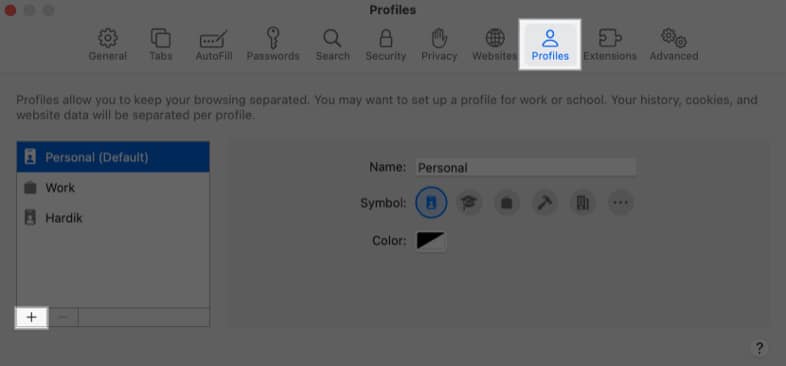
- Navigate to the Profiles tab → Then, click (+) icon located at the bottom left side of the Profiles window.
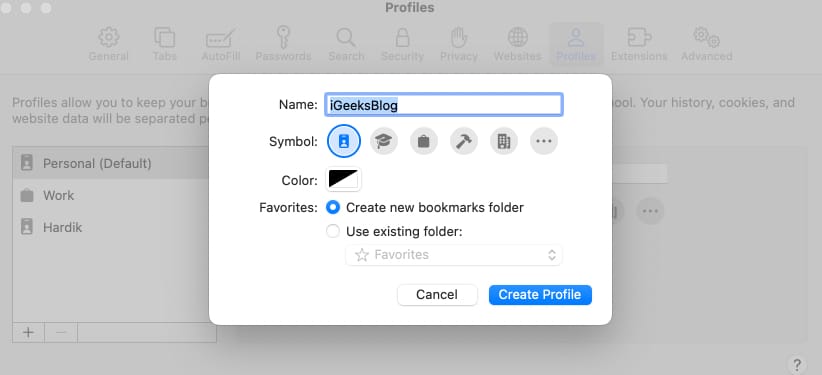
- Pick a name, symbol, and color for your Safari profile.
- Now, Create new bookmarks folder or Use existing folders.
- Now that your profile is configured to your needs click Create Profile.
Once you create a Safari profile, there are a few additional options that you can adjust to personalize your browsing experience even more and complete setting up your profile.
- From General, you can decide where you want your New windows or New tabs to open.
- From Extensions, you can choose the extensions you would like to use with your profile.
How to switch between profiles in Safari on Mac
You can switch between profiles either after launching Safari or directly from the Safari icon located on the dock. Here’s how all of these methods work:
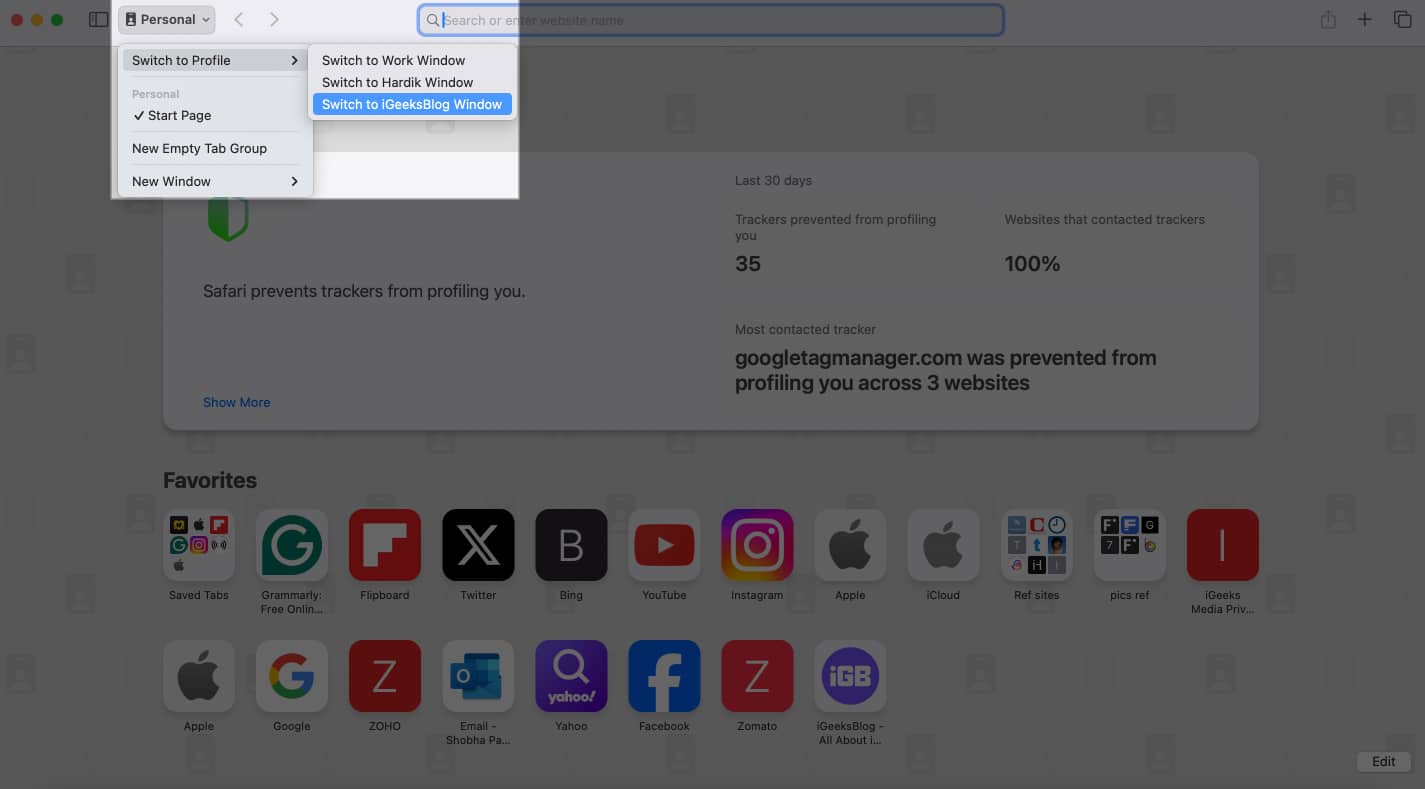
If the Safari sidebar is closed, you will get a rectangular drop-down from where you can switch profiles:
- Open Safari on Mac, you’ll be prompted with the normal Safari interface.
- Click the Profiles icon located in the top-left corner.
- Go to Switch to Profile option.
- Finally, pick the profile you want to switch to.
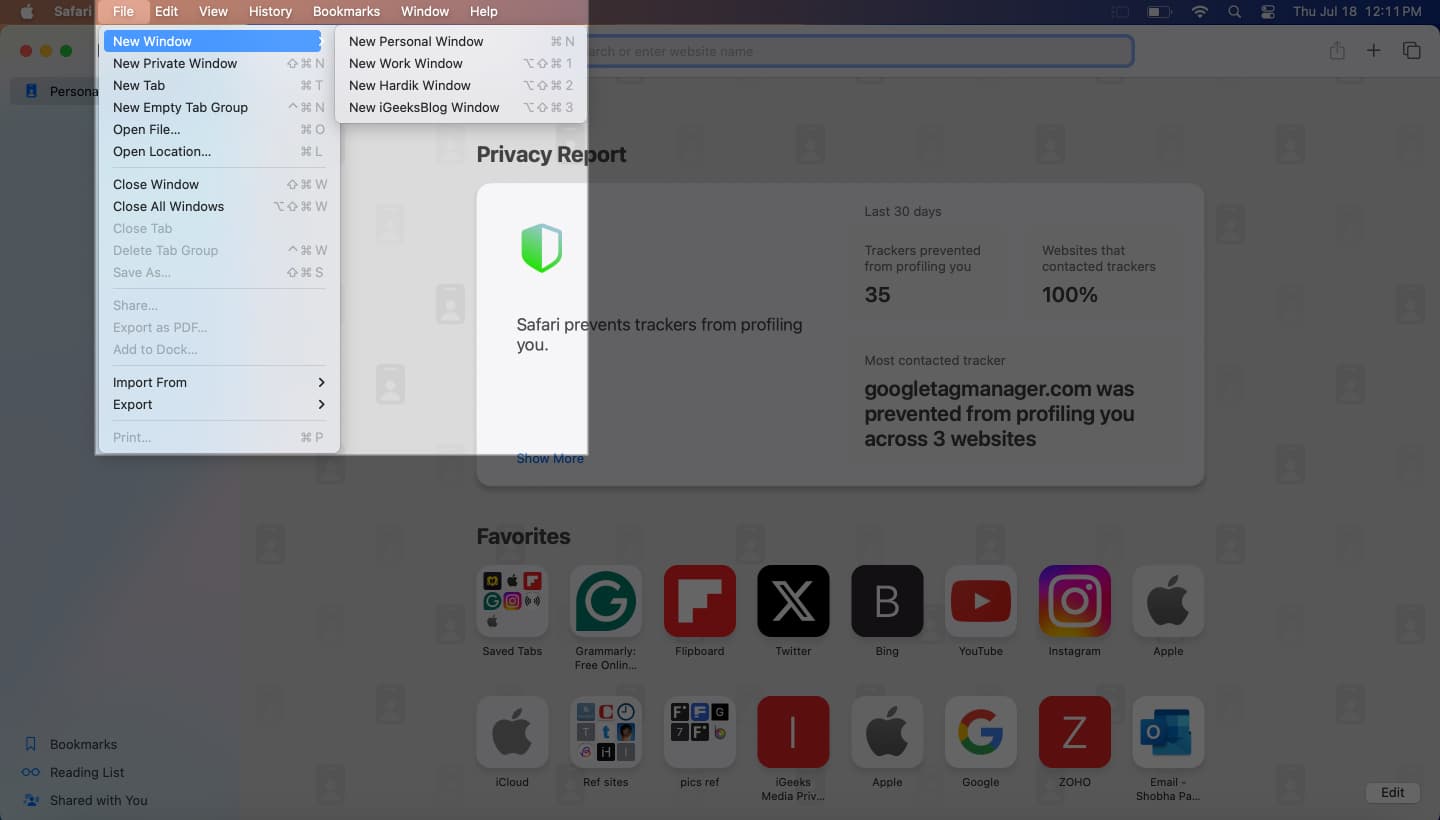
If the Safari sidebar is open, you won’t get a drop-down. You’ll have to go to the Files menu:
- Open Safari and click the Files option from the Menu bar at the top.
- Select New Window.
- Finally, pick the Safari profile you wish to switch to.
- Your Profiles are shown as New [Profile] Window.
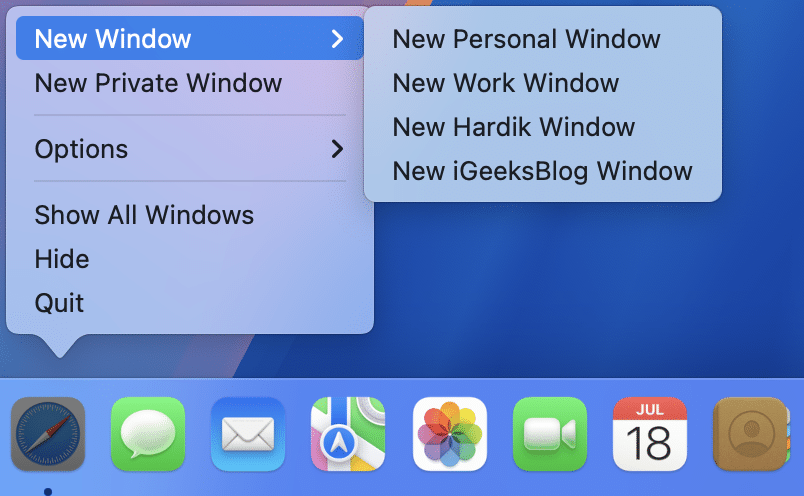
Alternatively, if you want to switch profiles when launching Safari, here’s what you need to do:
- Right-click on the Safari icon on the dock.
- Click New Window and select the Safari profile you want to switch to.
- Profiles are shown as New [ProfileName] Window.
Moreover, If you use Focus mode on your Mac, you can also create a Focus filter that will switch to a specific profile automatically whenever you switch to another Focus mode.
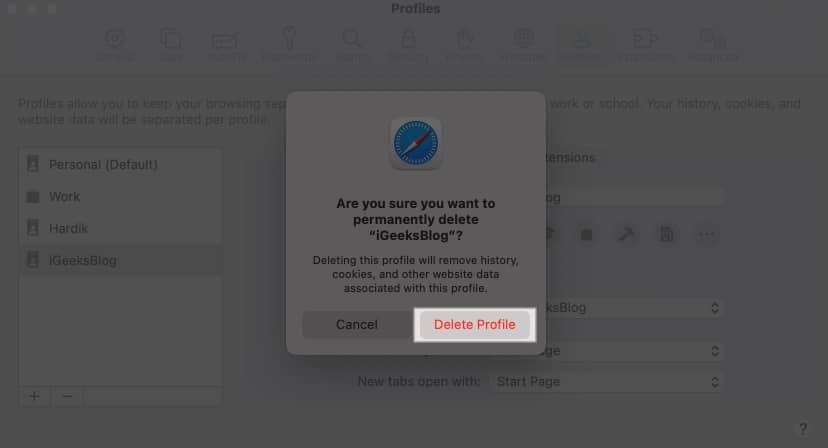
How to delete Safari profile on Mac
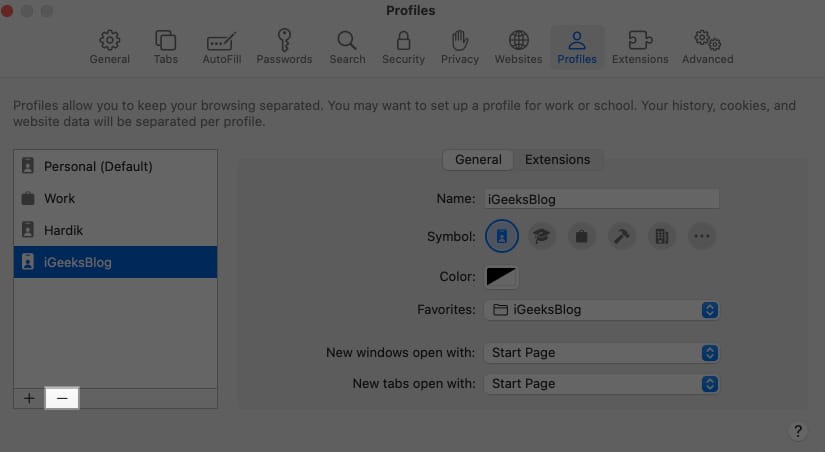
- Open Safari → Click Safari from the menu bar → Then, Select Settings.
- Go to the Profiles tab → Select the user profile you wish to remove.
- Click the (-) icon located at the bottom left side of the Profiles window.
- Finally, click Delete and Stop Using Profiles.
Enjoy a more personalized browsing experience in Safari!
Safari profiles on iPhone and Mac offer an excellent method of tailoring your browsing experience based on your needs. Each profile has its own set of extensions, history, and privacy settings. Give it a try, and let us know what you think about this nifty feature in the comments section below.
Also read:

