AutoFill is a convenient feature that saves time by automatically entering your saved passwords and personal details on websites and apps. But when it stops working, logging in can become frustrating. If you are facing the same problem, you’re in the right place. In this guide, we’ll walk you through the most effective solutions to fix the AutoFill not working issue.
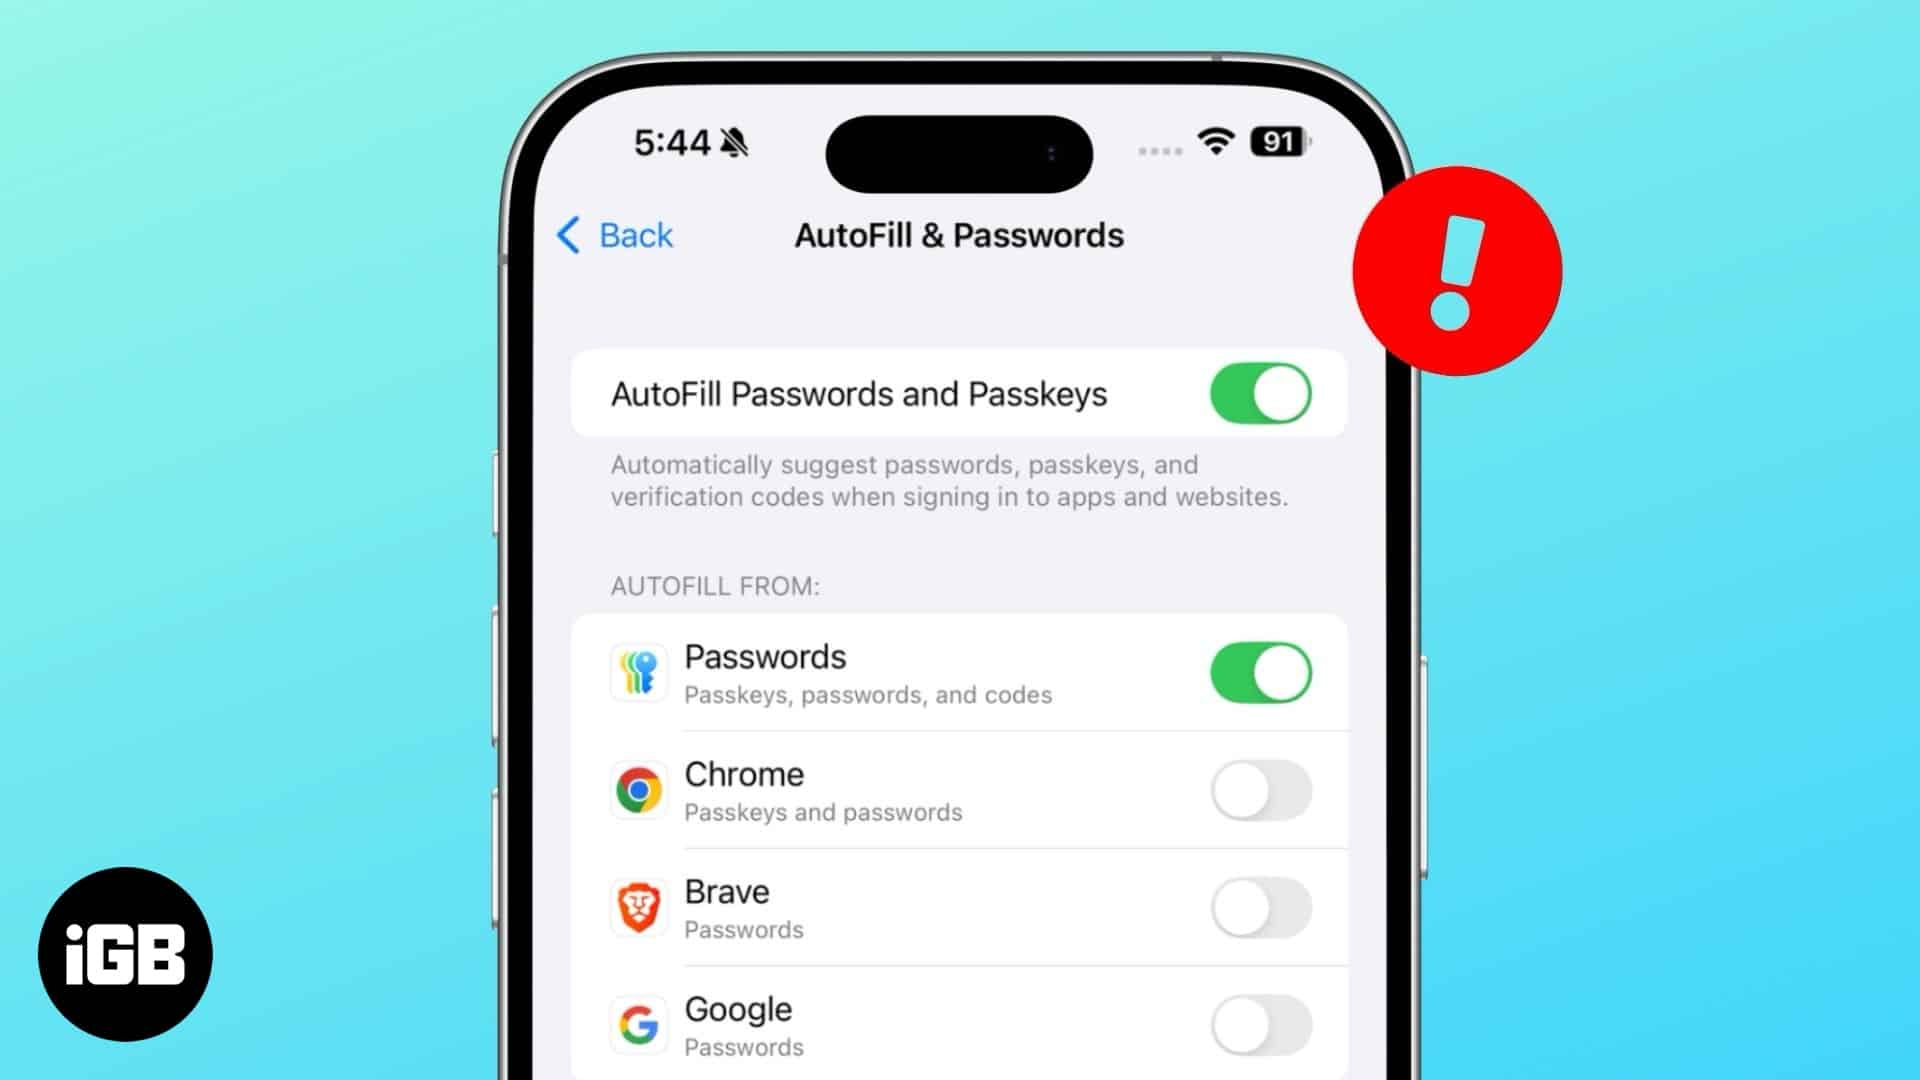
Table of Contents
- Why AutoFill is not working on my iPhone or iPad
- How to fix AutoFill issues on iPhone and iPad – Easy troubleshooting tips
- 1. Ensure AutoFill Password is enabled
- 2. Restart your iPhone or iPad
- 3. Allow iCloud Keychain
- 4. Check the iCloud status
- 5. Exit private browsing
- 6. Add login credentials for a specific website to AutoFill
- 7. Clear app cookies and data
- 8. Ensure you're using the default iOS keyboard
- 9. Update an iPhone to the latest iOS
Why AutoFill is not working on my iPhone or iPad
AutoFill may stop working on your iPhone or iPad due to several factors. Here are some common reasons:
- AutoFill is disabled: AutoFill must be enabled in your iPhone or iPad settings to function properly. If it’s turned off, your saved passwords won’t automatically populate in apps or websites.
- iCloud Keychain is not synced: AutoFill relies on iCloud Keychain to store and sync your passwords across Apple devices. If iCloud Keychain is disabled or not syncing correctly, AutoFill may fail to retrieve your stored credentials.
- Incorrect website or app credentials: If the saved login credentials in your AutoFill settings don’t match the website or app, AutoFill won’t work. This can happen if you’ve changed your password but haven’t updated it in the saved entries.
- Private Browsing Mode is enabled: Safari’s Private Browsing mode prevents AutoFill from working for security reasons.
- Software bugs or glitches: A temporary glitch in iOS or iPadOS may disrupt AutoFill.
- Third-party password managers interfering: If you’re using a third-party password manager like LastPass or 1Password alongside the Apple Passwords app, conflicts may arise, causing AutoFill to malfunction.
By identifying the cause of the issue, you can take the necessary steps to fix AutoFill and ensure a seamless login experience on your iPhone or iPad.
How to fix AutoFill issues on iPhone and iPad – Easy troubleshooting tips
Having faced the issue a couple of times, I know what can resolve this quickly. Keep reading to find out the best solution.
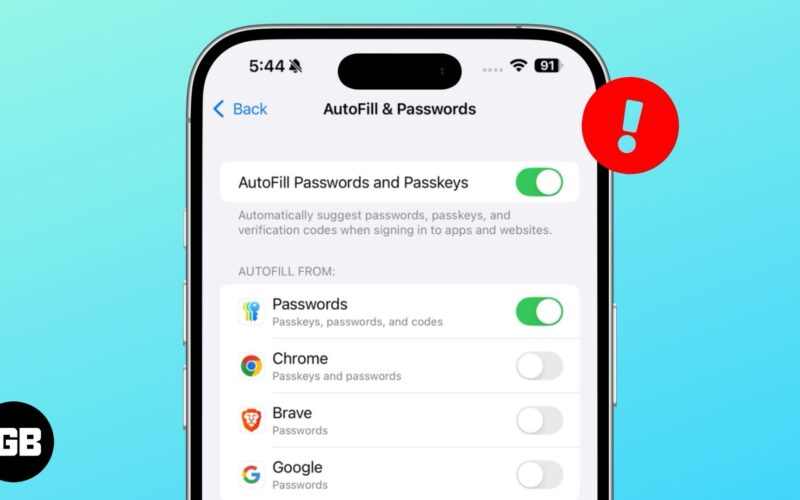
1. Ensure AutoFill Password is enabled
A common cause of AutoFill password failure on your iPhone is that users may have accidentally turned it off or never activated it. This is especially common among new iPhone users.
Thus, turning this feature on ensures that iOS registers all your credentials per website or app locally on your iPhone. It does this using the iCloud Keychain, which also helps secure credentials.
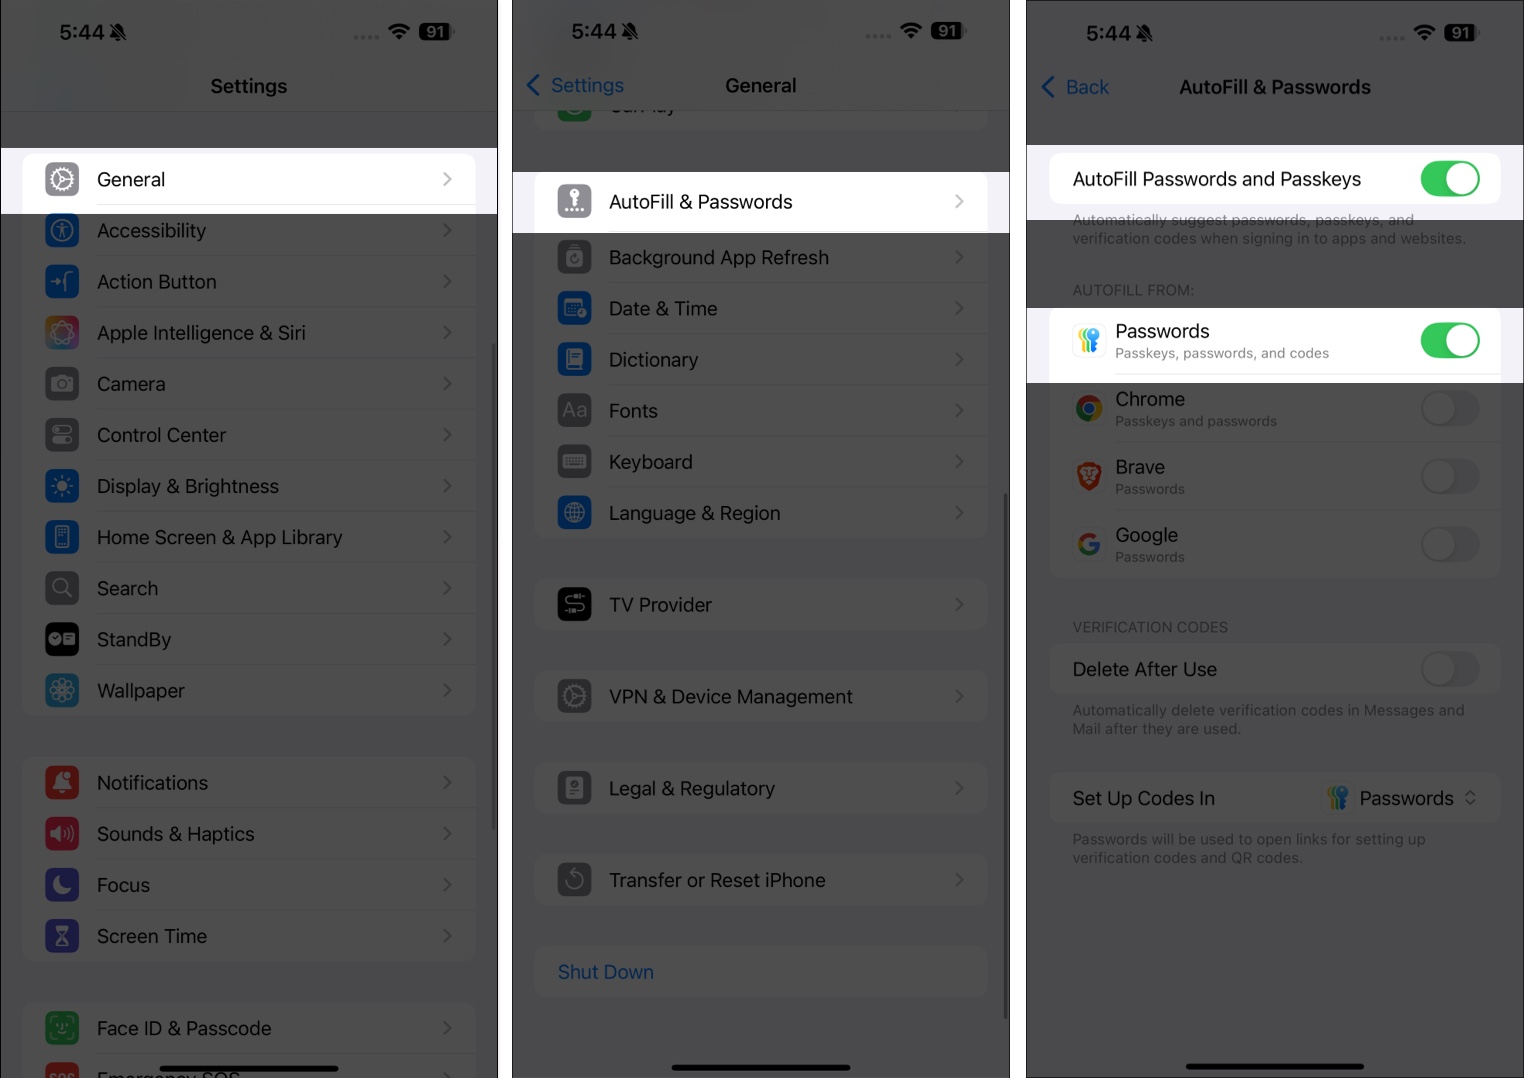
To activate AutoFill on your iPhone or iPad:
- Open Settings → Go to General.
- Tap AutoFill & Passwords.
- Toggle on AutoFill Passwords and Passkeys.
- Also, enable the Passwords app below.
2. Restart your iPhone or iPad
If you’re still having trouble with your iPhone’s AutoFill Password, restarting your device might help. However, how to do this varies depending on your iPhone model.
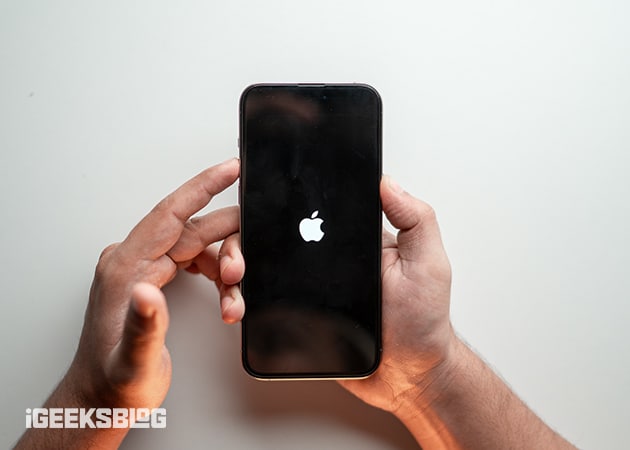
- To restart your iPhone, Press and hold down the Power and Volume buttons until a slider appears on the screen. Wait a few moments for the iPhone to turn off completely and the screen to go black. Press and hold the Power button until the Apple logo appears.
Here’s a guide on how to restart the various iPhone and iPad models.
3. Allow iCloud Keychain
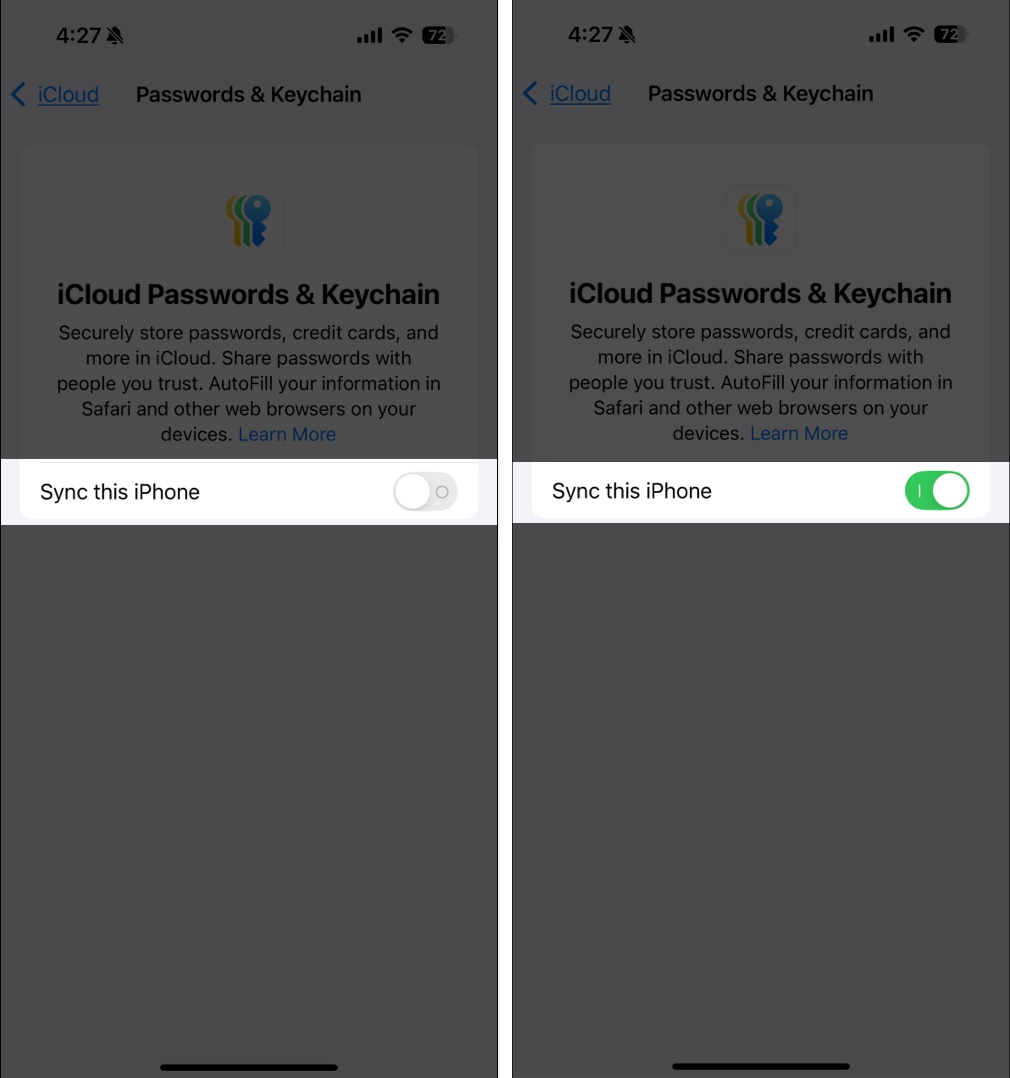
If enabled on your iPhone, Apple stores all your passwords, usernames, and payment information on your device using iCloud Keychain. Moreover, the stored credentials sync across all your Apple devices. Hence, you don’t need to fill in passwords repeatedly while logging in.
However, iCloud Keychain needs to be enabled on your device for AutoFill to work. So, one potential reason your AutoFill has stopped working is that this feature might be disabled. Take a look at our guide to enable iCloud Keychain on iPhone or iPad.
4. Check the iCloud status
On rare occasions, the iCloud Keychain server might be preventing AutoFill from working. This might be regional or more widespread. You can check the iCloud Keychain server status by going to the Apple Support System Status page.
A service with a green dot to its left shows that it’s currently available. Look for iCloud Keychain on the list and check whether it’s available.
Unfortunately, you cannot fix this yourself other than wait for Apple to resolve the issue. Nonetheless, this is uncommon. And if it occurs, it doesn’t take long before it comes to life.
5. Exit private browsing
Private browsing hides your browsing activities from other services. So even if the AutoFill feature works on your iPhone, trying to log into a website in incognito mode on Safari prevents iCloud Keychain from passing the authentication credentials.
Bear in mind that Password AutoFill will work for other apps at this point but won’t work on the browser. So, exit private browsing while signing in to a website. Here’s a handy guide for disabling private browsing on Safari.
6. Add login credentials for a specific website to AutoFill
Besides enabling AutoFill Password, some websites might need extra attention to autofill passwords and usernames during login. Hence, it is best to add them manually. This is especially helpful if you want to use other browsers besides Safari to log in to websites.
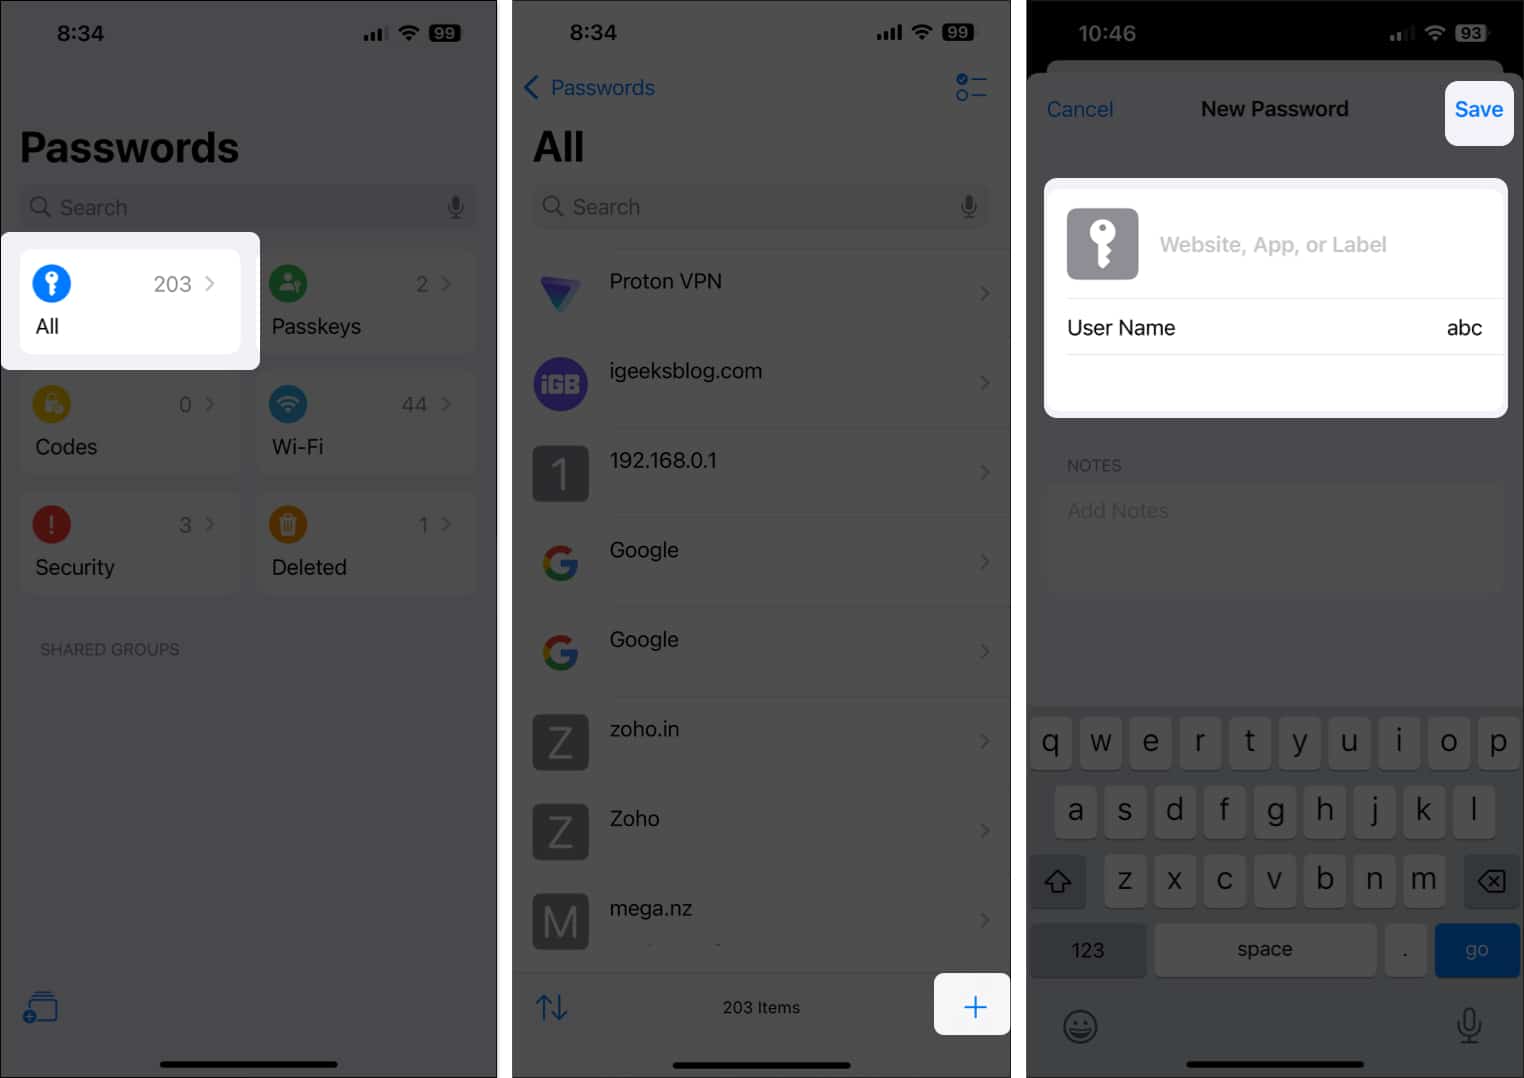
To do this, copy the URL of the said website and follow these instructions:
- Open the Passwords app.
- Tap the + icon at the bottom right.
- Enter the URL, username, and password of the website in the respective fields.
- Finally, tap Save at the top right.
You can also edit saved passwords, delete unnecessary ones, add 2FA codes, and much more in the Passwords app. To learn in detail, go through the detailed guide on how to use the Passwords app on your iPhone.
7. Clear app cookies and data
Corrupted cookies or cached data can sometimes prevent AutoFill from working properly, especially in browsers and certain apps. Clearing this data can help resolve the issue.
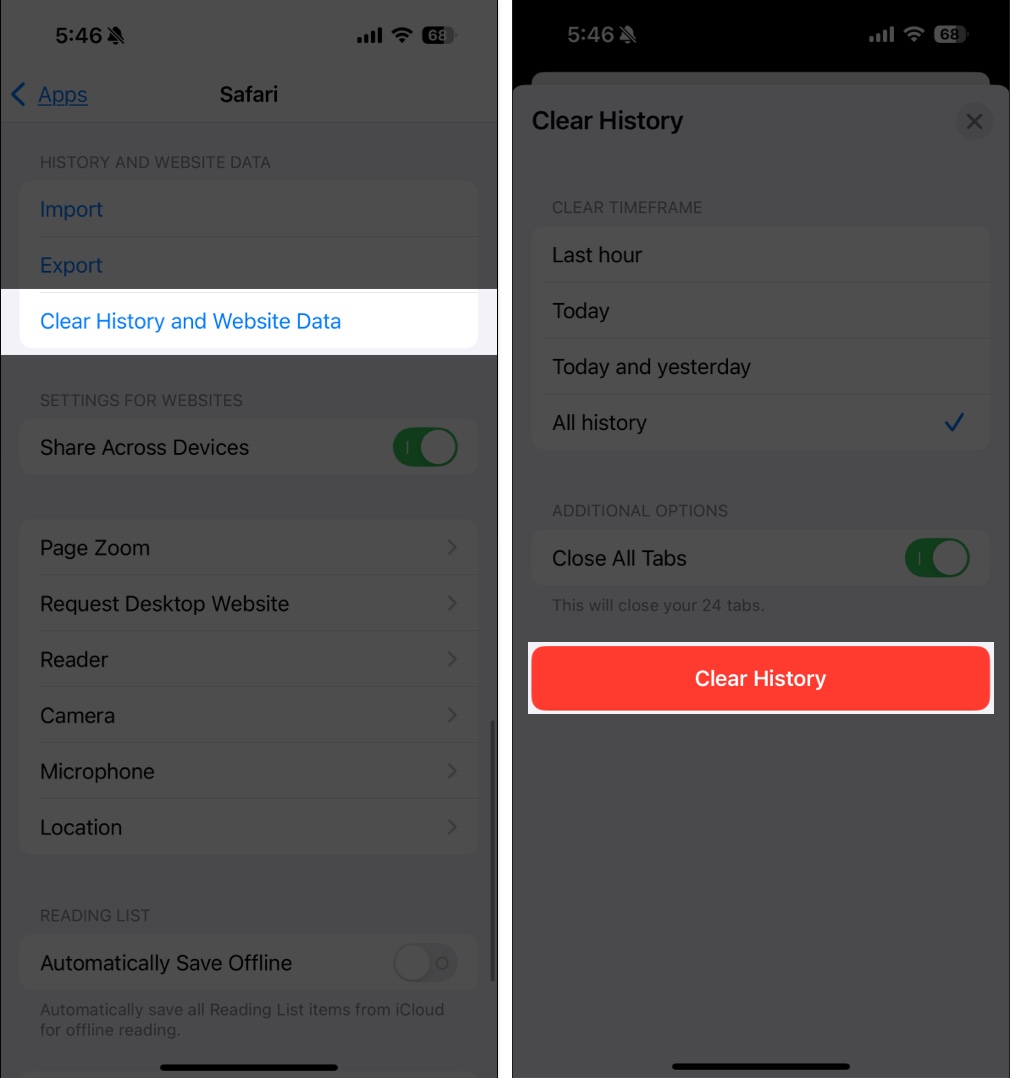
Here’s how to delete the browsing cache of Safari:
- Open Settings → Apps → Safari.
- Tap Clear History and Website Data.
- Confirm by Clear History.
To remove history in Chrome, open the app, tap the three-dot menu (⋮) at the bottom-right corner, and hit Clear Browsing Data. Finally, select Cookies, site data, and Cached images and files, then tap Clear Browsing Data.
If AutoFill isn’t working in specific apps, clearing their cache or reinstalling the app can help.
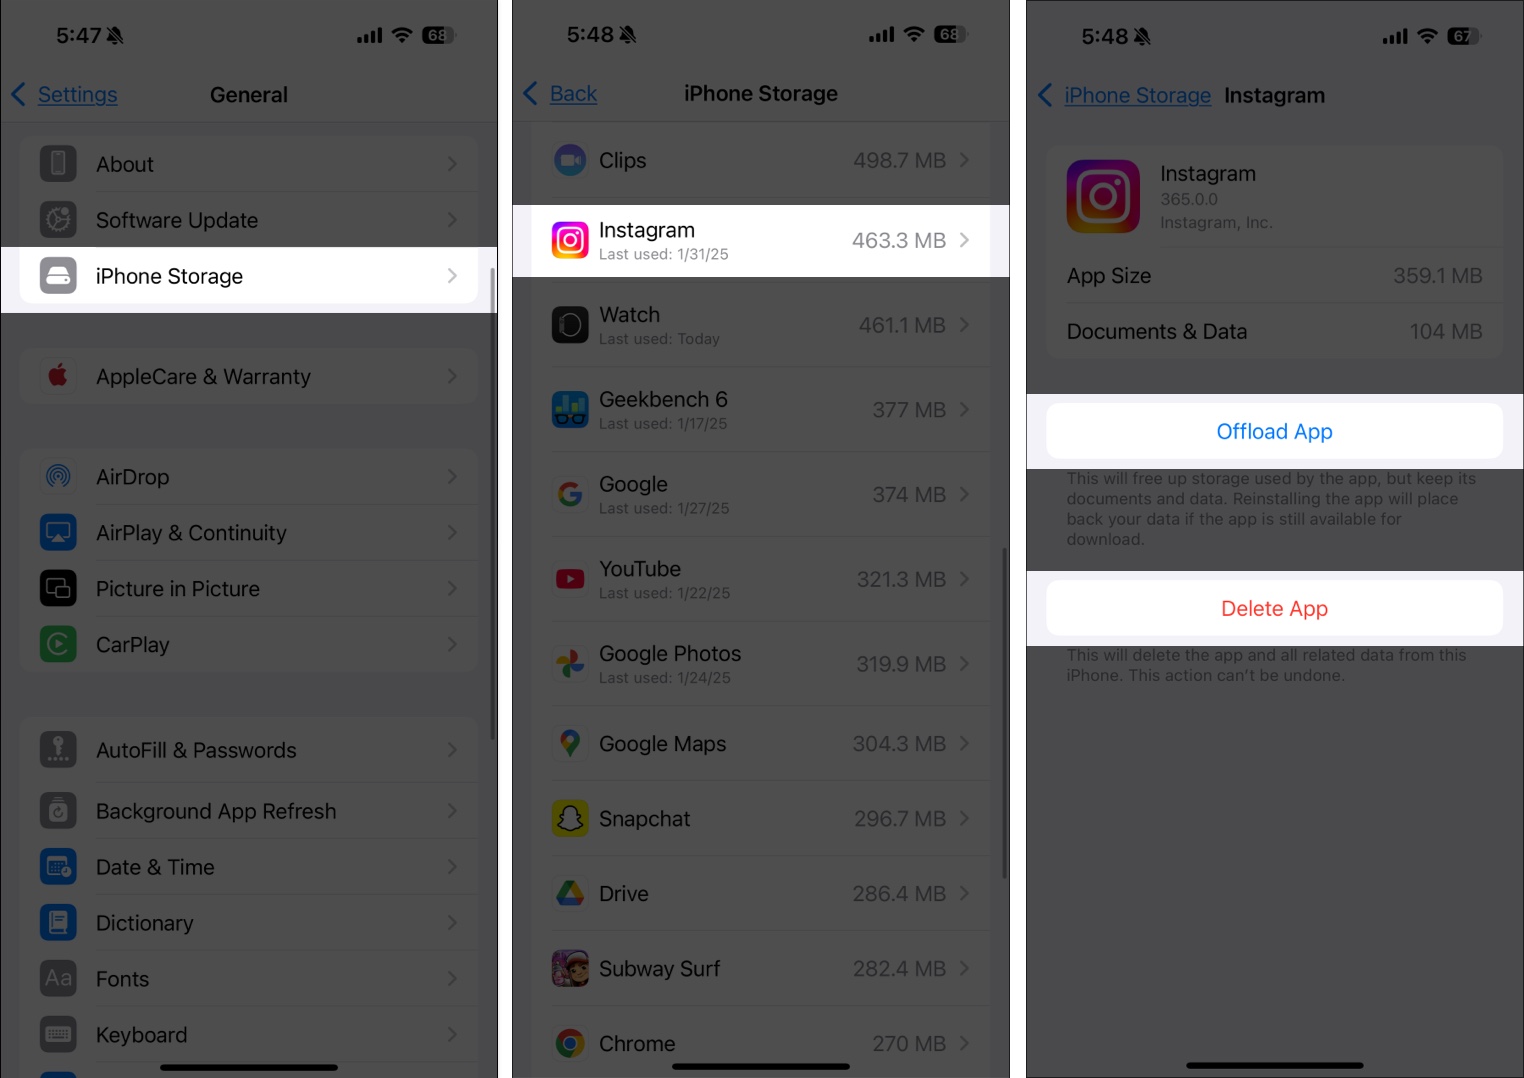
- Go to Settings → General → iPhone Storage.
- Select the app and tap Offload App (to free space without deleting data) or Delete App (to remove all data and reinstall fresh).
- Reinstall the app from the App Store and try using AutoFill again.
After clearing cookies and data, reopen the browser or app and check if AutoFill is functioning correctly.
8. Ensure you’re using the default iOS keyboard
If you’re using a third-party keyboard on your iPhone or iPad, it might be interfering with AutoFill functionality. Some keyboards may not fully support AutoFill or may block the password suggestions from appearing. Switch to the default Apple keyboard.
- Open Settings and go to General.
- Tap Keyboard → Keyboards.
- If you see third-party keyboards listed, tap Edit and remove them by tapping the red minus (-) icon.
- Ensure that Apple’s default keyboard is selected.
9. Update an iPhone to the latest iOS
If AutoFill still isn’t working on your iPhone, updating to the latest iOS version might resolve the issue. An outdated iOS version can prevent your iPhone from supporting recent features, including iCloud Keychain and AutoFill.
Signing off!
AutoFill simplifies logging into apps and websites, but it can be frustrating when it stops working. By following the troubleshooting steps in this guide, you can get AutoFill working smoothly again and enjoy a hassle-free login experience. If none of these fixes work, consider contacting Apple Support.
Check out other troubleshooting guides:

