The number of email spam has frighteningly been going up in the past few years. To protect users from phishing emails, Apple introduced a new feature called Hide My Email. With iCloud+, Apple has further pushed the boundaries of Hide My Email as it can now protect users across Apple apps, including Safari, Mail, and more.
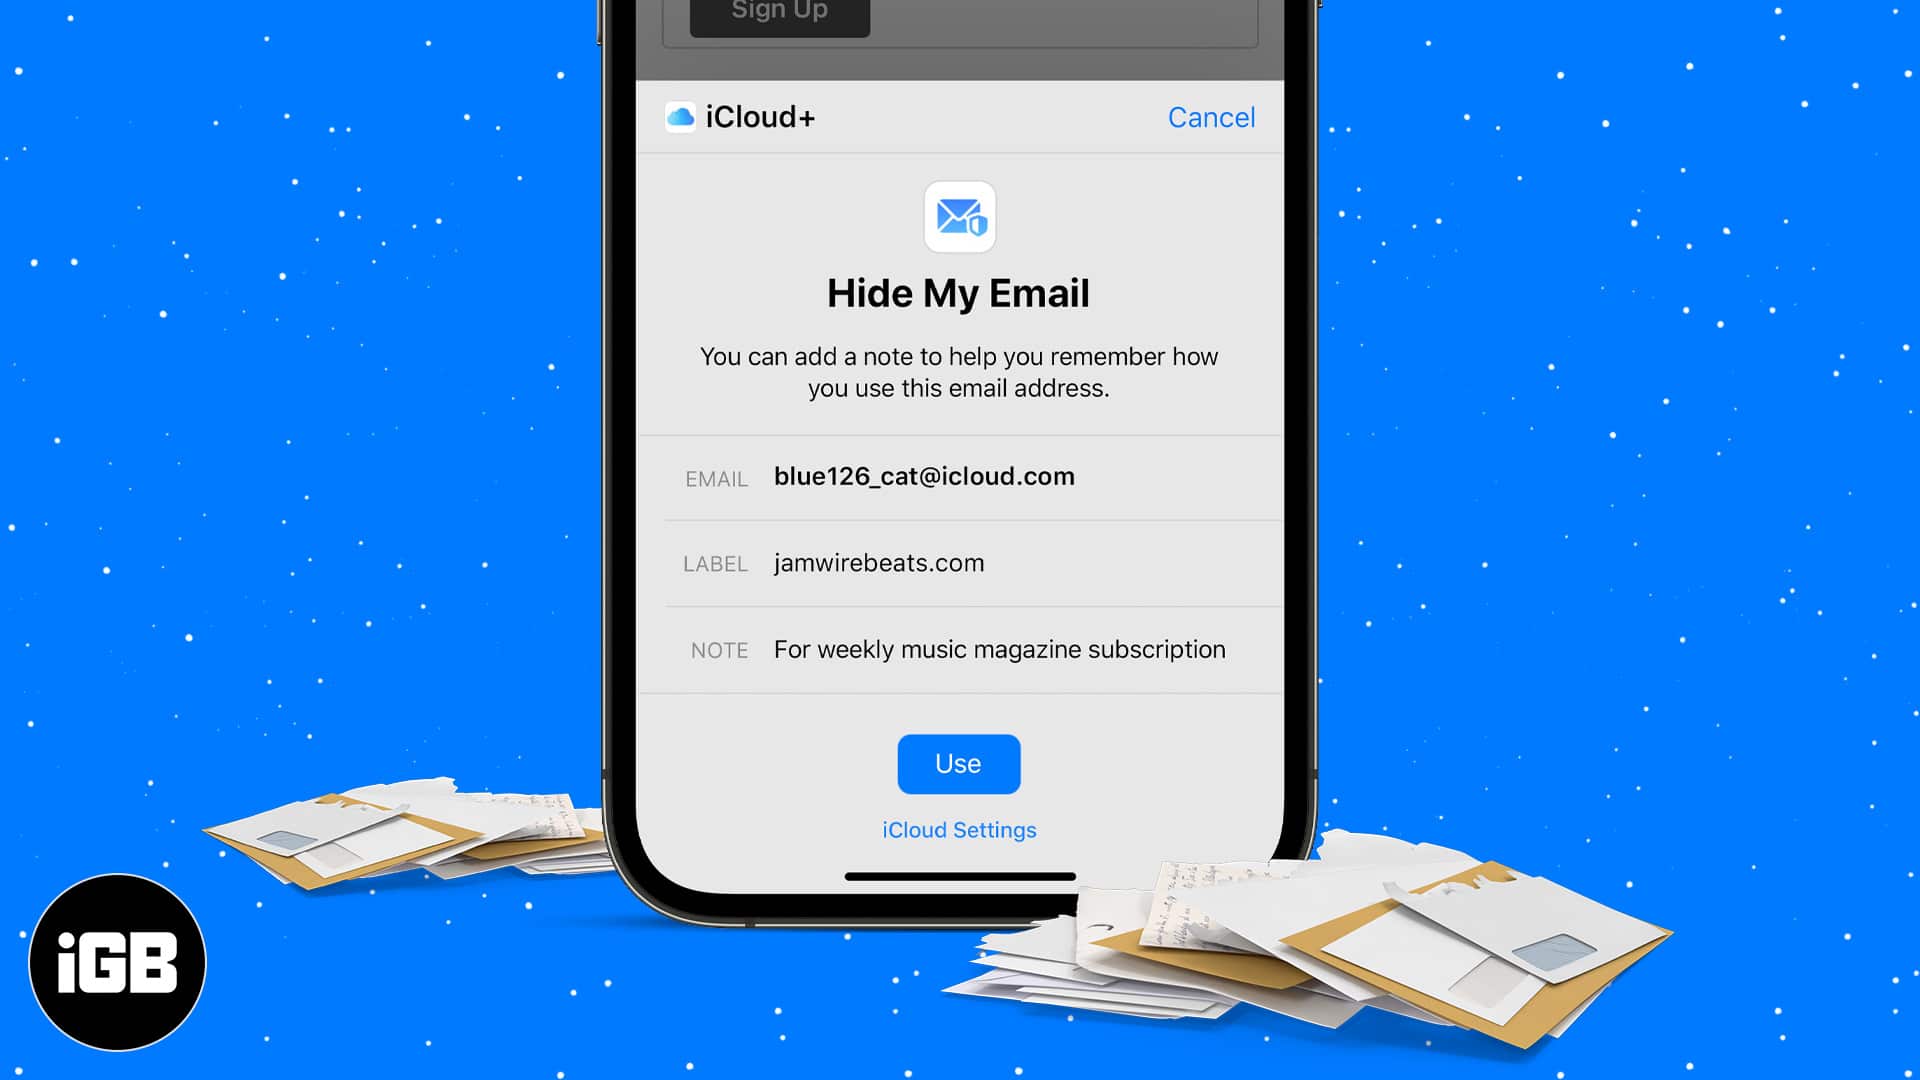
This article will explain what Hide My Email is, how it works, and how Apple users can take advantage of this fantastic privacy feature.
What is Apple’s Hide My Email feature?
You sign up on a free website or a service with your primary email address. Then, a few days later, you see your mailbox filled with junk mails from senders you do not recognize and mails from websites you didn’t even sign up for.
Raise your hand if this has happened to you!
What’s happening behind the scenes is that the ‘free’ service you signed up for is (probably) ‘leaking’ your email address to mass marketing websites that send you these phishing emails. To protect this from happening, Apple introduced a new feature called Hide My Email.
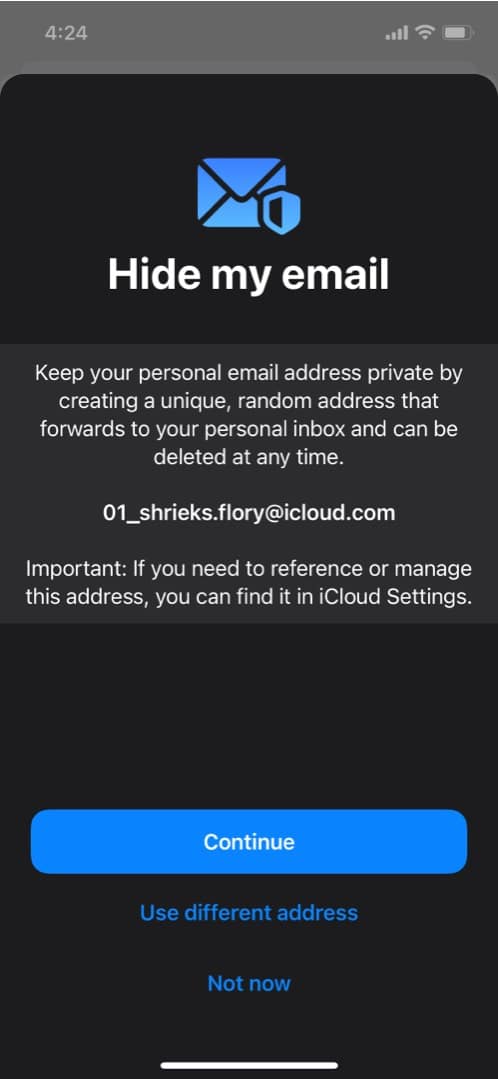
Hide My Email creates a new, unique, and random email address when you sign up on a website or an app on iPhone, Mac, or iPad. This ensures that your private email address isn’t shared with the websites.
Example:
Let’s say your primary email address is abc123@igeeksblog.com. When you sign up on a website, a prompt will ask you to use Hide My Email. If you choose yes, Apple will instantly generate a random, unique alphanumeric email address like cvjwdns8dj@privaterelay.appleid.com. This “@privaterelay.appleid.com” is the identifier for Apple’s Hide My Email address.
But will I have to sign in with a private relay email ID to receive email from the website?
No. Since Apple already knows your primary email, it will automatically forward all the emails sent to the private relay email ID.
One additional benefit of the Hide My Email feature is that it automatically filters out all the spam mails. Apple also states that it doesn’t “read or process any content in the email messages that pass through the relay service.”
What’s better in Hide My Email with iCloud+?
Up until now, you could only use Hide My Email to hide your email address from apps and websites when you create an account on them or sign up for any newsletters.
With iCloud+, Apple has added an option to protect your email address even when sending an email and making a purchase via Apple Pay. Now, whenever you use the Mail app to send an email, the Hide My Email option will come up.
This will generate a unique email address, and the receiver won’t see your primary email address. However, all the replies and emails sent to that unique mail address will be sent to your inbox.
How to enable Hide My Email on iPhone
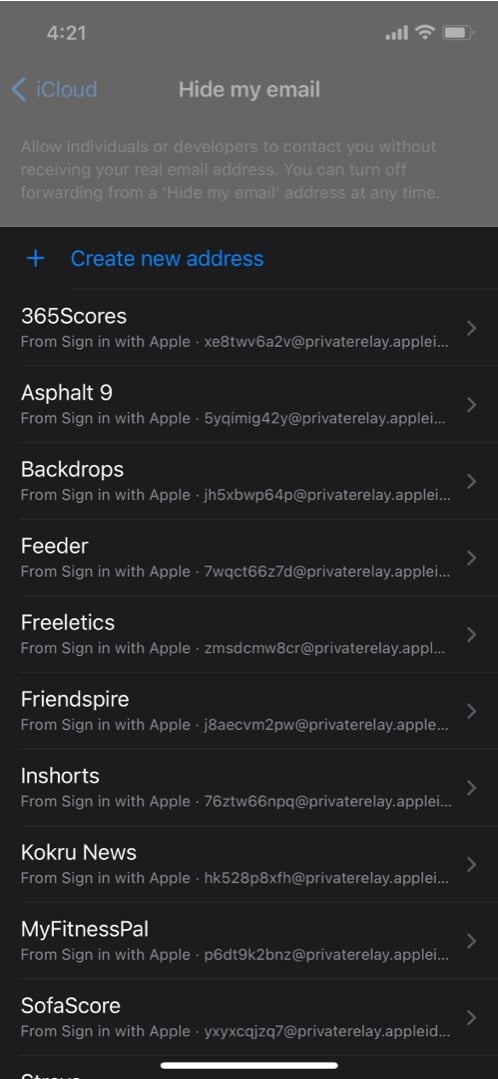
Paid iCloud+ subscribers can see a new option called Hide My Email in iCloud settings. In this setting, you’ll be able to manage all of your private relay emails, activate or delete a private relay email, and do much more.
- Create a new address: You can create a new private relay address anytime and use it to sign up on websites and send emails. Moreover, all the replies will be sent to your primary emails.
- Manage email addresses: Under create new address, you’ll see all the created private relay emails. In addition, you can tap the app’s/website’s name to change settings for that particular service.
Can I customize the email address for Hide My Email?
Currently, Apple does not provide an option to customize Hide My Emails. But since Apple already creates a unique email address, you don’t need to worry about others using it.
Also, all the private emails are stored on your Apple ID across devices. So there’s no need to “customize” them in case you’re wondering about memorizing each email ID.
How to change Hide My Email settings on iPhone
If you want to stop using Apple’s private email service, these are the options you can opt for.
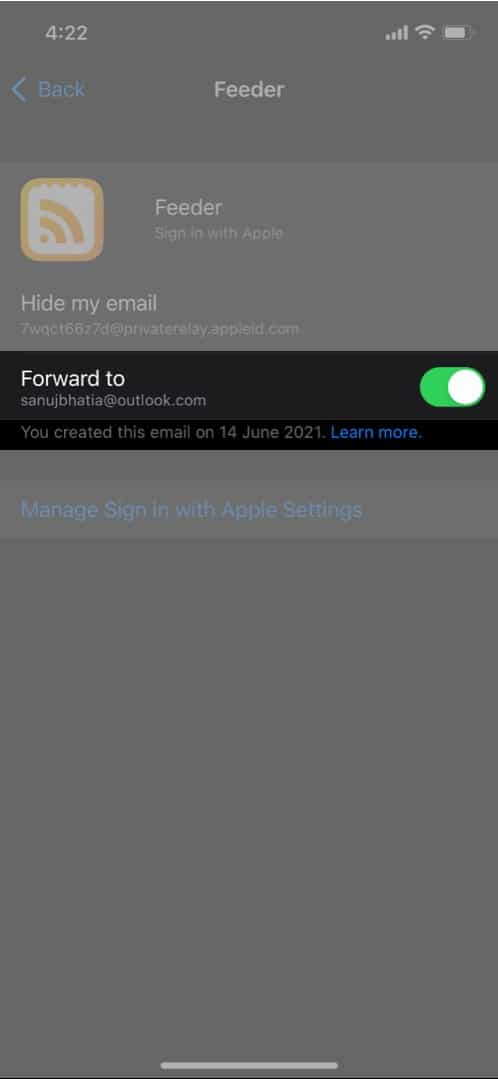
- Turn off email forwarding: If you’re irritated by the number of emails from a particular website, you can stop receiving them.
- Go to Settings.
- Tap your name → iCloud.
- Now select Hide My Email and choose the service from which you don’t want to receive emails.
- Toggle off Forward to.
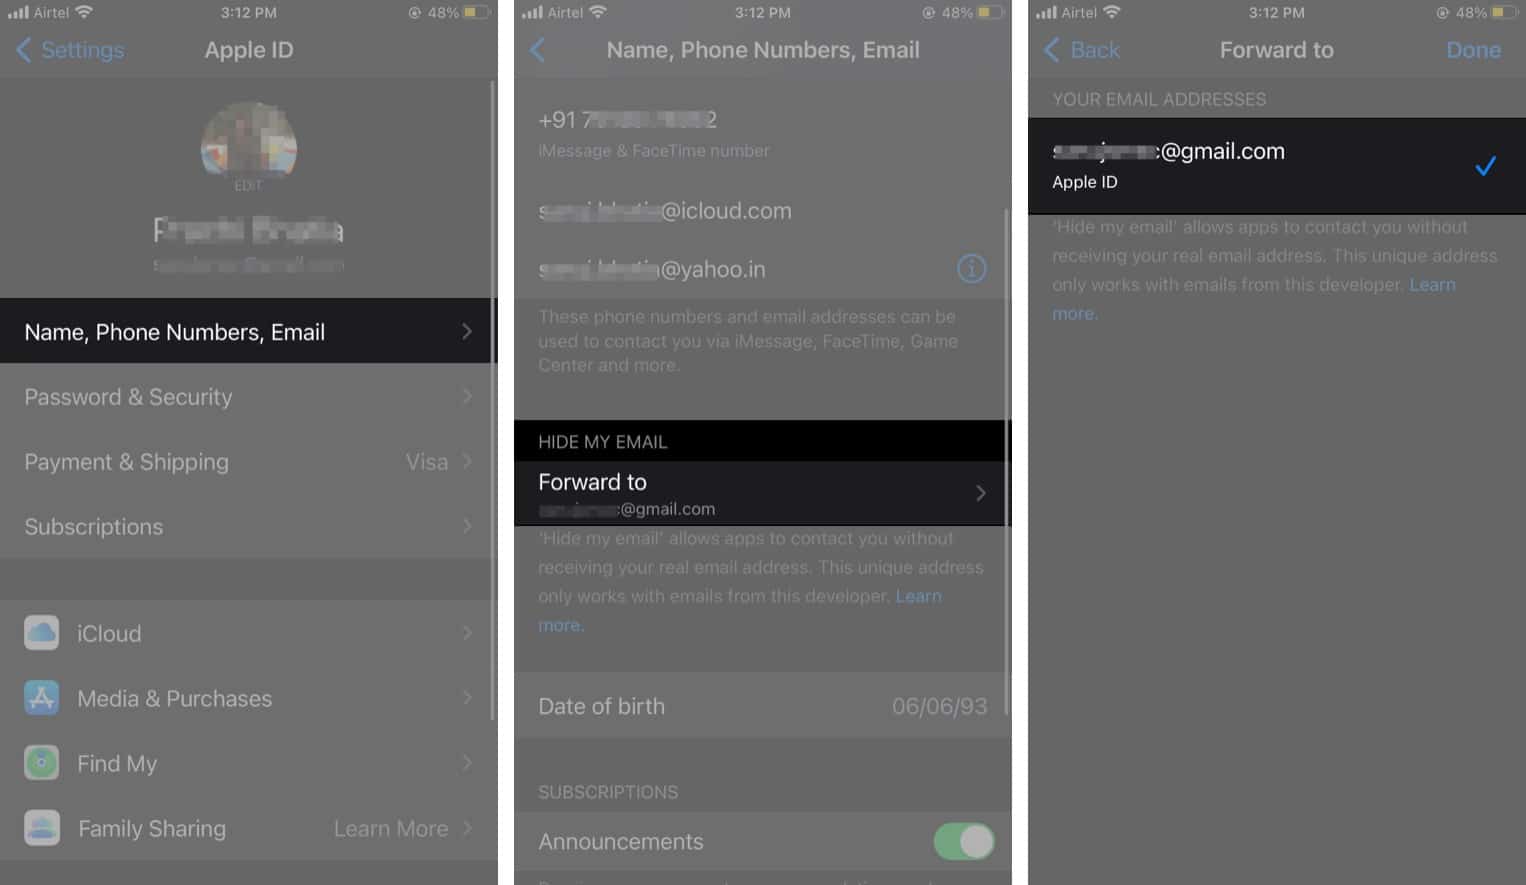
- Change forwarding address: If you’ve changed your primary email address, you can set the private email address to send all the emails to your new address.
- Go to Settings → tap your name.
- Tap Name, Phone Numbers, Email.
- Tap Forward to.
- Now, enter the new email address to which you want the emails to be forwarded.
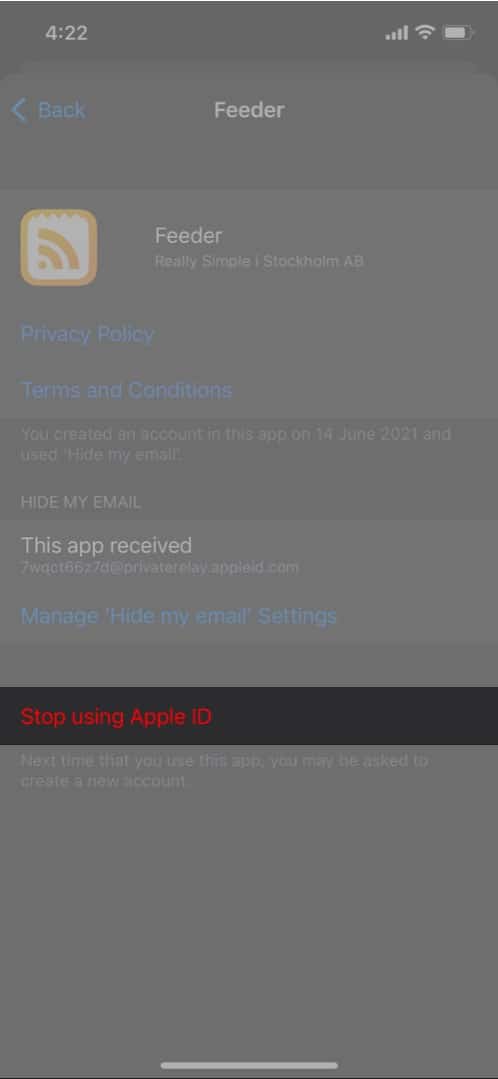
- Stop using Sign in with Apple for an app: To do so:
- Go to Settings → tap your name → iCloud.
- Now select Hide My Email → choose the service you don’t want to use the Apple ID email with.
- Tap Stop using Apple ID.
I hope this comprehensive guide helped you learn all about Hide My Email and how it shows Apple’s continued interest in protecting user’s privacy. Have some questions? Let us know in the comments section below!
You would like to read these as well:

