Can’t track your belongings attached to your AirTag? Whether your AirTag is not connecting to your iPhone or has stopped showing up on Find My, we’ve got you covered.
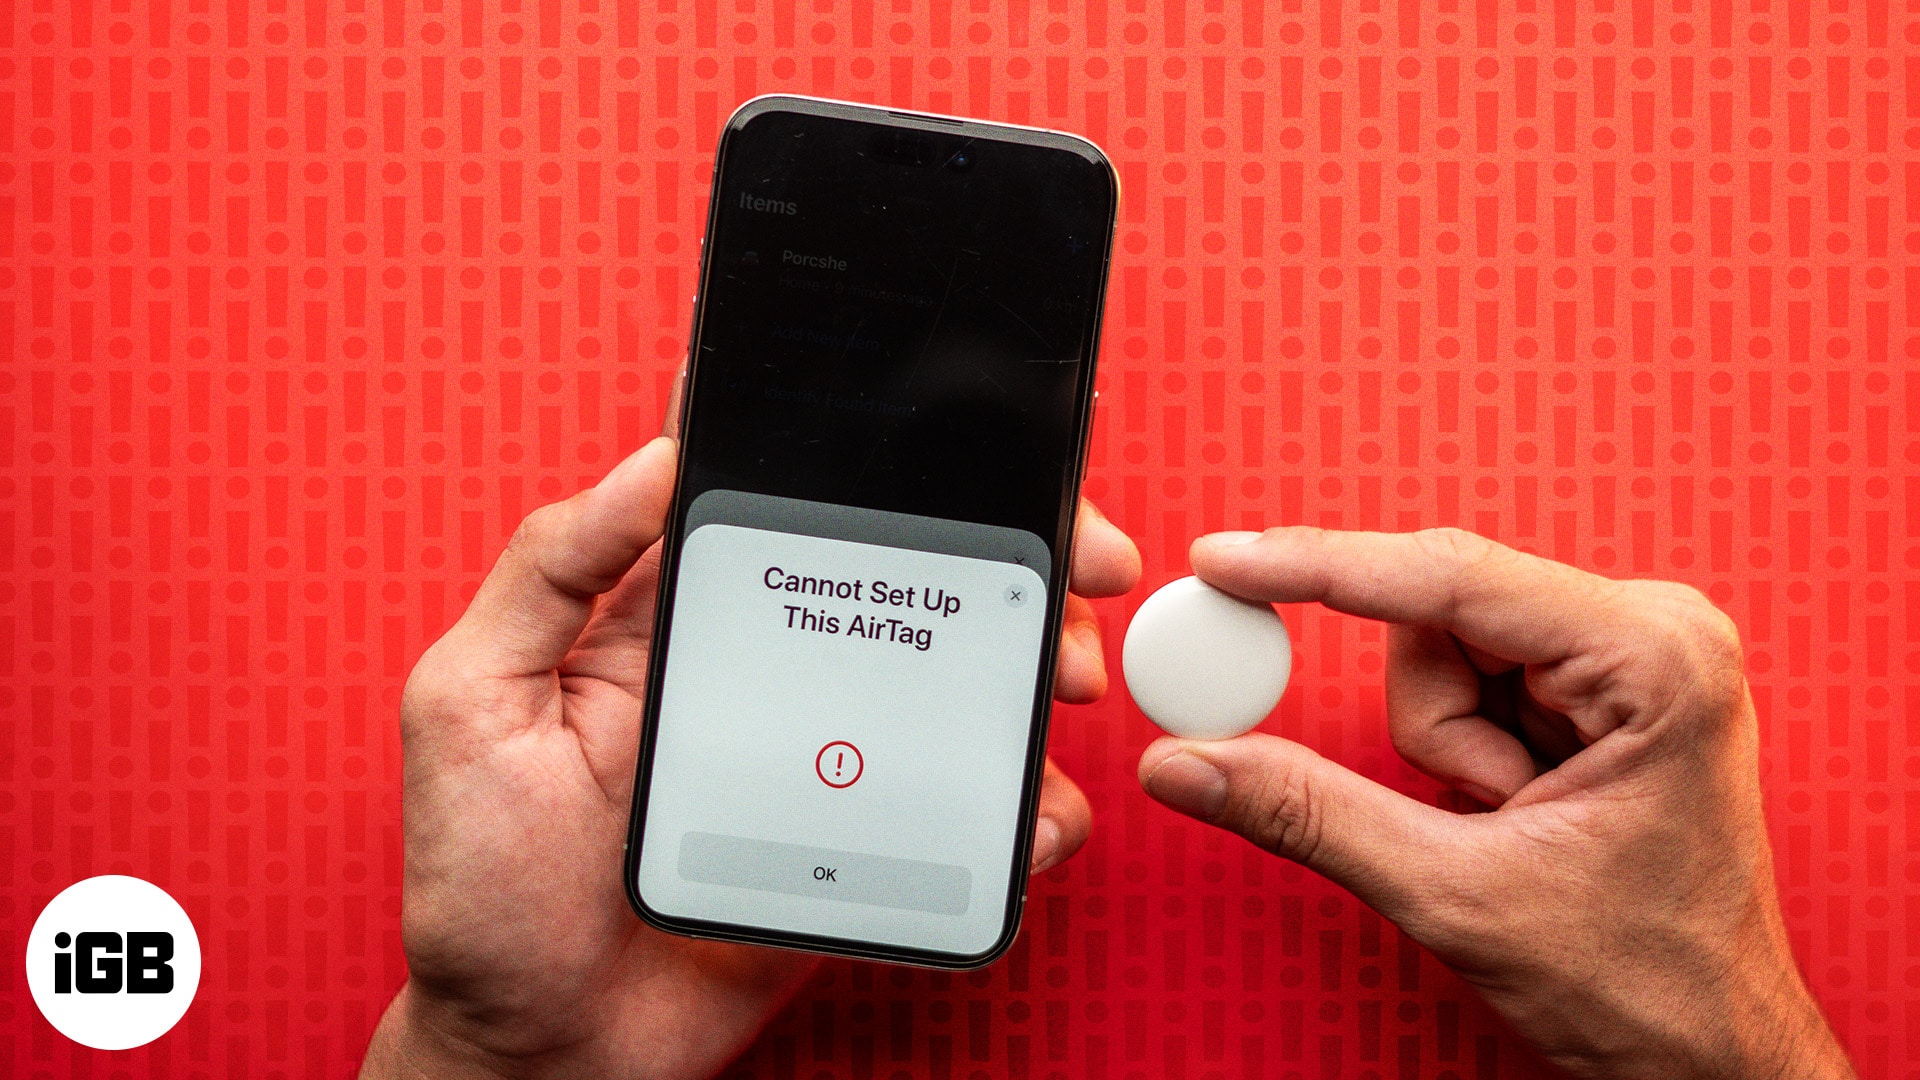
In this article, we’ll share some common reasons that can cause this problem and guide you through simple, effective solutions that you can use to fix an AirTag not connecting to your iPhone.
Why is your AirTag not connecting?
Before we jump to the solutions, you must find out the root cause behind the issue to troubleshoot it properly. Here are a few reasons why your AirTag may have stopped working or not be functioning as it should:
- AirTag’s battery is dead.
- Bluetooth or cellular connectivity issues on your iPhone.
- Software glitches or outdated firmware on the AirTag.
- Incorrect location settings on your iPhone.
- Find My not activated on the iPhone.
- Misconfiguration while setting up AirTag.
- Physical damage to AirTag.
Inspect your AirTag carefully and diagnose your problem. If you find physical damage on your AirTag, make a Genius bar appointment to get it fixed.
How to fix an AirTag not connecting to an iPhone
If your AirTag looks fine but still does not connect to your iPhone or show up in Find My, don’t worry. Here are some easy solutions to get it working again.
1. Change AirTag’s battery
Sometimes, the reason your AirTag does not show up is simply because its battery is dead, and you may have missed the low battery alert. AirTag features a user-replaceable CR2032 coin cell battery. After using it for 10-12 months, you must replace the battery to ensure your AirTag has enough power to connect.
Follow these steps to change your AirTag’s battery:
- Press down the AirTag’s back stainless steel cover.
- While pushing down, rotate it anticlockwise (right to left) until it stops rotating further.
- Next, pull up the back cover and take out the battery.
- When putting the battery back in, ensure that positive (+) side is facing up.
- Press down on battery until you hear a beep indicating it has been inserted properly.
- Finally, place the cover and turn it from left to right to close it securely.
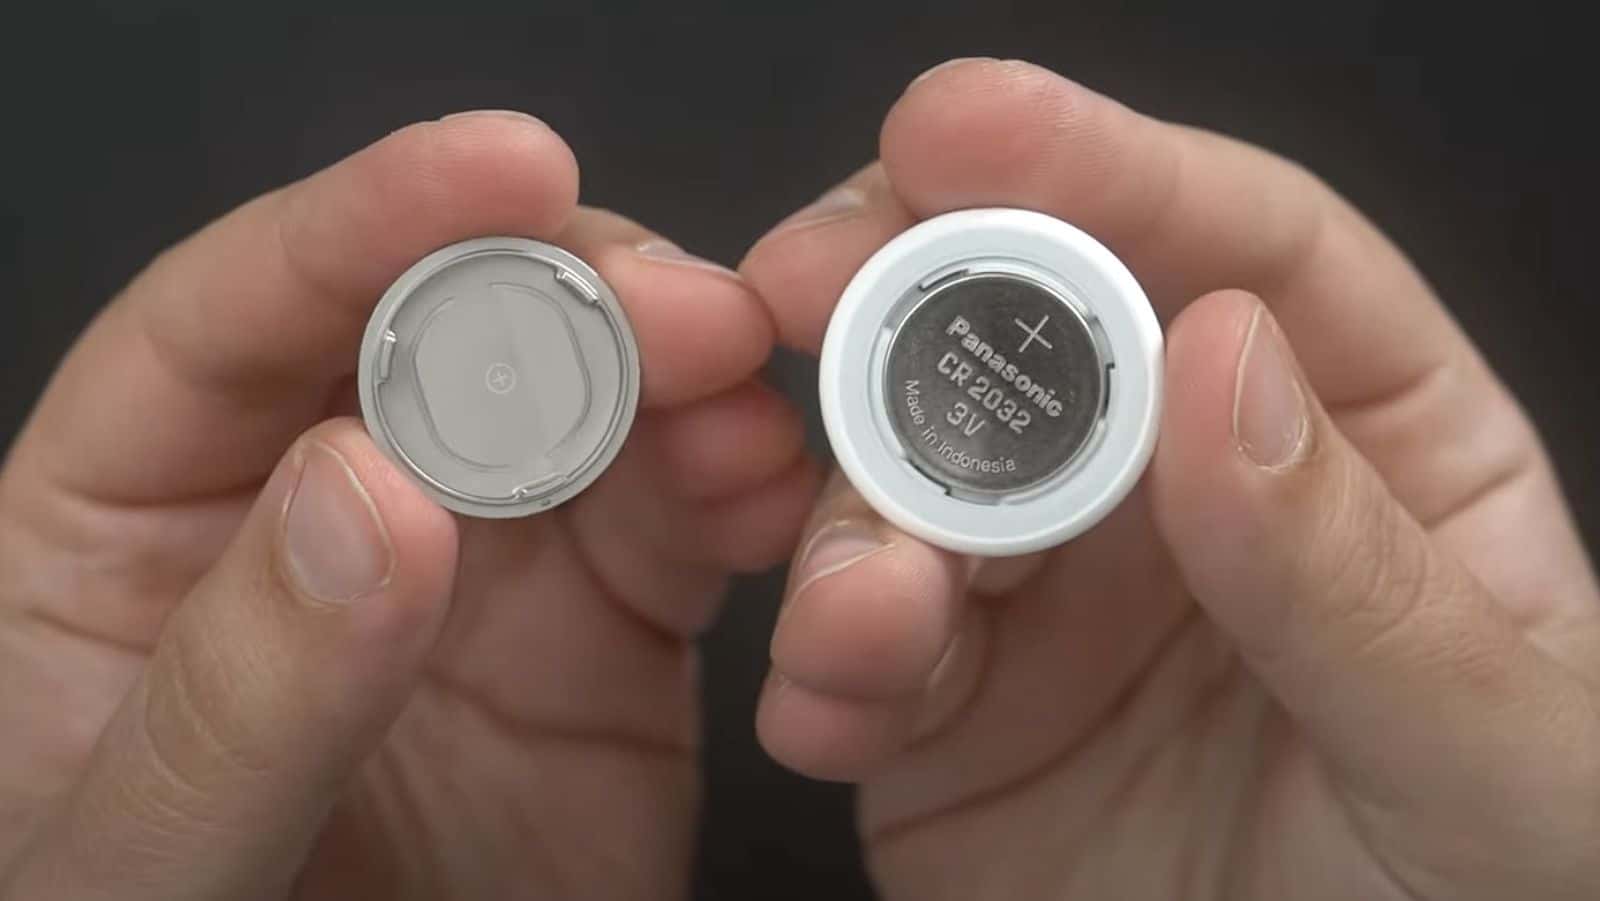
This is how you can remove and reinsert the AirTag battery to fix related problems. While in the process, ensure the surface is not covered with dust, wax, and other unnecessary coatings.
2. Ensure two-factor authentication is enabled
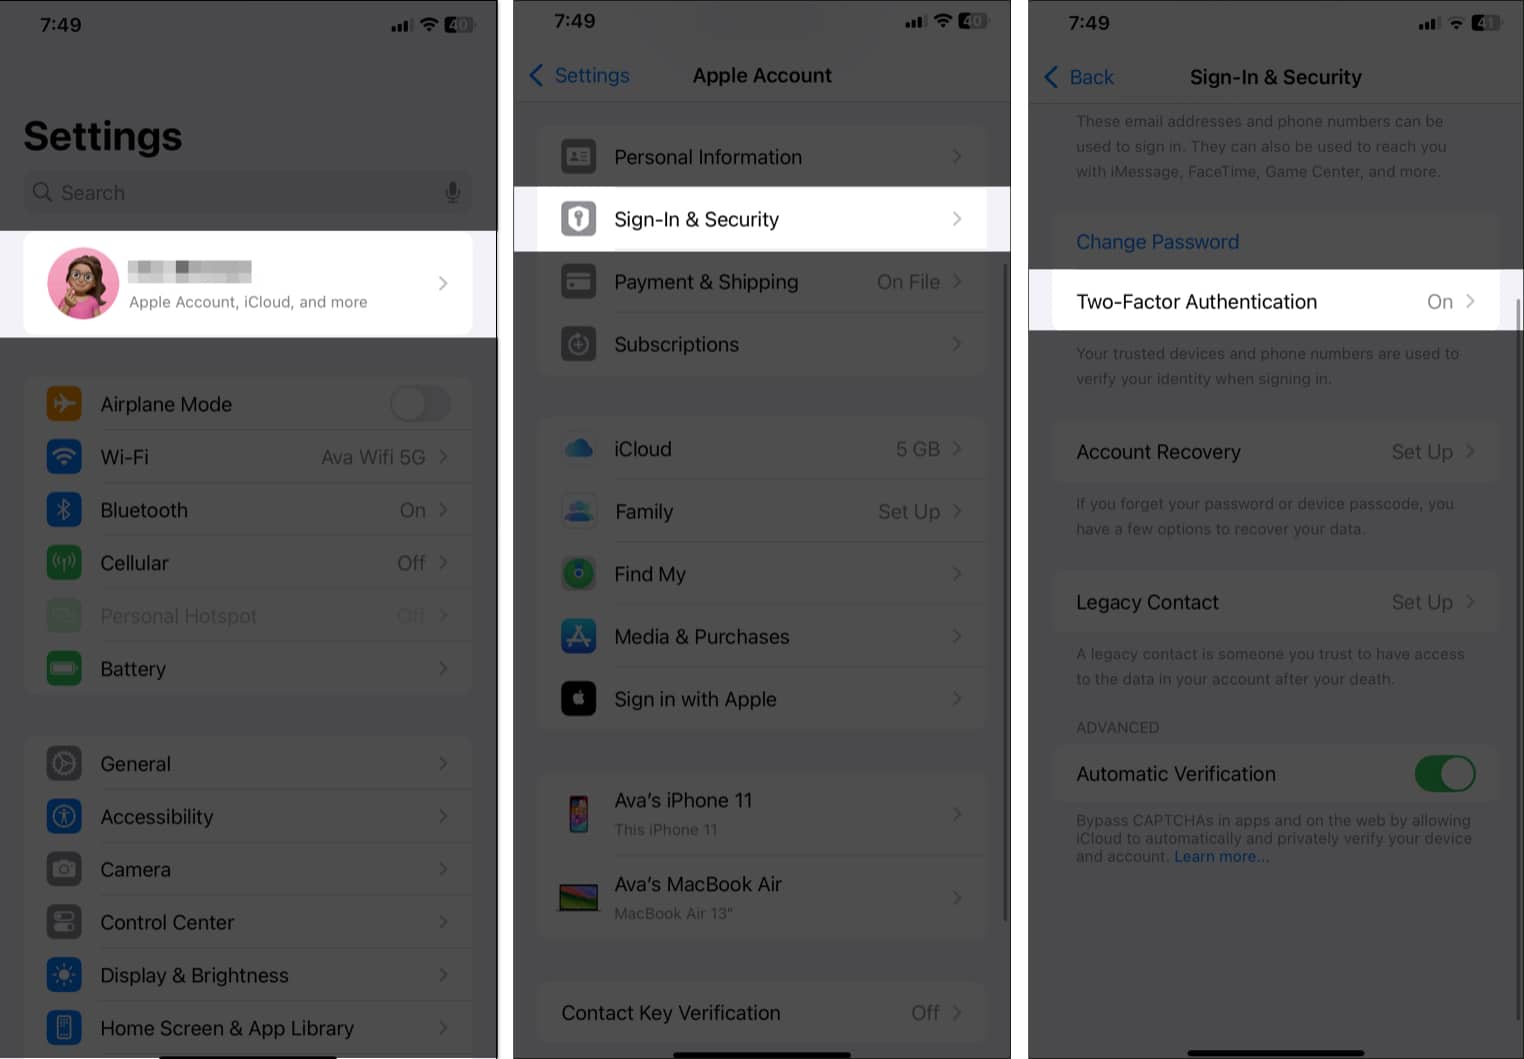
If your AirTag is not connecting, maybe two-factor authentication is not enabled for your Apple ID. Before setting up your AirTag, open the Settings app and tap on your name at the top Then, select Sign-In & Security and confirm that Two-Factor Authentication is On.
3. Turn off/on Bluetooth, Wi-Fi, and cellular network
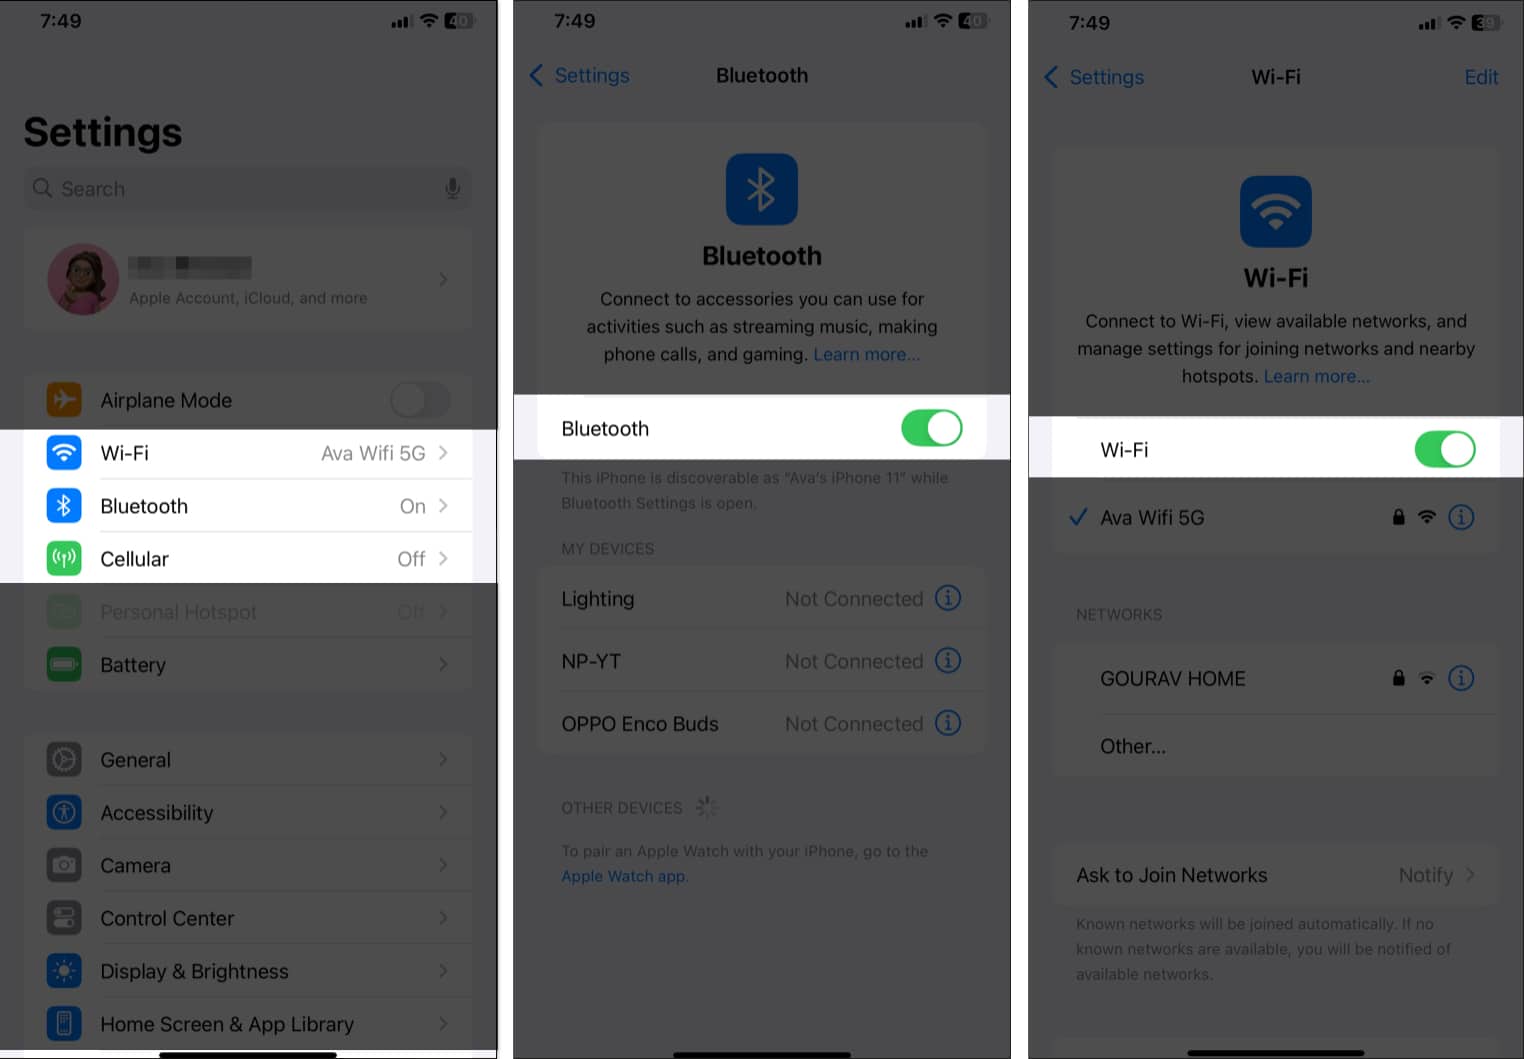
Connectivity issues can also cause an AirTag to not connect to your iPhone and show up on Find My. Refresh your connections by toggling off and on Bluetooth, Wi-Fi, and cellular network in your iPhone Settings app.
- Go to Settings and tap on Bluetooth.
- Toggle off Bluetooth, then turn it back on after 30 seconds.
- Repeat the same process for Wi-Fi and Cellular.
Wait for your iPhone to reconnect to the networks. Make sure you are connected to a strong Wi-Fi or cellular data network to maintain a good connection.
If you are setting up AirTag for the first time, keep it near your iPhone. Apple states that AirTags have a range of up to 800 feet in an open outdoor area.
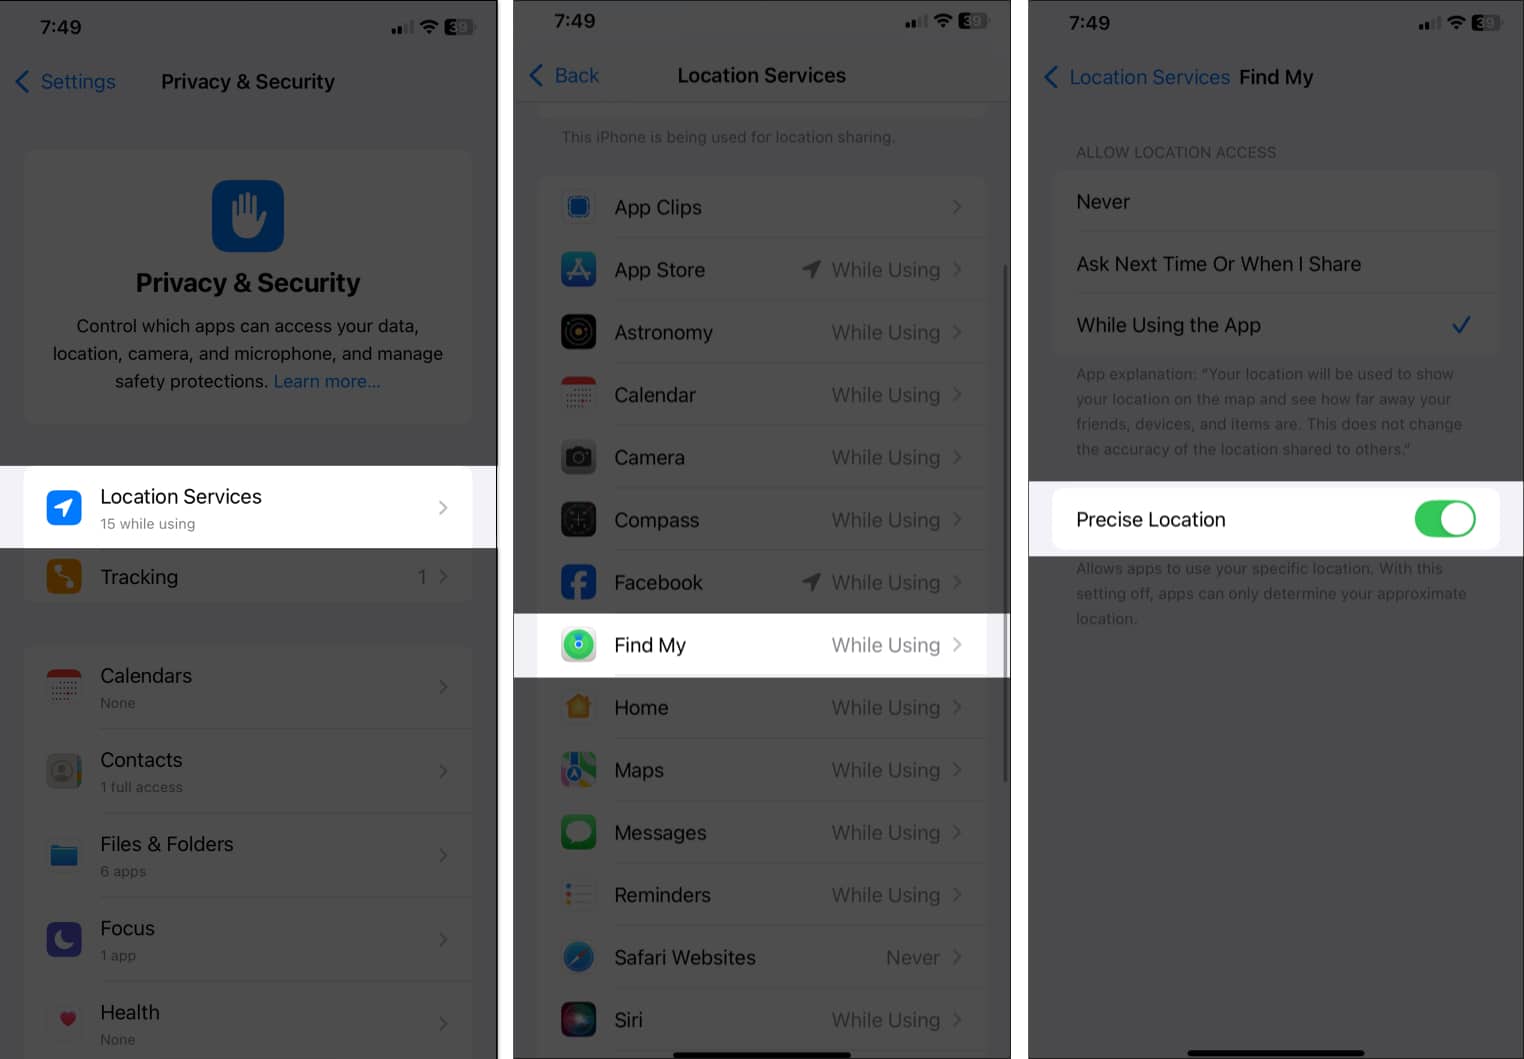
Also, ensure AirTag Precision Finding is enabled so you can easily locate your belongings. To do this, head over to Settings → Privacy & Security → Location Services → Find My and toggle on the Precise Location option. Now, check if you can track the AirTag on Find My.
4. Restart your iPhone
A simple restart can fix many glitches, including those preventing your AirTag from connecting.
- Hold the Side button and either Volume button until the power off slider appears.
- Slide the slider all the way to the right.
- Wait a few seconds, and then turn your iPhone back on.
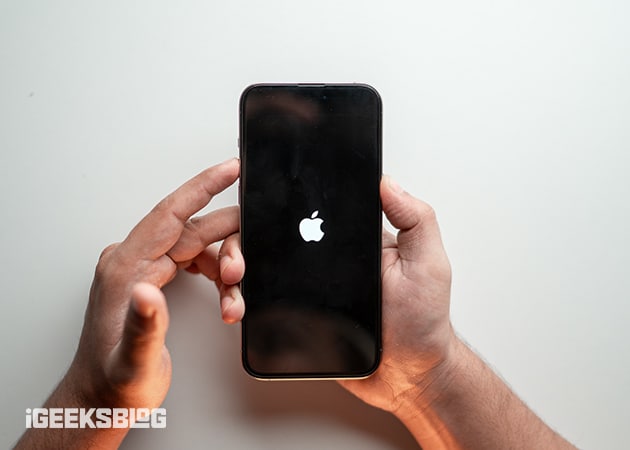
Now, head over to Find My and go to Items. You should be able to see the live location of your AirTag.
5. Update your iPhone and AirTag’s firmware
Obsolete firmware may lead to connection problems which will make it impossible for an AirTag to show up on Find My. So, update iPhone to the latest iOS version and make sure your AirTag has the latest firmware.
Simply, launch the Settings app and select the General menu. Here, choose Software Update and tap Update Now if any new iOS version is available.
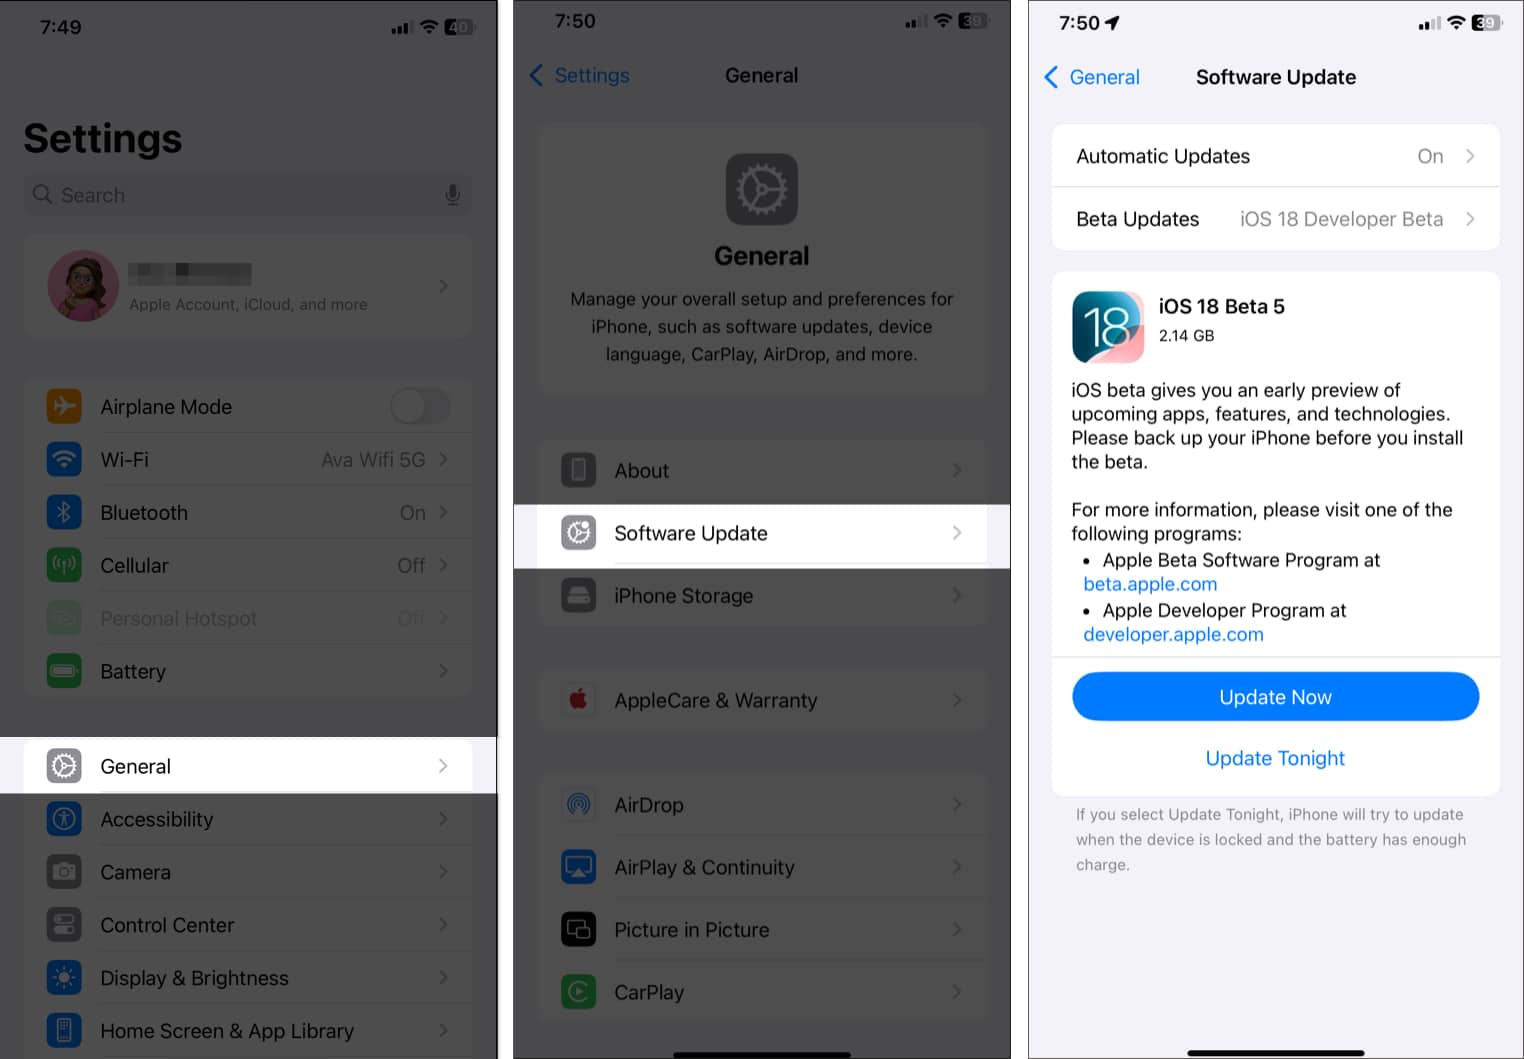
To update your AirTag’s firmware, you need to keep it near your iPhone for 15 to 20 minutes. The update process is automatic and happens over the air through your paired iPhone.
6. Reset Network and Location & Privacy settings
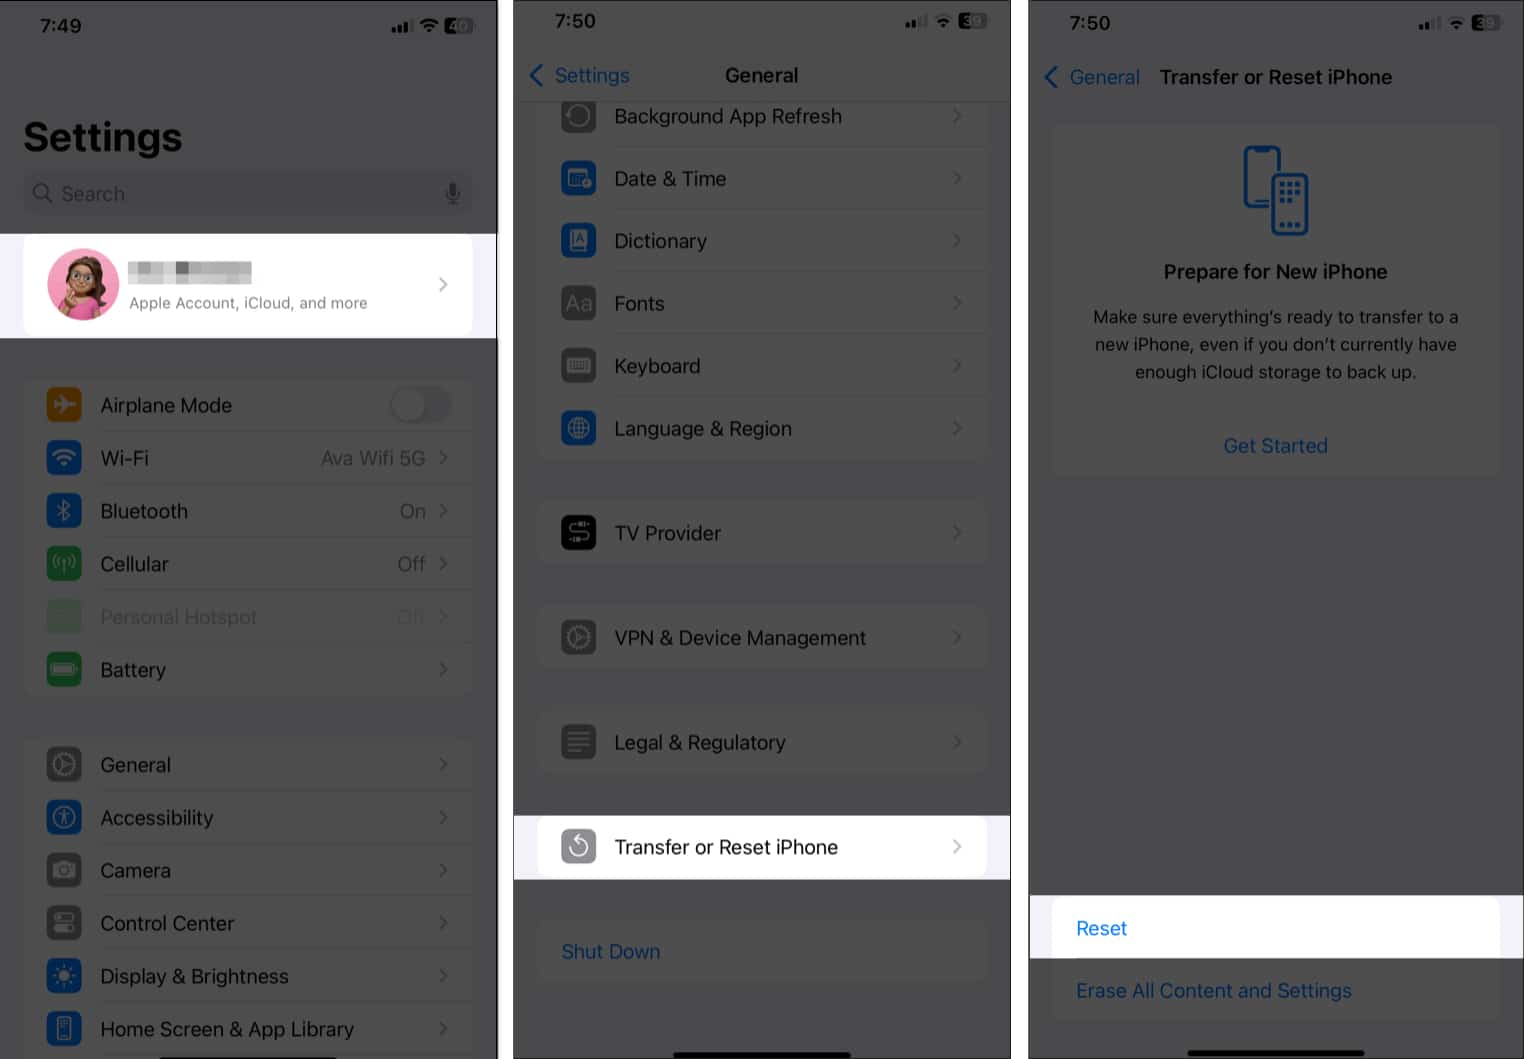
In case the aforementioned methods don’t help, go ahead and try to reset your iPhone’s Network and Location & Privacy settings. If your iPhone is facing connectivity issues, this method should clear out the misconfigurations and revert the settings to default.
- Open Settings and tap General.
- Scroll down and tap Transfer or Reset iPhone and Select Reset.
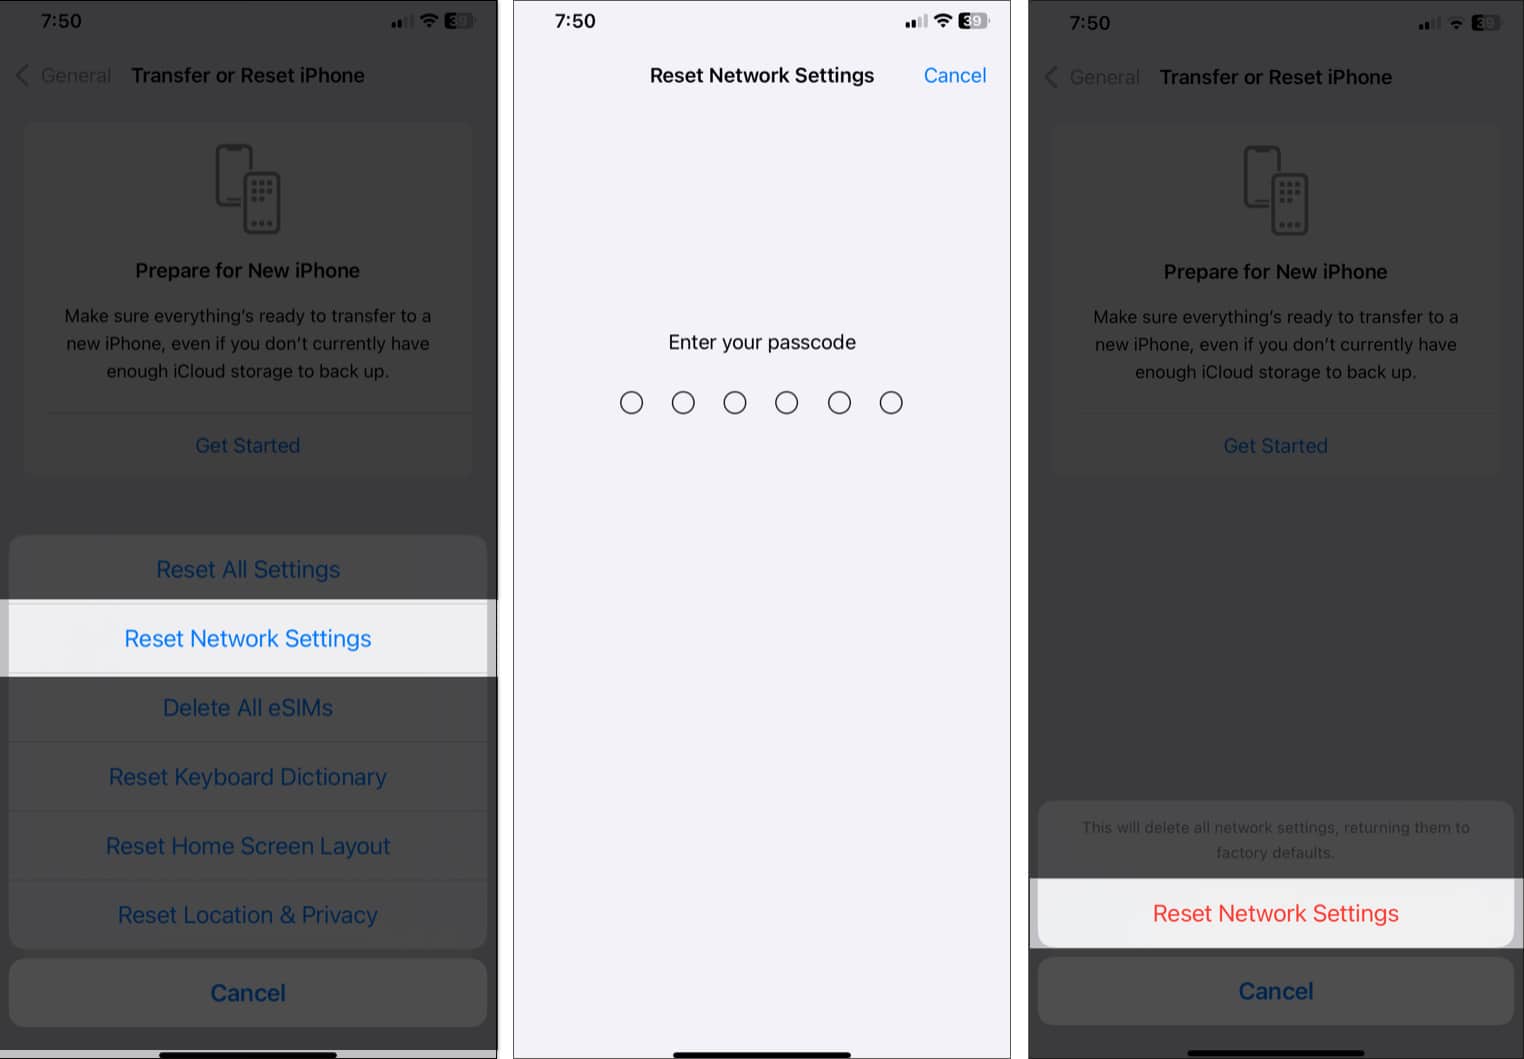
- Tap Reset Network Settings.
- Enter your passcode.
- Confirm your choice by tapping Reset Network Settings.
Once your iPhone restarts, connect it to Wi-Fi or cellular data and check if your AirTag connects. If not, follow the above steps 1 and 2 and select Reset Location & Privacy. After that, go to Settings → Privacy & Security and ensure Location Services is toggled on.
This is how you can fix almost all AirTag problems and use it effectively to keep a tab on your everyday belongings.
7. Manually reset the AirTag
As a last resort, you might need to reset your AirTag.
- Follow the steps to replace the AirTag battery 5 times in a row. Ensure you hear the sound every time while replacing the battery.
- Once done, put the cover back on.
- You should see three visible tabs on the cover and three slots on AirTags. Align them together and keep pressing them till you hear a chirping sound.
- Now, rotate the cover clockwise.
- Set up your AirTag again.
Happy tracking!
It can be frustrating when your AirTag is not connecting to your iPhone, but these simple steps should help you get it working again. Whether it’s a battery issue, a need for a firmware update, or resetting your network settings, these fixes should cover all bases. If your AirTag is still not working, it may be time to contact Apple Support for further assistance.
Check out our other AirTag guides:

