When you have two or more Safari tabs open, hovering the mouse pointer on a tab shows you its preview. This feature was made available in Safari 14 for macOS Big Sur, Catalina, and Mojave.

However, there is no option to turn it off in preferences. But, if you find the Safari tab previews distracting and useless, here is how to disable it through a Terminal command.
First off, you must first grant full disk access to Terminal. Hence, I have divided the steps into two parts. Let’s look at them.
Give full access to Terminal
- Click the Apple logo at the top left and choose System Preferences.
- Click Security & Privacy.
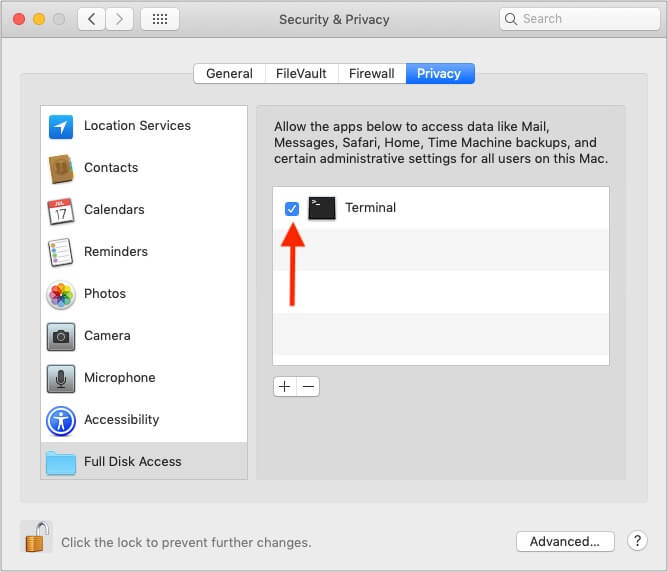
- Ensure you are in the Privacy tab and click Full Disk Access.
- Click the padlock icon and authenticate using Mac’s password.
- Check the box for Terminal.
If you do not see Terminal here, click the plus (+) button → Applications → Utilities → select Terminal, and click Open.
Note: You can revoke full access given to Terminal once you disable the previews. To do so, follow the steps above and uncheck the box beside Terminal.
Turn Off Safari tab previews on Mac
- Close Safari. To do so, go to Safari → select Quit Safari at the top menu bar.
- Open Terminal.
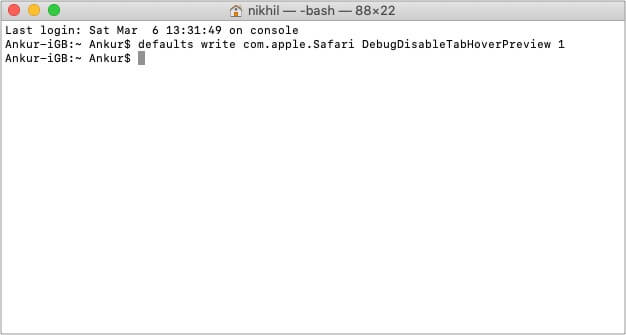
- Copy and paste this command in the Terminal and hit the enter key.
defaults write com.apple.Safari DebugDisableTabHoverPreview 1
Done! Launch Safari and open at least two tabs. Hover the mouse on the non-active tab, and you won’t see the preview like before – just the tab name in simple text.
Now, if you change your mind, you can re-enable the preview. Here’s how to do it!
How to re-enable Safari tab previews in macOS
- Quit Safari if it is already running.
- Launch Terminal on your Mac.
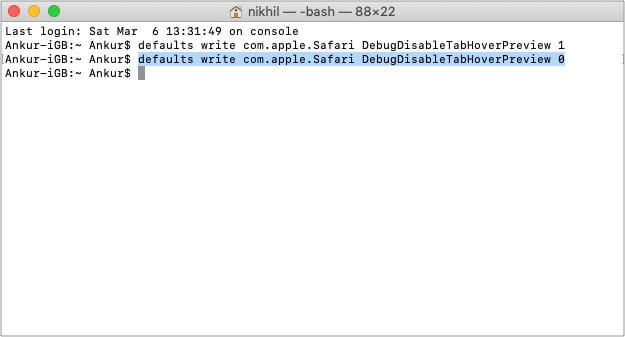
- Copy and paste the following command and hit the enter key. The command line is the same as above except 0 at the end instead of 1.
defaults write com.apple.Safari DebugDisableTabHoverPreview 0 - Done. Now, open Safari, and you have the tab preview feature again.
This is how you can disable or re-enable tab previews in Safari on Mac. Have more questions? Shoot them in the comments section below.
More Mac posts for you:


