Knowing how to perform a reverse image search on an iPhone is a handy skill that can help you find the actual source, a higher resolution, related images, and more about the image you have at hand. While the iPhone does not offer a native way to perform a reverse image search, multiple third-party tools can help you accomplish this task.
Keep reading to learn about the multiple ways to do a reverse image search on iPhone.
What is reverse image search?
Reverse image search is a process that helps you retrieve information present in an image by uploading it to the web. A reverse image search tool scans the image for details and matches it to sources present on the web. Then, it provides you with relevant context about the information in the image, helping you understand everything about it.
If the process yields no results, then the details of the image cannot be matched with anything present on the web. This may involve personal and private details that are otherwise not available through a search engine. You may see results that are similar to the details present in the image.
How reverse image search is useful?
Reverse image search may come in handy during the following situations:
- Identifying objects inside an image: It helps you identify the objects present inside an image. For example, I may want to know where the beautiful mountain in the photo is located, and reverse image search will help me find it. Crop the image to the object you are looking to seek information about and upload it to the search tool.
- Identify the source of the image: If you’re wondering where a picture on the web originated from, a reverse image search can help you identify the source.
- This helps you verify the authenticity and legitimacy of the image.
- Further, you can verify if an image has been altered from its original state or plagiarized from a protected source on the web.
- If you suspect someone using a fraudulent identity, a reverse search of the image can reveal more information.
- Find related information from the image: If you want to learn more about the information present in an image, a reverse image search can lead you to related blogs, articles, and similar images on the web.
- Find different resolutions of the same image: This can help you find the same image in different available resolutions on the web. If you’re looking for a high-quality version of the existing image, you can try finding a higher-resolution version of the image.
6 Ways to reverse image search on iPhone or iPad
If you are ready to discover the truth behind the image you have, here’s how you perform.
1. Use Google app
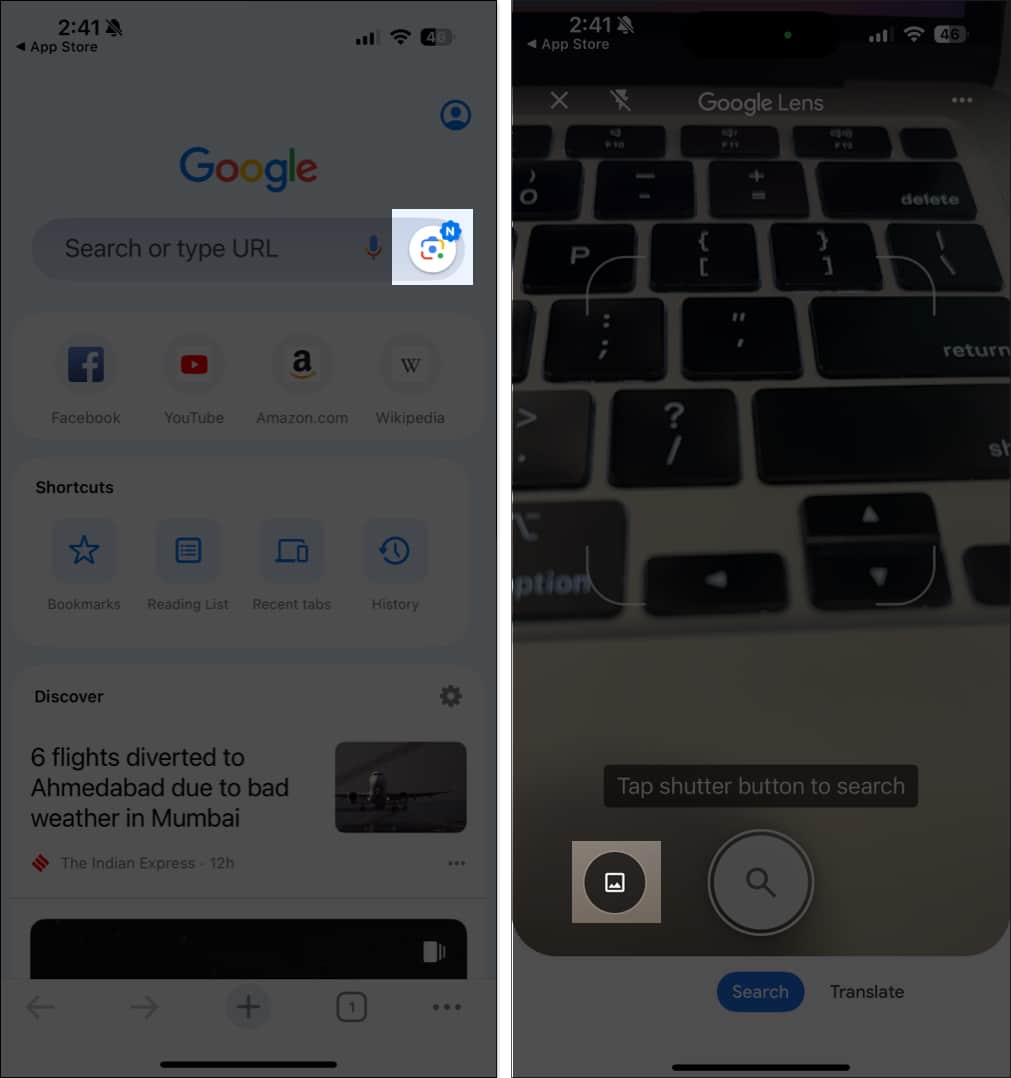
The Google Search app on your iPhone lets you reverse-search a web image by either capturing it in real time or uploading one from your library.
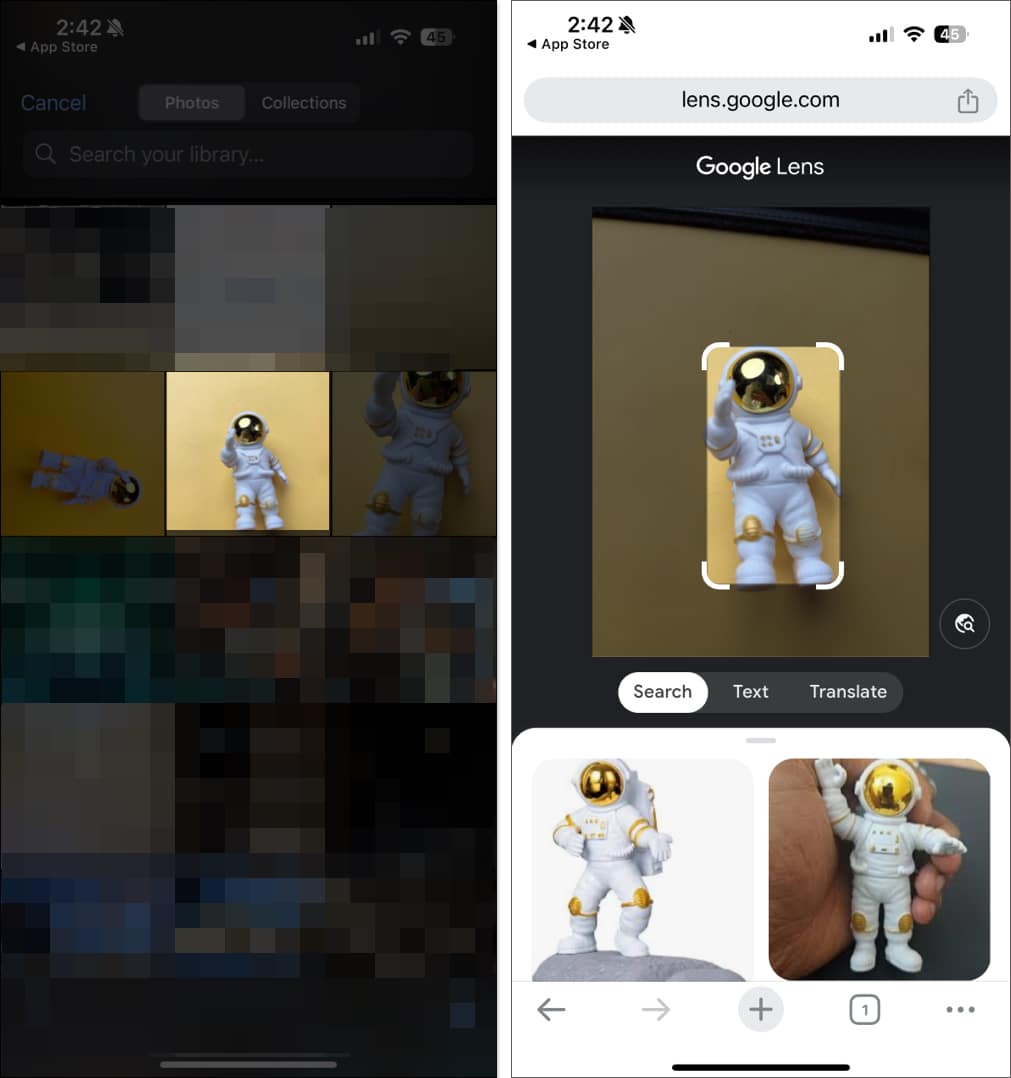
- Open the Google Search app on your iPhone. Tap on the Google Lens icon. Select whether you want to capture or upload an image.
- Once you add an image, you can find information regarding its contents on the web.
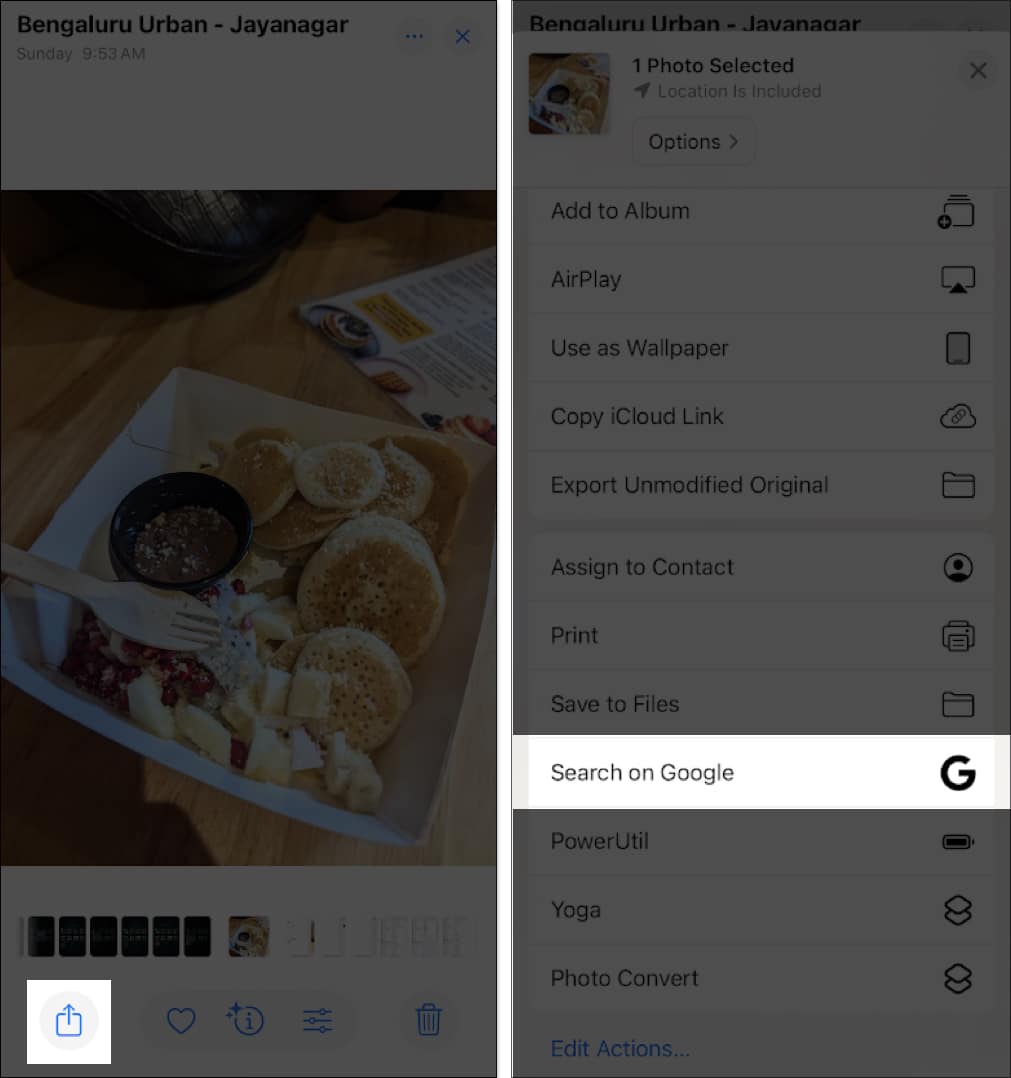
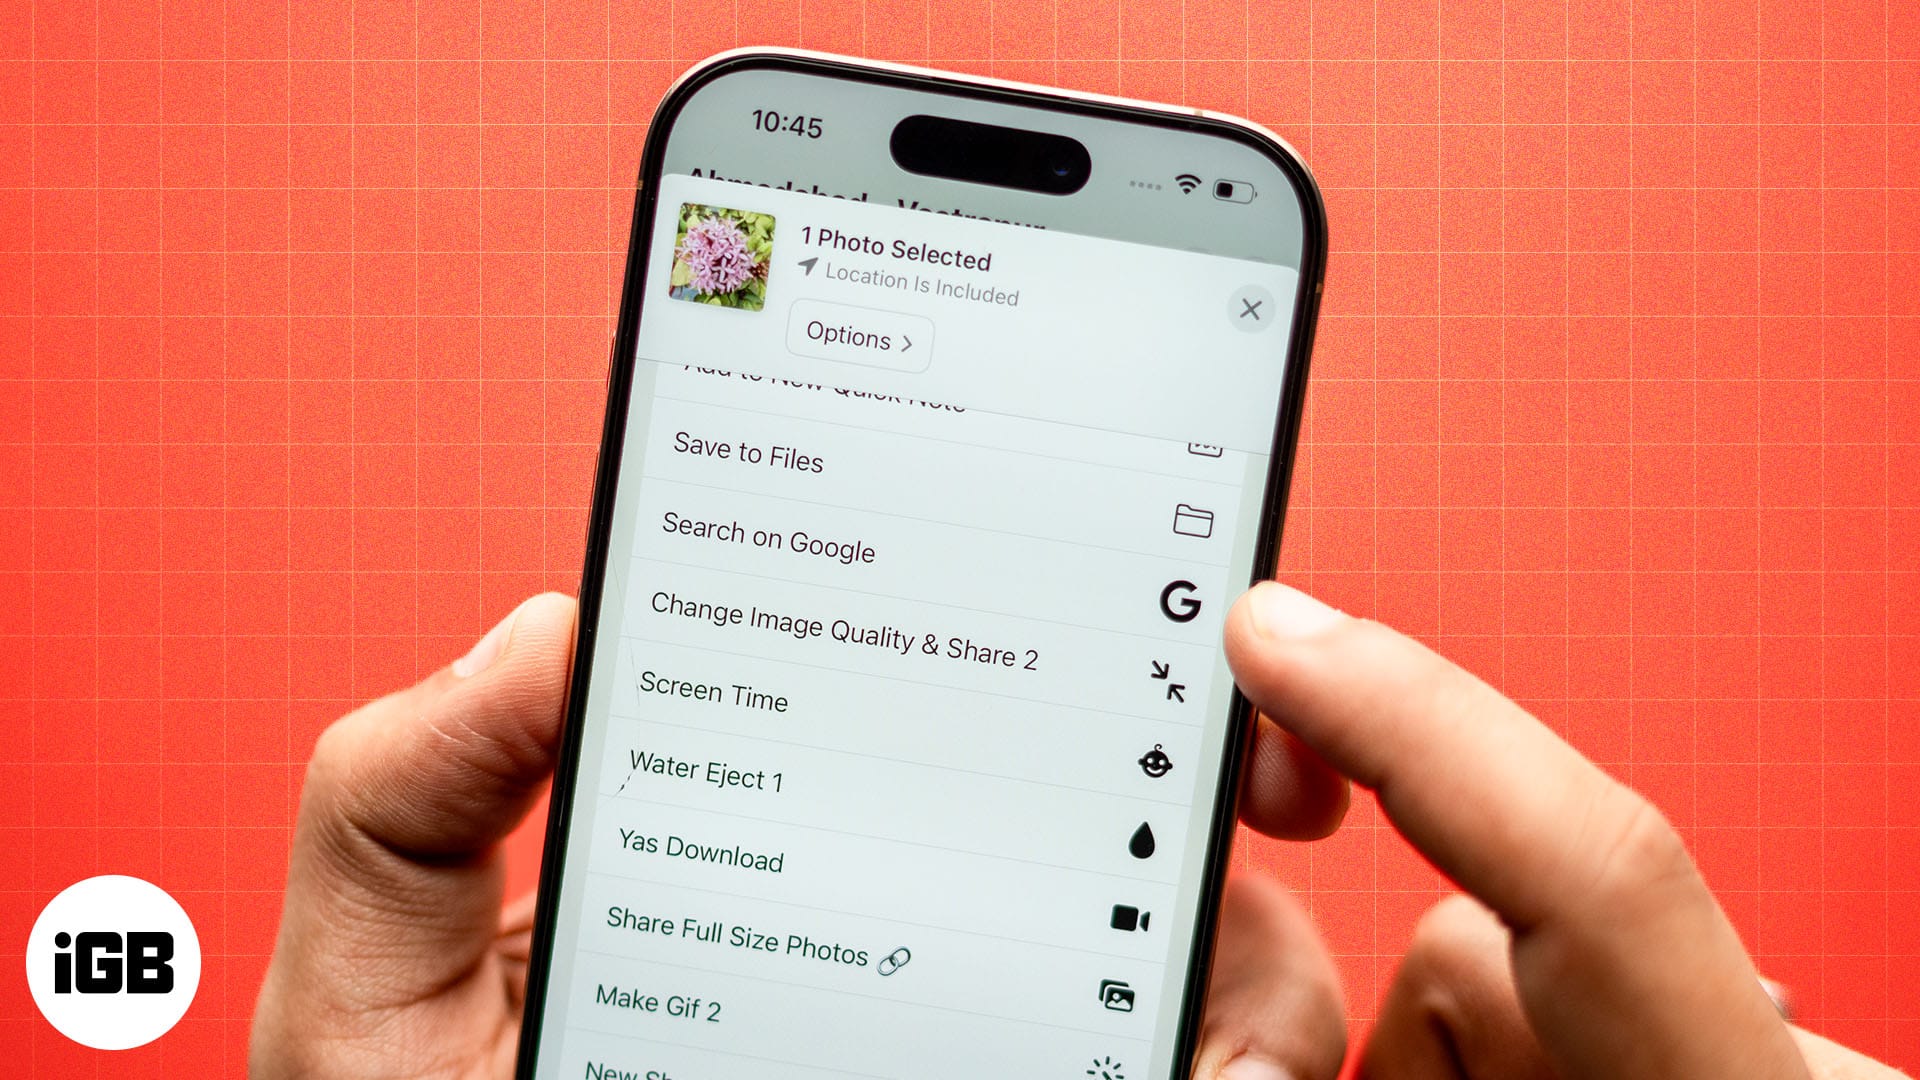
Alternatively, you can also use a shortcut to reverse search images on Google directly from the photos app. To do so,
- Open the photo in the Photos app, tap on the Share icon, and select Search on Google.
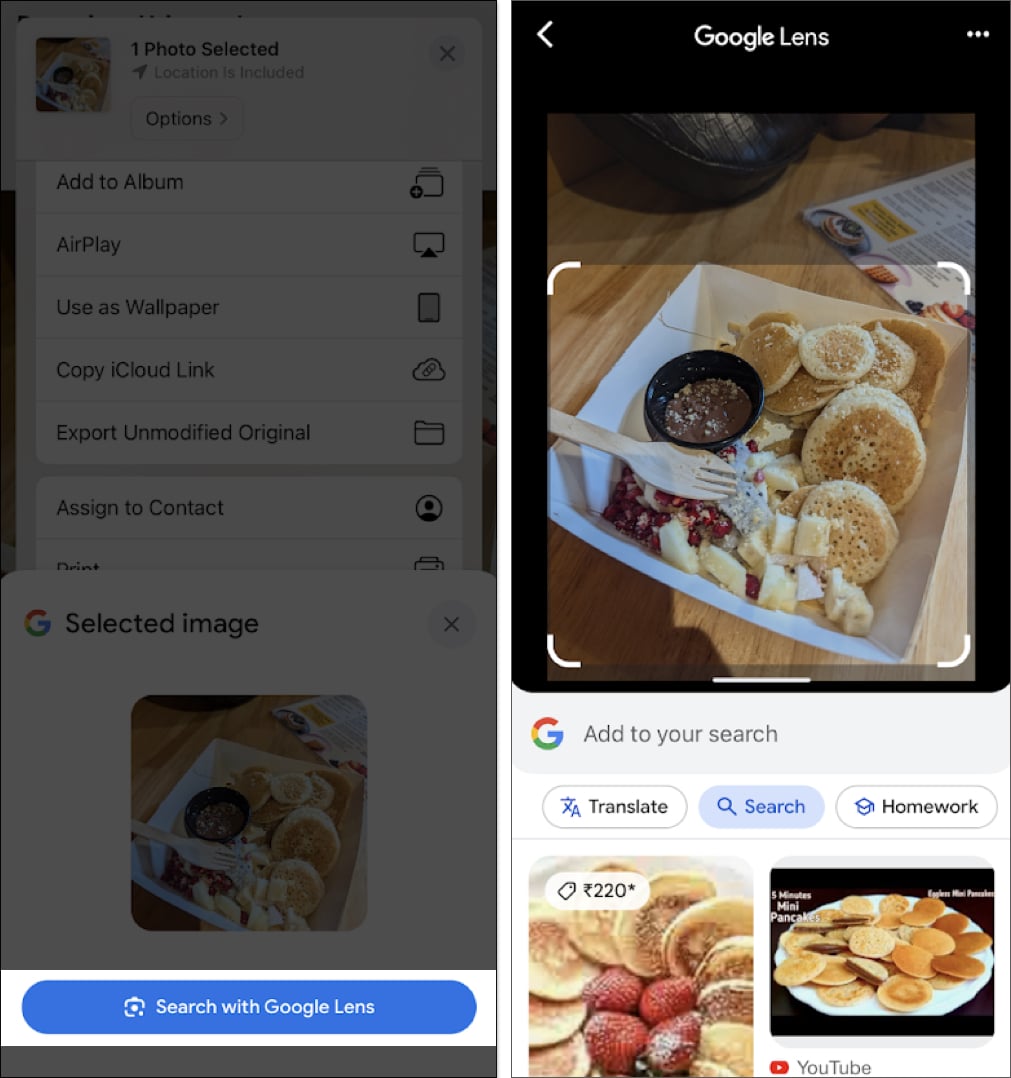
- Select Search With Google Lens. This will open up the Google Search app and show you the results.
2. Reverse image search with lenso.ai
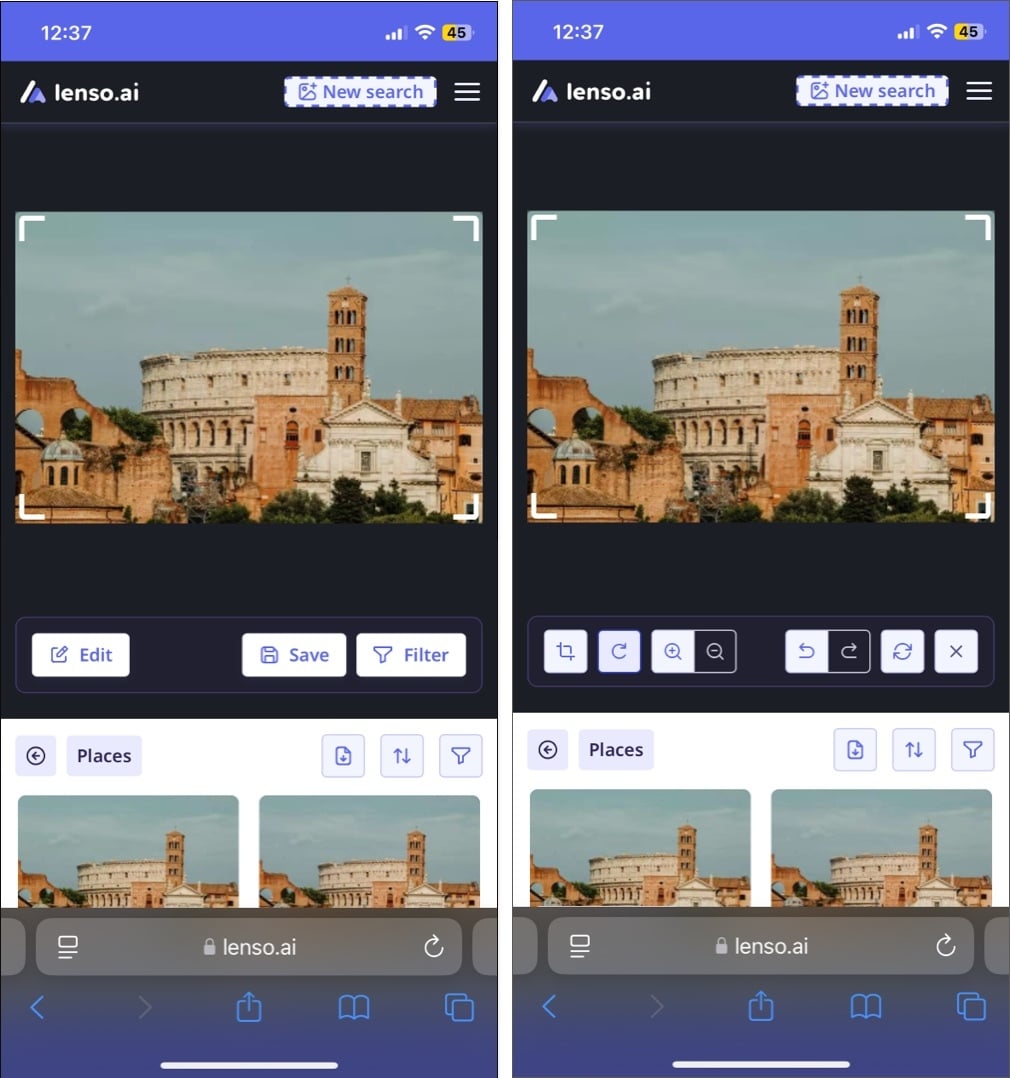
The Google app can only help you perform a simple reverse image search; the Lenso AI takes reverse image search to the next level. You can narrow your search by flipping, cropping, or mirroring your image; this way, you can pinpoint the exact part of your image for better results.
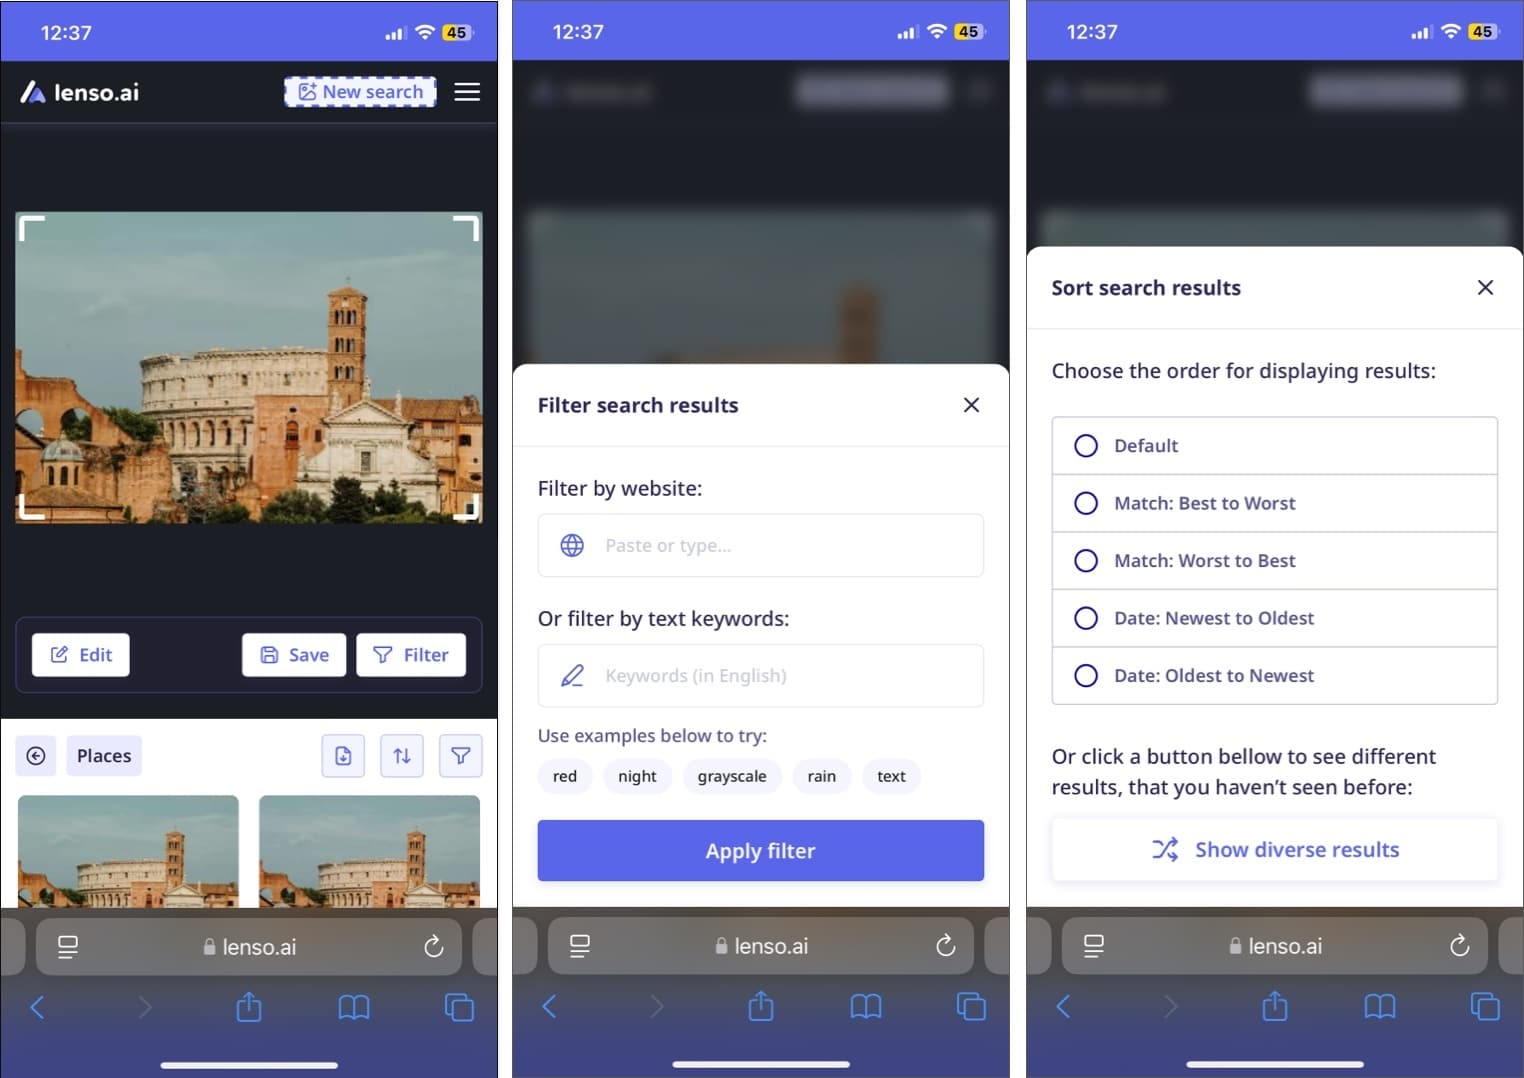
You also get many filters to improve your search, such as keyword search to make a more precise search and domain search for searching on a particular website. Moreover, Lenso AI also allows you to sort the search results in many ways.
Here’s how you can make a reverse image search on your iPhone using Lenso AI.
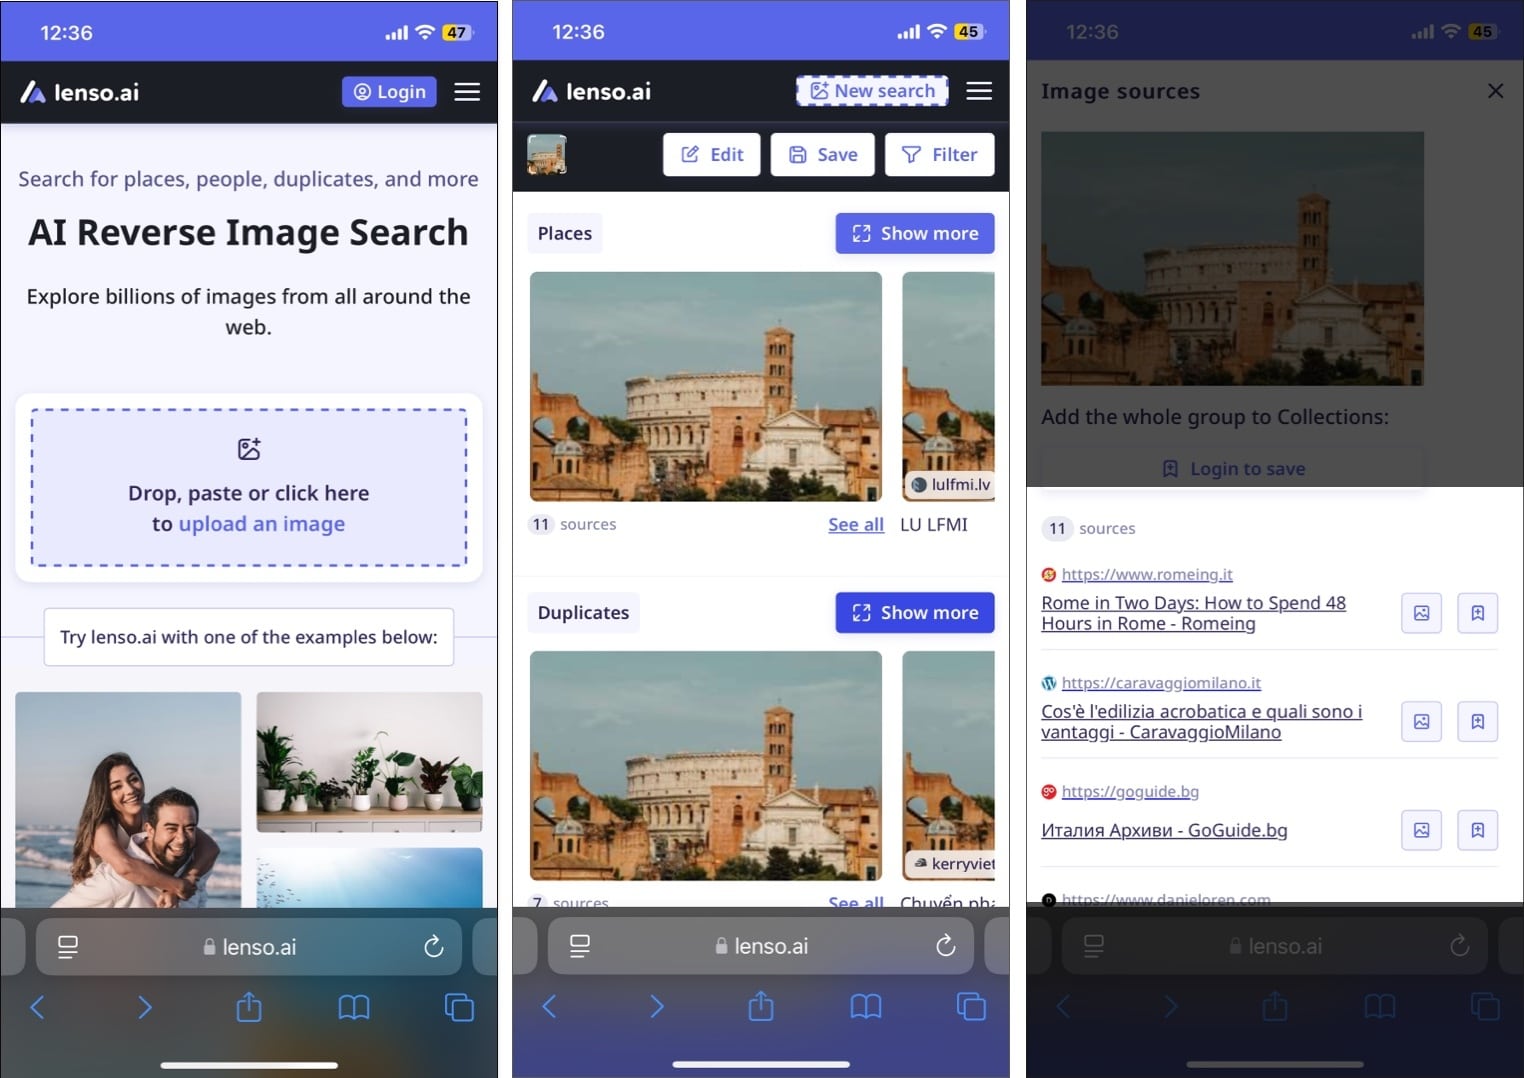
- On your iPhone, visit the Lenso.ai website.
- Here, upload an image from your library or take a photo using your iPhone camera. You can also use one of the available sample images to try lenso.ai.
- Once done, you can explore all the matches Lenso finds for your image.
- You can also tap the See All button next to Sources below an image to view all the places the image appears online.
- To narrow down your search, tap the Edit button and use the appropriate available option.
- To filter your search, tap the Filters button.
- Here, enter a website’s URL to filter results by the website or enter a Keyword to filter results by text keywords.
- You can also tap the Sort button to display the search results in a specific manner.
3. Using the Safari app
Installing the Google or Chrome app is not mandatory. You may also conduct reverse image searches on iPhone using Safari.
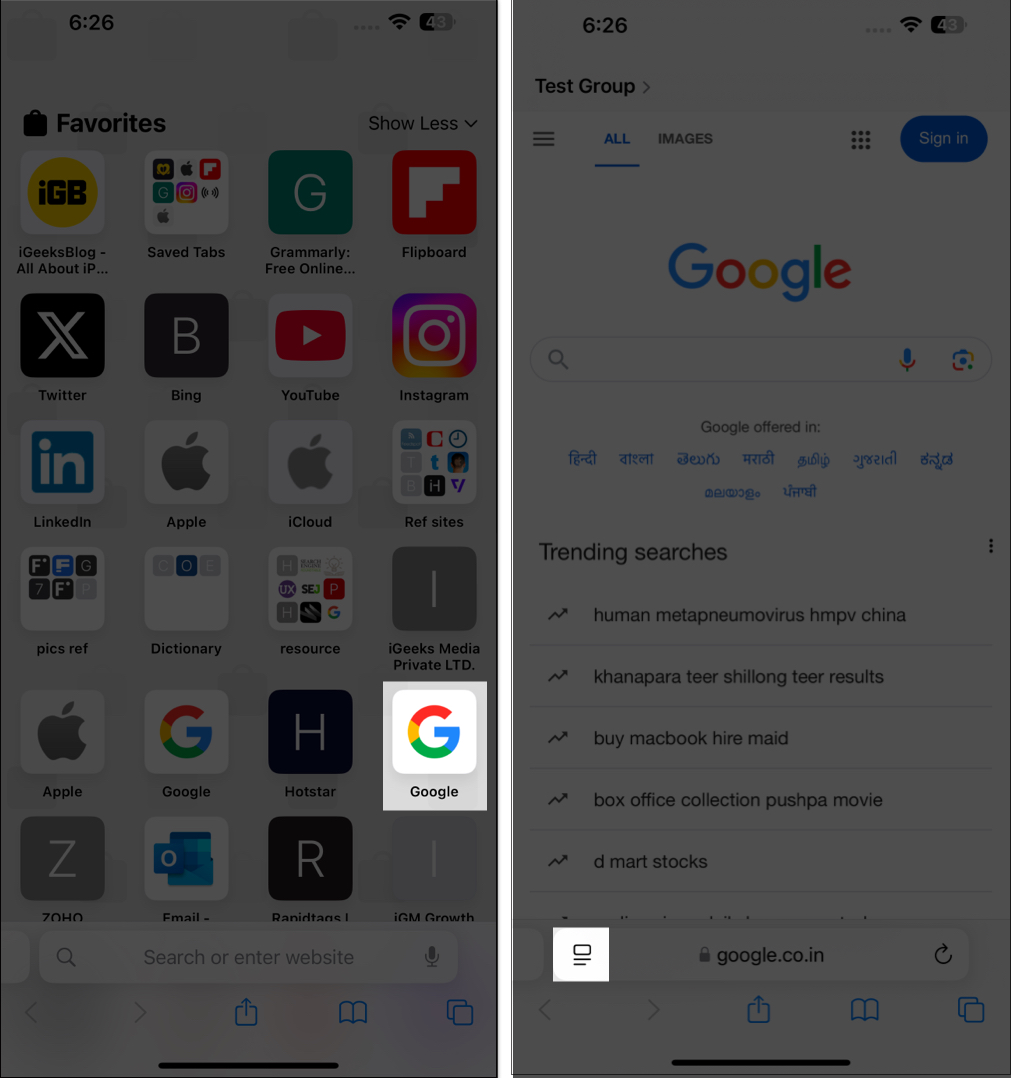
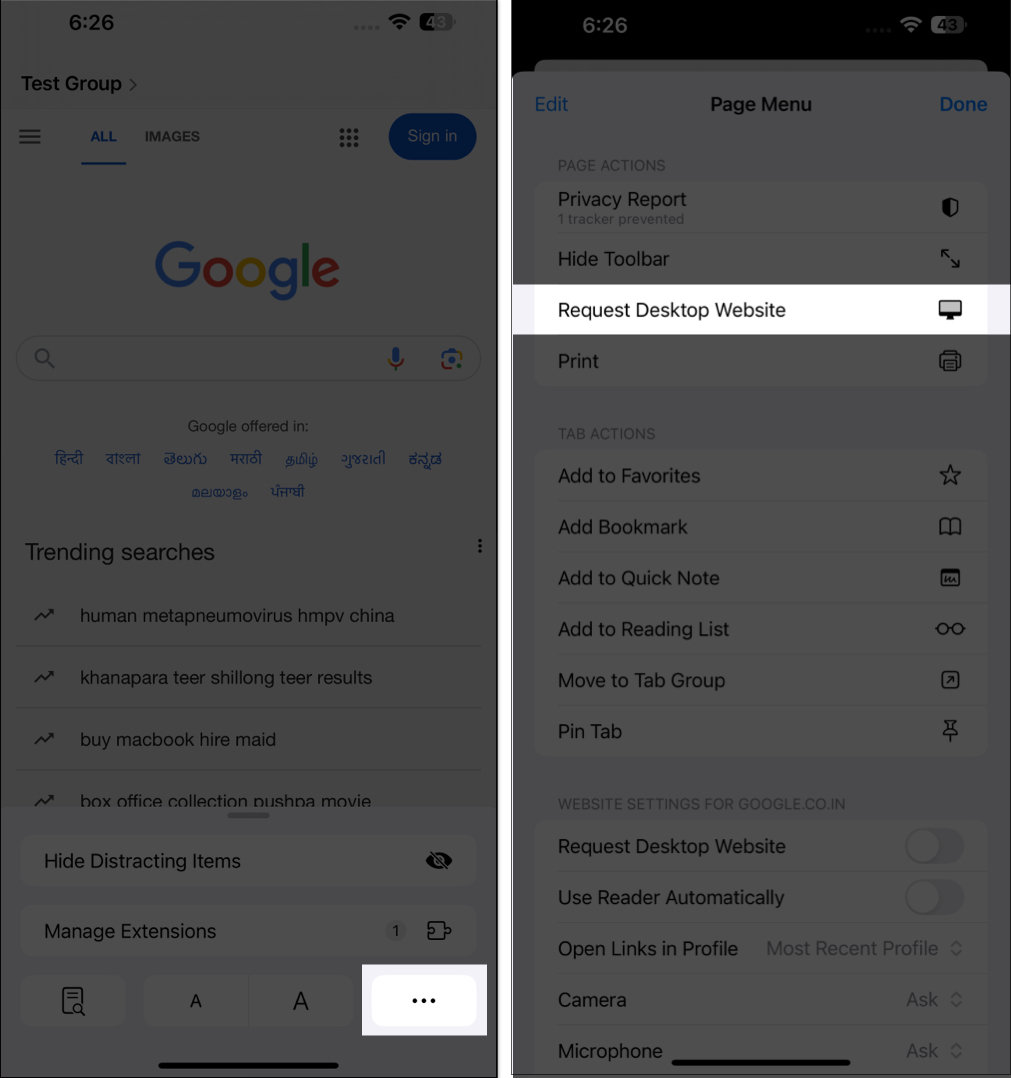
- Open Safari → Go to Google and tap on Reader mode icon.
- Tap the more option (three dots) → Select Request Desktop Website.
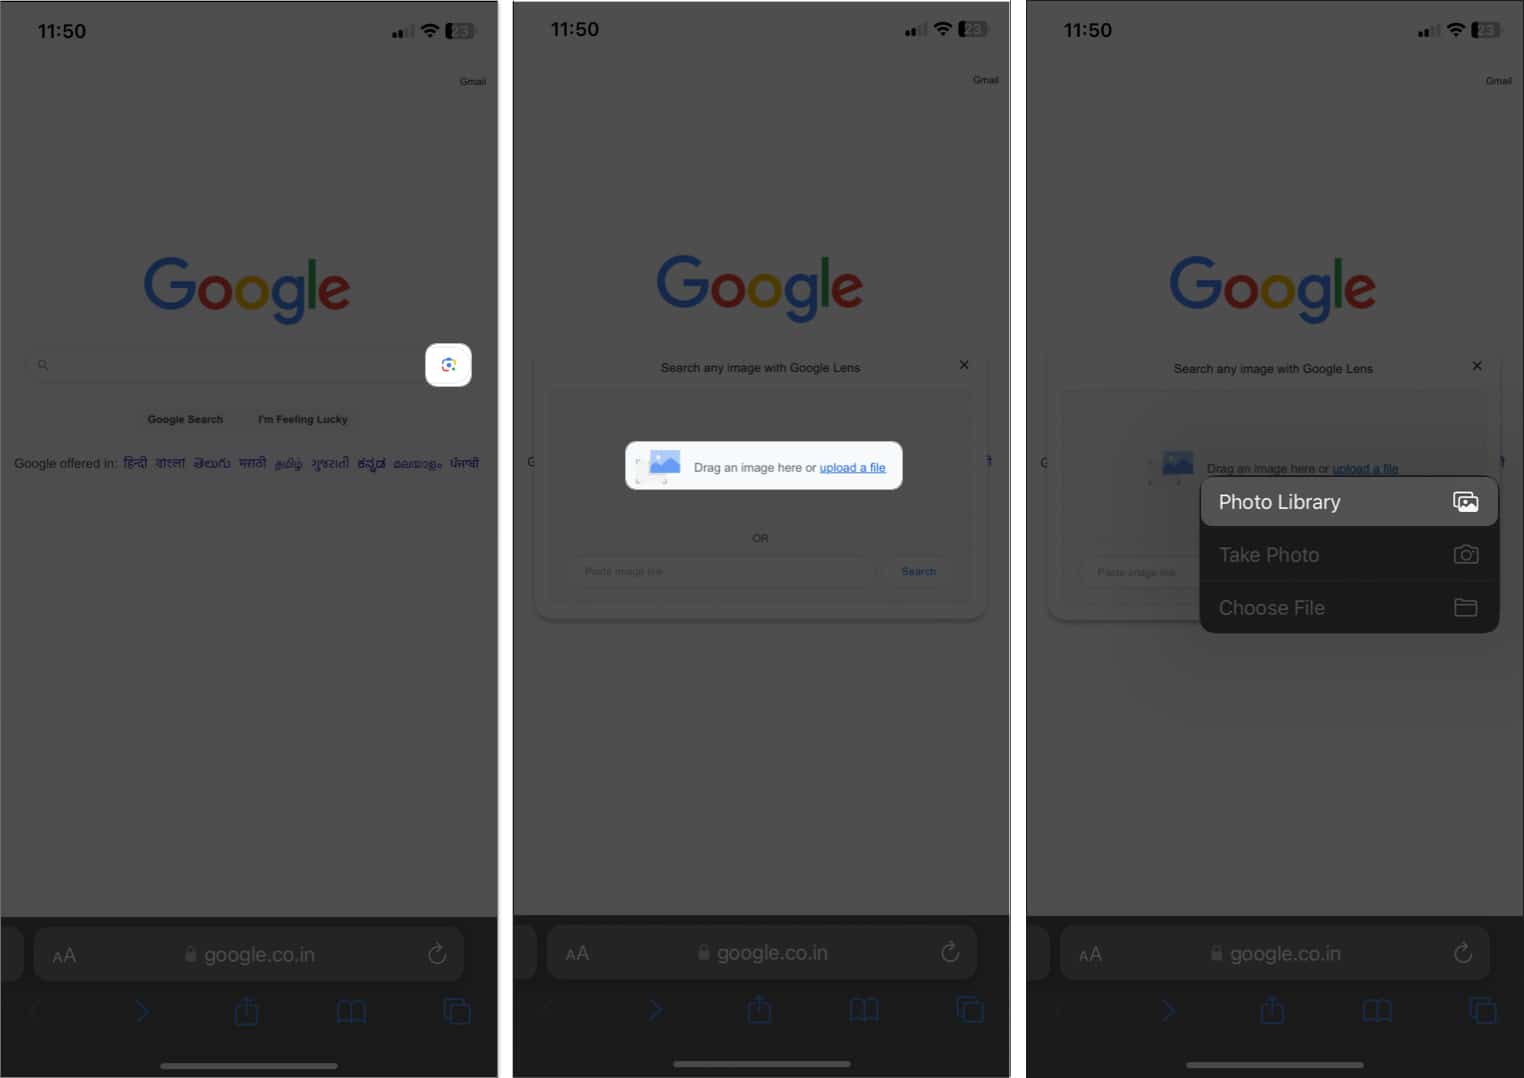
- Now tap the camera icon in the Google search bar.
- Tap Upload a file → Photo Library.
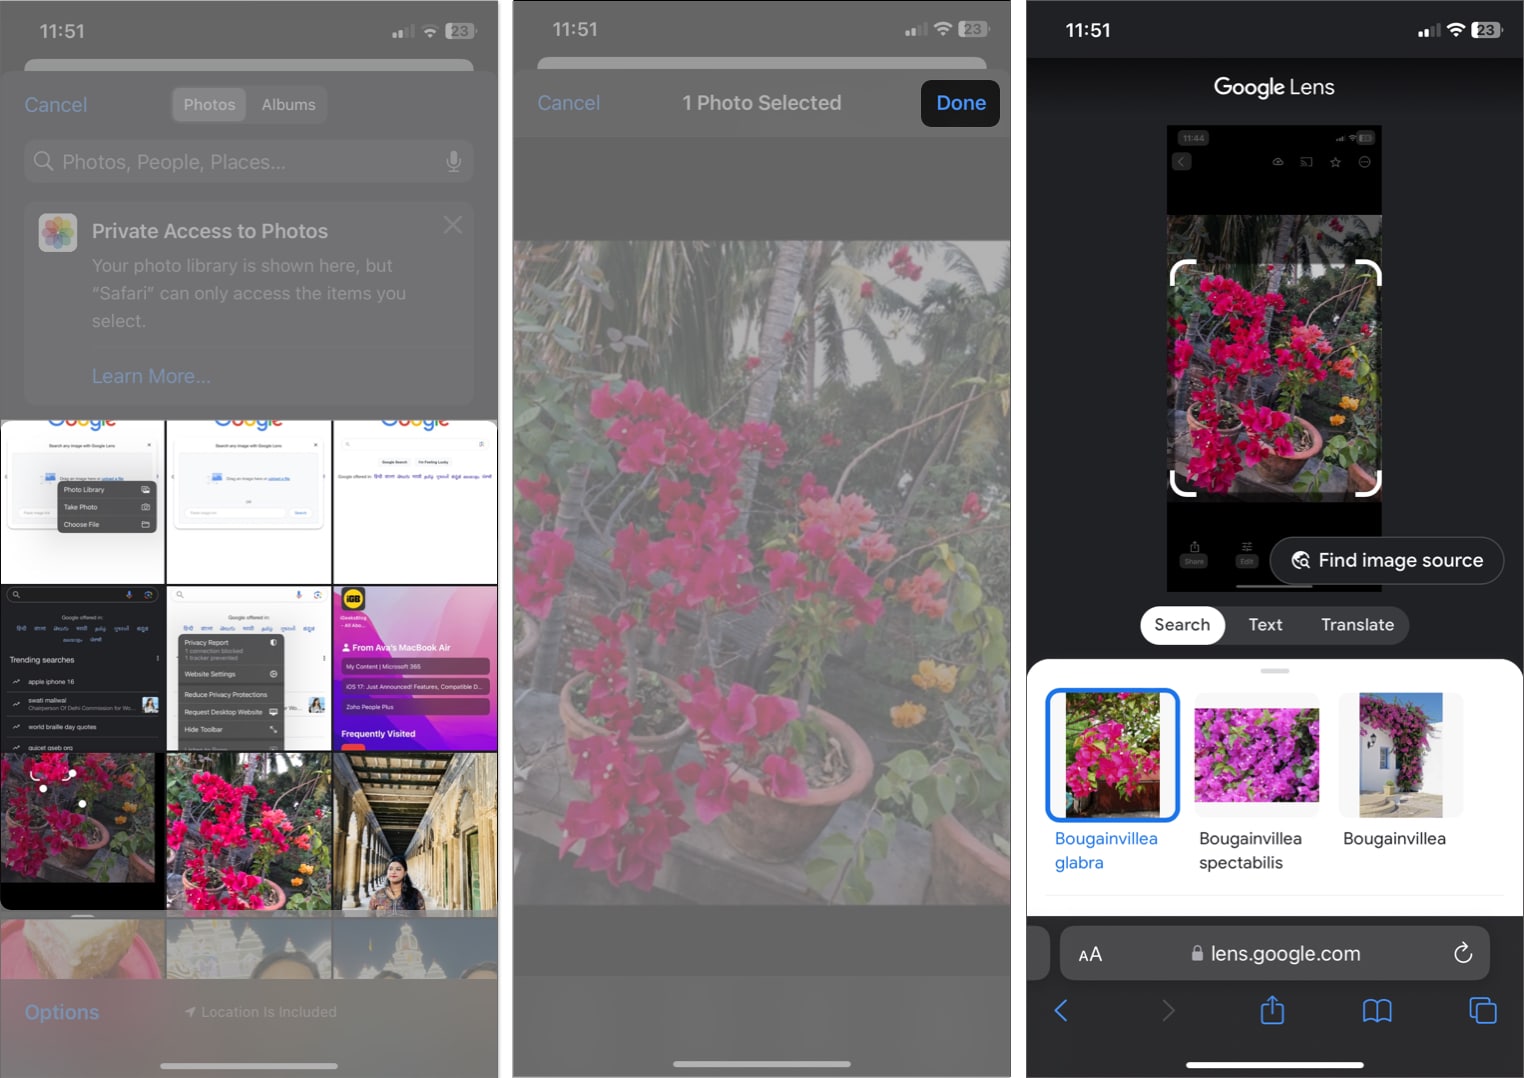
- Choose an image and tap Done.
- It will show similar images → Scroll down the Search tab for more information.
4. Using Chrome browser
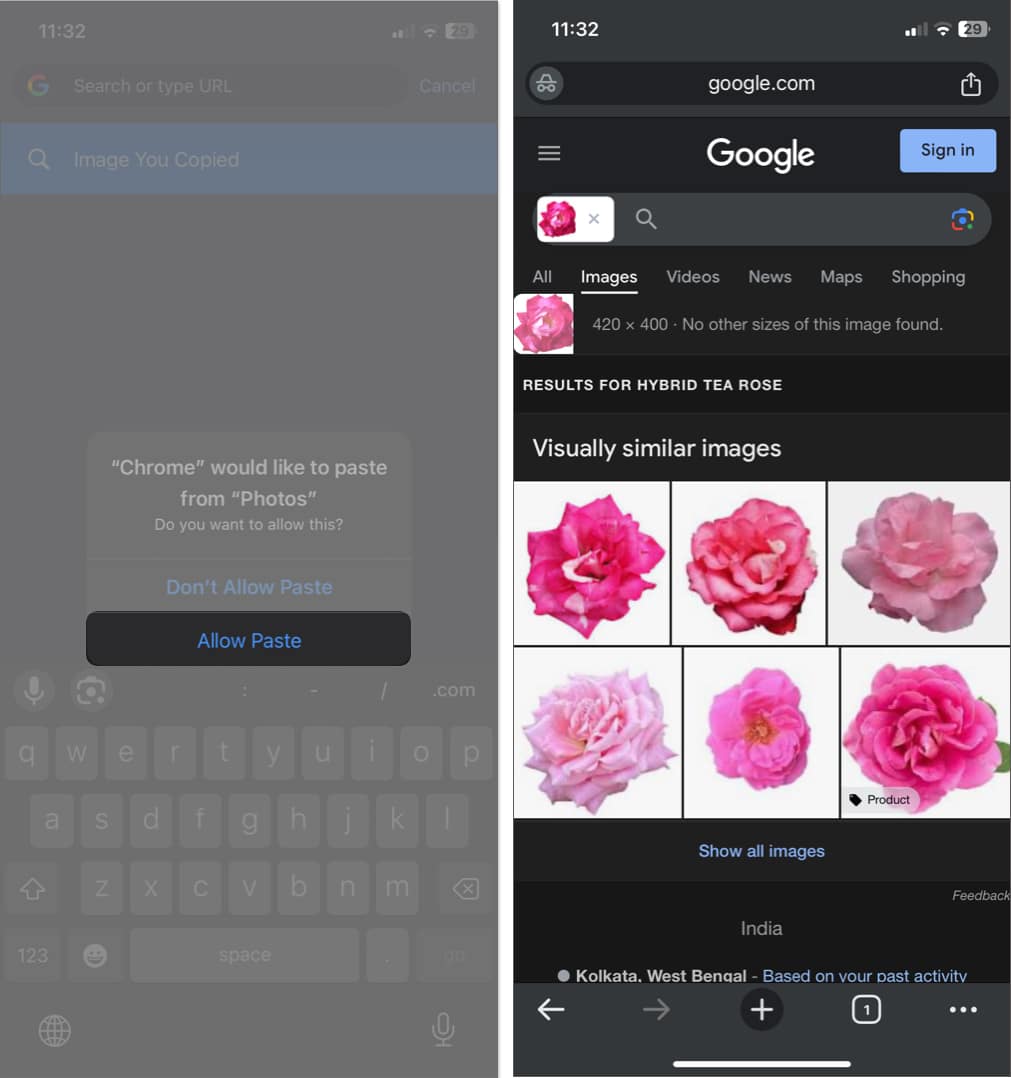
An easy method of doing a reverse image search is to copy the subject of your image and paste it into Google Search.
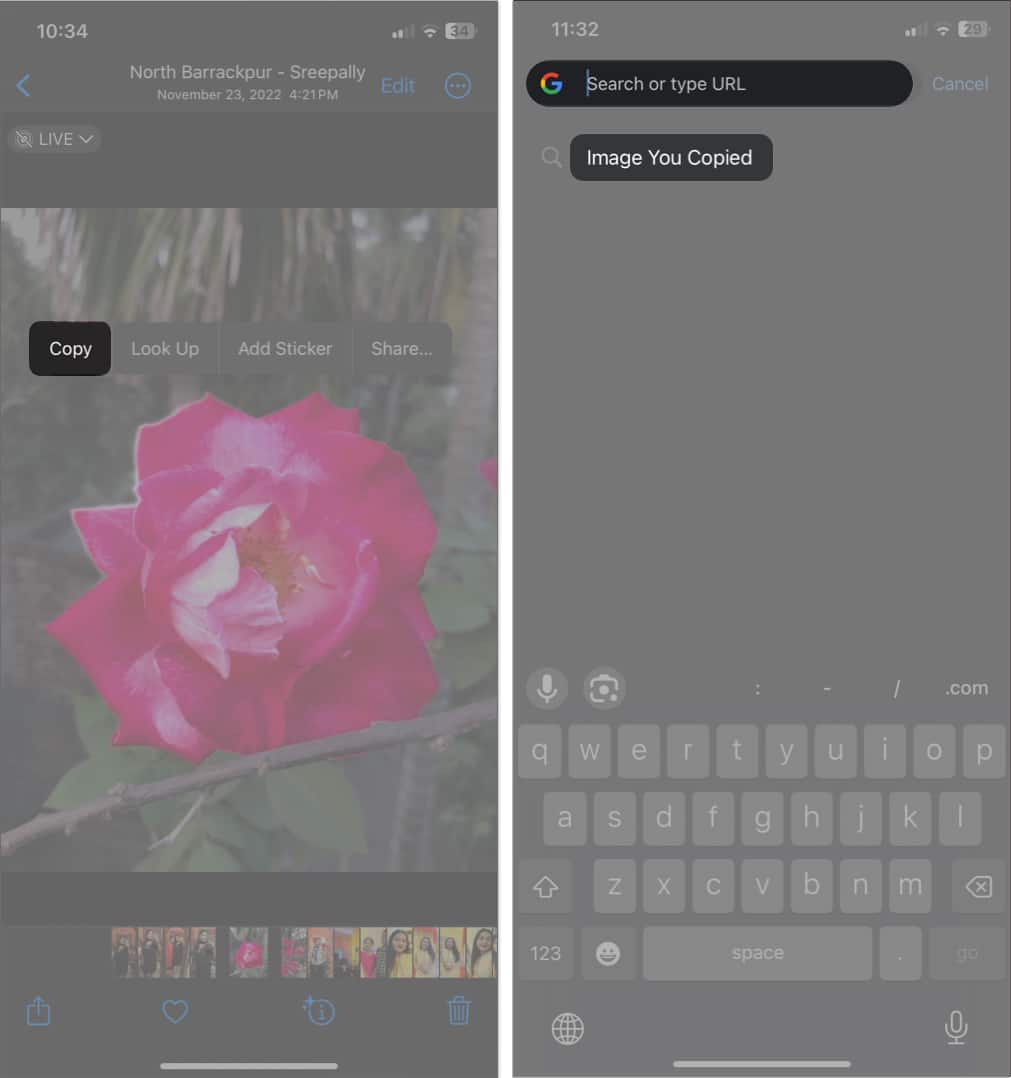
- Go to Photos → Tap and hold an image to pick the subject.
- Select Copy.
- Open Chrome → Tap the search bar → Hit Image You Copied.
- If prompted, select Allow Paste.
- You will get search results for that image.
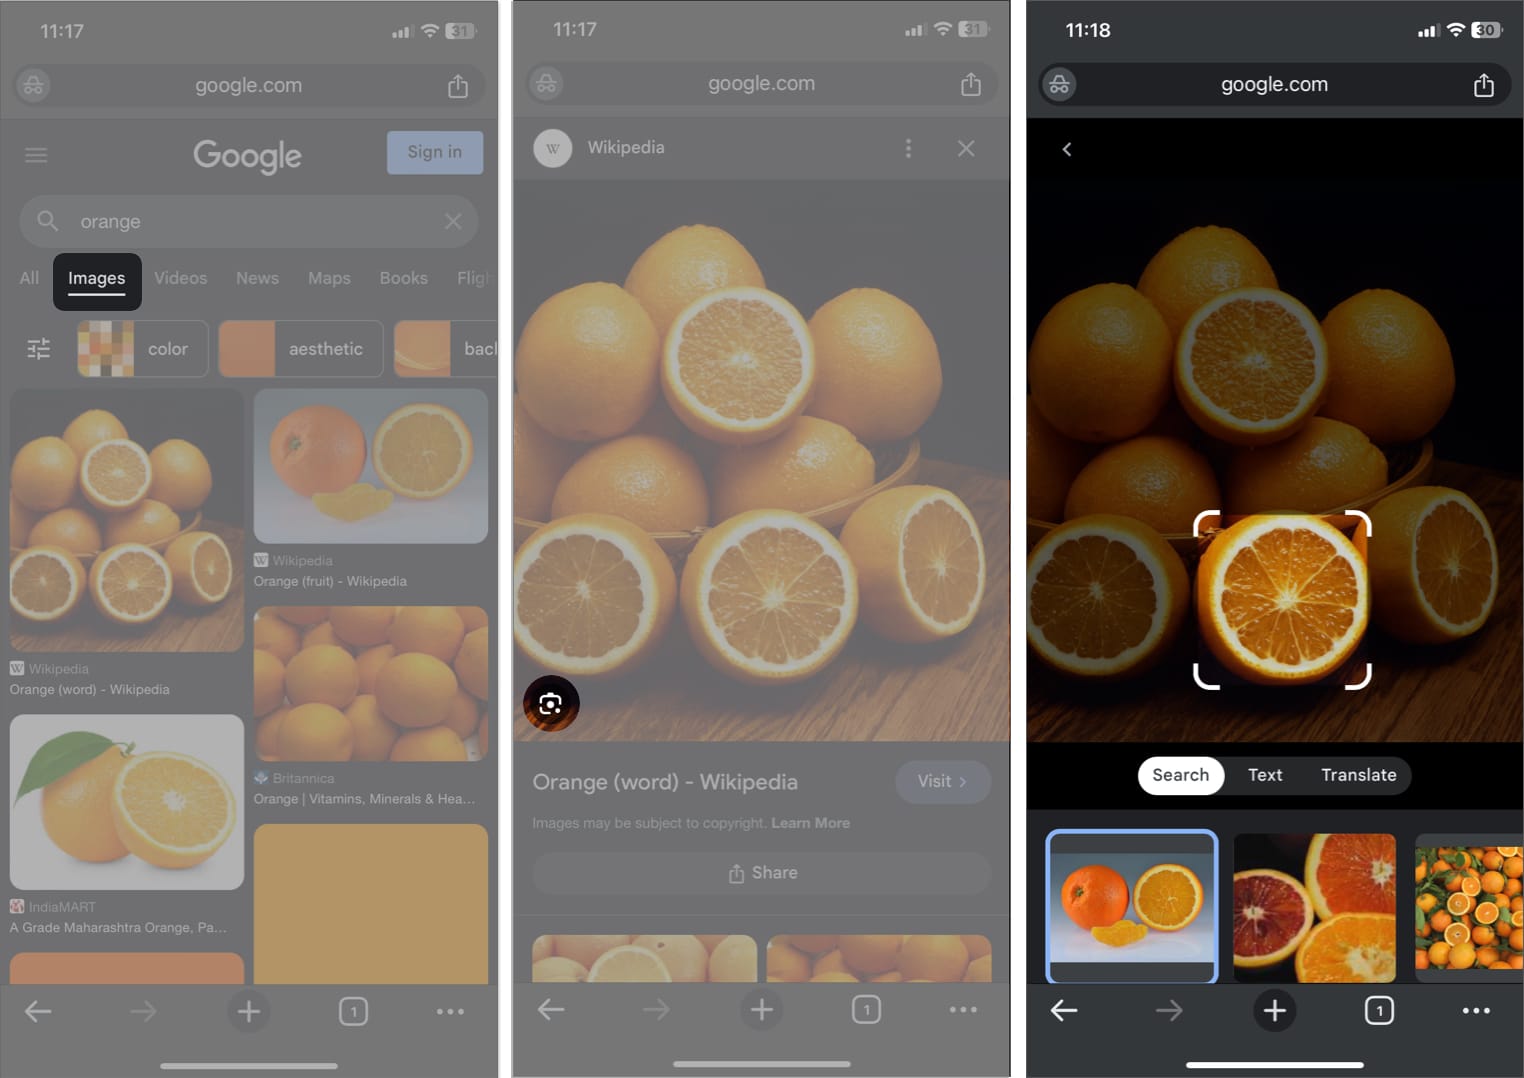
Suppose Google’s AI cannot accurately recognize the image, or you’d like to improve the search results. In that case, you can manually enter keywords to find images that look much like the original image while also matching the search terms you enter. Here’s how to do it.
- Open Chrome → Type the image name in the search bar.
- Tap Images from the menu bar.
- Open any image from the results → Tap the Google lens icon.
Alternatively, tap and hold any image from the result page and select Search Image with Google or Search inside image. It will open a new tab and show similar images. 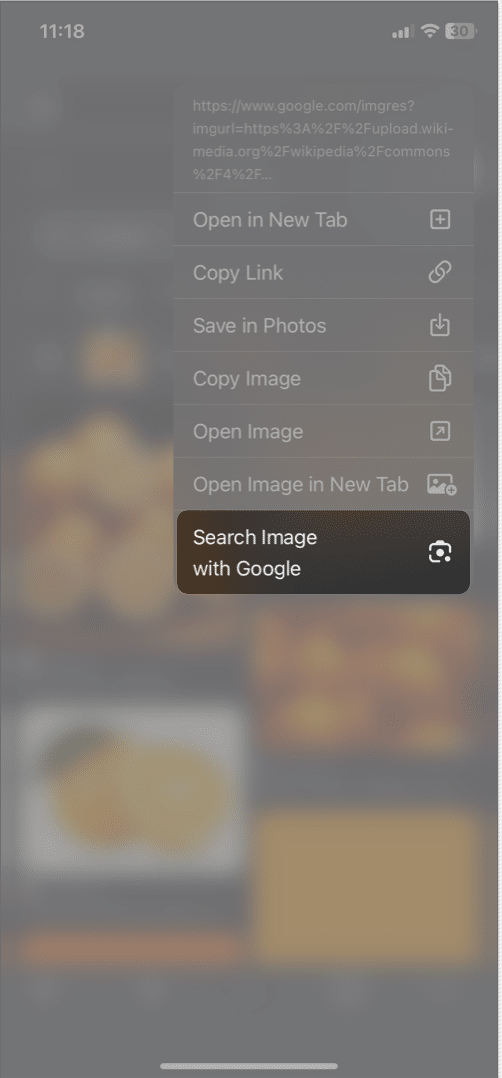
5. Use Google Lens to reverse image search
Google Lens is a convenient way to learn about any live object or saved image in your gallery. Though no dedicated iOS app exists, you can still use Google Lens on your iPhone. Pick any image from your camera roll or click a live photo and search for it across the web.
You can also use Google Lens from the Google Photos app. For this, open Google Photos → Select an image → Tap Lens at the bottom.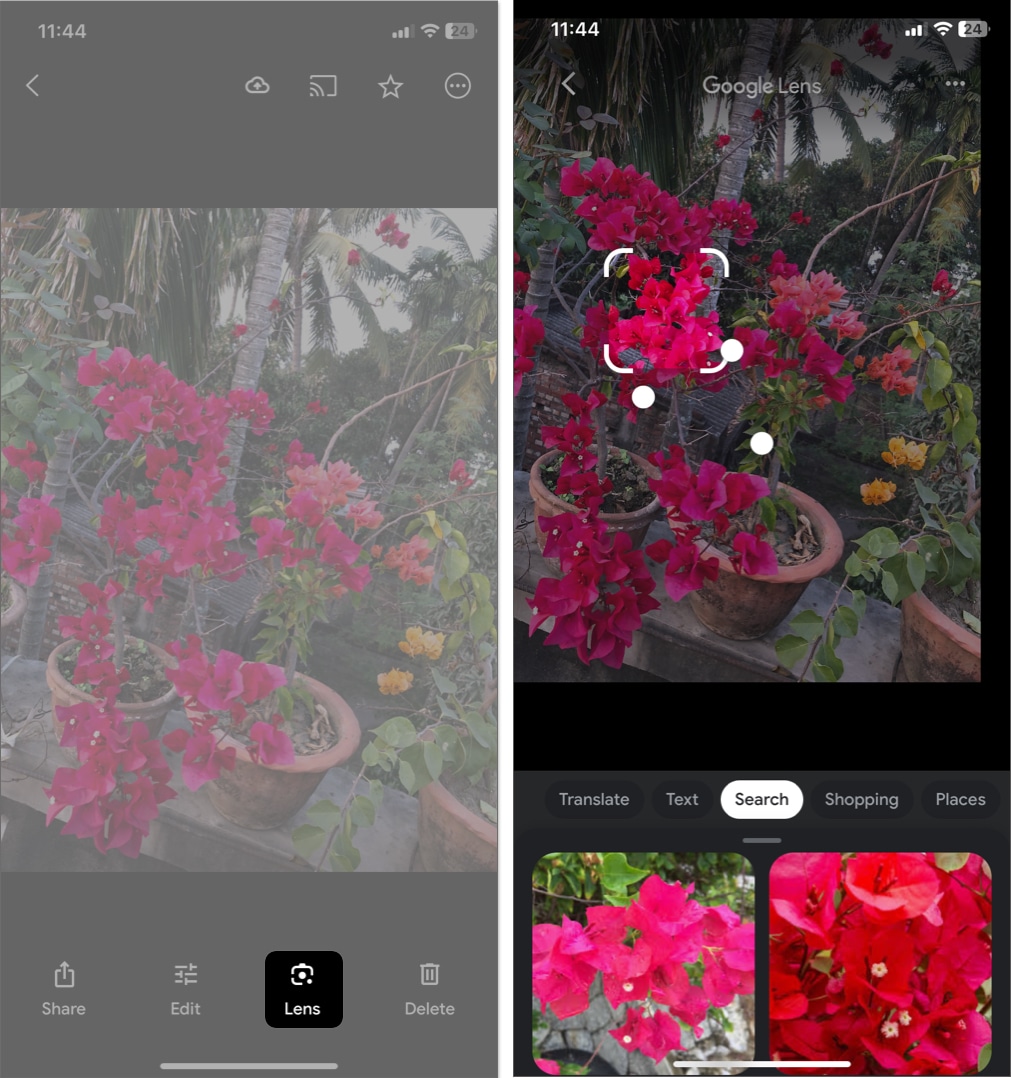
6. Reverse image search on an iPhone with third-party apps and websites
Besides Google, you can use one of the various sites to perform this action. Here are some other tools you might want to use instead.
Third-party apps:
When you use a reverse search app, you can quickly access its shortcut from the share sheet in your iPhone’s Photos app.
Get to the roots of an image!
Now, you have all the methods to conduct a reverse image search on your iPhone or iPad. Use the method you prefer.
However, please note that the pictures you upload to Google may be stored for seven days. Google may analyze them to improve its services. Similarly, proceed with caution for other third-party apps and websites. Do not upload any personal images or documents!
Have you ever researched using images? Let me know your cheat sheet.
Explore more…

