Automatically connecting to a saved Wi-Fi network saves time. However, it may be annoying when your device keeps auto-joining known Wi-Fi without permission. Also, this can raise security threats if you’re on the move and your device connects to public networks. Fortunately, you can stop automatically connecting to Wi-Fi, so your devices never connect to a network without your permission. In this blog, I will share how to stop Wi-Fi auto-join on your iPhone, iPad, and Mac.
How to turn off Wi-Fi auto-join on iPhone or iPad
- Launch Settings → Select Wi-Fi.
- Tap the info icon next to the saved network.
- Now, toggle off Auto-Join.
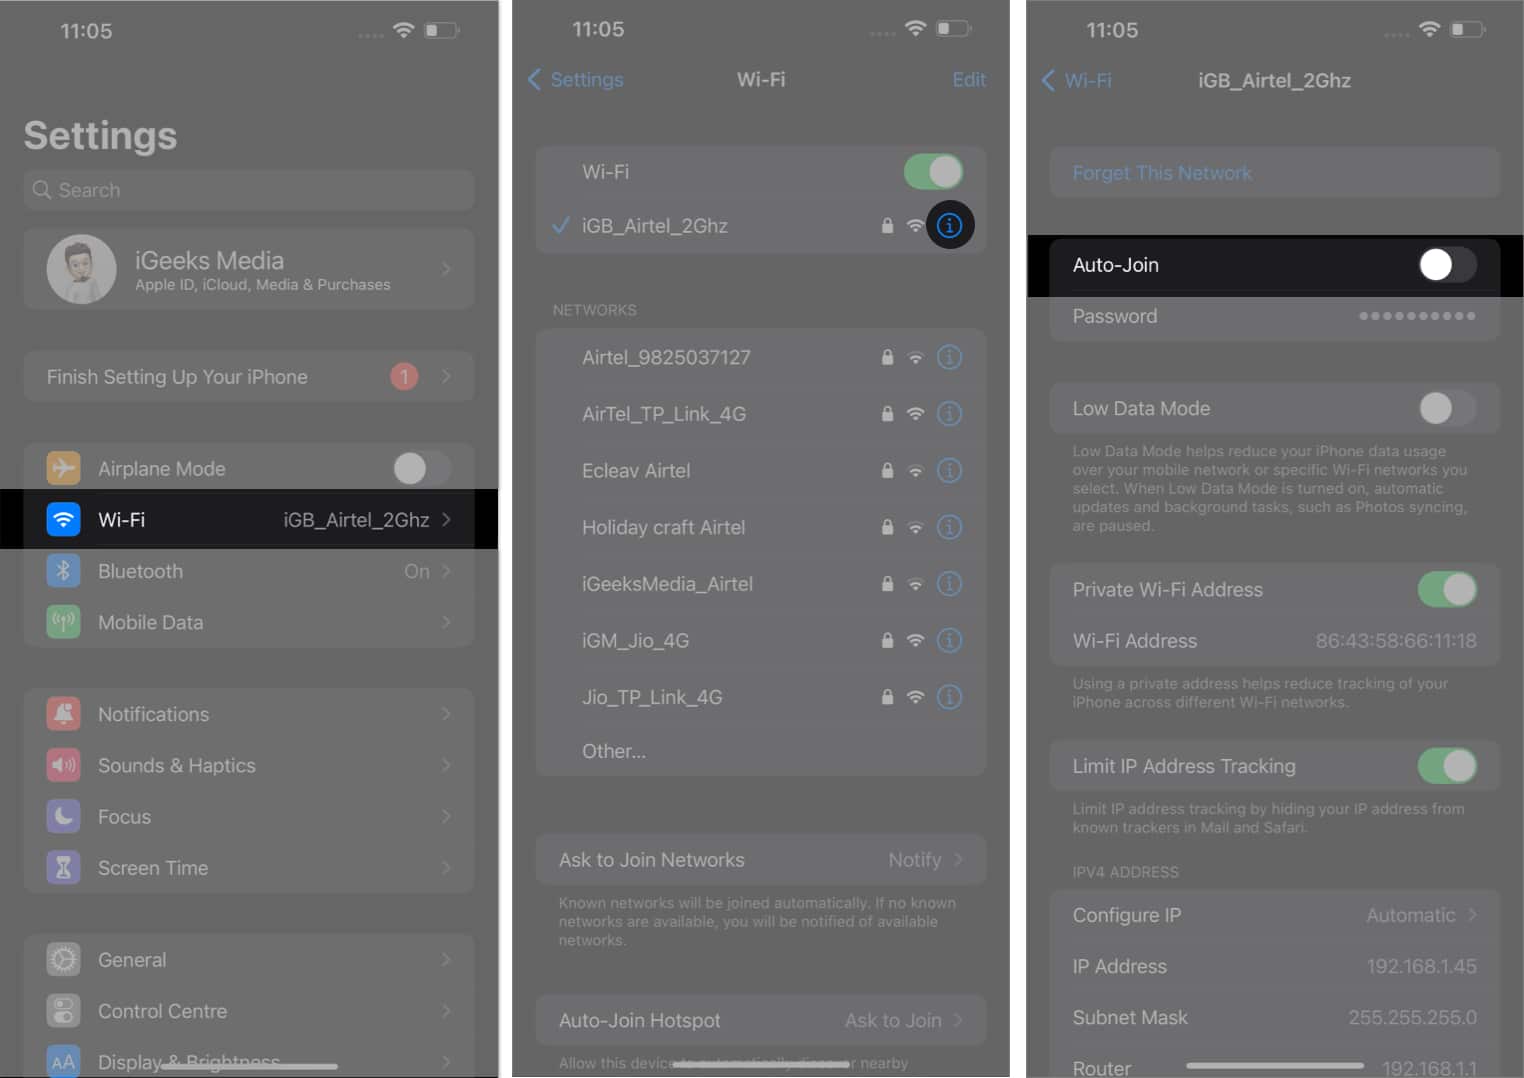
The process does not require you to stay connected to the network; you can disable the automatic network connection as long as it is saved. Besides, you must delete the saved public networks to prevent automatic Wi-Fi connections.
How to forget Wi-Fi network on iPhone or iPad
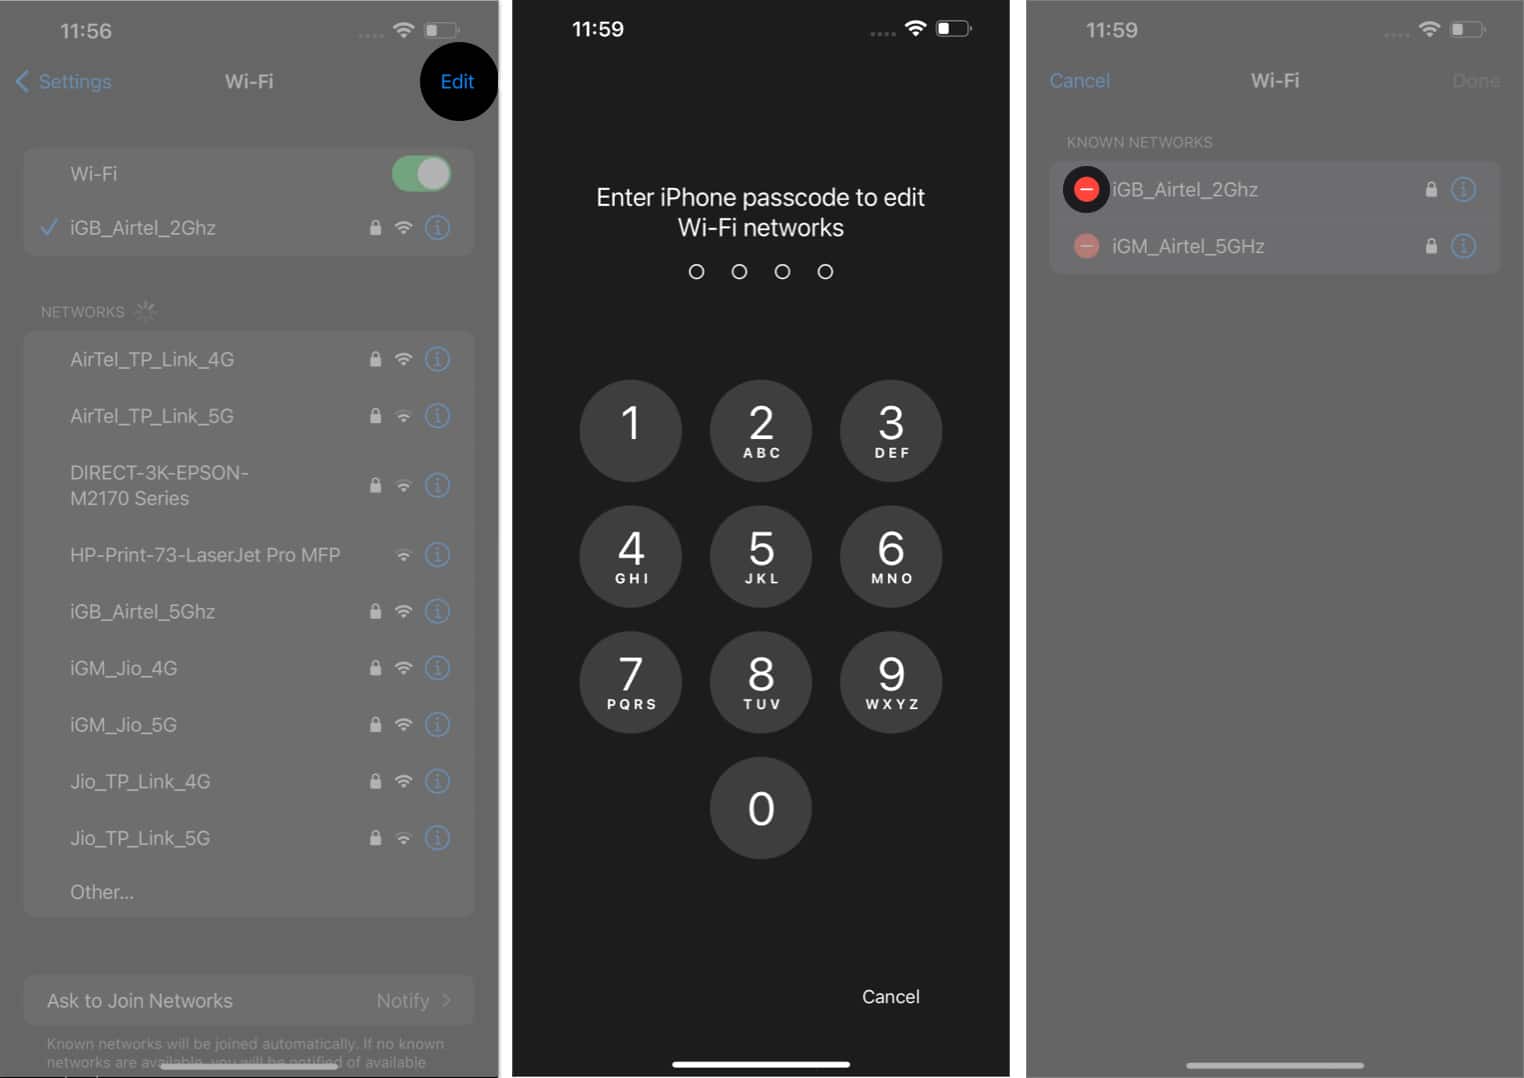
- Open Settings → Navigate to Wi-Fi → Edit.
- Enter the passcode of your device to proceed.
- Tap the minus (-) icon next to the network.
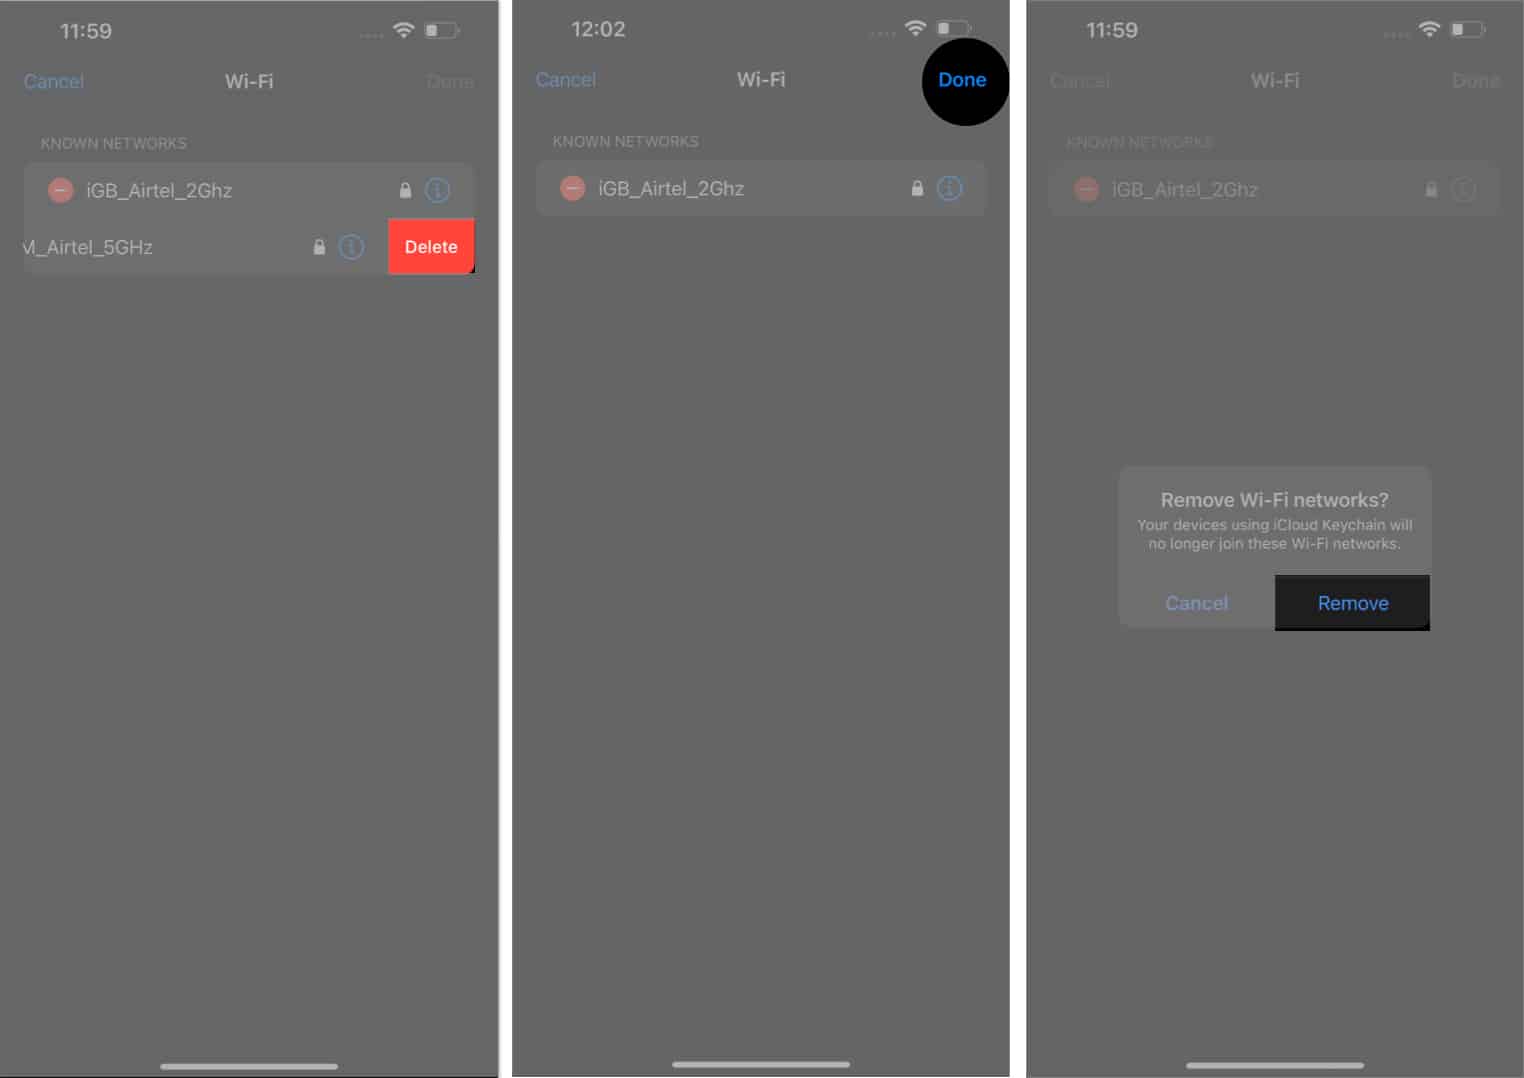
- Hit Delete → Done → Select Remove when prompted.
How to disable Wi-Fi Auto-Join on Mac
Now that you know how to stop Wi-Fi from auto-connecting on your iPhone, you must do the same on your Mac. Follow the steps below.
Ventura and later
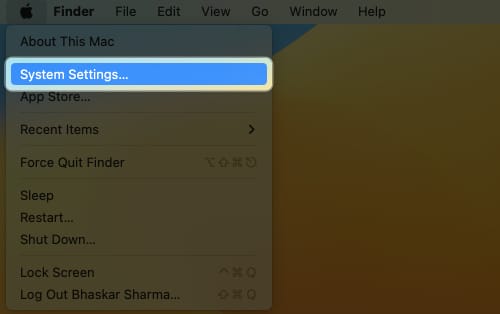
- Click the Apple logo () → System Settings.
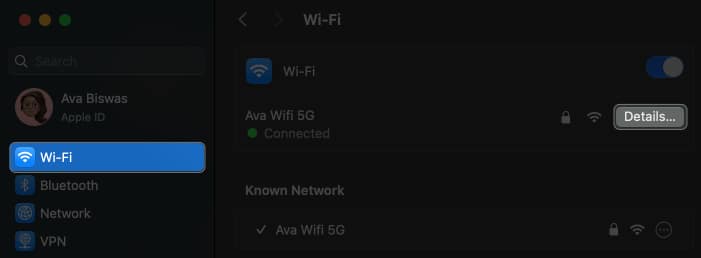
- Navigate to the Wi-Fi → Press Details for the network you’re connected to.
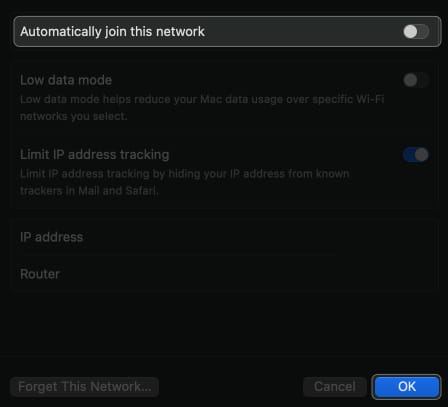
- Now, toggle off Automatically join this network → Click OK.
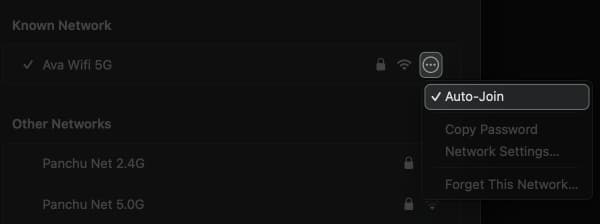
Enter your Mac password if prompted. - If you’re not connected to the network and still want to stop Wi-Fi auto-connect, click the three-dot icon next to the network and uncheck Auto-Join.
Monterey and earlier
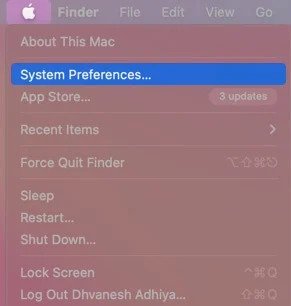
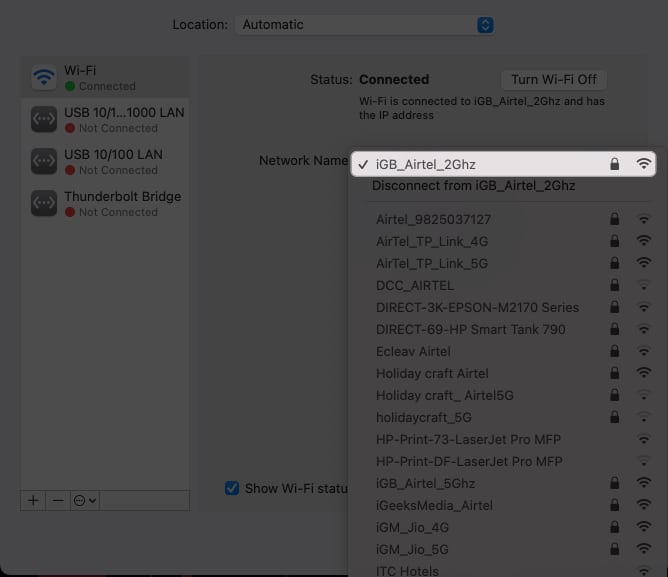
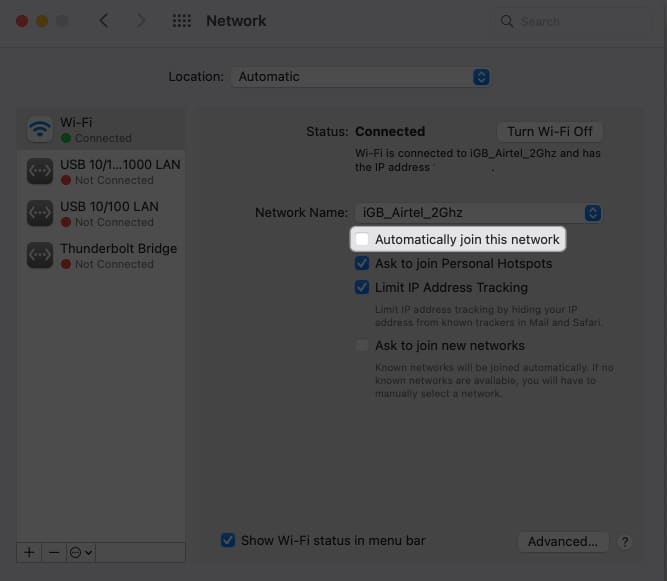
- Click the Apple logo ()→ System Preferences.
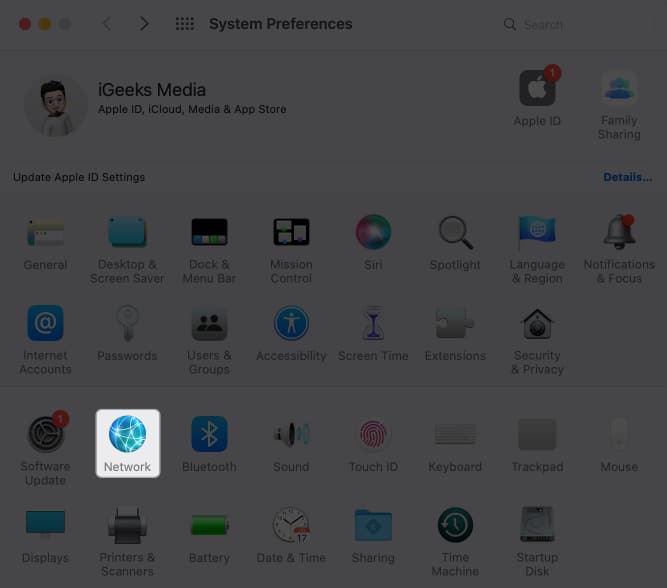
- Access Network from the menu.
- Select the network from the drop-down menu.
- Uncheck Automatically join this network.
How to forget Wi-Fi network on Mac
Alternatively, you can avoid the threat of cyberattacks or data breaches by removing open networks from your Mac.
Ventura and later
- Navigate to the Apple logo () → System Settings.
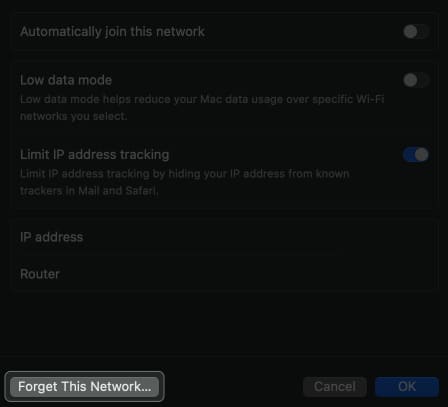
- Go to Wi-Fi → Click Details next to the connected network.
- Press Forget This Network.
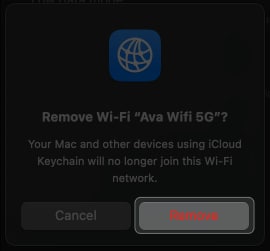
If you’re not connected to the network, click the three-dot icon and press Forget This Network. - Hit Remove when prompted.
Monterey and earlier
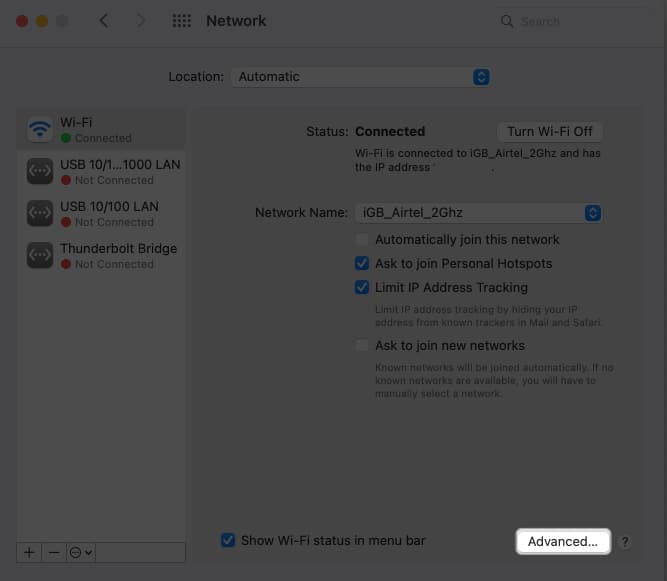
- Click Apple logo ()→ System Preferences→ Network.
- Select Advanced.
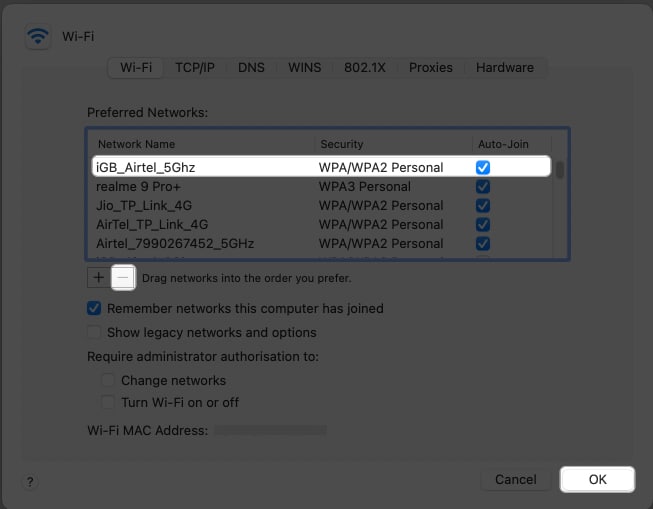
- Select the network you prefer to remove → Hit the minus (-) icon.
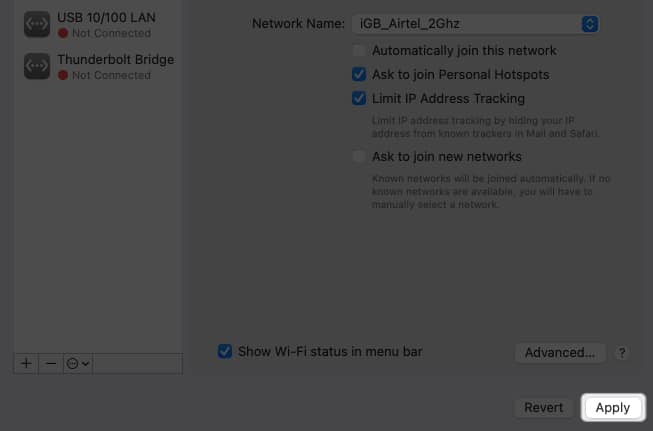
Additionally, disable auto-connect for other saved networks by unchecking Auto-Join. - Hit OK → Apply.
Save yourself!
The automatically connect to Wi-Fi networks feature is convenient yet dangerous, as your device may pair with an unsecured network. So, you should take the necessary precautions to avoid becoming a victim. You may reset your network settings if you face issues disabling the auto-join Wi-Fi feature.
Read more:

