With iPhones’ powerful cameras come great photos—and, unfortunately, greater image sizes. A single picture can take up 1.5MB to 5MB of space and quickly eat into your device storage. So, if you’re running low on space or want to share pictures faster, reducing the size of photo files on your iPhone or iPad is a must.
Thankfully, there are several simple ways to reduce image file size on iPhone without losing quality. Let’s explore the best options.
1. Use High-Efficiency Format in iPhone settings
The best way to avoid the hassle of compressing photos later is to capture images with smaller file sizes right from the start. The High-Efficiency Image Format (HEIF) is designed to offer excellent quality while keeping file sizes low.
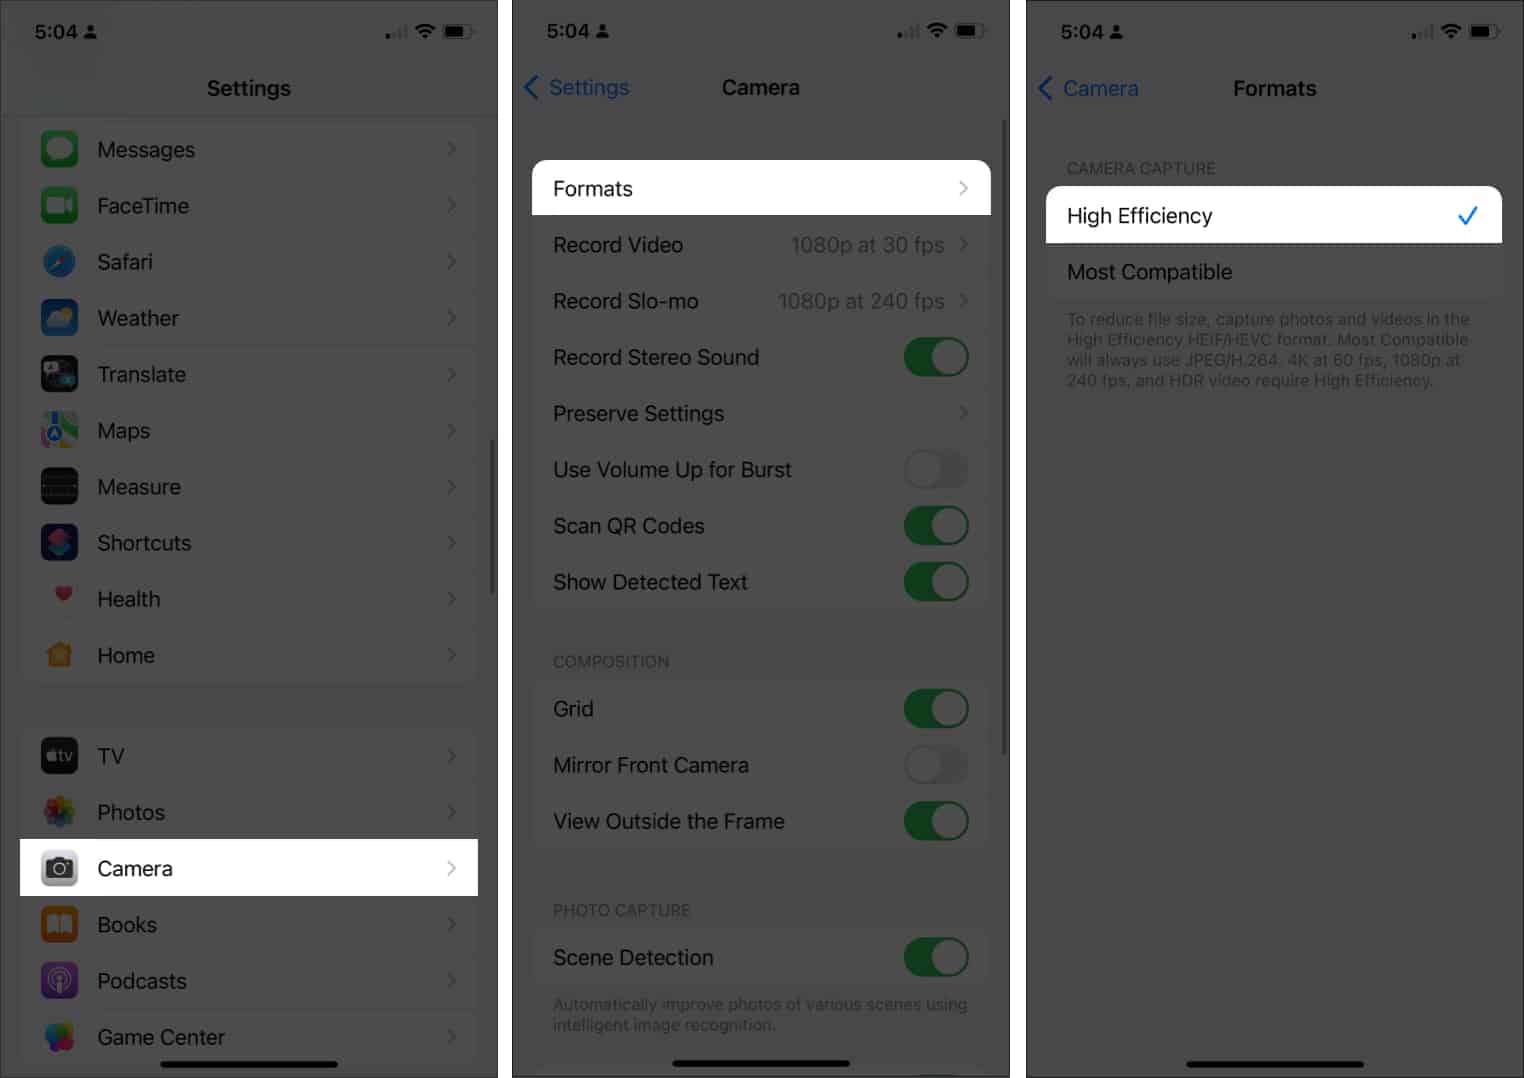
Your iPhone or iPad likely uses HEIF by default, but if it was changed, here’s how to enable it again:
- Open Settings → Go to Camera.
- Tap Formats → Select High Efficiency.
Note: HEIF (with .HEIC extension) may not be compatible with all devices or platforms. If needed, you can convert HEIC to JPEG on iPhone.
2. Reduce photo file size using Shortcuts app
The Shortcuts app is a hidden gem for automating tasks on your iPhone, including resizing or compressing images.
Here’s how to reduce photo size using a custom shortcut:
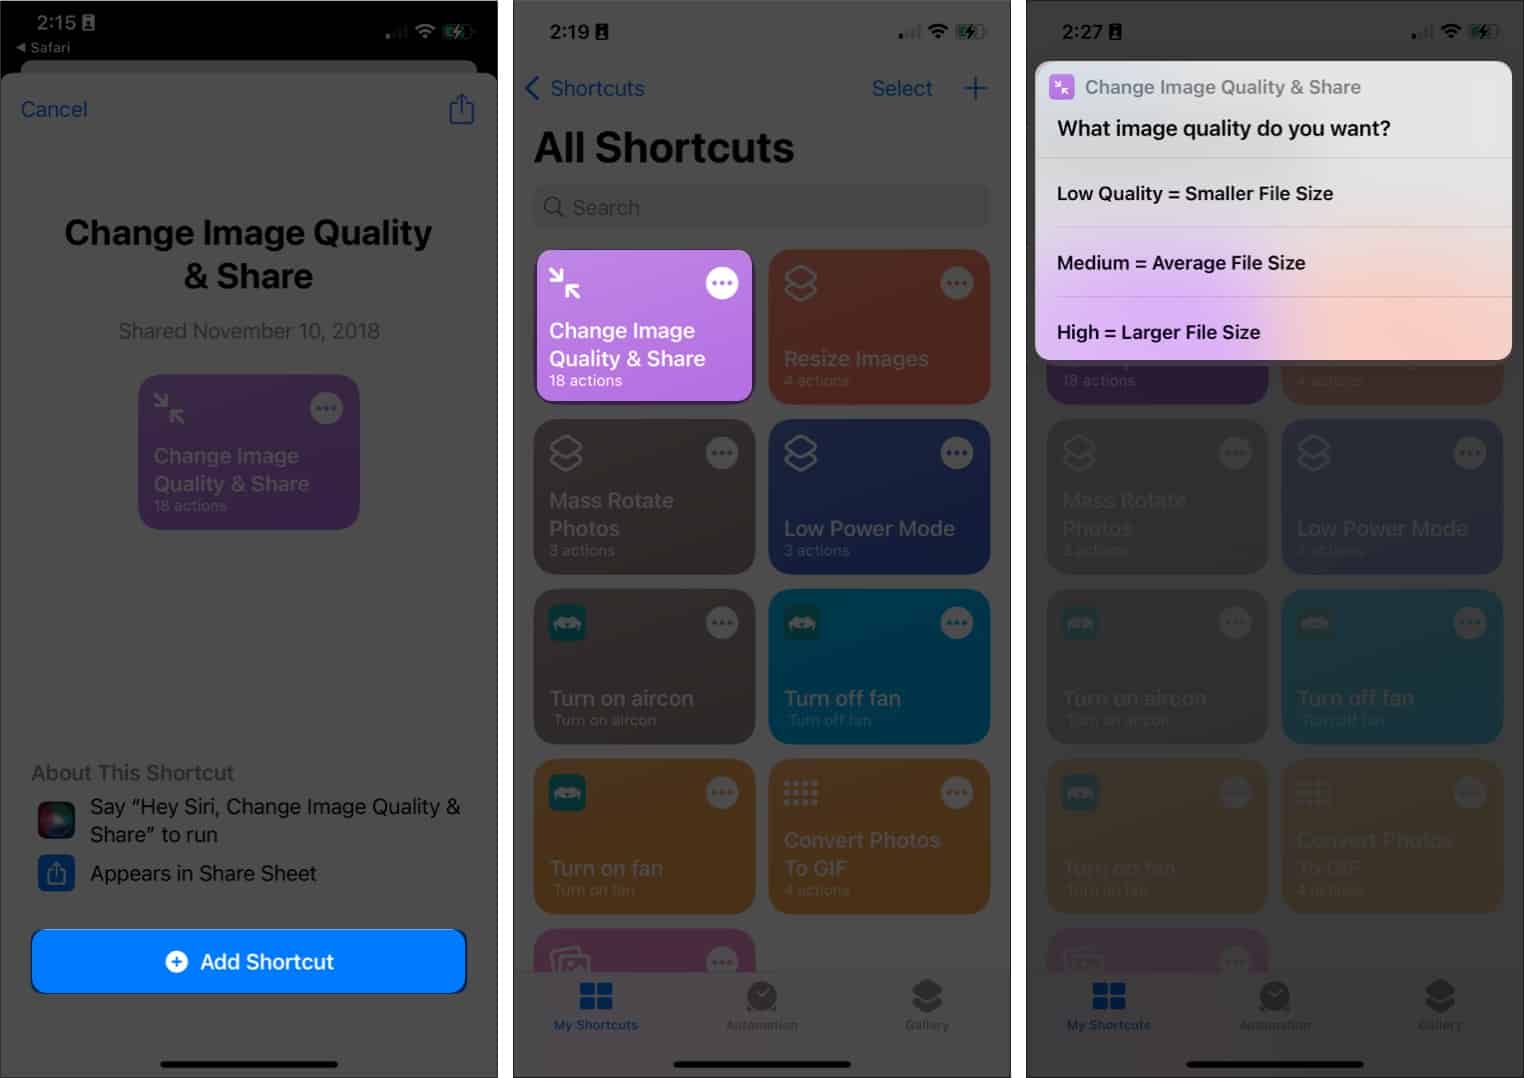
- Download Change Image Quality & Share Shortcut.
- Tap Add Shortcut and wait for it to appear in your Shortcuts app.
- Open the Shortcuts app → Tap Change Image Quality and Share.
You may be asked to give the app access to your photos. Tap Allow Access. - Select the photo(s) you want to resize → Tap Add at the top right.
- From the pop-up, select your preferred image quality.
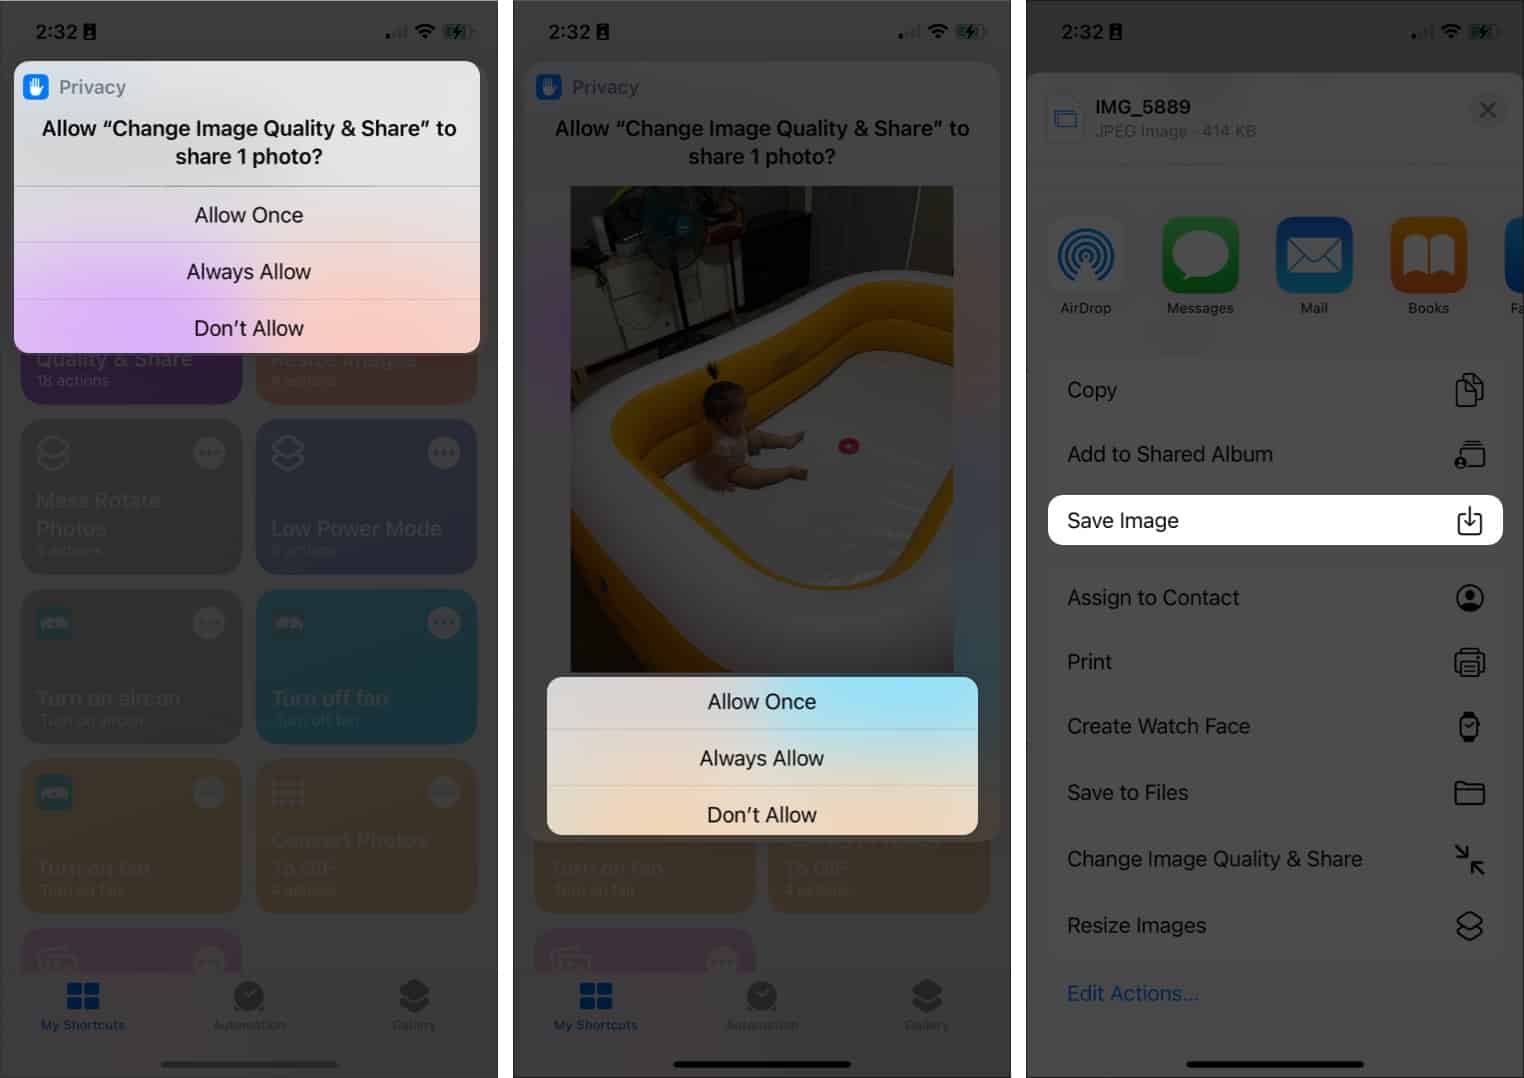
I’d prefer going with Medium = Average File Size. - A prompt will appear asking you to allow the shortcut to share the image(s) you resized. Select Allow Once or Always Allow.
- A Share sheet will appear → Tap Save Image.
Now, you can easily resize images from the Photos app as well. Just select the photos and follow steps 4 to 7 from above.
By default, the resized images will appear in the Recents section of the Photos app.
3. Shrink image size using the Mail app
If you’re emailing photos and want to shrink them quickly, the Mail app on iPhone lets you resize images before sending.
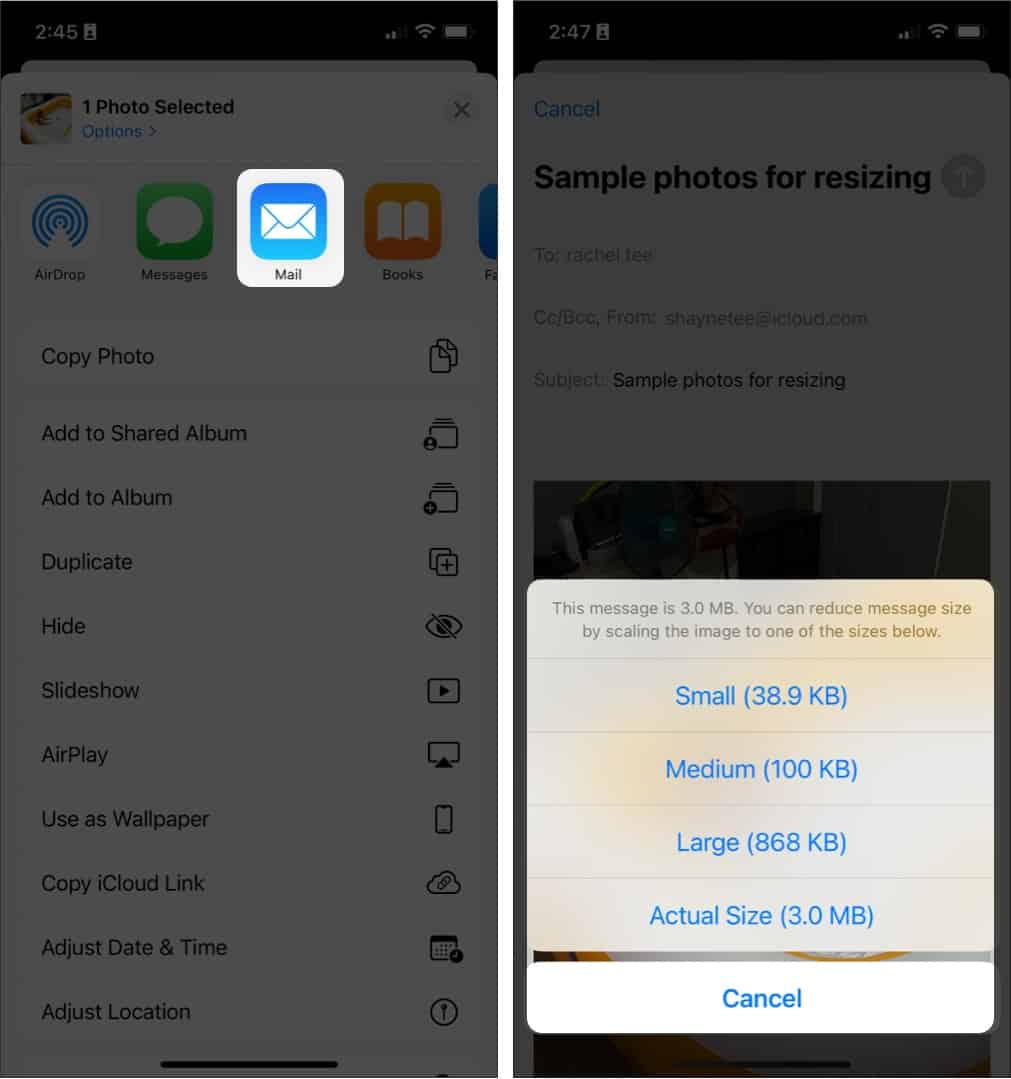
- Go to Photos → Select the image(s) you want to resize.
- Tap the Share icon → Choose Mail.
- Enter your email ID and tap Send.
- When prompted, choose the image size: Small, Medium, Large, or Actual Size.
- Open your Mail app and download the resized version from your inbox.
This is a quick method for users who don’t want to install extra apps or use automation.
4. Use a Third-Party app to compress images
If you frequently work with large files or need more control, image compression apps are your best bet. One of the best free apps for this is Image Size.
How to use the Image Size app:
- Download the Image Size from the App Store.
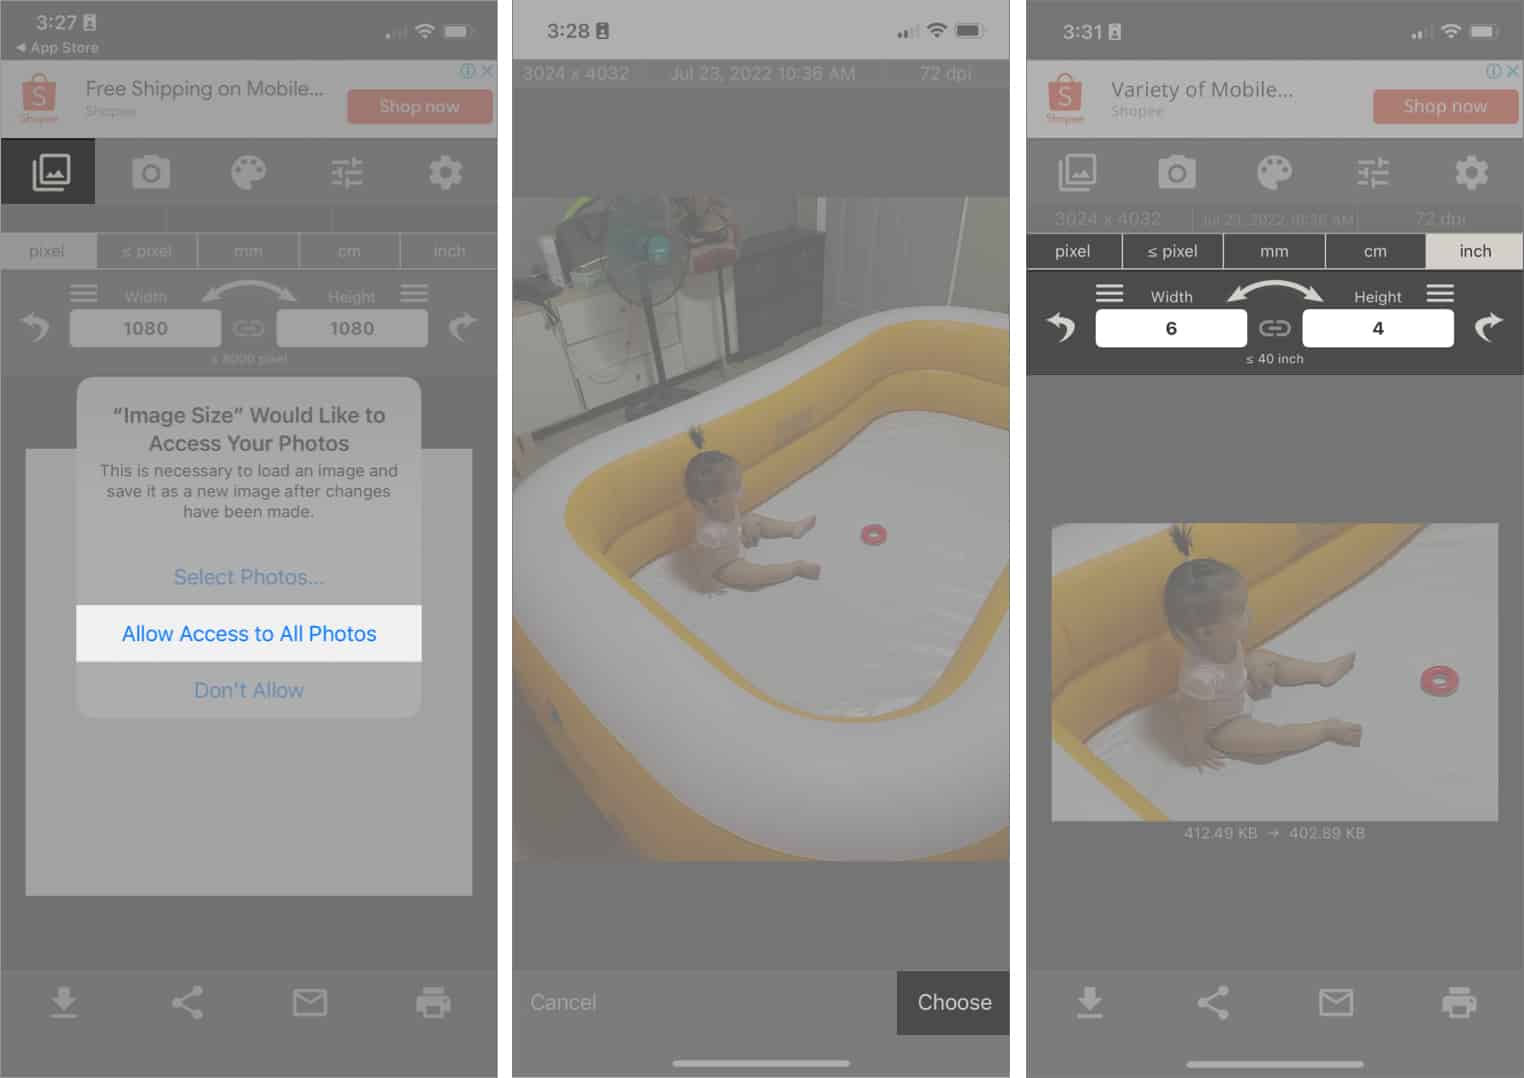
- Tap the Photo icon and grant access to your photo library.
- Select your image(s) → Tap Choose.
- Enter custom dimensions in pixels, cm, or inches.
- Adjust and preview the image. The app will show both the original and resized file size.
- Tap the Download/Save icon to save the image.
You can also check out other great photo editing apps for iPhone to manage and enhance your images.
Video: How to Reduce Photo File Size on iPhone or iPad
Why you should reduce image size on iPhone
- Free up storage space: Especially important for devices without expandable memory.
- Faster uploads and sharing: Smaller files are easier to send via email or messaging apps.
- Better compatibility: Some websites and platforms have file size upload limits.
Need more ways to manage your storage? Learn how to clear iPhone storage.
Wrapping up…
Knowing how to reduce photo file size on your iPhone or iPad can be incredibly useful, whether you want to save storage space, share photos faster, or upload them online. Depending on your preference, try any of the four methods above: Settings for automatic optimization, Shortcuts for quick resizing, Mail for instant compression, or third-party apps for full control.
Do you have another trick for compressing images on your iPhone? Please share it in the comments—we’d love to hear it!
Read more:


Great tips! I never knew about the “Optimize iPhone Storage” option. It really helps to save space without losing quality. Thanks for sharing!