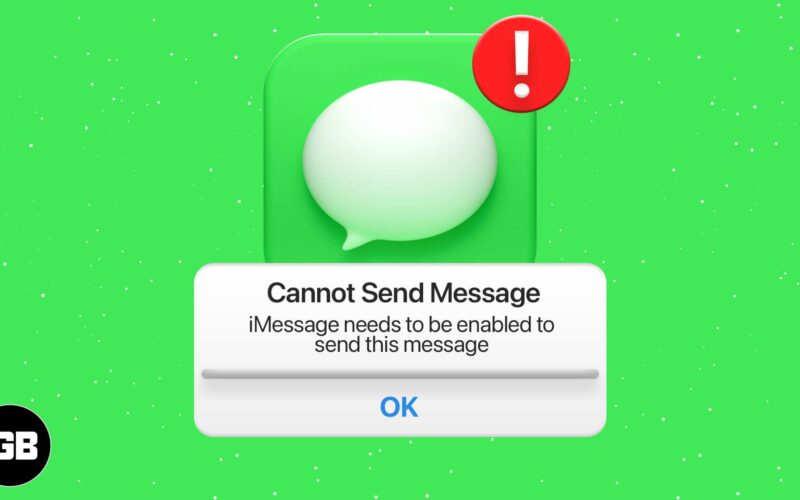
iMessage effortlessly connects you to the people you need to communicate with. It’s easy to use, effective, and reliable for the most part. But sometimes, you can encounter a strange error that says, “iMessage needs to be enabled to send this message.”
This typically only happens when the message you’re trying to send has emojis, message effects, or any other special features exclusive to iMessage. Needless to say, this error can be quite frustrating, especially when you believe iMessage is already enabled on your device. But don’t worry; I’ll help you fix the issue in this guide so you can continue enjoying iMessage.
Table of Contents
- What causes iMessage to turn off?
- 10 ways to fix iMessage need to be enabled to send this message
- Ensure iMessage is enabled
- Force quit the Messages app
- Disable and enable iMessage from Settings
- Check iMessage server status
- Enable and disable Airplane mode
- Restart your iPhone
- Delete stuck messages or conversation
- Sign out of Apple ID and sign in again
- Reset network settings
- Send as SMS instead of iMessage while you contact support
What causes iMessage to turn off?
There are several reasons why iMessage can turn off and cause the issue you’re experiencing. Here are some common causes:
- Poor Connectivity: To function well, iMessage requires a stable internet connection. So, if your wi-fi is slow or you have a weak cellular signal, iMessage may not function properly and display an error message due to connectivity issues.
- iOS Glitches: Temporary bugs or glitches in iOS can sometimes cause iMessage to turn off. To fix this, you can restart your device and make sure it’s updated to the latest iOS version.
- Outdated iOS version: Not updating your iPhone to the latest iOS can cause compatibility issues that can make iMessage stop working. So keep your device updated with the latest iOS that’s available for it.
- Change in Settings: Sometimes, you might accidentally change your iMessage settings or turn it off without knowing. You can easily check this by going to Settings > Messages and ensuring that iMessage is toggled on.
- Apple ID Issues: iMessage can stop working or turn off if there’s an issue with your Apple ID or your iCloud account. To fix this, you can sign out of your account and then sign back in.
- Activation Issues: It’s possible that iMessage encountered an error during activation, which caused it to get turned off. To fix this, you must ensure your phone number and network are set up correctly.
- Carrier Settings: Sometimes, carrier settings updates can impair iMessage functionality. To check this, go to Settings → General → About.
- Restrictions or Parental Controls: Using restrictions or parental controls on your device may prevent Message from working. You can check these settings by going to Settings → Screen Time → Content & Privacy Restrictions.
- Hardware issues: Though quite rare, damage to your device or a hardware malfunction can also impair iMessage performance.
10 ways to fix iMessage need to be enabled to send this message
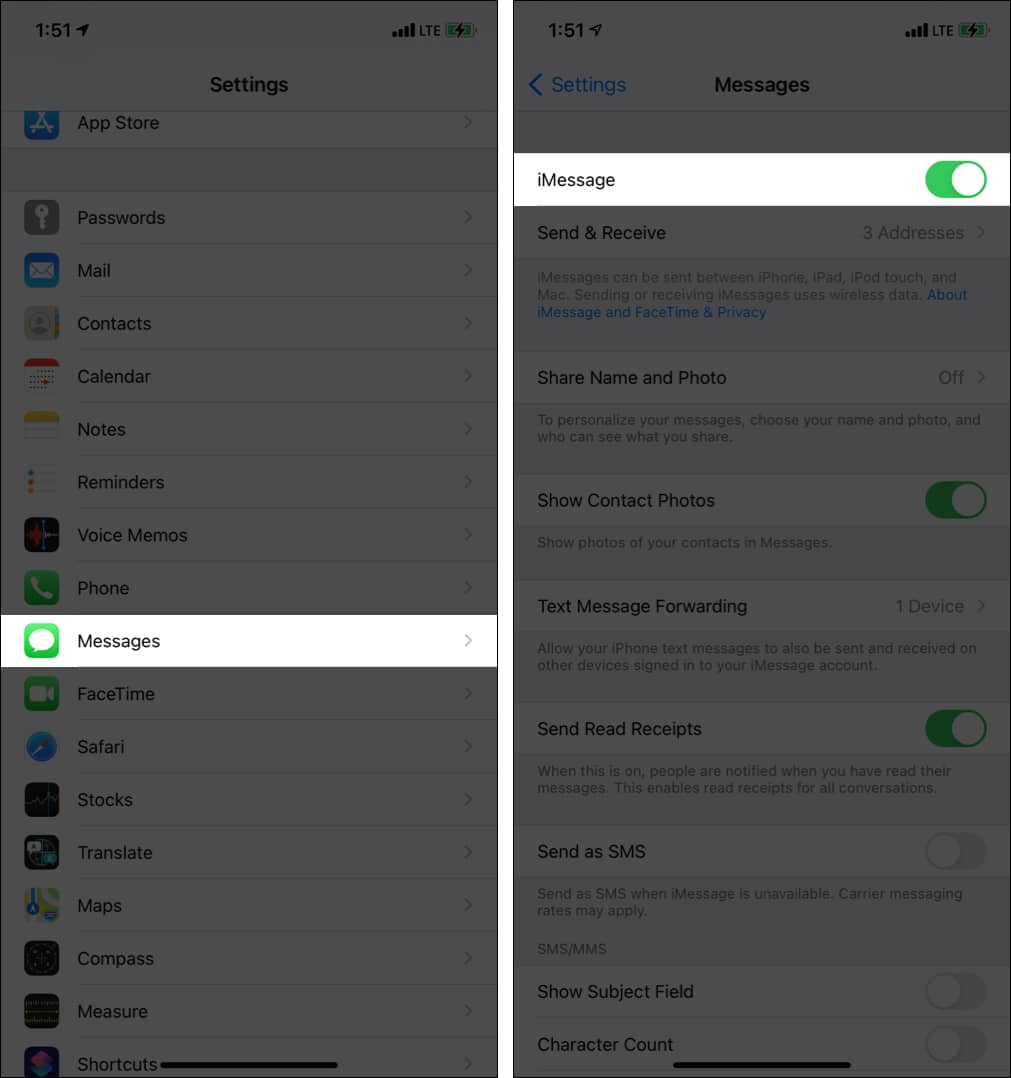
1. Ensure iMessage is enabled
- Open Settings and tap Messages.
- Make sure the toggle for iMessage is green and there is no message below it like iMessage waiting for activation.
If iMessage is on, we can move on to the subsequent fixes.
2. Force quit the Messages app
After you follow the above solution (Airplane mode on and off), force-quit the Messages app. To do this, enter the App Switcher on your iPhone.
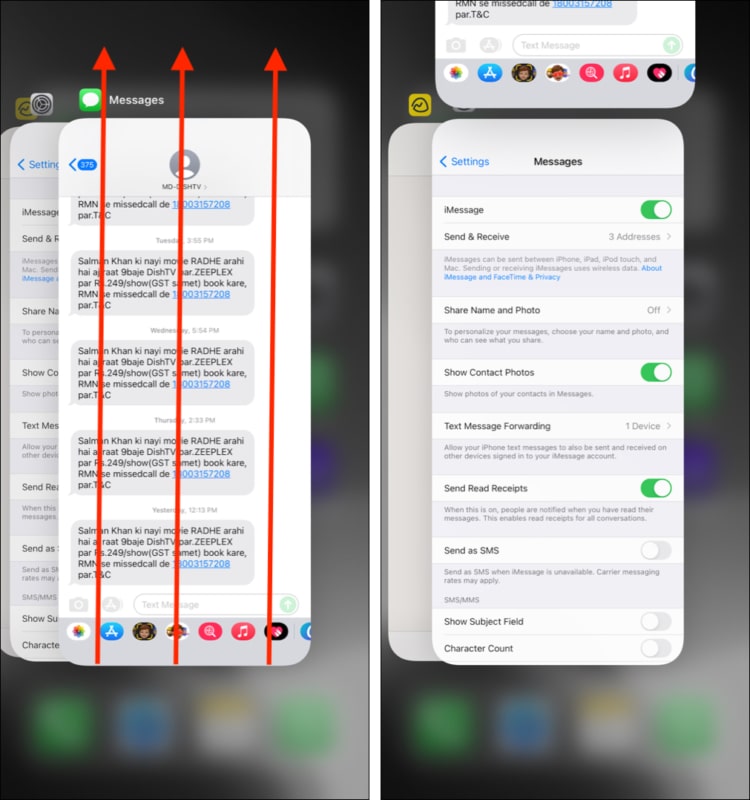
On an iPhone with Face ID, swipe up from the bottom and hold. If your iPhone has a Home button, quickly double-press it. You will see all currently open apps. Close the Messages app by dragging it upwards. After 15 seconds, open the Messages app again and try sending the text.
3. Disable and enable iMessage from Settings
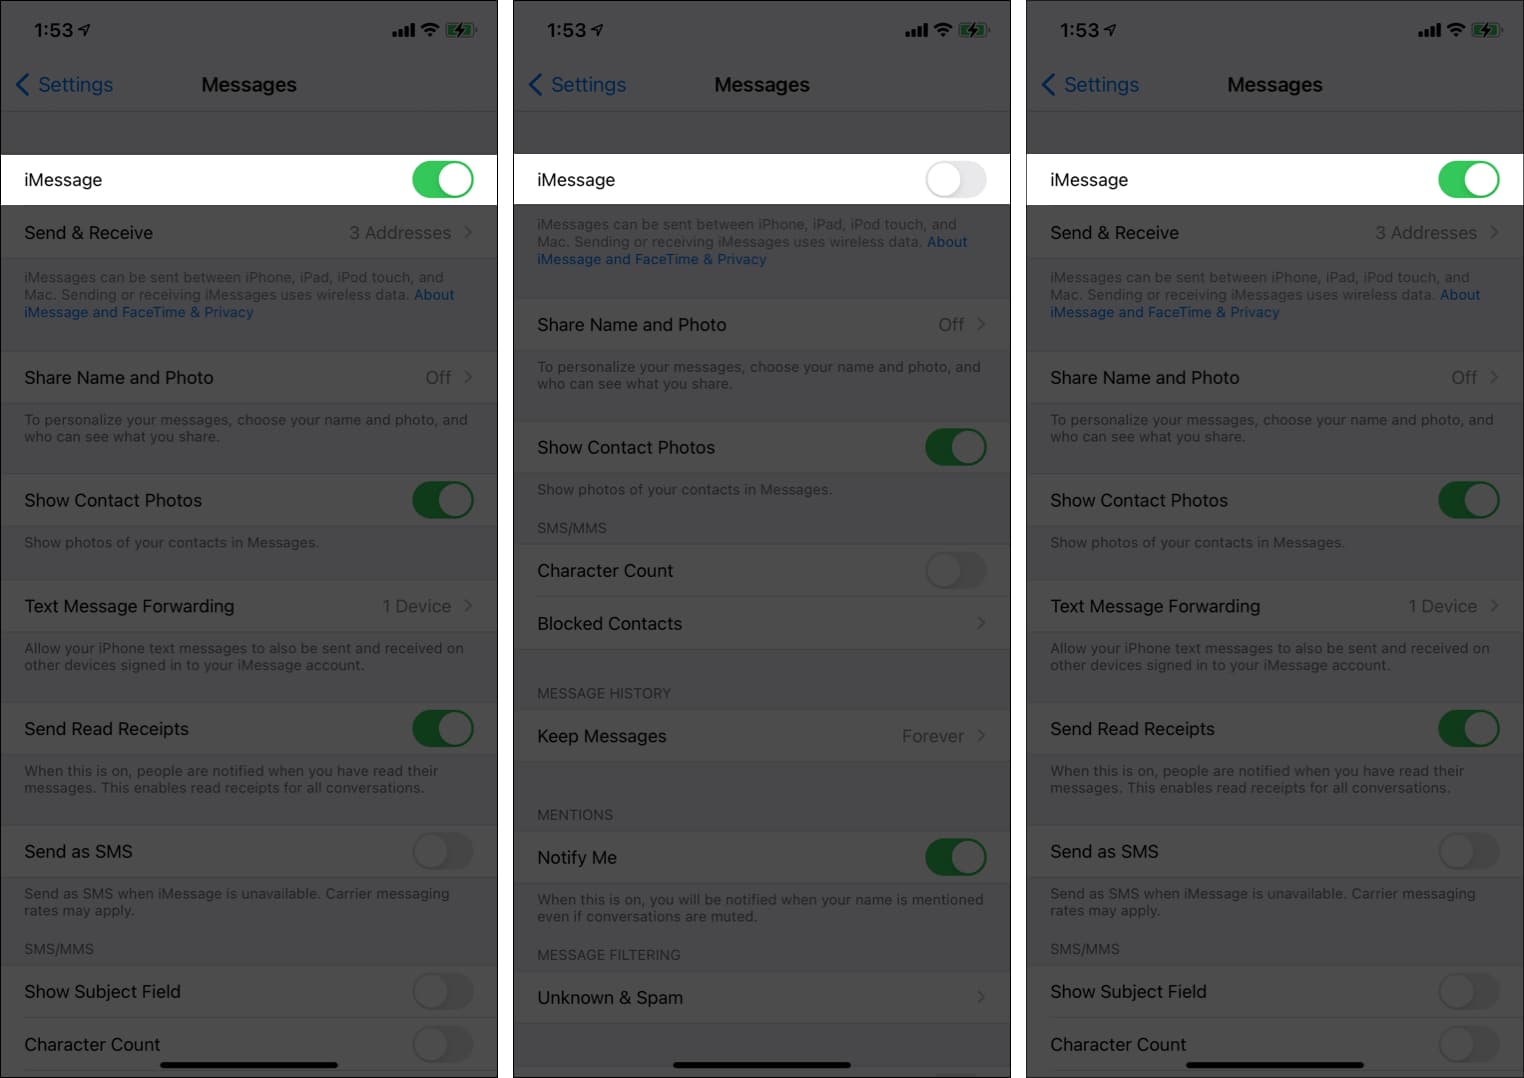
Although iMessage is enabled, your iPhone may say, ‘iMessage needs to be enabled to send this message.’ In this situation, turning iMessage off and then on can solve the problem.
- Open Settings and tap Messages.
- Toggle off iMessage.
- Restart your iPhone.
- Follow step 1 and toggle on iMessage again.
4. Check iMessage server status
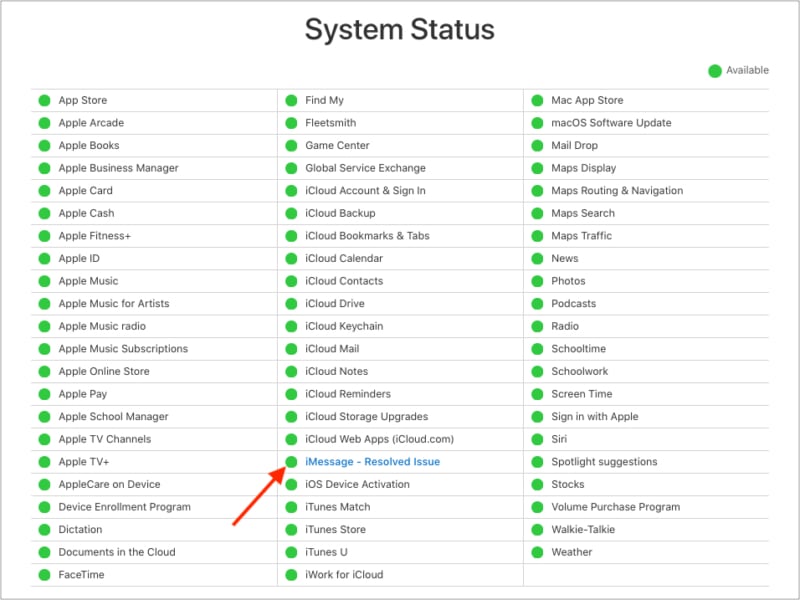
In rare cases, the fault might not be yours but Apple’s. To check this, head over to their System Status Page, and if you see a green dot next to iMessage, that’s good news. If it is yellow or red, then iMessage is down, and Apple is working to implement the fix.
It may take a few minutes to a few hours for everything to return to normal.
5. Enable and disable Airplane mode
This is a pretty easy and quick thing to try before going for other complex solutions.
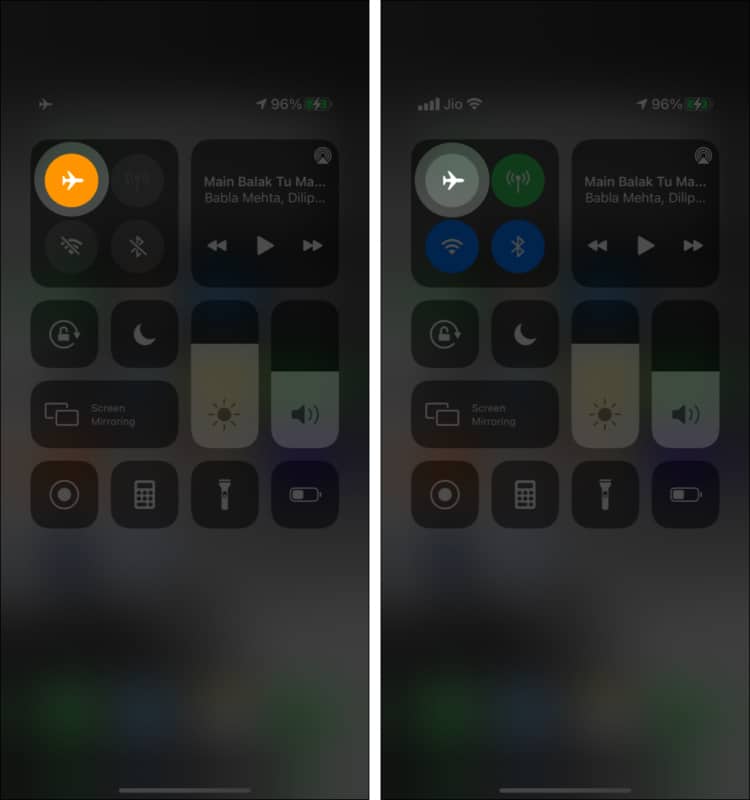
Swipe down from the screen’s top left to open the Control Center. If you have an iPhone with a Home button, swipe up from the bottom of the screen. Next, tap the Airplane icon. It will become orange. After 30 seconds, tap again to disable it.
6. Restart your iPhone
This quick solution works wonders in solving several problems like ‘iPhone says cannot send a message as iMessage needs to be enabled.’ To restart your iPhone use the buttons first to turn it off and, after a minute, turn it back on.
7. Delete stuck messages or conversation
At times, removing the stuck, failed message from the conversation can help clear the way for new messages to be sent successfully.
To do this, open the Messages app and go to the conversation. Long-press the failed message and delete it. Now, try to send a new message again. If this does not work, delete the entire conversation and try sending the message.
Alternatively, sometimes, you may not be able to send messages to a particular contact. Try sending it to others to find out. If this happens, follow the solutions below. It would also help to ask the recipient and ensure their iMessage settings are correct.
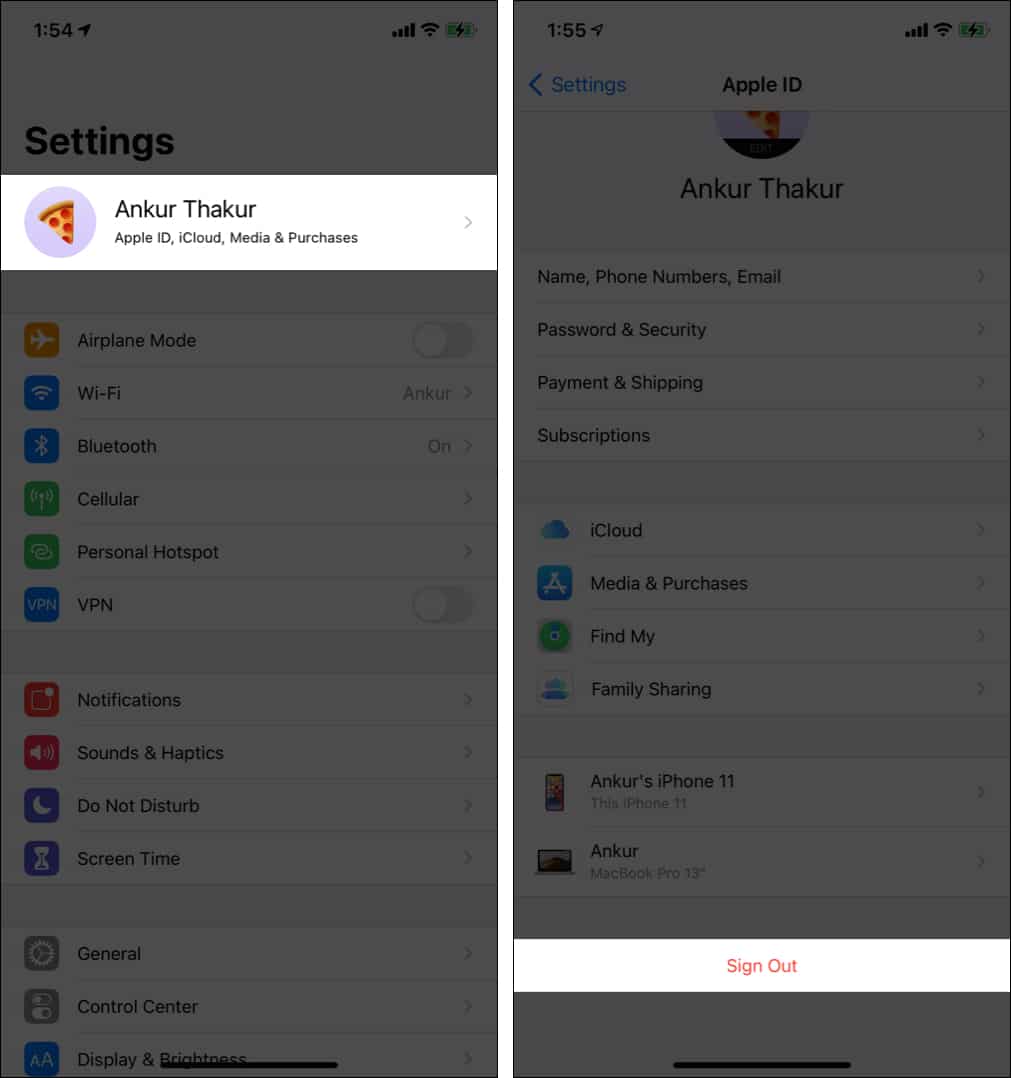
8. Sign out of Apple ID and sign in again
- Go to iPhone Settings and tap your name at the top.
- Scroll to the bottom and tap Sign Out.
- Restart your iPhone.
- Go to Settings and tap Sign in at the top.
- Once signed in again, launch iMessage and see if it works correctly.
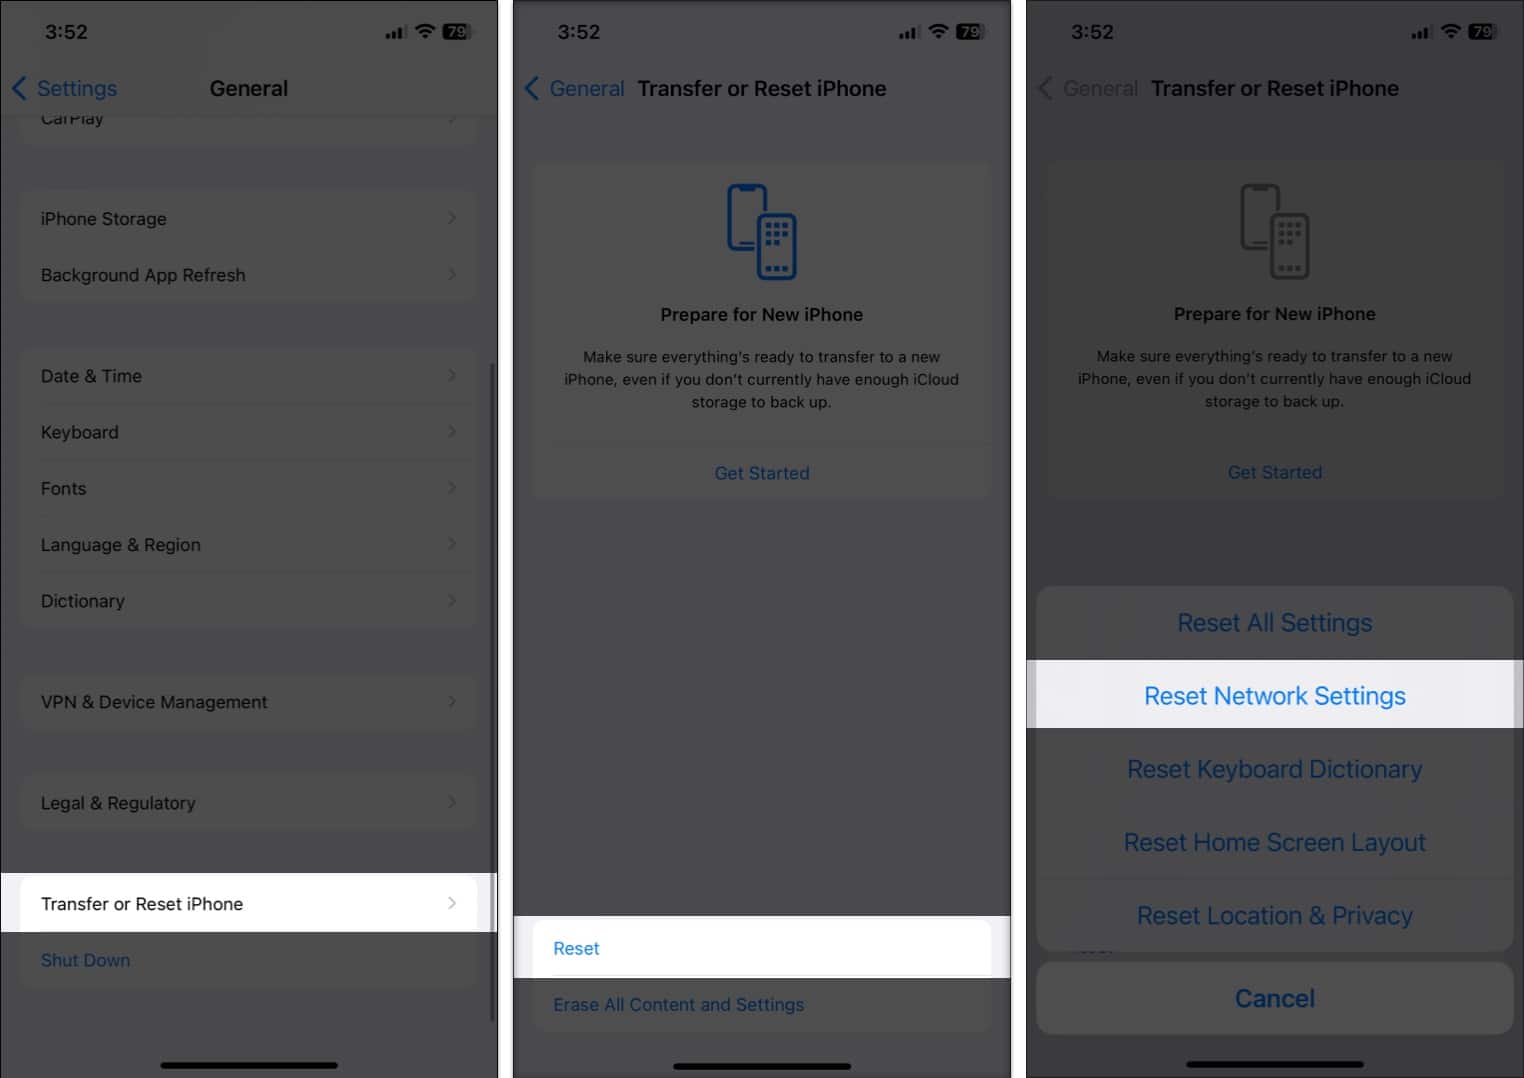
9. Reset network settings
This will not erase personal data like apps, photos, music, etc., but it will set all network-related settings to default.
- Open iPhone Settings and tap General.
- From the bottom, tap Transfer or Reset iPhone.
- Tap Reset → Reset Network Settings. Then enter your passcode and tap Reset Network Settings to confirm.
If the network settings reset does not bring any luck, you may try to Reset All Settings. This won’t delete any personal data except all the settings you have changed like Wi-Fi, Bluetooth, VPN, notifications, etc.
10. Send as SMS instead of iMessage while you contact support
Finally, if nothing helps, contact Apple Support. Meanwhile, if you really want to send the message, try sending it as a regular SMS instead of iMessage.
Signing off
I hope the above solutions helped you fix the “iMessage needs to be enabled” error. If you have additional questions, feel free to ask via the comments section below.
Other helpful posts:

You have the best guide I’ve found so far.
TYVM!
This post is loaded with beneficial info, thanks for sharing!