Whether you want to discuss a work project with your colleagues or plan a trip with your friends, the iMessage group chat is a great way to indulge with multiple people simultaneously. However, getting the hang of iMessage group chats can take time for someone new to the Apple ecosystem.
So, to help you out, we’ve prepared this guide detailing how to create and customize iMessage group chats on an iPhone or iPad to enhance your conversation and ensure everyone is in the loop.
How to create an iMessage group chat on an iPhone
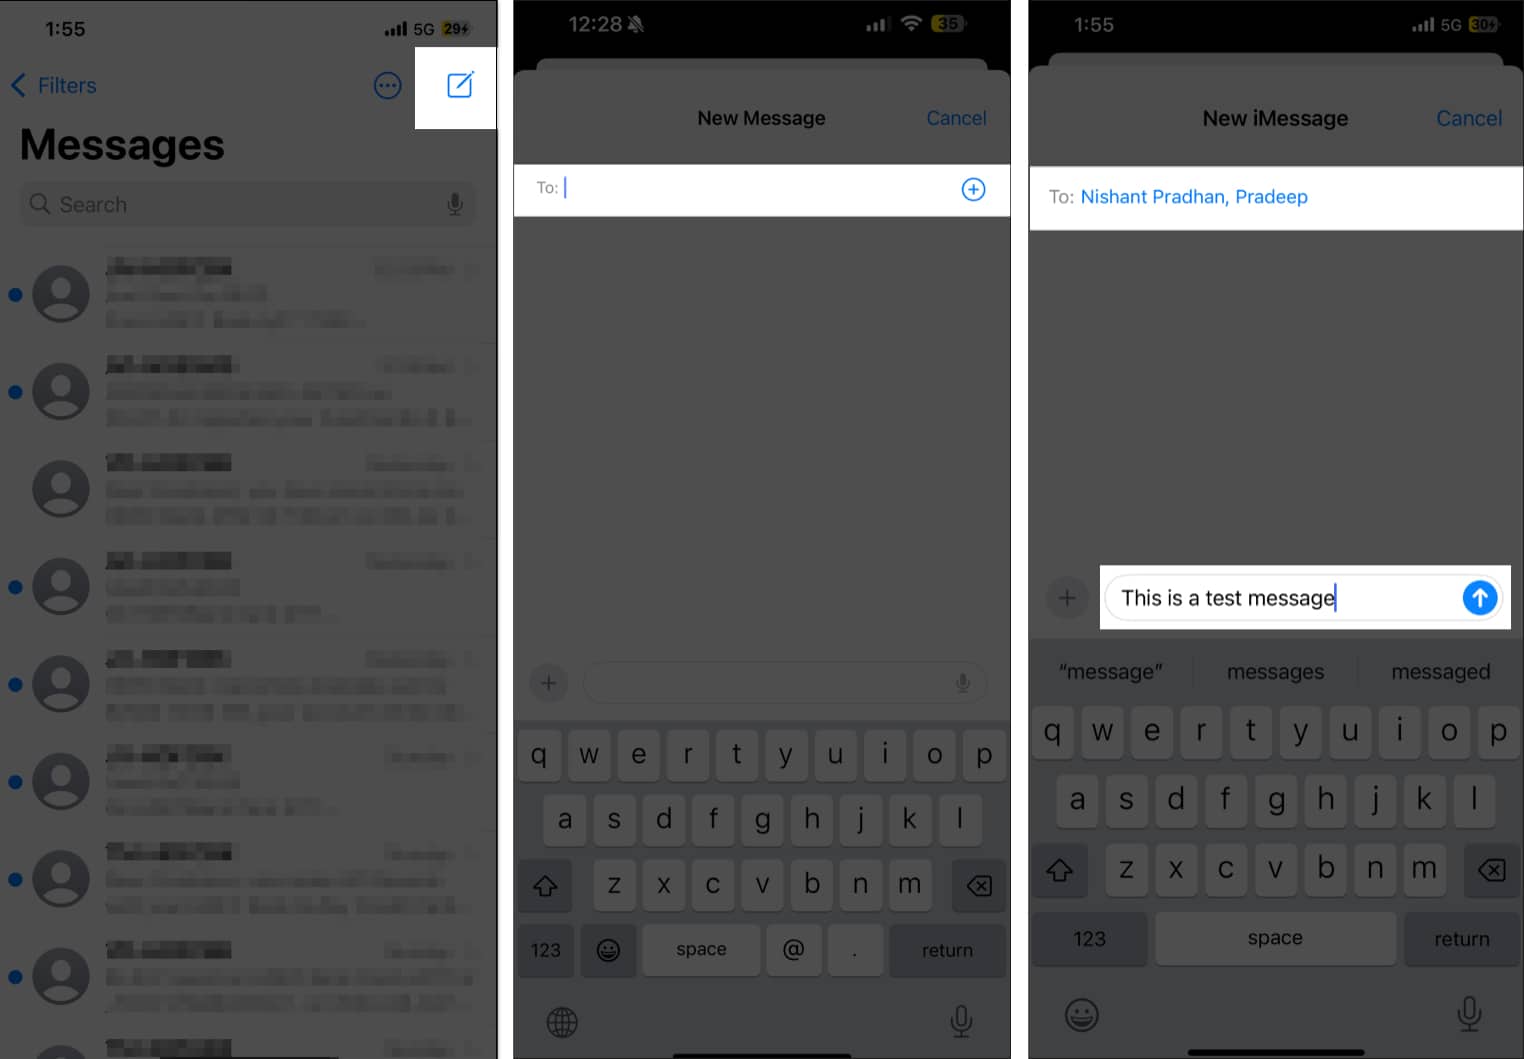
Setting up an iMessage group chat on an iPhone or iPad is pretty straightforward. All you need to do is compose a new message as you normally do but add multiple contacts to the recipient’s list instead of just one. Here’s how:
- Open the Messages app on your iPhone or iPad.
- Tap the Compose button in the top-right corner.
- Here, enter the recipients’ names in the To section or tap the + button to add someone from your contacts.
- Next, type in your text in the text box.
- Once done, tap the Send (upward arrow) button next to the text box to send the message.
You have now successfully created an iMessage group chat. Any new message you or any member sends to this group will get delivered to all the group members. And subsequently, everyone can reply or react to it.
How to customize an iMessage group chat on an iPhone
From adding/removing members in/from the group to giving the group a unique name and icon, there’s a lot you can do to customize an iMessage group chat. Let’s jump in to find out how.
How to name an iMessage group chat
Giving your iMessage group chat a name and icon is wise, as it will make it easier for you to find and identify the group among countless chats in the Messages app.
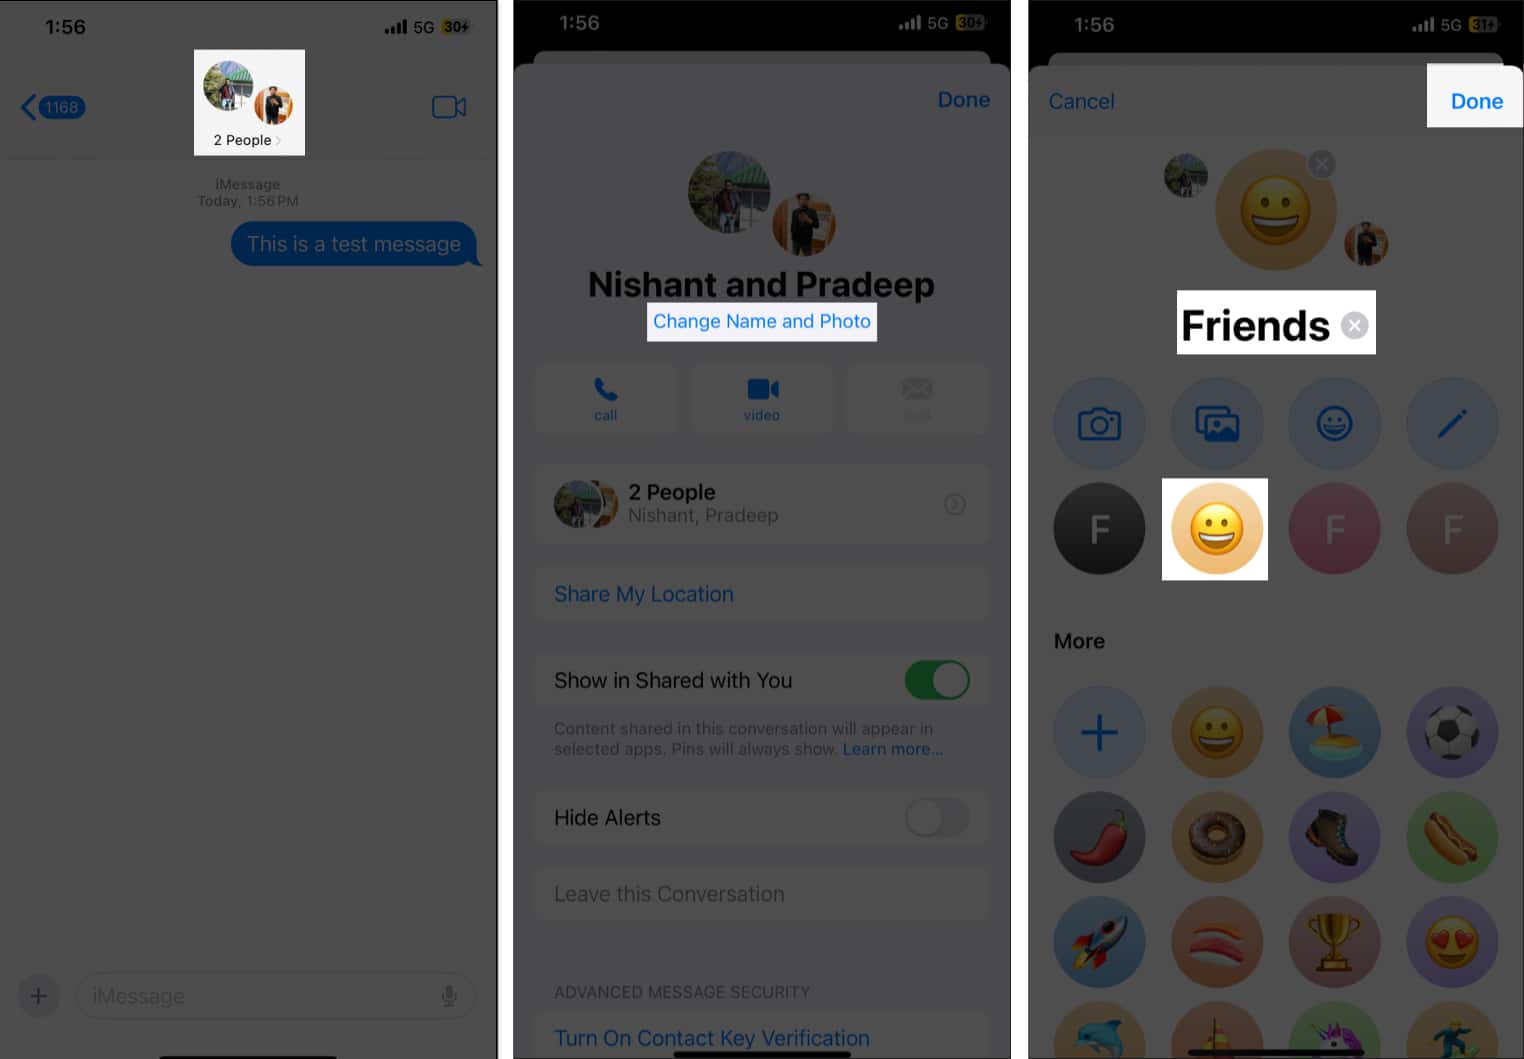
- Open the iMessage group chat in the Messages app.
- Tap on People at the top.
- Here, tap on Change Name and Photo under the group member names.
- Type the group name in the Enter a Group Name field.
- Next, choose a group icon. You can either select one from the available options or tap the gallery icon to pick one from your Photos app library.
- Tap Done in the top-right corner to save the changes.
How to add or remove people from an iMessage group chat
Once you have created and set up an iMessage group chat, you can add or remove members at your convenience anytime, as shown below.
Add people
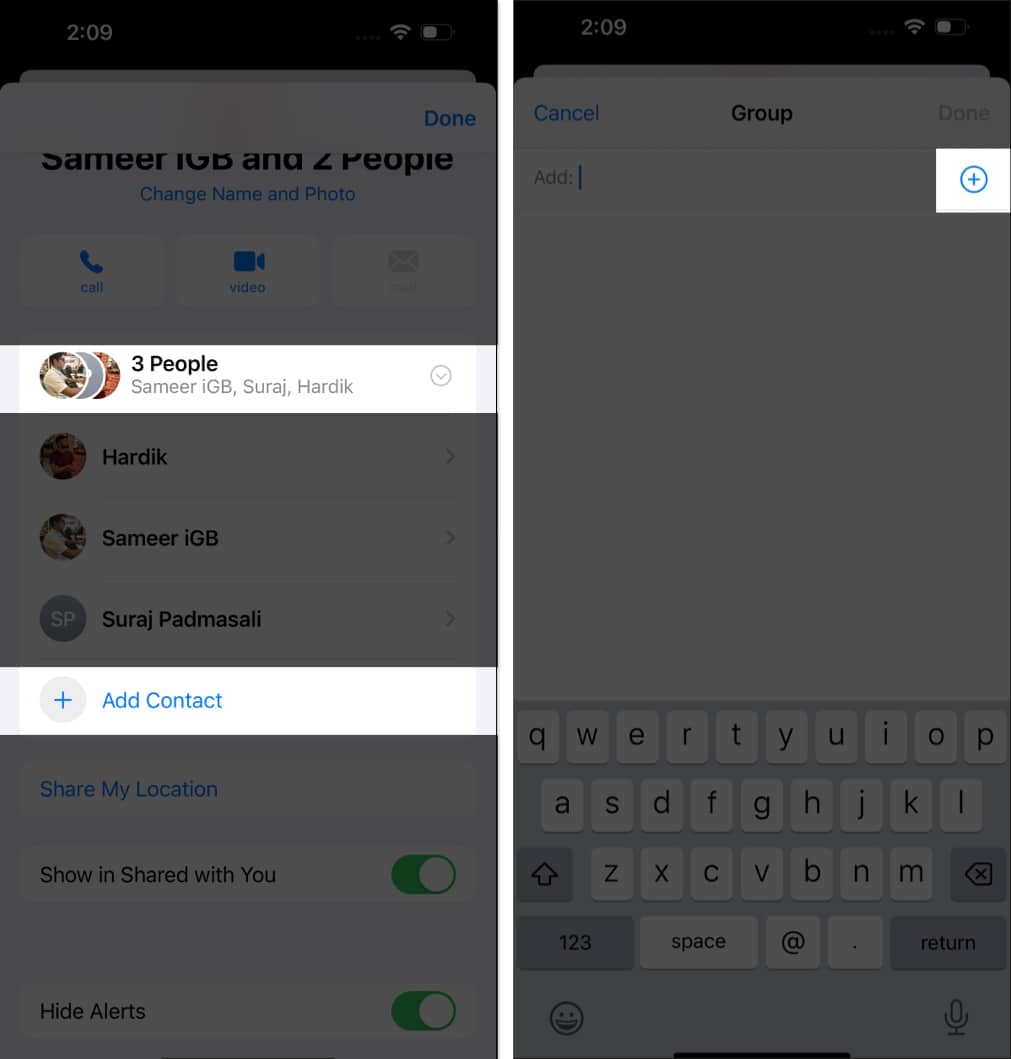
- In the iMessage group chat, tap the group name at the top.
- Here, tap the People tab, then hit the Add Contact button from the menu.
- Next, enter the new member’s name or tap the + button to choose one from your contacts.
- Tap Done in the top-right corner to add the person to the group chat.
Remove people
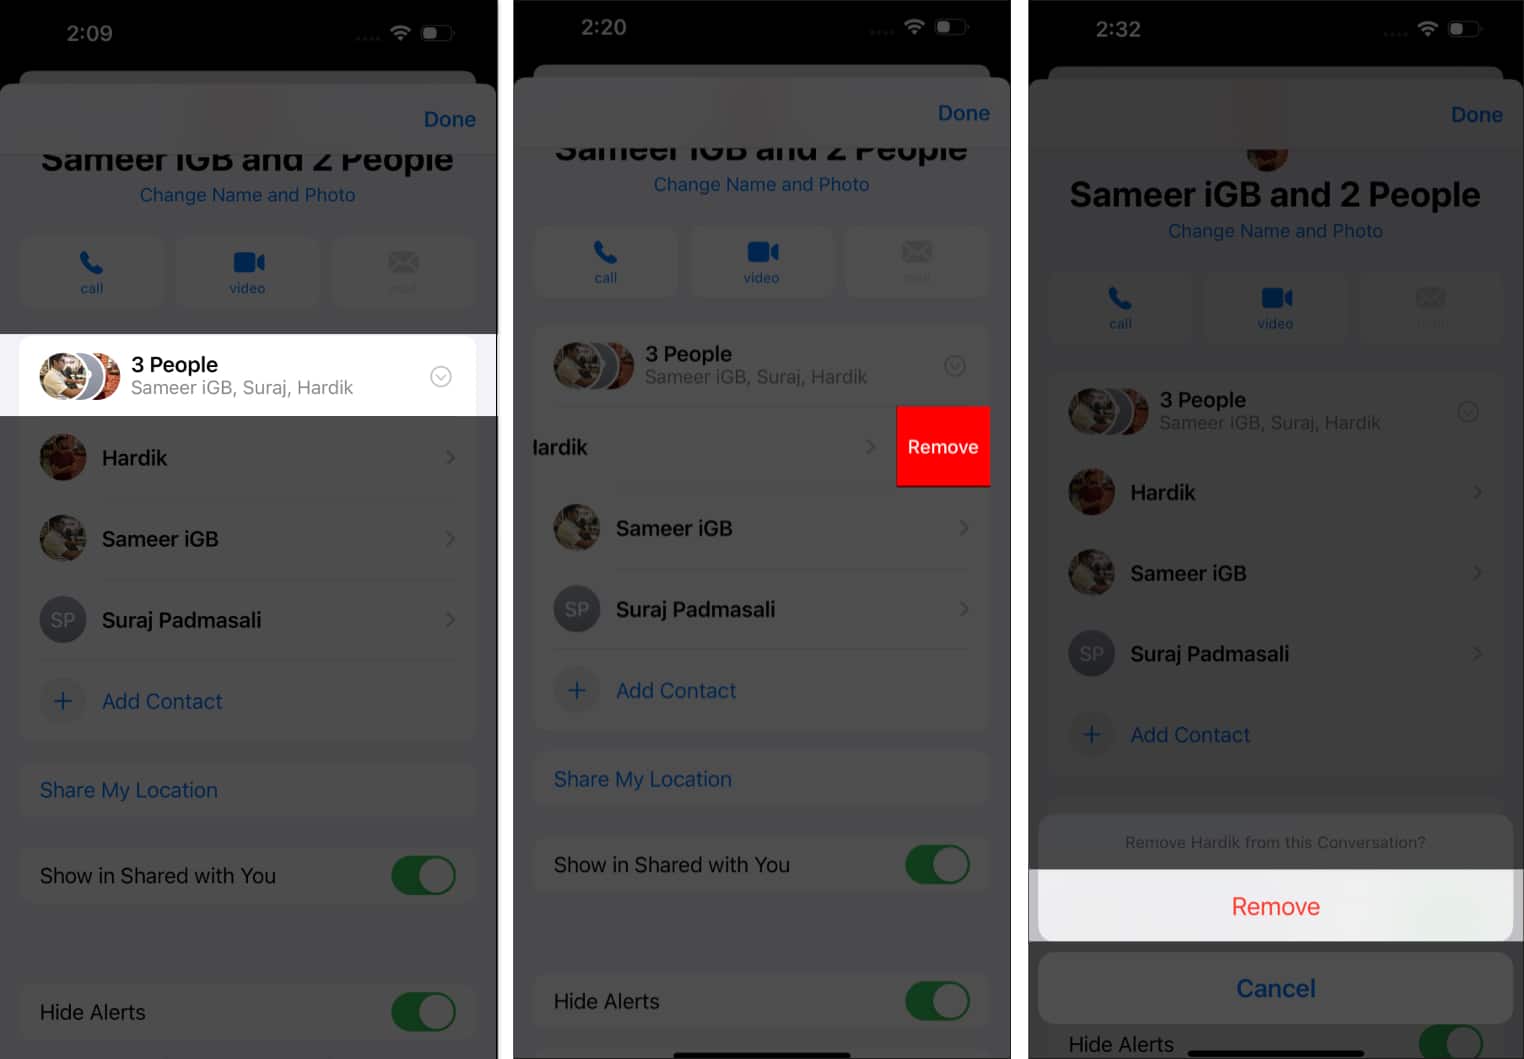
- Go to the iMessage group chat information screen.
- Tap the People tab.
- Here, swipe left on the contact you want to remove and tap the red Remove button to confirm your decision.
How to have a group conversation in iMessage on an iPhone
From adding text effects to messages to sharing media to mentioning people in your message, there’s a lot you can do in a group chat to make it more fun and easy for members to comprehend each message.
- Reply to specific messages: To add clarity to a busy conversation, you can directly reply to a specific message in the chat. To do so, swipe left on the message you want to reply to, then write your reply and send it.
- Mention people: To draw a member’s attention, you can mention the person in your message. Simply type in their name in the text box, and iMessage will automatically highlight their name and notify them specifically.
How to silence notifications from an iMessage group chat
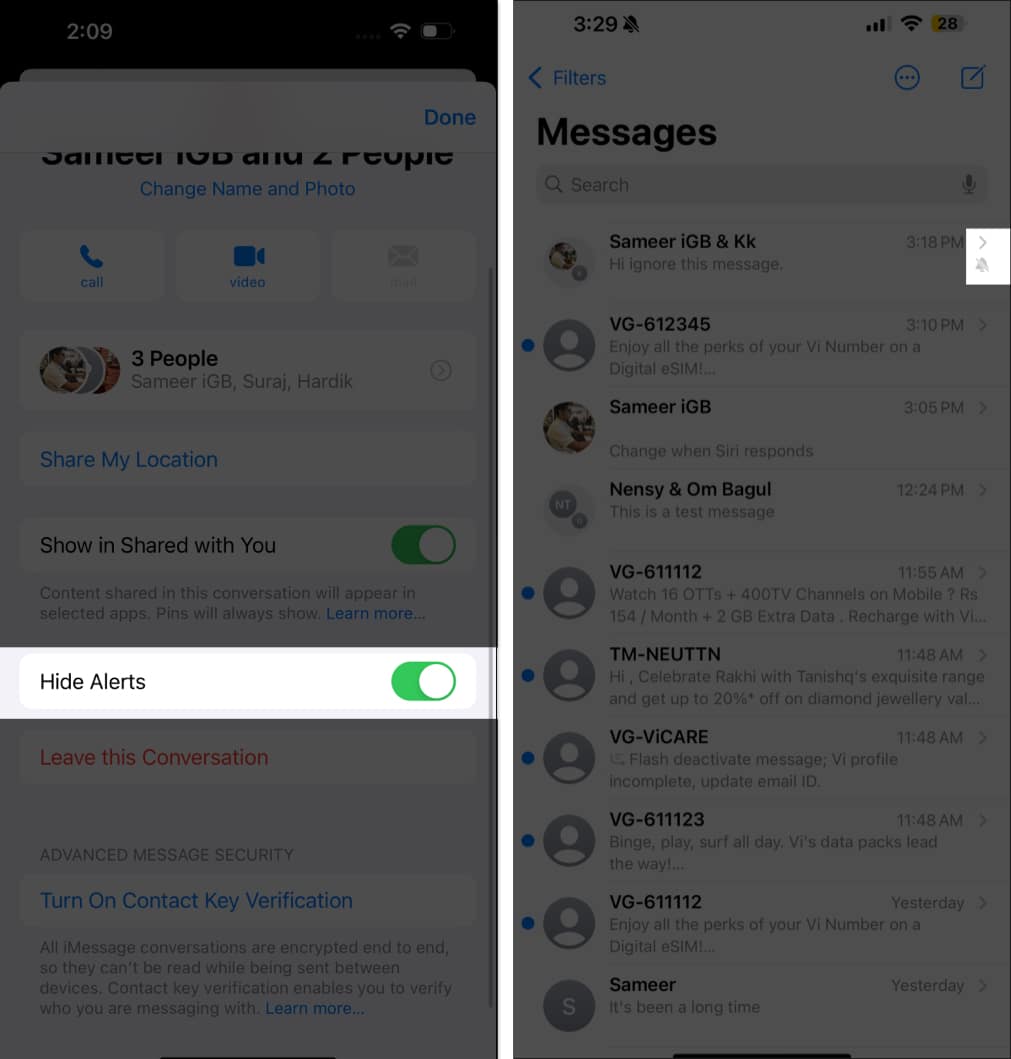
For times when you need a break from the constant pings or simply want to focus more on more important things, you can silence the group chat notifications. Here’s how:
- Tap the group name and icon at the top.
- Here, scroll down and tap toggle on Hide Alerts.
Once done, a crossed-bell icon will appear next to the group chat in the conversation list, indicating that alerts from the group chat are hidden.
How to leave an iMessage group chat on an iPhone
While iMessage group chat is a convenient way to interact with multiple people at once, there may come a time when the group members no longer match your vibe. Thus, knowing how to leave an iMessage is essential to find peace of mind.
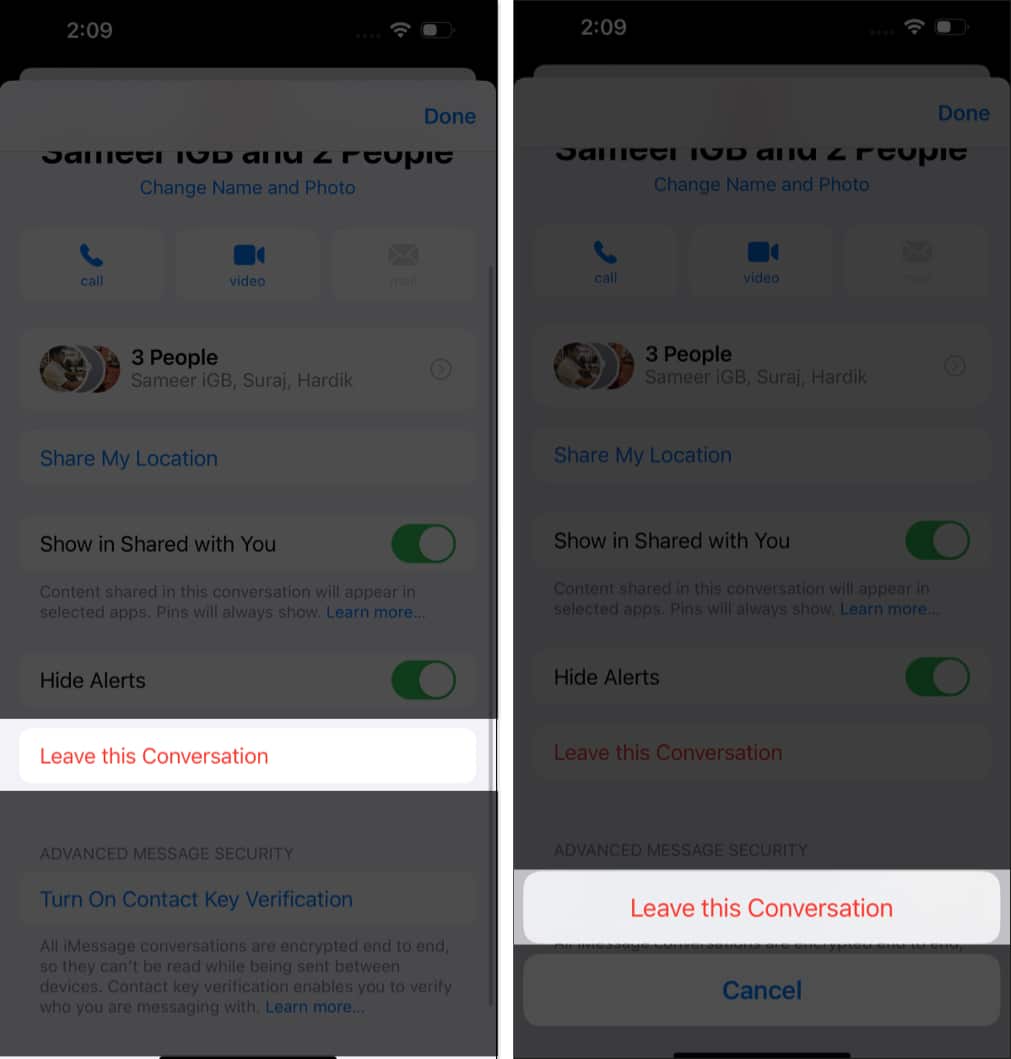
- Tap the group icon at the top.
- Next, scroll down to the bottom and tap the Leave this Conversation tab.
- Finally, tap on Leave this Conversation in the pop-up menu to confirm your decision.
Signing off…
That’s all you need to know to use and customize an iMessage group chat on your iPhone or iPad. So go ahead and create a group with your favorite people to have fun and interesting conversations.
If you have any questions or queries about using group chat or some interesting iMessage tips, do share them with us in the comments below.
FAQs
A maximum number of people in an iMessage group chat is 32. The number in regular SMS group chats is 20.
No, they cannot. You must create a new group for having group conversations with non-iPhone users. Mind you, all your messages in this group chat will be sent as SMS/MMS by default.
There can be various reasons why iMessage may not be working on your iPhone. However, the primary reason behind this issue is that iMessage is yet to be activated for your phone number or email address.
More iMessage tricks to know:

