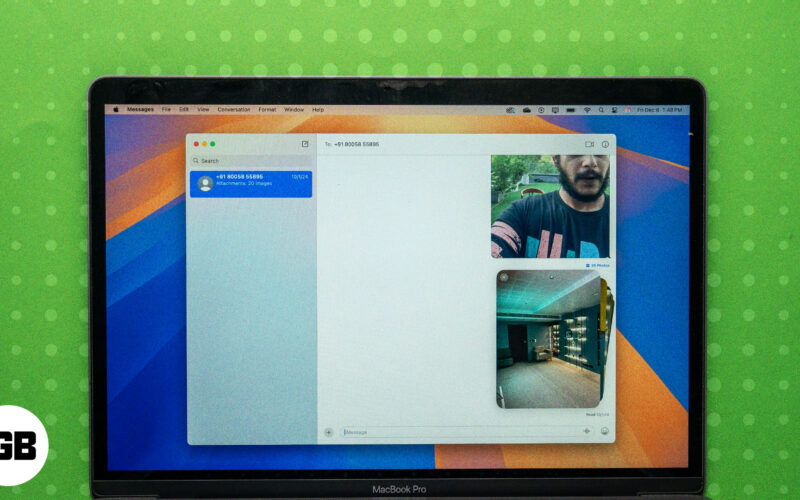
The Messages app lets you send and receive text messages and iMessages on your iPhone. You can even use the Messages app on your Mac, if you have one, to stay on top of your conversations without having to always use your iPhone.
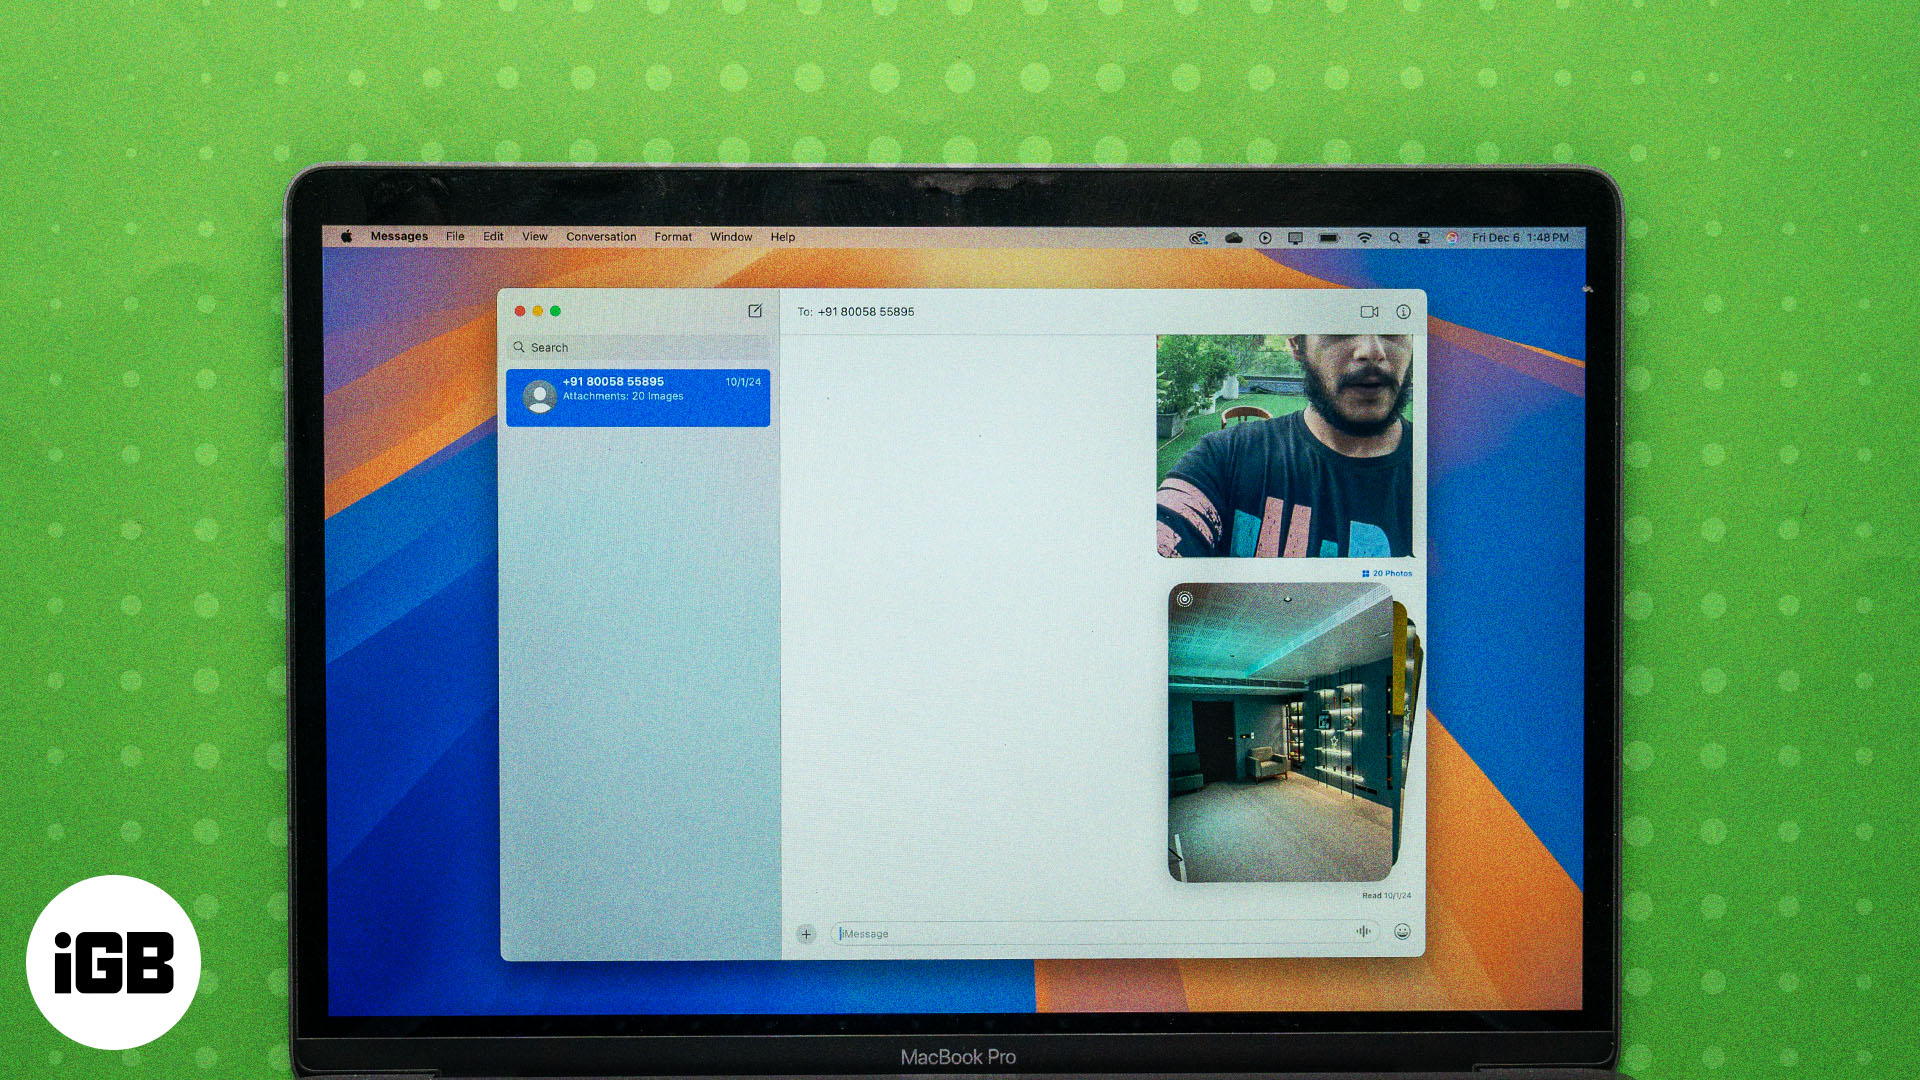
In this guide, I’ll cover everything you need to know about using the Messages app on a Mac to help create a seamless messaging experience across your devices.
Table of Contents
- How to set up iMessage on Mac
- How to use iMessage on Mac
- How to turn off iMessage on Mac
How to set up iMessage on Mac
To send and receive messages via iMessage on your Mac, the first thing you need to do is set up iMessage on the Messages app. Here’s what the process looks like.
Sign in to iMessage
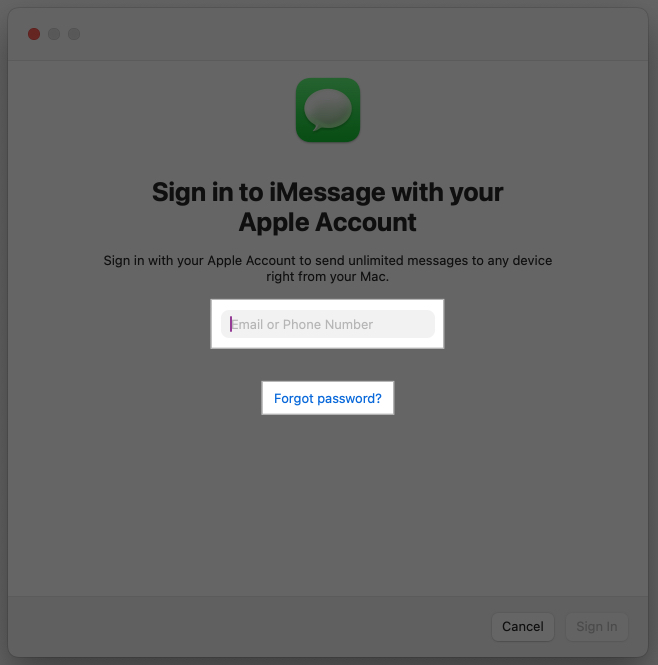
Start by signing in to iMessage with your Apple Account using the steps below. Be sure you’re using the same Apple Account you use on your iPhone.
- Open the Messages app on your Mac.
- Enter your Apple Account email or phone number along with your password. Click the Forgot Password? option if you can’t remember your password to reset it.
- Hit Sign In.
You’ll now be signed in.
If you don’t want to receive Messages app notifications on your Mac, you can use Do Not Disturb mode or turn off notifications. Alternatively, you can use Focus mode to receive specific notifications.
Sync iMessages across devices
With iMessage enabled, you’ll want your messages to be accessible across all your Apple devices. You can do this by turning on iCloud sync for Messages, like this:
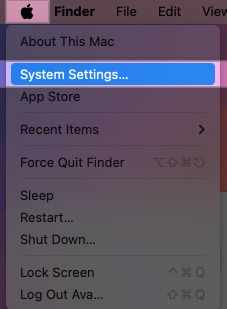
- Click the Apple menu in the top-left corner of the screen and select System Settings.
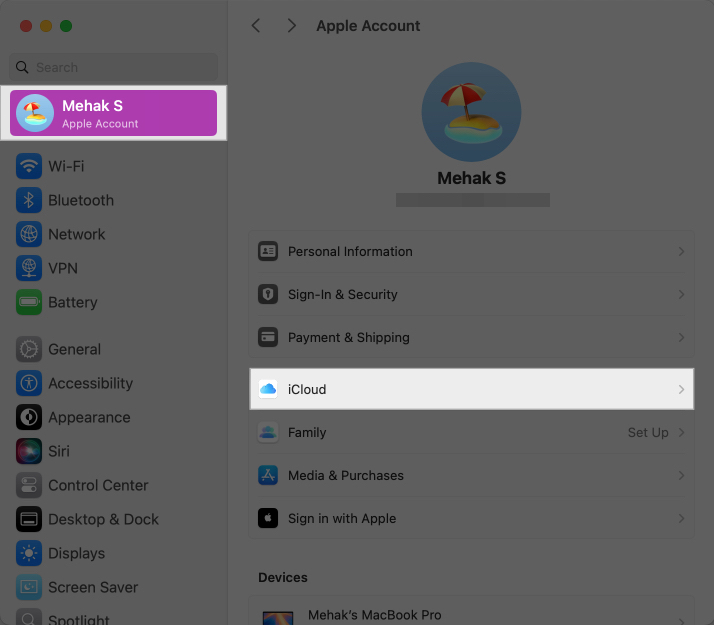
- Click on your Apple Account in the left pane, then click iCloud.
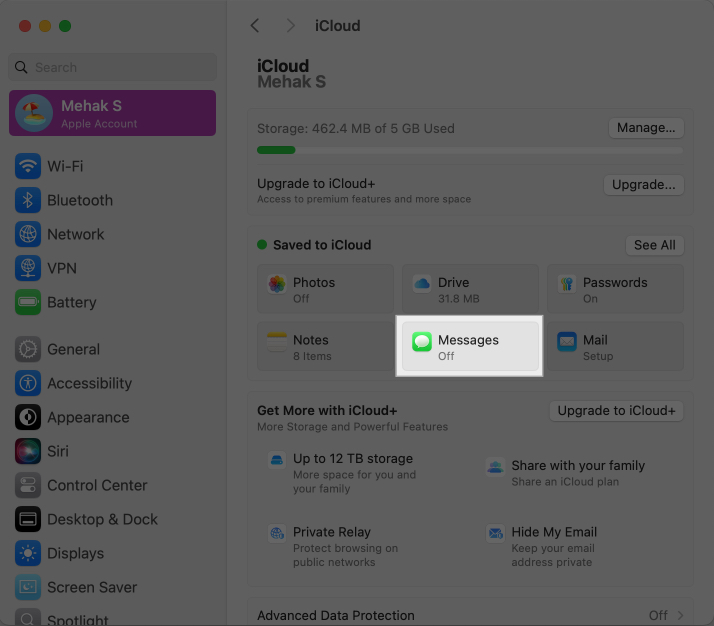
- Scroll to the Saved to iCloud section and click Messages.
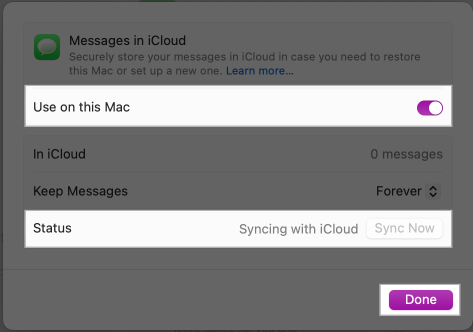
- Toggle on the switch for Use on this Mac.
- Click the Sync Now button to sync your messages and hit Done.
For more details, check out our how to sync iMessages across iPhone, iPad, and Mac guide.
How to use iMessage on Mac
With the Messages app set up to use iMessage, here’s everything you can do with iMessage on your Mac.
Start a conversation in Messages on Mac
You can start a new conversation in the Messages app on your Mac like this:
- Go to the Messages app.
- Click on the new message icon and type the number or name of the contact you want to text in the To field.
- Type your message in the text field and hit the Return key to send it.
Send photos, videos, documents, and more
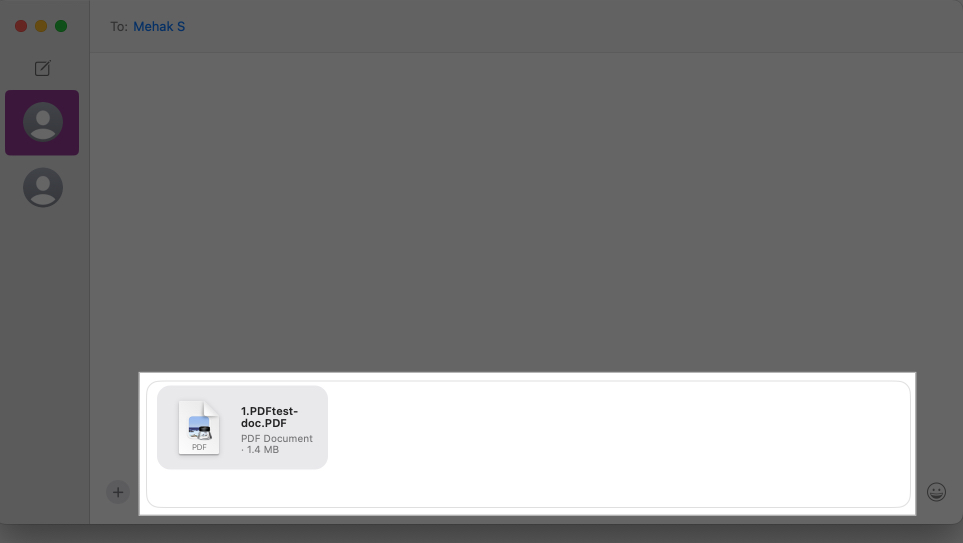
Alongside sending messages, you can also easily share any kind of file over iMessage. Simply drag and drop the media into the text field as shown in the screenshot below. You can send multiple files at once and also add a text message to go with it.
Send Memoji and stickers
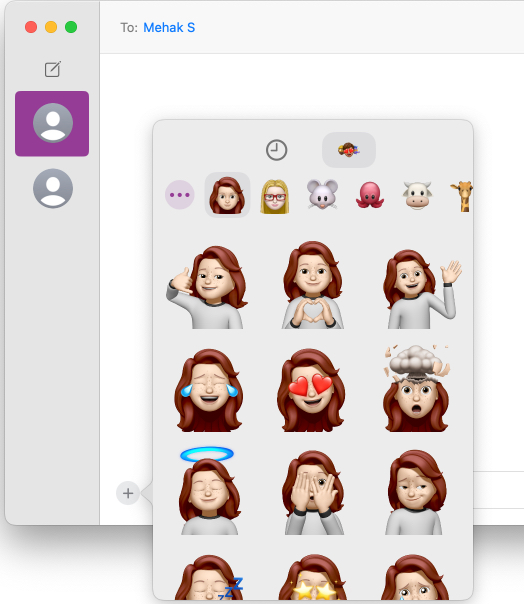
One of the most fun aspects of iMessage is using Memoji and stickers. They add a touch of personality and charm to your conversations and let you express your emotions in various ways. This is how you do it:
- Click the + icon on the left of the text field and select Stickers.
- Choose a sticker or Memoji.
Check out our complete guide on how to use Memoji on Mac for more details.
Start and manage group chats in Messages on Mac
If you want to start a group chat on iMessage on your Mac, simply click the new chat icon, and in the To field, type the names or numbers of everyone you want to include in the conversation.
Then, type your message and hit the Return key to start the conversation.
You can then manage the group chat by giving it a name, adding or removing members, etc., as explained below.
Add a name and profile photo for a group chat
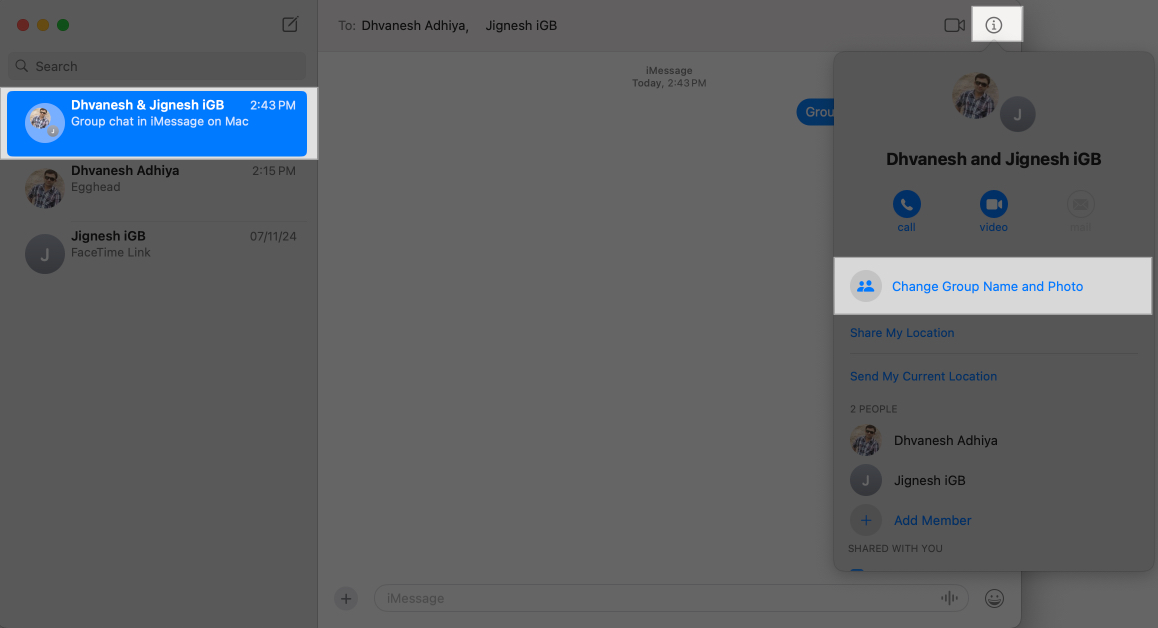
You can also add a name or profile photo to a group chat to easily identify it, as shown in the steps below:
- Go to the conversation and click the i button.
- Click on Change Group Name and Photo.
- Follow the instructions and enter the group name that you want to set.
- For the group picture, you can choose a regular photo or a personalized Memoji.
- Click Done.
Add someone to a group chat
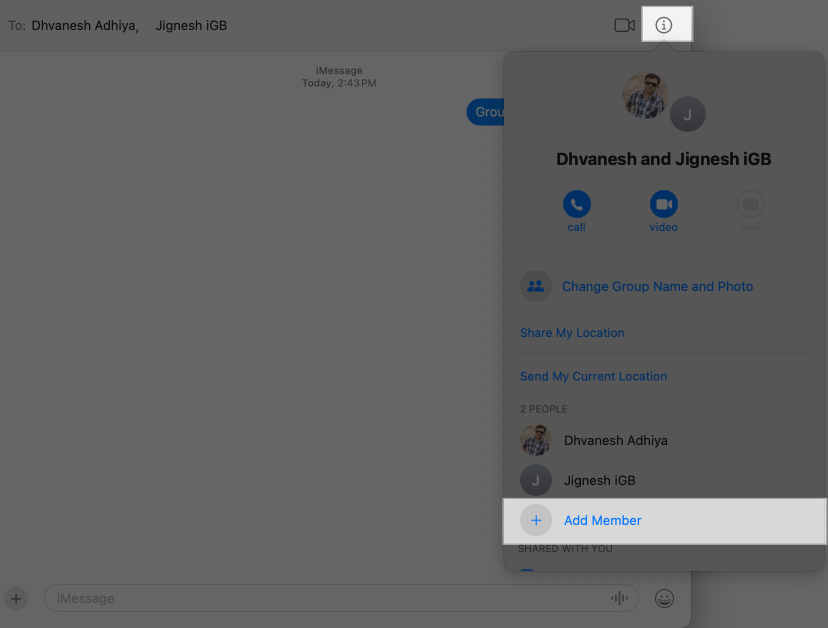
You can also add new members to a group chat later. Just follow these steps:
- Head to the group chat.
- Click the i button, then select Add Member.
- Put in the contact irmation of the person you want to add.
Remove someone from a group chat
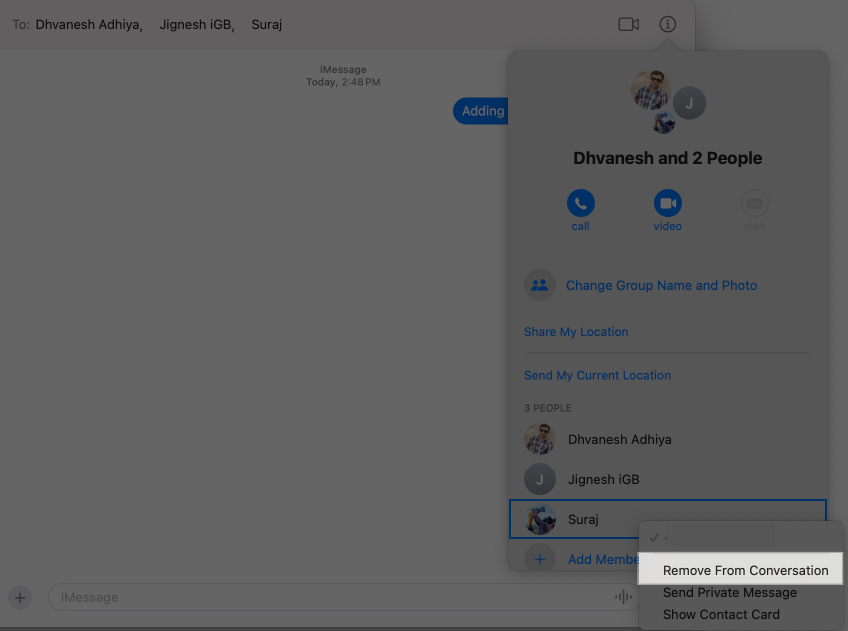
Removing a person from a group chat is easy, too:
- Go to the group chat.
- Click the i button.
- Hold down the Control key, click the name of the person you want to remove, and select Remove From Conversation.
Leave a group chat
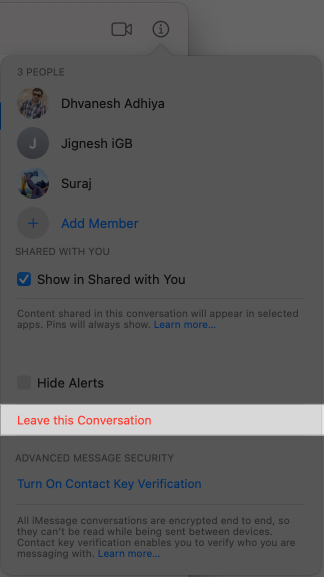
When you want to leave a group conversation, you can do it like this:
- Head to the group chat.
- Click the i button and scroll down below the list of members.
- Click Leave this Conversation.
Send effects and reactions on Messages
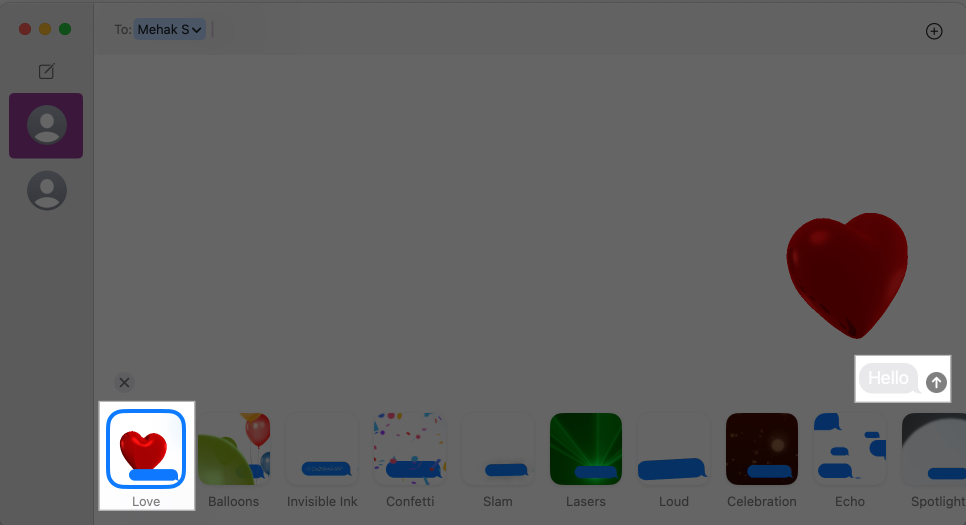
To add some extra flair to your conversations, you can use full-screen message effects such as hearts, balloons, fireworks, and many more. We’ve done a complete guide on how to send messages with effects on Mac, but here’s the short version:
- Type your message and then click the + icon to the left of the text field.
- Select Message Effects.
- Choose an effect you want to send.
- Hit the Return key or click the small upward arrow to send the message with the selected effect.
Add Tapbacks (quick reactions) to messages
Tapbacks let you quickly react to a message with a symbol such as a heart, thumbs up, thumbs down, double exclamation mark, “Ha ha,” or question mark. You can learn more in our article about how to use Tapback on a Mac.
To add a Tapback, open the conversation, then do the following.
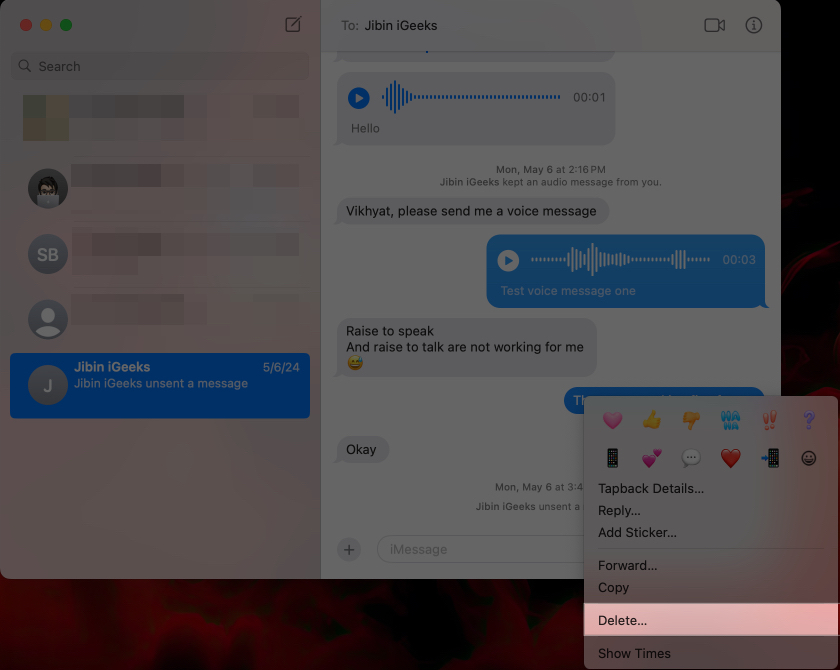
- Hold down the Control key and click on the message you want to react to.
- In the pop-up that appears, click the emoji you want to respond with.
Start FaceTime Audio or Video call from Messages on Mac
You can seamlessly go from texting to an audio or video FaceTime call on the Messages app on your Mac. Here’s how:
- Select or start a chat with a person or group.
- Click the Video icon in the top-right corner of the window, then choose FaceTime Video or FaceTime Audio to begin a call.
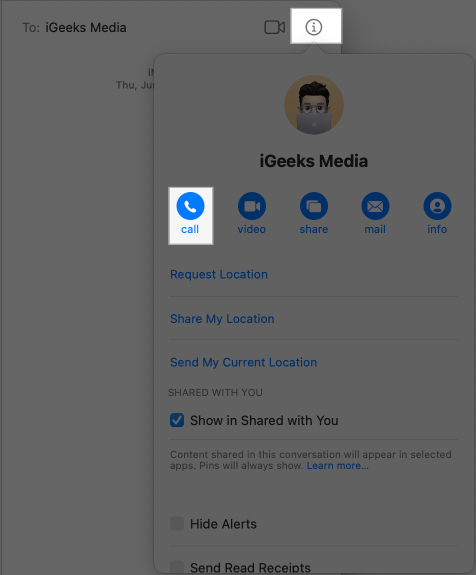
- Alternatively, click the i button, then click the Call button. If you see more than one number on the contact card, choose the number to call. If there’s only one number, the call will begin immediately.
Delete messages
It’s super easy to delete single messages or entire conversations on the Messages app.
- To delete a message, Control-click the blank area of the specific message bubble and select Delete.
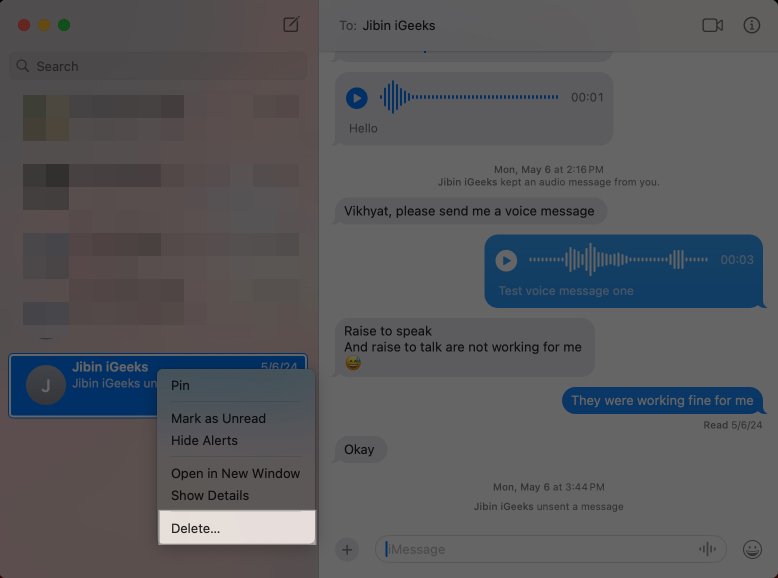
- To delete a conversation, Control-click on the conversation in the left pane and select Delete.
You can go through our detailed guide on how to delete messages on Mac to learn more.
How to turn off iMessage on Mac
You can sign out of iMessage on Mac if you don’t want to use it on your Mac. Here’s how:
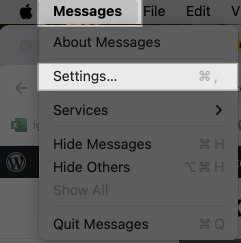
- Open Messages and then click the Messages menu at the top. Select Settings.
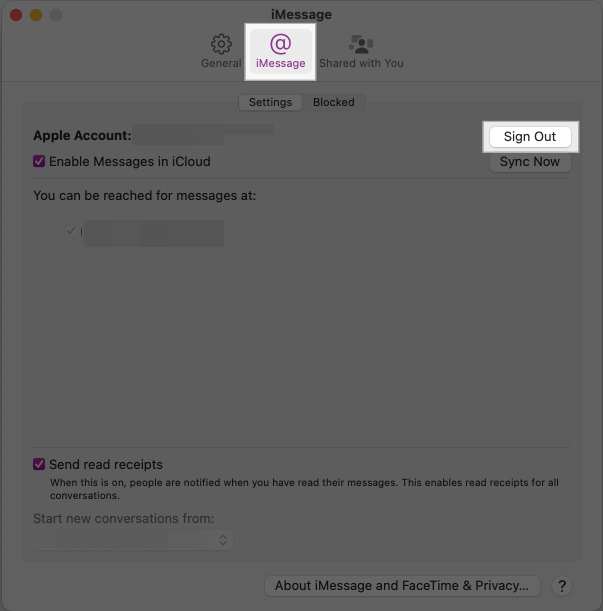
- Click on iMessage and click Sign Out.
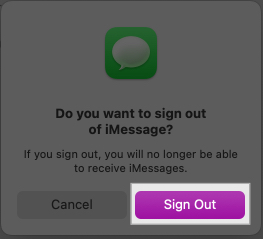
- Click Sign Out again in the confirmation box.
This will turn off iMessage on your Mac. However, you can continue using it on your other Apple devices.
Signing off…
That’s pretty much all you need to know to use iMessage on your Mac and enjoy a seamless messaging experience across your Apple devices. iMessage conversations are end-to-end encrypted, so you can rest assured that your messages are protected from unauthorized access and unreadable to third parties.
If you have any questions, let us know in the comments below, and we’ll be happy to help.
Don’t miss:

