Did you know you can personalize your Mac Lock Screen to make your experience more unique and captivating? Whether inspiring yourself with an inspirational quote or reminding yourself of a forthcoming task, adding custom text to a Mac login screen is a great way.
Let me show you how to display a custom Lock Screen Message on your Mac. Without any further ado, let’s get started!
How to add custom message to Mac Lock Screen
- Click the Apple logo () → System Settings.
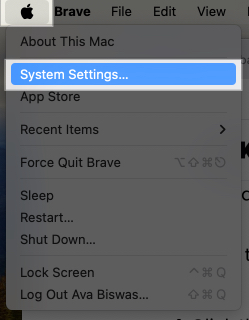
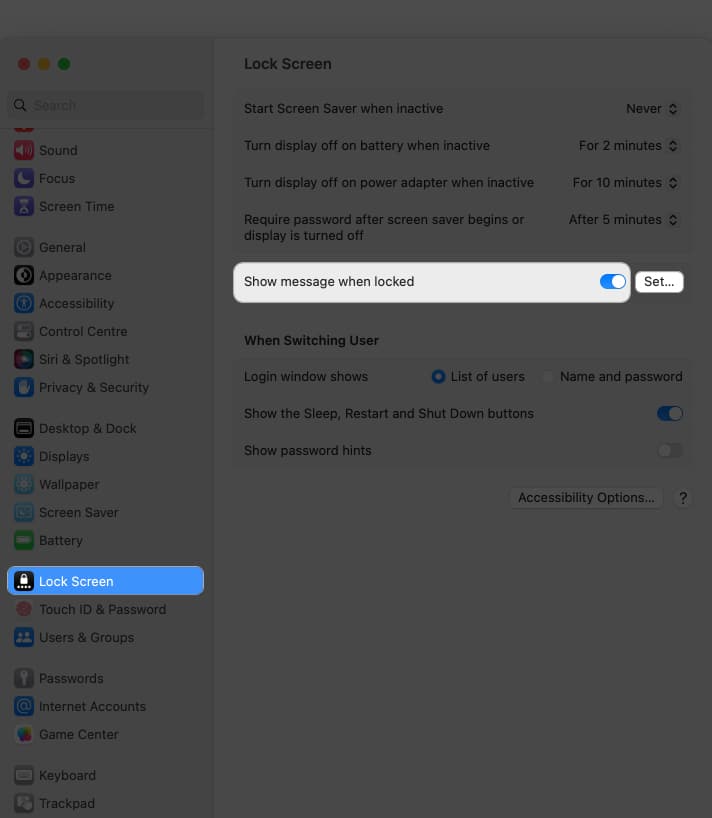
- Select Lock Screen from the sidebar.
- Toggle on Show message when locked → Click Set.
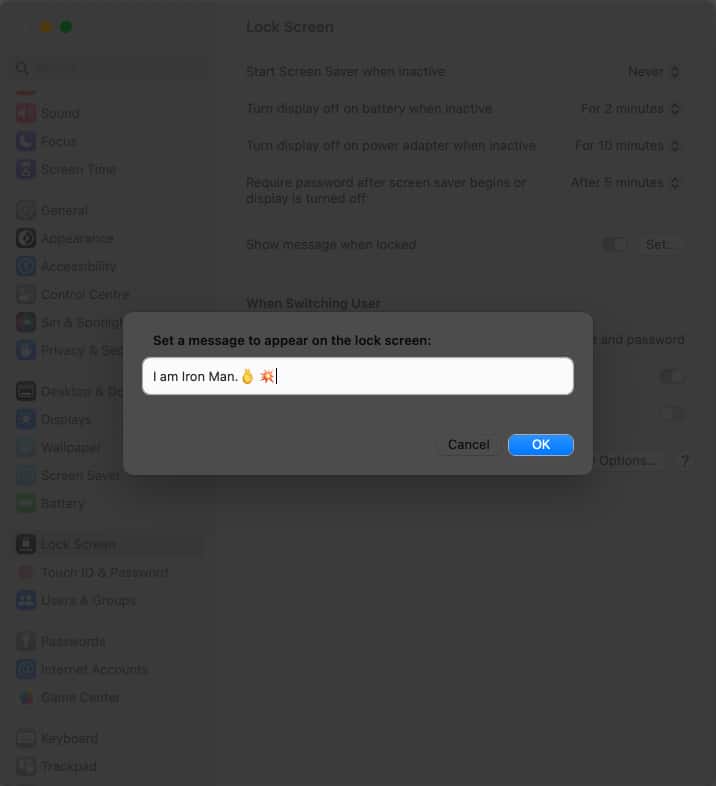
- Type a custom message as you like → Hit OK.
Note: To change the set custom Lock Screen message on Mac, follow the steps above and click Set. Then delete the old text and type your new message to display on your Mac’s Lock Screen.
How to remove custom Lock Screen Message on Mac
- Go to Apple logo () → System Settings.
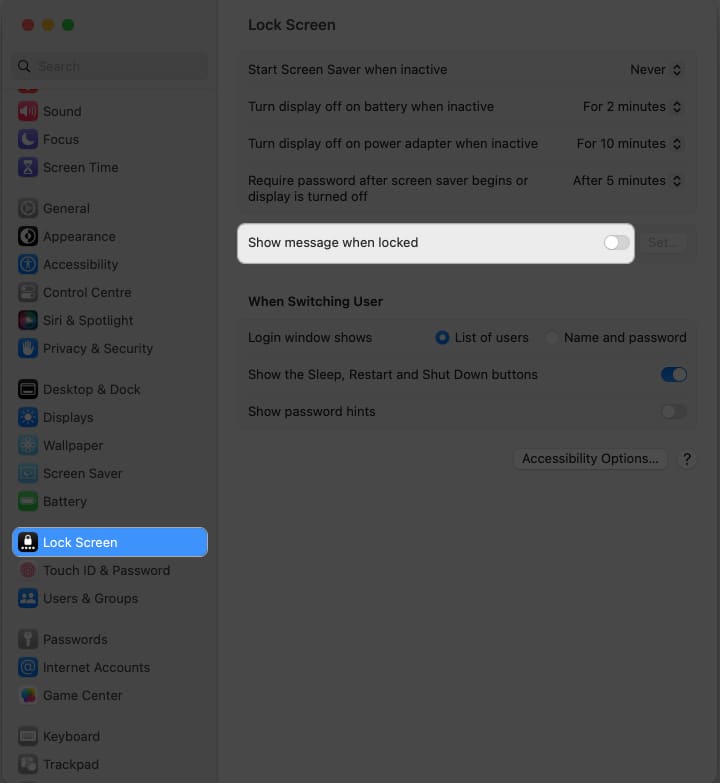
- Access Lock Screen → Toggle off Show message when locked.
Note: The lock screen message is visible to anyone who interacts with your Mac when it is locked. It can be a helpful way to display essential information or leave a message for other users.
Get creative!
As you know how to show a message when your Mac screen is locked, experiment with different messages to find the one that resonates most with you. Enjoy your personalized lock screen and continue enjoying the seamless experience that your Mac offers.
Thank you for reading. If you have any, please drop your thoughts in the comment section below.
Read more:

