I recently replaced my Mac’s 500GB internal hard disk drive (HDD) with a faster 120GB solid-state drive (SSD). The sole reason behind this was the ubiquitous fact – “mechanical hard disks are slow.” Now, although my Mac works smoothly, there’s the vast iTunes library I have – over 80GB of movies and TV Shows! If I copy them to the new 120GB internal SSD, I would have little to no space for anything else. Hence, I split the iTunes library into multiple folders. It helped. A lot! Here’s everything you should know from whats to hows of splitting the iTunes library.
- What is ‘splitting iTunes library’?
- Why is splitting your iTunes library helpful?
- How to split the iTunes library between two folders or drives
- Bonus Tip: How to create and use multiple iTunes libraries on your computer
What is ‘splitting iTunes library’?
As evident from the name, splitting iTunes library means retaining a portion of your iTunes media (say music that takes less space) on the internal drive and moving another portion (say movies and TV shows that take huge space) on an external drive.
Now, in the example above, I mentioned two separate drives – internal and external. This is because most people look for this as it lets them free up space on their Mac. But if you like, you can divide your iTunes library into multiple folders, even if they are on the same internal drive. The steps are the same.
Why is splitting your iTunes library helpful?
- Lets you free space on the computer.
- You can move the entire iTunes folder to an external drive. But that would mean losing access to your music files if you are not carrying your Ha. So, splitting the iTunes library lets you keep the music (or files you like) on the internal disk and the rest of the large ones (that you seldom watch) on an external drive.
Now that you know the basics let us get straight in and follow the steps below to split your iTunes content into multiple drives.
The process is divided into the following two subtasks.
- Locate the existing media and copy it to an external drive (or a separate folder).
- Ask iTunes to play media directly from that drive or folder, without copying it to its folders.
Note: For the steps below, I am using a Mac. The steps for iTunes on Windows are similar. Also, I am splitting the iTunes library into two – music (I will leave it on the internal drive) and movies (I will move it to the external drive).
How to split the iTunes library between two folders or drives
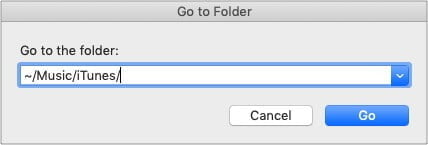
- On Mac: Go to Finder and press Command + Shift + G. Type or copy-paste this location
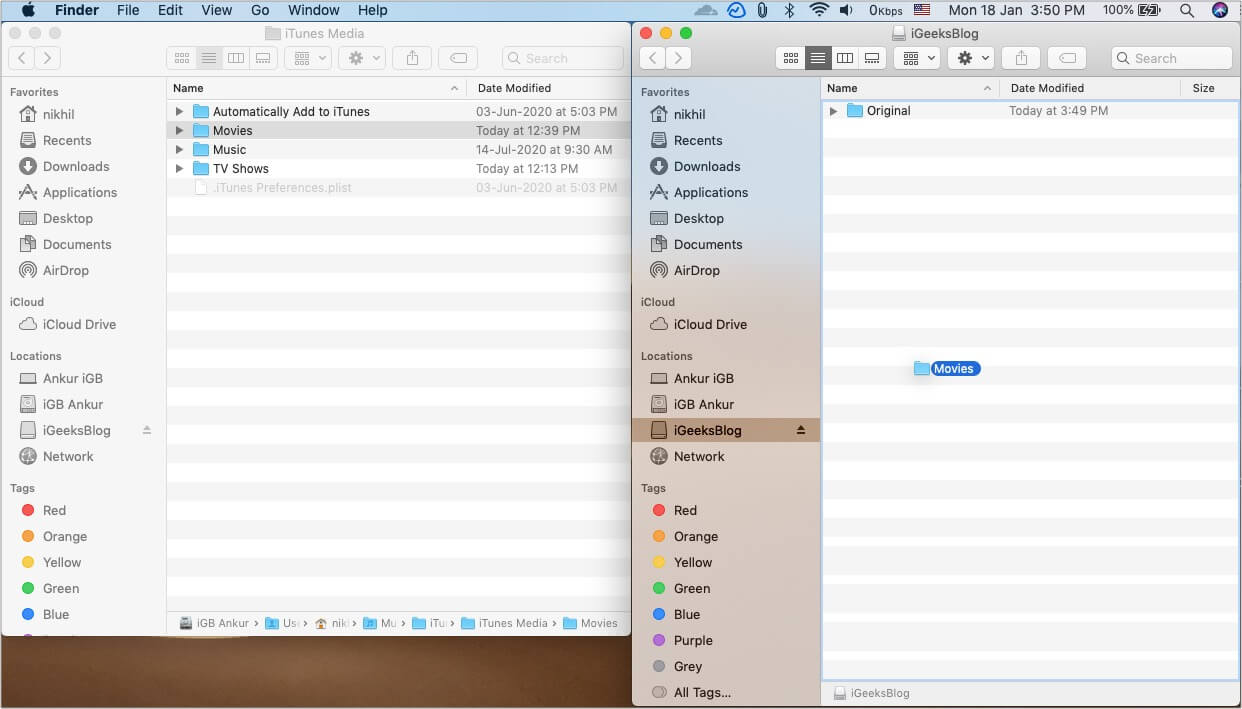
~/Music/iTunes/Click on iTunes Media. Here you will see folders like Movies, TV Shows, Music, etc.
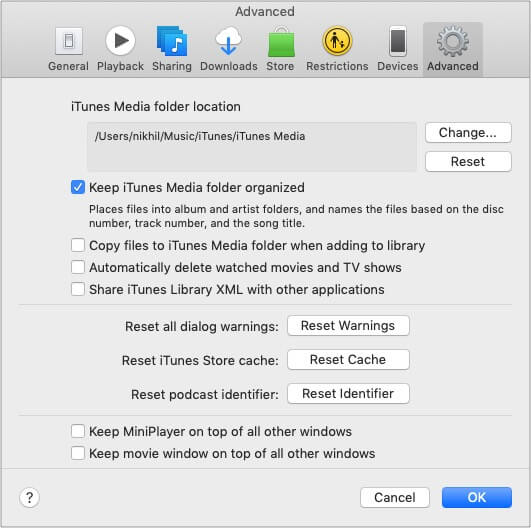
On Windows: Open iTunes, click on Edit → Preferences → Advanced. Copy the folder location you see here and open it in File Explorer. You will see the iTunes Media folder. - Connect an external drive and copy the folder Movies onto it.
- Now, delete the contents of the iTunes Media Movies folder and empty the trash. Don’t worry about losing them, as you have already copied these to the external drive.
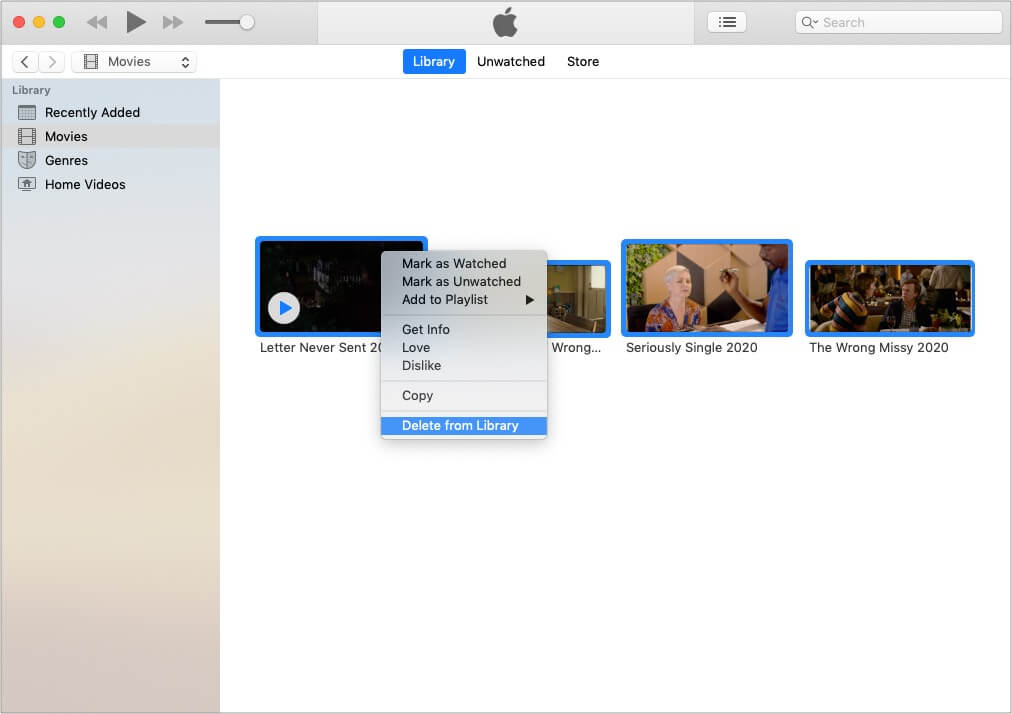
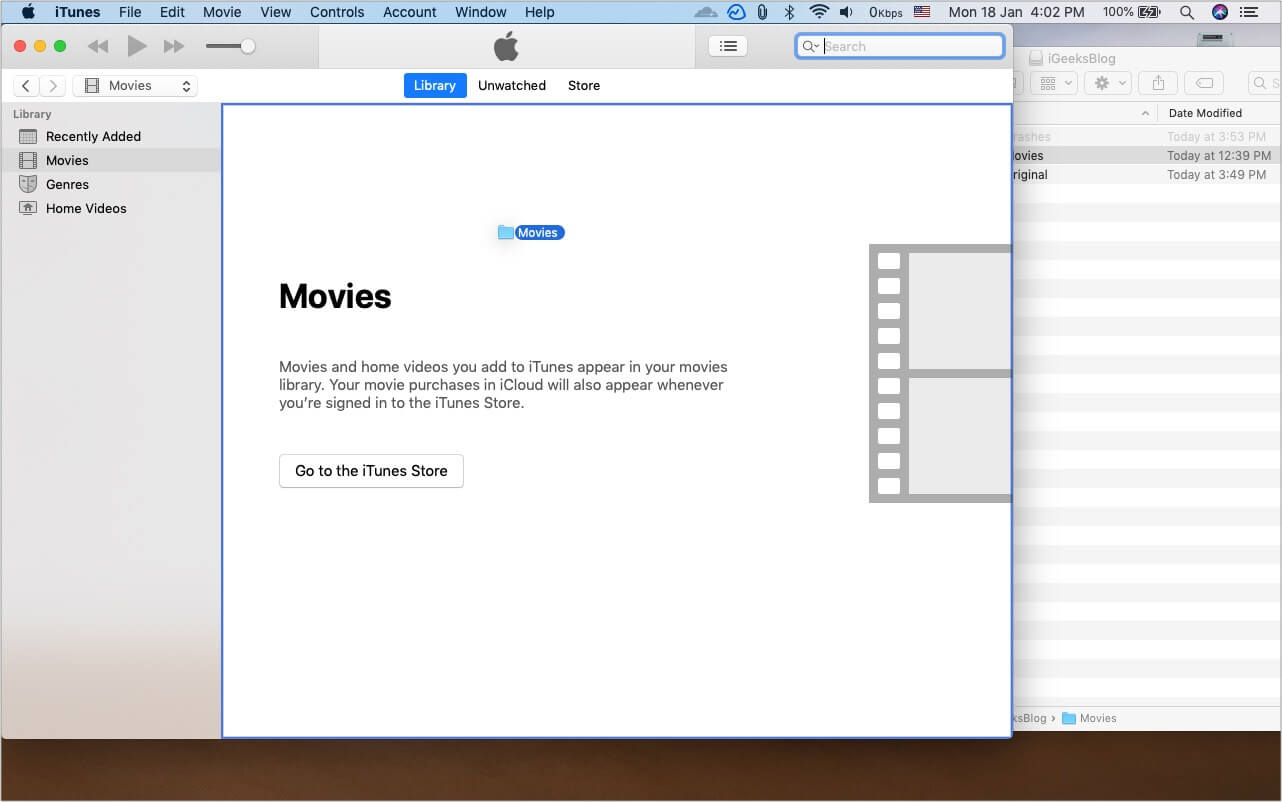
- Open iTunes and go to the Movies section at the top left. Please select all the movie files and delete them. In step 3, you already deleted the actual files. These are just references to those files. We do not need them now. Plus, iTunes will automatically create new reference files in the next steps.
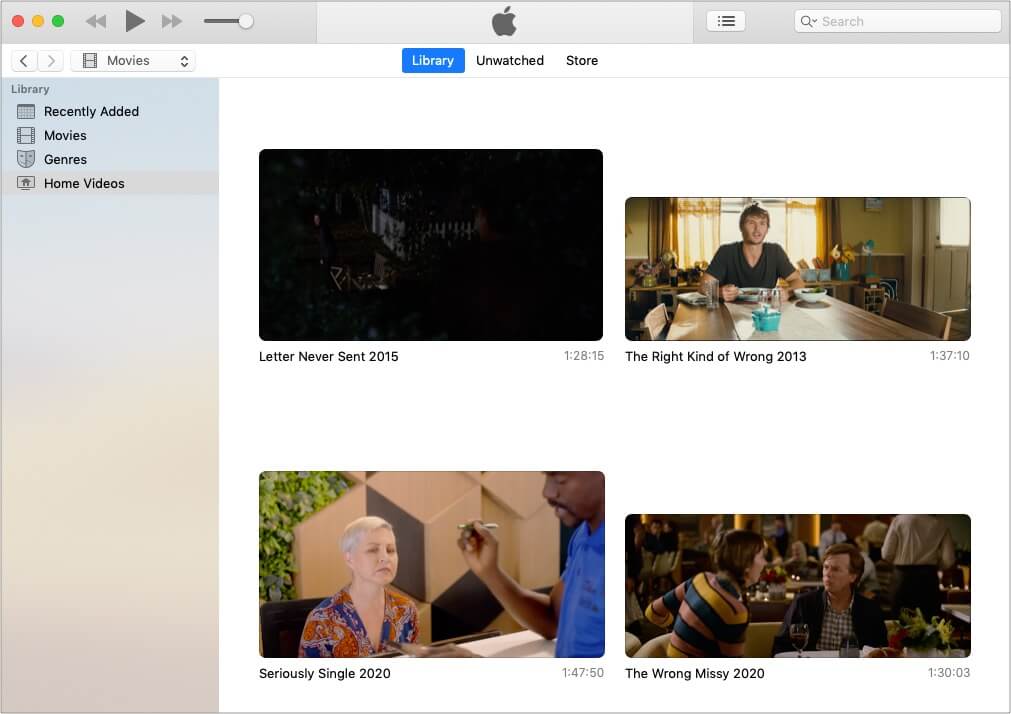
- Select all the movie files from the external drive folder. On Mac, press the option key (Shift key on Windows PC) and drag these movies onto the iTunes window. iTunes will not copy the actual movie file to the internal drive. The movie will stay in the external folder. You can find these video files in the Home Videos, TV Shows, or Movies sections on iTunes. From now on, click on these filenames/thumbnails to play them in iTunes.
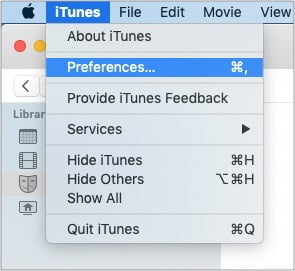
- An alternative to Step 5: iTunes also has an option that prevents it from copying the files to its folder. After this, you will not have to press the option key while adding files. For this, open iTunes and go to its Preferences. Click on Advanced and uncheck the box for ‘Copy files to iTunes Media folder when adding to library.’
Some important points:
- If you try to play a movie when the external drive is not connected to the Mac, it will show a popup error asking you to locate the file. To avoid this, ensure you connect the drive first.
- Personal thought: If you choose to follow step 6, I would advise rechecking the box if you add music files. I like having the music files added to the iTunes folder. This gives me the option to even delete the original files without worrying. Also, music files are small in size. So no problem there, unless you have thousands of songs!
Finally, I have one more tip that lets you create multiple iTunes libraries on the same computer. This is helpful if your family uses the same computer. You can each have your personalized music library. The icing on the cake is that you can even sync your iPhone, iPad, iPod separately!
Let me show you how to create and access different libraries in iTunes.
Bonus Tip: How to create and use multiple iTunes libraries on your computer
Create multiple iTunes libraries on Mac
- Quit iTunes if it is already open.
- Hold the option key on Mac (Shift on Windows PC) and launch iTunes.
- Click Create Library and complete the process. You may choose the default Music folder (recommended) or a different one.
- Now you have a fresh new iTunes library. Whatever you add will be saved to this folder.
- You can follow the same steps to create more libraries.
Select and open the desired library in iTunes
- Quit iTunes.
- Hold the option key on Mac (Shift on Windows PC) and launch iTunes.
- Click Choose Library.
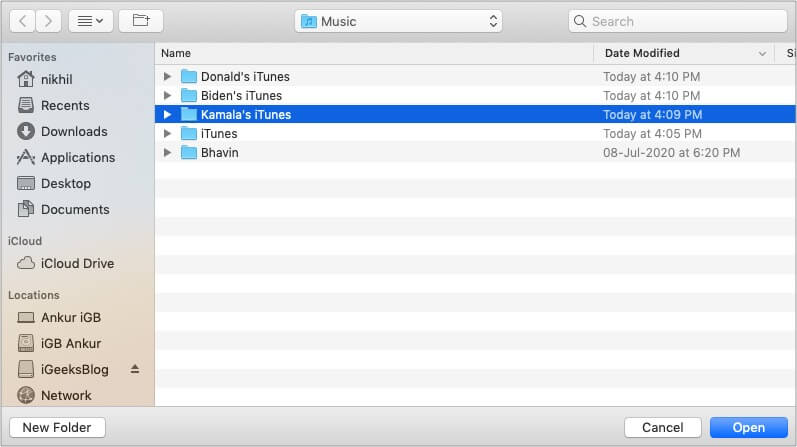
- Select the desired library (folder) and click Open.
Note: iTunes, by default, opens the last library that was open on it. If you wish that nobody else sees your songs and music, create a dummy library, and open it before shutting down the Mac or handing it to someone.
Successfully split the iTunes library into multiple locations!
I hope the above steps to split the iTunes library helped you organize things. If you have additional questions, please feel free to ask in the comments below.
READ NEXT

