We all love listening to music on the go, and the best way to do so is to keep the music files on your iPhone. However, if you currently have your music library on your PC, worry not. You can easily transfer and sync music from your computer to your iPhone and access them offline. Keep reading, and we’ll explore how to transfer music from a computer to an iPhone in this guide.
How to transfer music from a computer to an iPhone with iTunes
iTunes has been a go-to method for transferring music from a PC to an iPhone for years. You can use it to transfer music from your computer to an iPhone as shown below.
1. Automatically transfer music from iTunes
You can sync your iTunes music library from your computer to your iPhone to transfer the songs and videos automatically. To do this, first, download the latest version of iTunes on your Windows system. Then, follow the steps below:
- Connect your iPhone to your computer using a USB cable.
- Open the iTunes app on your PC.
- Click the iPhone icon at the top.
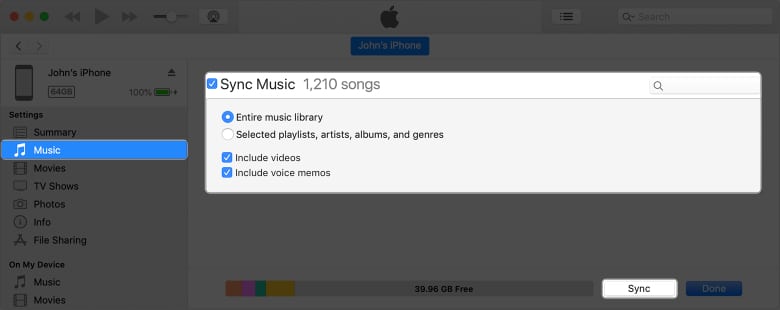
- From the left pane, select Music.
- Choose which media to transfer and tick the checkbox beside Sync Music.
- Click Apply. If the automatic sync process doesn’t begin immediately, click Sync.
- After syncing, open the Music app on your iPhone to see the music tracks in your library.
Now, every time you connect your device, the selected folders will sync automatically.
You may also transfer music from your computer to your iPhone wirelessly. After setting up iTunes, connect both devices to the same Wi-Fi, and you will see your iPhone under the Device section. Click Summary, choose Sync with this [device] over Wi-Fi, and hit Apply.
Afterward, whenever your iPhone is connected to power, and you have iTunes open on your computer, it will automatically sync and transfer music.
If you’ve previously linked your iPhone to another computer, you may get an alert that your iPhone is synchronized with another iTunes library. Click Erase and Sync to replace the existing music library.
2. Import music from iTunes to iPhone
You may stop iTunes from auto-syncing your iPhone to save storage space. If you decide to do so, you will have to transfer music from iTunes to your iPhone manually.
- After you connect your iPhone to PC, open iTunes.
- Click the drop-down menu at the top-left corner and select Music.
- Now, head to the Library tab.
- Click Downloaded on the left sidebar of your iTunes library.
- Right-click on the music file you want to transfer.
- Select Add to Device from the context menu and select your iPhone.
How to transfer music from a PC to an iPhone without iTunes
If you prefer not to use iTunes, there are alternative methods that are just as effective at transferring music from a PC to an iPhone. Let’s look at a few of them.
1. Transfer music to an iPhone via Apple Devices app
Like iTunes, Apple offers another handy tool called Apple Devices to help you manage your Apple devices directly from your Windows PC. Using it, you can back up, update, restore, and sync an Apple device. However, you must have Apple Music installed on your computer to transfer the music library to your iPhone via the Apple Devices app.
- Connect your iPhone to your computer using a USB cable.
- Launch the Apple Devices app on your Windows PC.
- Select your iPhone from the sidebar.
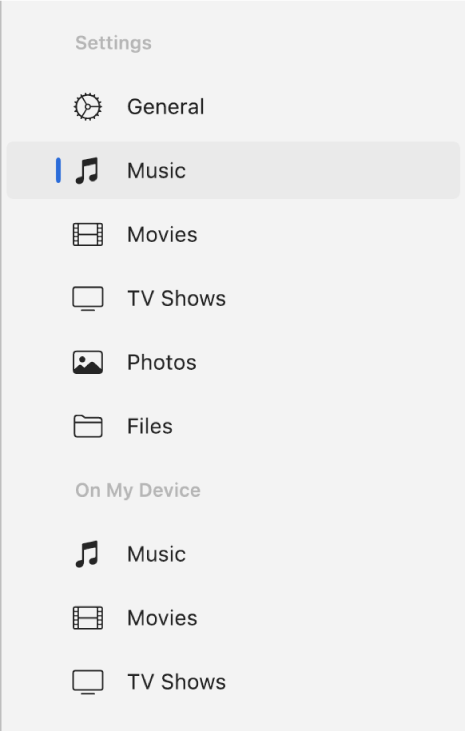
- Now, click Music under Settings.
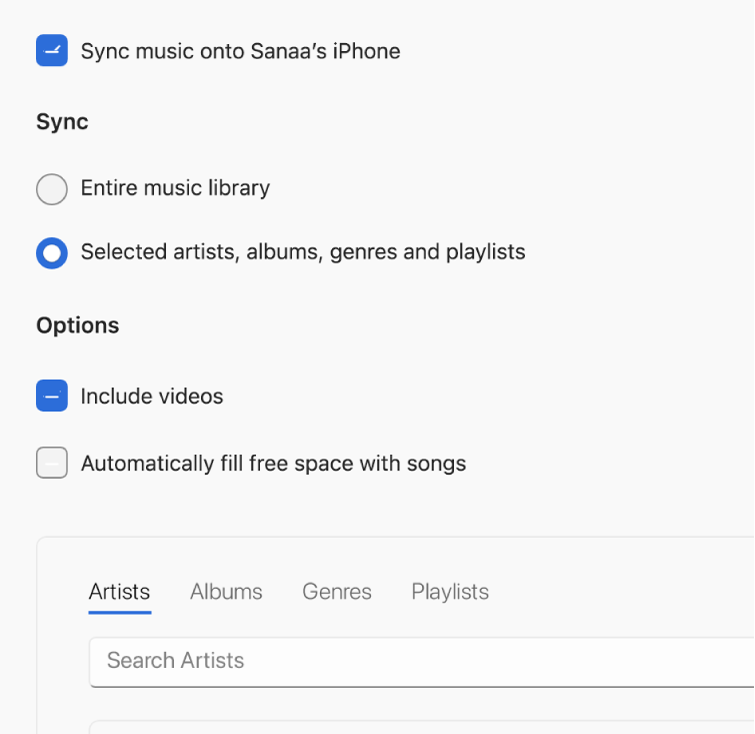
- Tick the Sync Music Onto [device name] box.
- Next, select Entire Music Library as the Sync option.
- Finally, hit Apply.
If you want your iPhone to sync music automatically, click General and tick the Show this [device] When on Wi-Fi box. Now, choose the sync settings and confirm by clicking Apply.
2. Transfer music to an iPhone via the Documents app
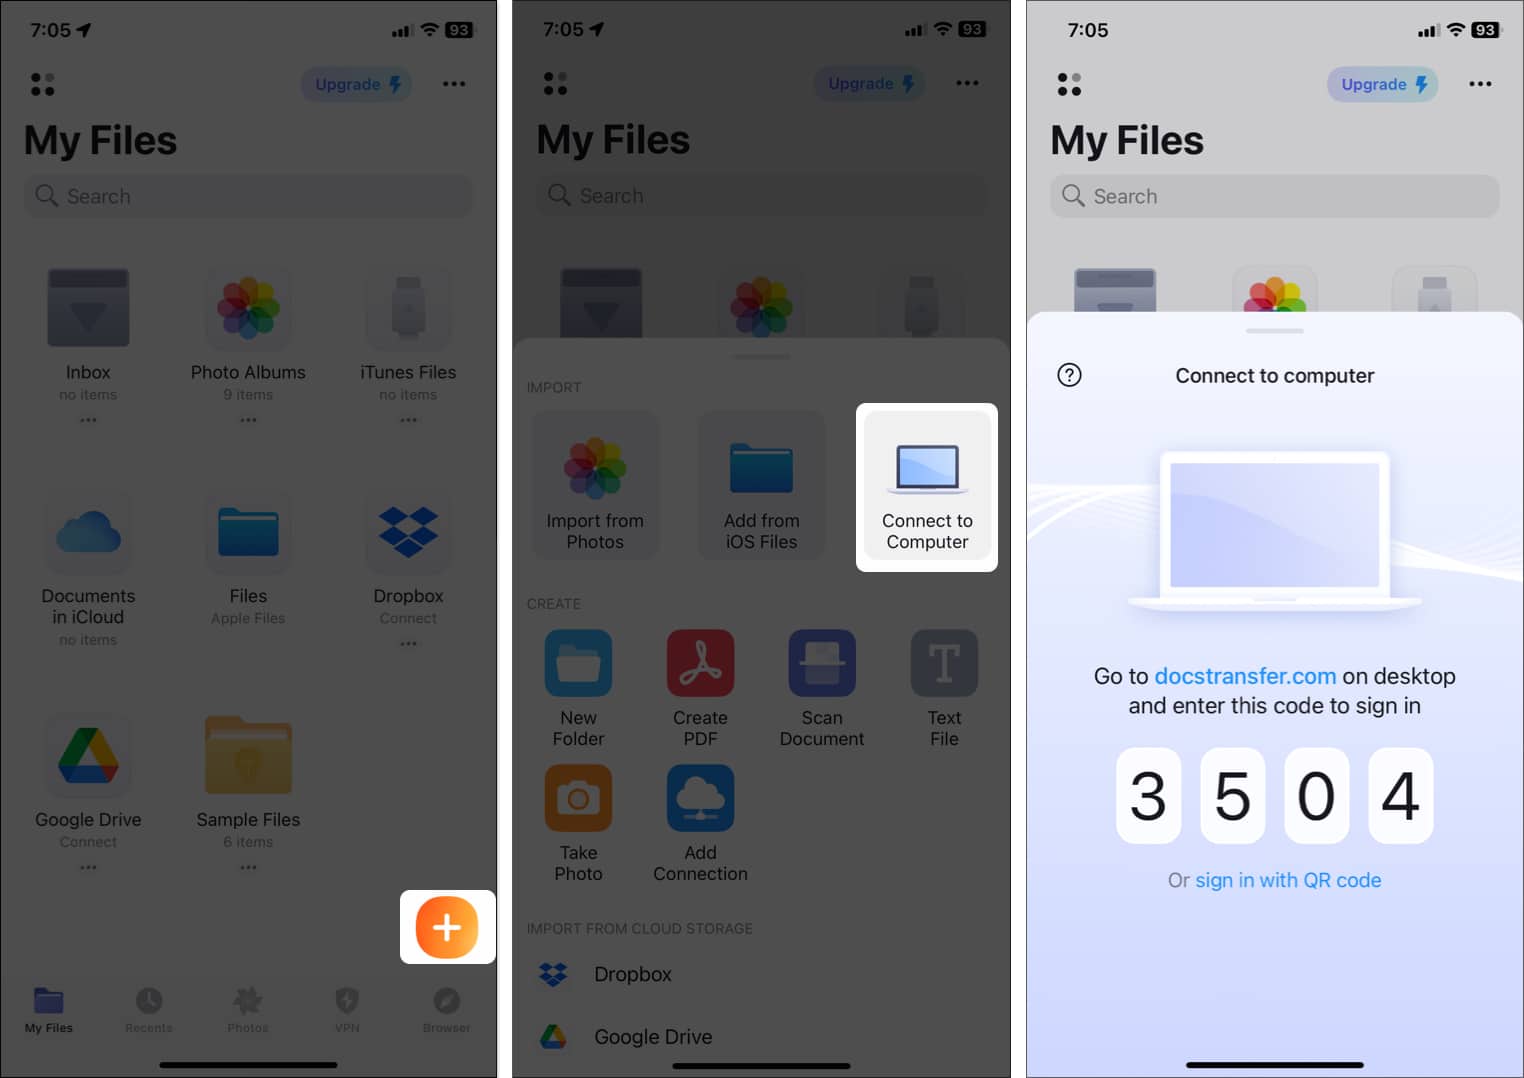
The Documents app by Readdle makes it easy to transfer music files from a PC to an iPhone without iTunes. It has a Wi-Fi transfer feature that establishes a temporary local network to move files and folders across devices. This is what you need to do:
- Download and install the Documents app from the App Store.
- Ensure your iPhone and your computer are connected to the same Wi-Fi.
- Now, launch the Documents app on your iPhone.
- Tap on the plus (+) icon at the bottom-right corner.
- Select the Connect to Computer option, and you will see a code on your screen.
- Now, visit the docstransfer on your computer.
- Enter the code shown on your iPhone to connect your devices.
- Click Upload and select your music files to transfer them to your iPhone.
You can see your music files in the Documents app on your iPhone. If you want, you can even save them to the Files app. Using this method, you can transfer music folders as they are organized and categorized on your PC.
3. Transfer music to an iPhone via a cloud service
Using cloud services like Dropbox, Google Drive, or iCloud is another convenient way to transfer music to an iPhone. Here’s what the process looks like with Dropbox:
- Install the Dropbox app on your computer and iPhone and sign in using the same credentials.
- Upload your music files from your computer.
- Open the app on your iPhone and download the music files to your device.
This method is also helpful if you want to import your photos from your iPhone to your PC and Mac.
4. Transfer music to an iPhone via third-party apps
There are several third-party software options available that simplify transferring music from a PC to an iPhone. Some popular choices include AnyTrans and Wondershare MobileTrans. However, note that this method may have some privacy issues.
Here, I’m using Wondershare to demonstrate the process.
- Download and install Wondershare MobileTrans on your computer.
- Connect your iPhone to your computer via a USB cable.
- Open the software and move to the Phone Transfer tab.
- Here, select the Import to Phone tile.
- Once your media loads, click on Music from the sidebar.
- Choose the files you want to transfer and hit Import.
- Select Add folder.
- Now, you can see the files window. Select the music folder and click Open.
Once the transfer is complete, you can access the music tracks on your iPhone.
Signing off…
Transferring music from your computer to your iPhone doesn’t have to be complicated. With these methods, you can easily get your music collection on your iPhone and enjoy your music wherever you go. Remember to always safely eject your iPhone from your computer when you’re done to avoid any data loss or corruption.
FAQs
You can use a third-party tool like SongShift to transfer your Spotify playlists to Apple Music. Check out our guide on how to transfer Spotify playlists to Apple Music for step-by-step instructions.
Transferring data from an Android to an iPhone can be done using various methods, including the Move to iOS app, iCloud, or a third-party app like AnyTrans. Check out our guide on how to transfer data from Android to iPhone for more information.
Also Read:



This is not accurate information anymore. Apple only uses iTunes for podcasts and audio books now. They have transitioned to the apple music app and apple devices app which currently does not allow music transfer from a Windows PC. They want you to subscribe to the apple music format and pay. All of us that own our own music from burning an entire CD collection are left out in the cold unless you pay apple.
Yes, iTunes is discontinued for Windows 10 and later. However, you can use third-party tools like AnyTrans, EaseUs, or Dropbox to transfer songs from PC to iPhone. Hope that helps!