Sometimes, your iPhone or iPad may encounter issues like getting stuck on the Apple logo, freezing during an update, or simply refusing to turn on. When basic troubleshooting doesn’t work, putting your device in recovery mode can fix it. This mode lets you update or restore your iPhone via Mac or PC and bring it back to life. Keep reading to learn why and how to put your iPhone and iPad into recovery mode.

Table of Contents
- What happens when you put your iPhone or iPad in recovery mode?
- When should you put your iPhone or iPad in recovery mode?
- How to put iPhone 8 and later into recovery mode
- How to enter recovery mode on iPhone 7 and iPhone 7 Plus
- Enter recovery mode on iPhone 6s and earlier or iPad with Home button
- Put an iPad without the Home button in recovery mode
- How to exit recovery mode on iPhone or iPad
- How to fix an iPhone stuck in recovery mode
What happens when you put your iPhone or iPad in recovery mode?
Putting your iPhone or iPad into recovery mode allows it to troubleshoot issues by updating or restoring your device with the help of a computer.
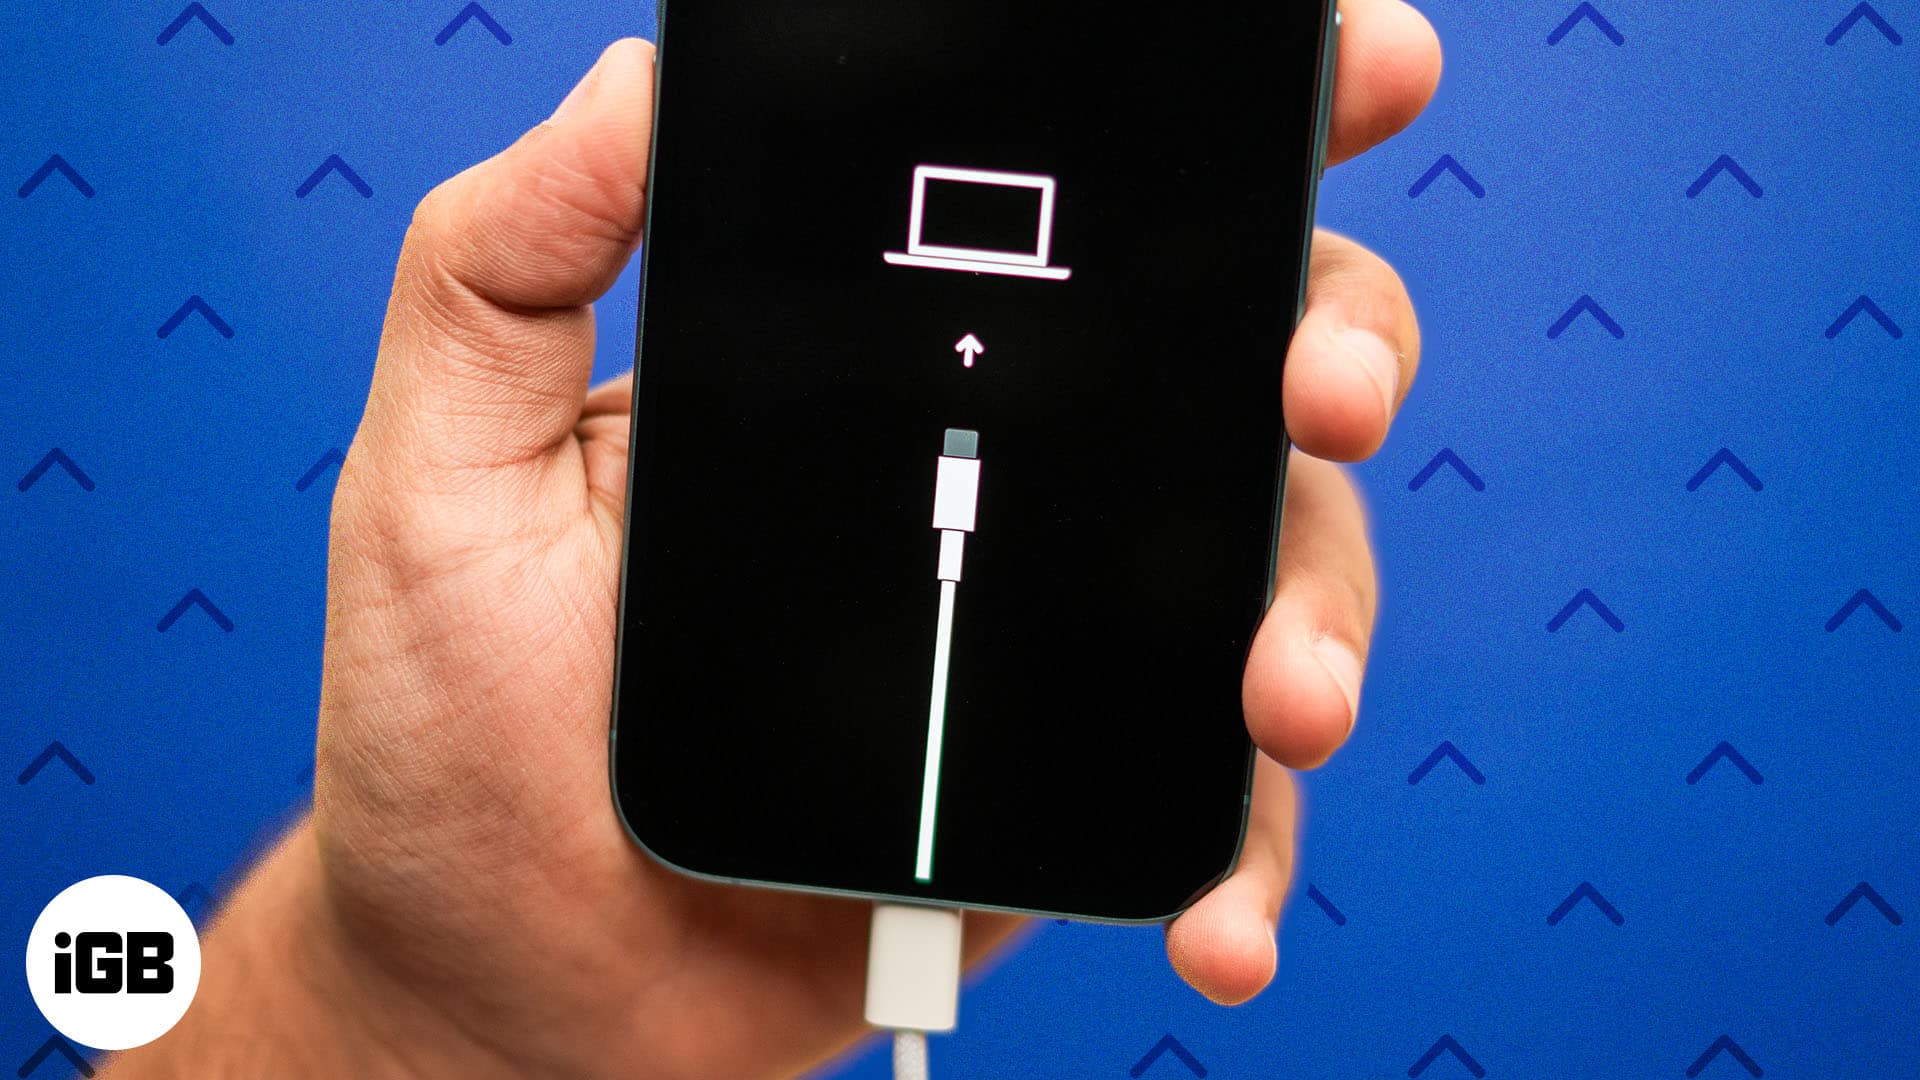
When you put your iPhone or iPad in recovery mode, it temporarily disconnects from the normal functions. You can’t open apps, make calls, or use it like you typically would. Instead, you’ll see a screen with a cable pointing to a computer icon.
Then, you can revive your unresponsive device via the Finder or iTunes on your Mac or PC. It provides two options:
- Update: Install a fresh version of iOS without deleting your data.
- Restore: Erase everything on the device and reinstall the operating system to fix deeper issues.
In both cases, your computer will download the latest iOS or iPadOS from the internet and reinstall it on your device. So, you can enjoy using your iPhone or iPad without any bugs.
However, as this is a drastic step, you don’t need recovery mode every time. Continue reading to know why you should use recovery mode on your iPhone or iPad.
When should you put your iPhone or iPad in recovery mode?
Apple has designed recovery mode when your iPhone or iPad runs into serious issues. Here are the situations when you should consider using it:
- Stuck on the Apple logo: If your device gets stuck on the Apple logo for a long time and won’t show a progress bar, recovery mode can help.
- Failed iOS update or downgrade: Sometimes, an iOS update fails or gets interrupted, leaving your device unresponsive. Recovery mode allows you to retry the update or restore the system.
- Device won’t turn on or respond: If your iPhone or iPad refuses to turn on or shows a black screen, putting it in recovery mode can help restore it.
- iTunes or Finder can’t detect your device: When your device isn’t recognized by your computer, even after trying different cables or ports, recovery mode can force a connection.
- Boot loop issues: If your iPhone or iPad continuously restarts without reaching the Home Screen, recovery mode can break the loop and allow you to restore the system.
- Failed to restore device: Sometimes, you may get stuck or face errors when trying to restore your iPhone or iPad from backup. Recovery mode helps you to restore the system smoothly.
Moreover, if you have forgotten your passcode and cannot unlock your iPhone or iPad, you can use this mode to restore your device to its factory default.
Now that you know the basic info, let’s get to the step-by-step guide for entering recovery mode on an iPhone or iPad. The method varies depending on your model. However, the process followed on a Mac or PC remains the same for every device.
How to put iPhone 8 and later into recovery mode
Before you start the process, ensure you’ve backed up your iPhone. You must also update your Mac to the latest version. If you are using a Windows PC, check if the iTunes app is up-to-date.
Then, follow the steps below to put your iPhone 16e, iPhone 16, or earlier (until the iPhone 7) in recovery mode:
- Connect your iPhone to a Mac or PC using a Lightning or USB-C cable.
- Launch Finder on Mac or iTunes on PC. If iTunes was already open, close it and open it again.
- Then press the Volume Up button of your iPhone and release it quickly.
- Similarly, press the Volume Down button and release it quickly.
- Now, press and hold the Power button. You will see the slider to power off. Ignore it and continue pressing. After a few seconds, the screen will turn black and show an Apple logo. Don’t stop pressing until you see a cable pointing toward a computer.
That’s it! Your iPhone has entered recovery mode successfully. You can now troubleshoot your system from your computer.
- On the Finder, click your iPhone name from the left sidebar. For iTunes, click the iPhone icon at the top.
- Click Allow if prompted.
- Now, you will see a pop-up saying, “There is a problem with the iPhone that requires it to be updated or restored.”
- Click Update to reinstall the latest iOS version to fix the problem. This will keep all of your settings and iPhone data.
- If the update doesn’t fix your problem, repeat the process and click on Restore. Restore will erase all settings and content. If you’ve backed up your iPhone as recommended, you can restore everything from the backup afterward (while setting up your iPhone).
If your computer takes more than fifteen minutes to download the software, your iPhone or iPad may automatically exit recovery mode during restoration or upgrading. In this scenario, let your computer complete downloading the file. Then, repeat the steps again.
After the restoration is complete, you will need to re-set up your device. For detailed instructions, go through our step-by-step guide on how to set up an iPhone.
How to enter recovery mode on iPhone 7 and iPhone 7 Plus
- Connect your device to a computer and open iTunes or Finder. Be sure the device icon appears on the menu.
- Press and hold the Side button and Volume Down button together.
- Release the buttons after you see the recovery mode screen.
Enter recovery mode on iPhone 6s and earlier or iPad with Home button
- After you connect your iPhone or iPad to the computer, press and hold the Side button and Home button together.
- Keep pressing the buttons until it shows the recovery mode screen.
Put an iPad without the Home button in recovery mode
- Quickly press and release the volume button closest to the Power button.
- Then press and release the volume button that is farthest from the Power button.
- Lastly, hold down the Power button until your iPad displays the recovery mode screen.
How to exit recovery mode on iPhone or iPad
If you’ve entered recovery mode on your iPhone or iPad and now want to exit it without restoring or updating your device, you can easily do that.
Simply press and hold the Power button on your iPhone or iPad until the recovery mode screen disappears. When the Apple logo shows on the screen, stop pushing the power button. It will boot up your device and turn it on.
Keep in mind that exiting recovery mode in the middle is like force restarting your device. No changes or fixes will be made unless you go through the restore or update process.
How to fix an iPhone stuck in recovery mode
While the chances are rare, this could happen sometime. You have put the iPhone in recovery mode to troubleshoot an issue. However, now the iPhone is stuck on the recovery mode screen, and you’ll have to troubleshoot that first.
To fix the issues, you’ll have to restore your iPhone. You can do so via iTunes/Finder, though that would result in complete data loss, which is not such a great scenario. The better and smarter way is to use Dr. Fone.
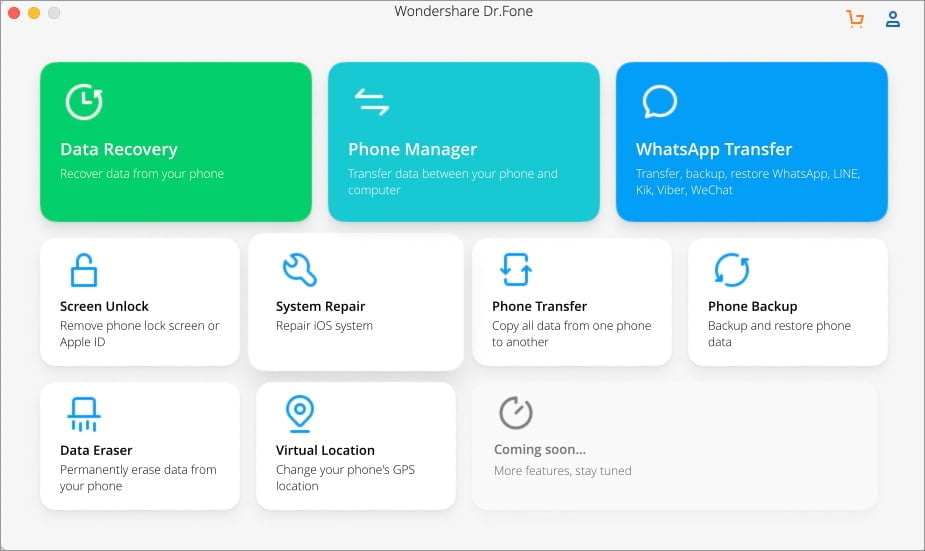
Dr. Fone – System Repair is a complete iOS and iPadOS repair solution. It is a master of its trade and can fix various system issues like boot loop, black/white screen of death, frozen iPhone, and stuck in recovery mode. Most importantly, these issues are fixed with a few clicks and without data loss. Let’s see how:
- Launch Dr. Fone on a Mac/Windows PC and click System Repair.
- Connect your iPhone/iPad stuck in recovery mode via USB (if not already connected).
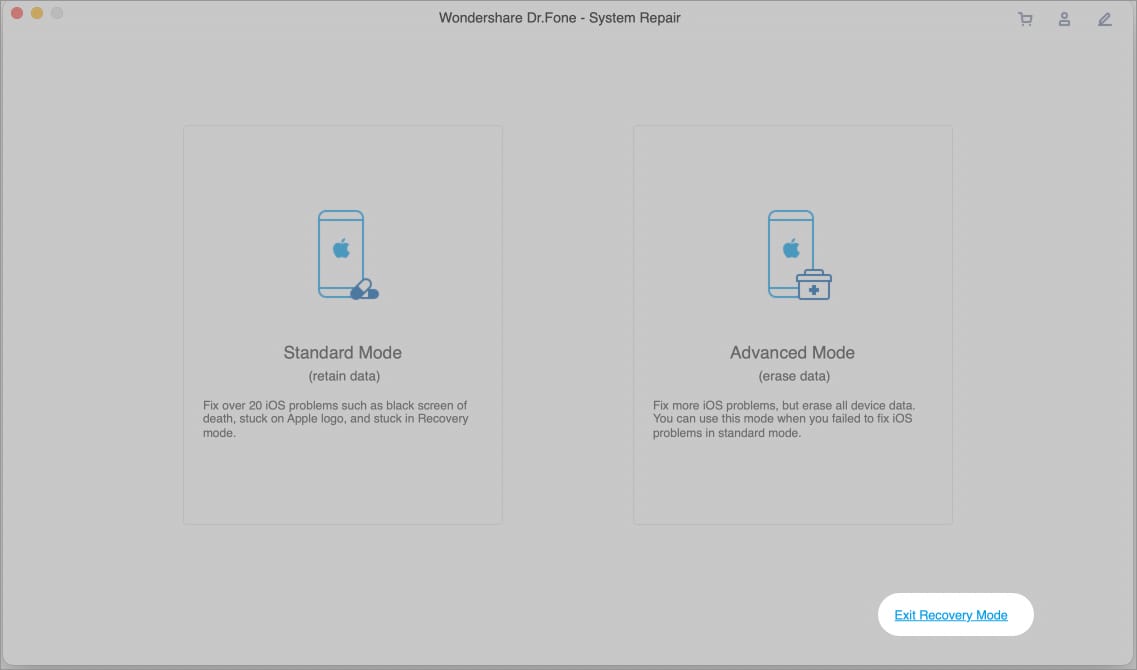
- Here, select Exit Recovery Mode from the bottom-right of the window.
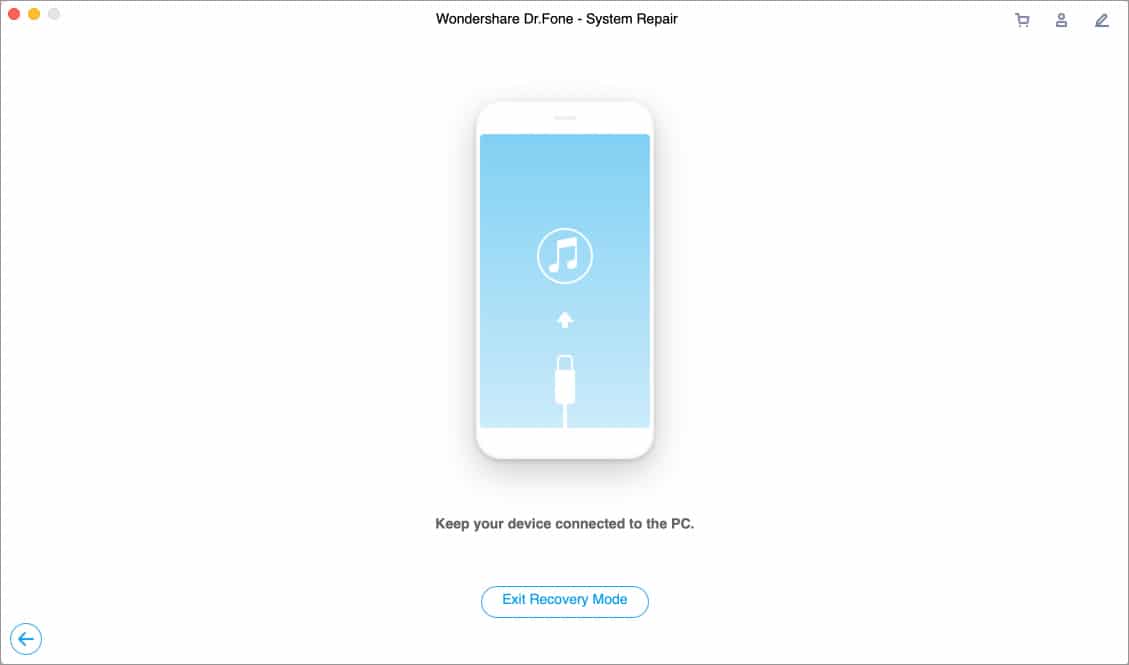
- In the new window, click Exit Recovery Mode again.
Let the software work its magic; it may take some time, depending on device-to-device. Once done, your iPhone will restart, and an Exited Recovery Mode successfully window will pop up. Just disconnect the phone and enjoy.
If the original issue still exists, run the Dr. Fone System Repair again and click Standard Mode. As a last resort, Advanced Mode can also fix the issue, although that will lead to data loss.
Signing off…
We hope you learned what you needed to put your iPhone in Recovery Mode. Did using Recovery Mode work to restore your device? Let us know in the comments whether it did or not. If it didn’t, we’ll work towards finding you a proper solution.
Have any other Apple-related questions? Ask away in the comments; we want to hear from you!
FAQs
Generally, your move here is to force restart your iPhone. If that doesn’t work, make sure iTunes is up to date, and think about using DFU mode as an alternative.
This depends on a few factors, like your internet speed, iPhone or iPad model, and the amount of actively used storage on the device. In most cases, it’s an hours-long process. It’s best to set it and forget it.
You may like to read:


