Experiencing Wi-Fi issues on your iPhone after updating to iOS 18 can be frustrating, especially when your device has been working just fine before. It’s quite common to experience some Wi-Fi connectivity problems after a major software update because new features and changes can sometimes introduce unexpected bugs or glitches.
If you can’t connect to Wi-Fi on your iPhone or are facing frequent disconnections, there are several troubleshooting steps you can take to resolve the issue. Let’s look at how to fix W-Fi not working on an iPhone after the iOS 18 update.
Why is Wi-Fi not working on my iPhone?
Wi-Fi issues after updating to iOS 18 can occur due to various reasons, ranging from software glitches to settings issues. Here are some common reasons why Wi-Fi may not work on your iPhone:
- Software Bugs: New iOS updates can sometimes introduce bugs that affect Wi-Fi performance. These may cause your iPhone to struggle with maintaining a stable connection, fail to connect to networks, or even stop detecting available networks altogether.
- Network Settings Conflicts: Updating your iPhone can reset certain network configurations or create conflicts with existing settings. If your network settings aren’t properly aligned after the update, your Wi-Fi connection may become unstable or fail to connect.
- Router or Network Issues: The problem might not be with your iPhone at all. Your Wi-Fi router could be facing issues such as temporary downtime, signal interference, or outdated firmware. These problems can manifest as connectivity issues on your device.
- Outdated or Corrupted Network Configuration Files: iOS updates can sometimes overwrite or corrupt saved network data. If your phone’s configuration files for a specific Wi-Fi network have become corrupted, it may prevent a proper connection.
- Compatibility Issues with Certain Apps or Settings: Some apps that rely heavily on Wi-Fi might have compatibility issues with the latest iOS update, affecting overall network connectivity. Moreover, certain custom settings or third-party VPNs can also interfere with Wi-Fi functionality.
How to fix Wi-Fi not working after the iOS 18 update
Here are some easy solutions to resolve Wi-Fi issues on your iPhone.
1. Restart the router
This is one of the easiest and quickest ways to fix Wi-Fi issues. Simply power off your router, wait about a minute, and then turn it back on.
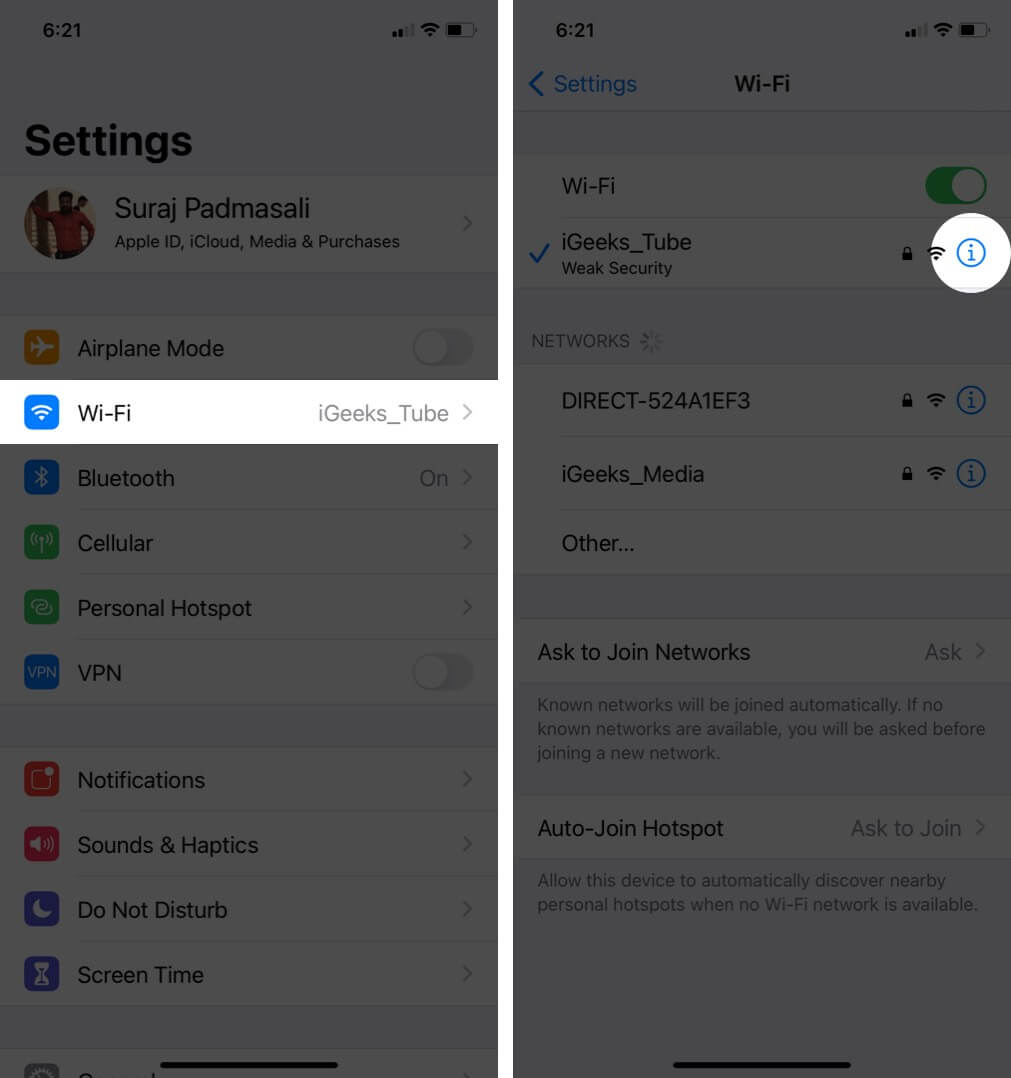
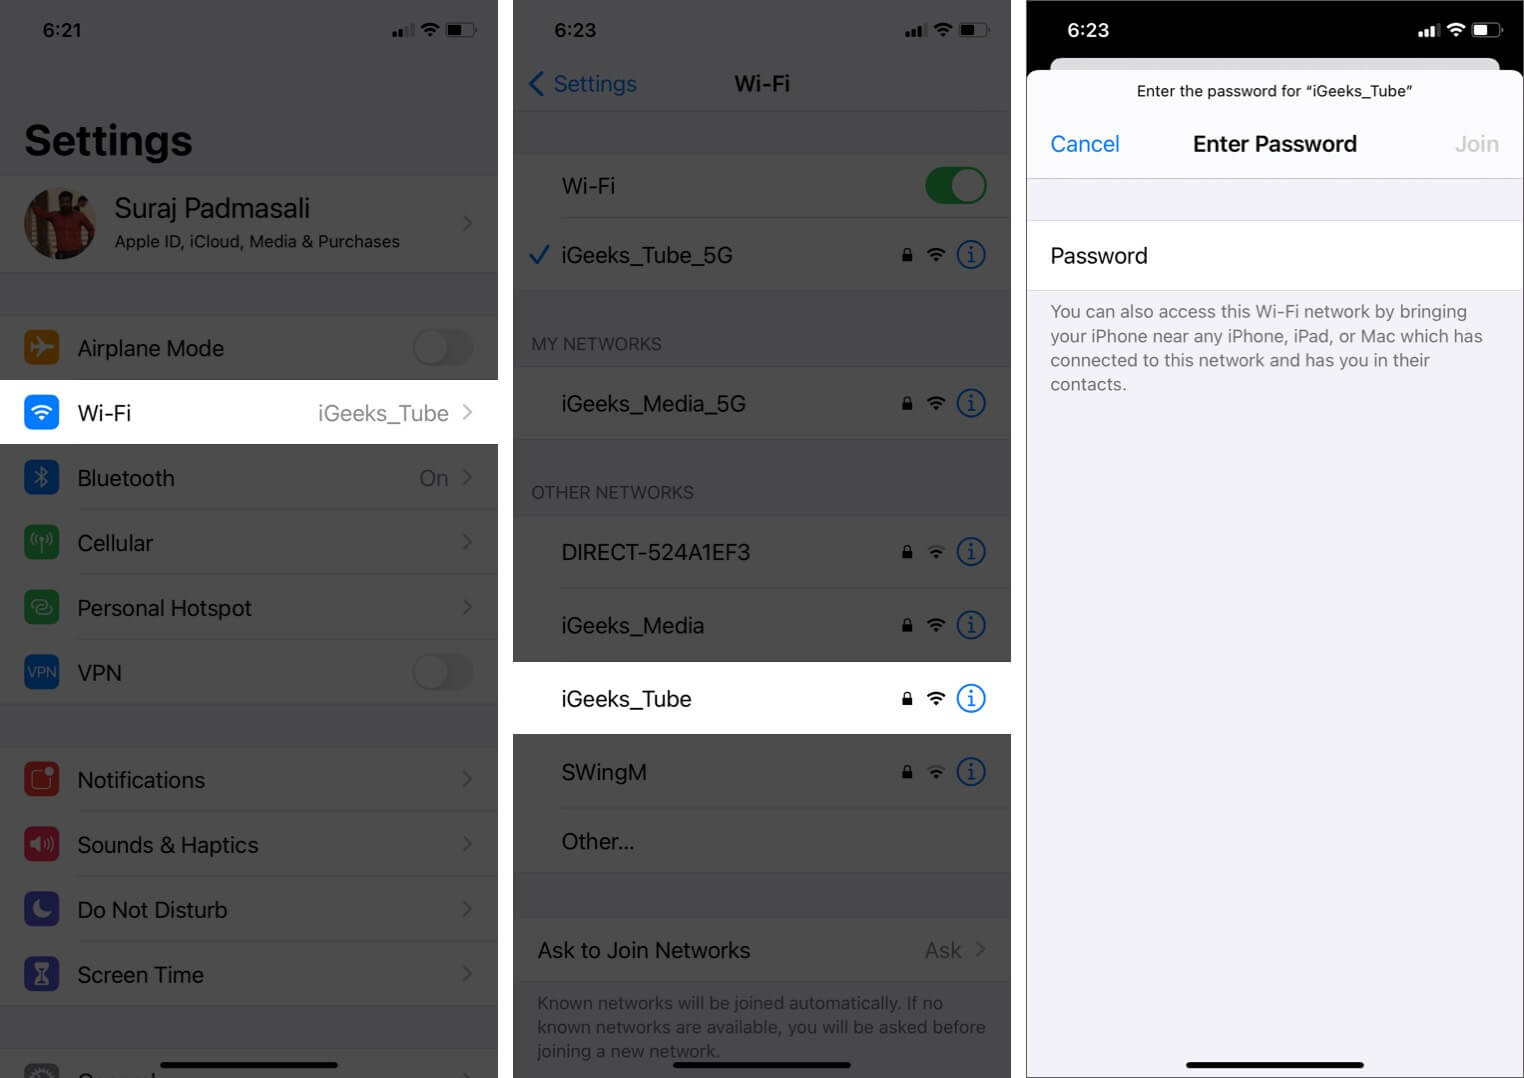
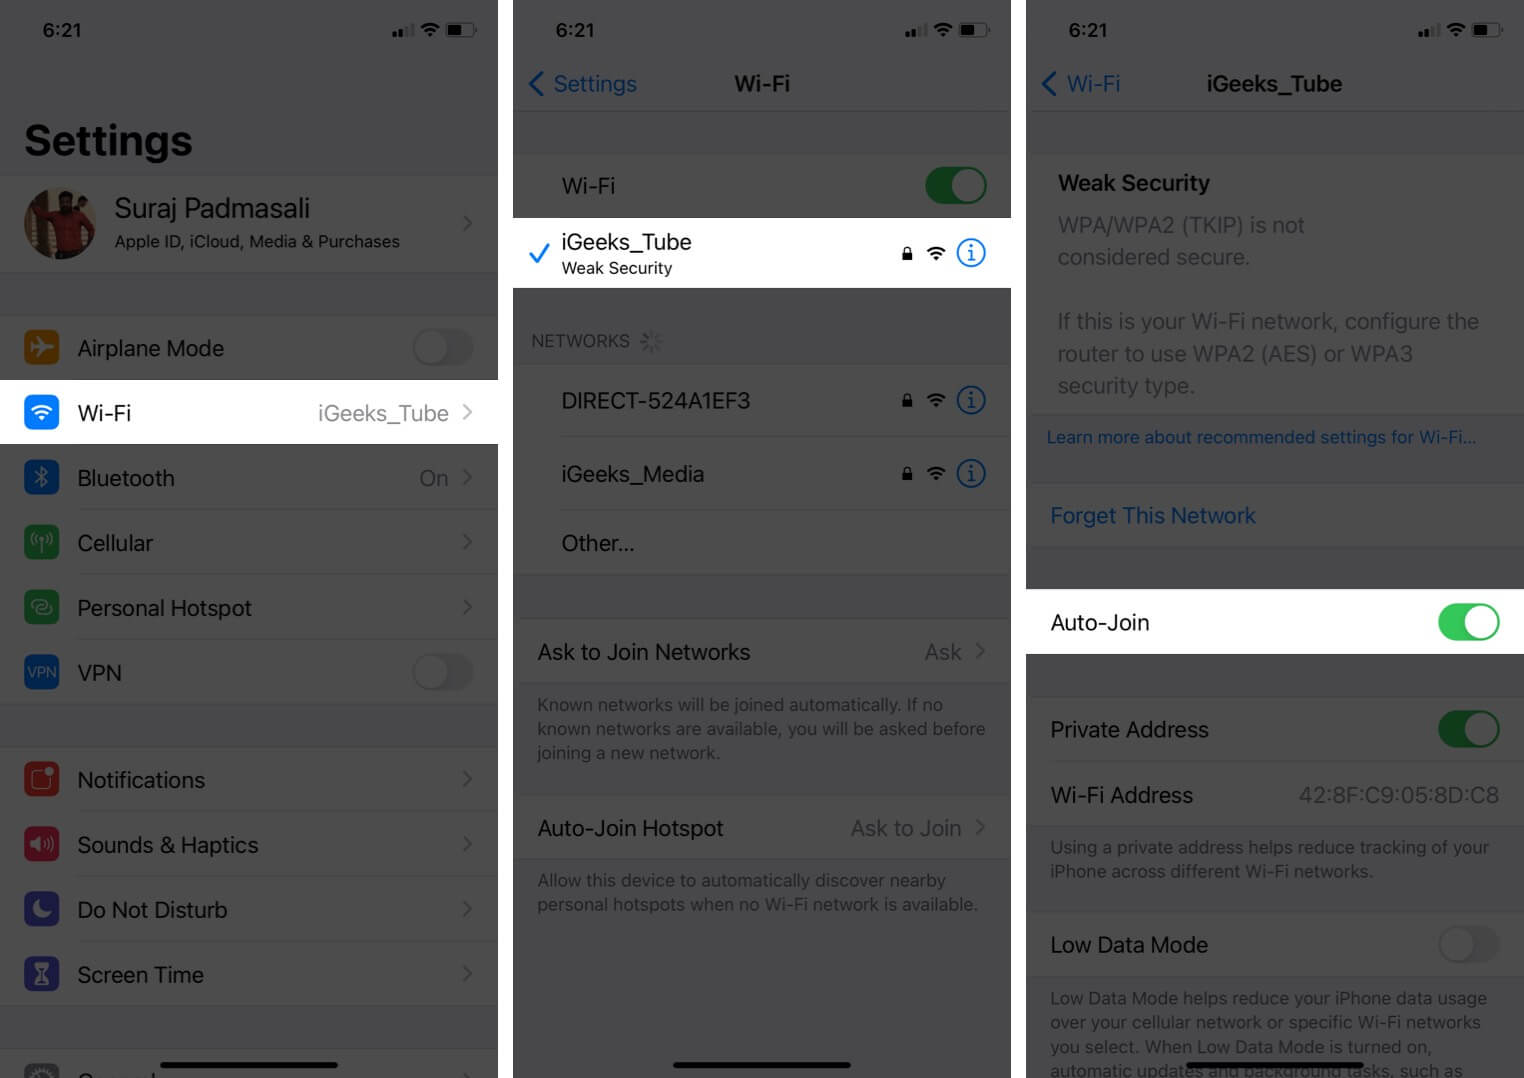
Now, make sure your iPhone is connected to the network. Open Settings on your phone and tap Wi-Fi. Make sure you are connected to the right network. A blue tick before the name signifies that you are connected. After this, tap on the info (i) next to the correct Wi-Fi name and turn on the toggle for Auto-Join.
2. Turn off Wi-Fi and reconnect
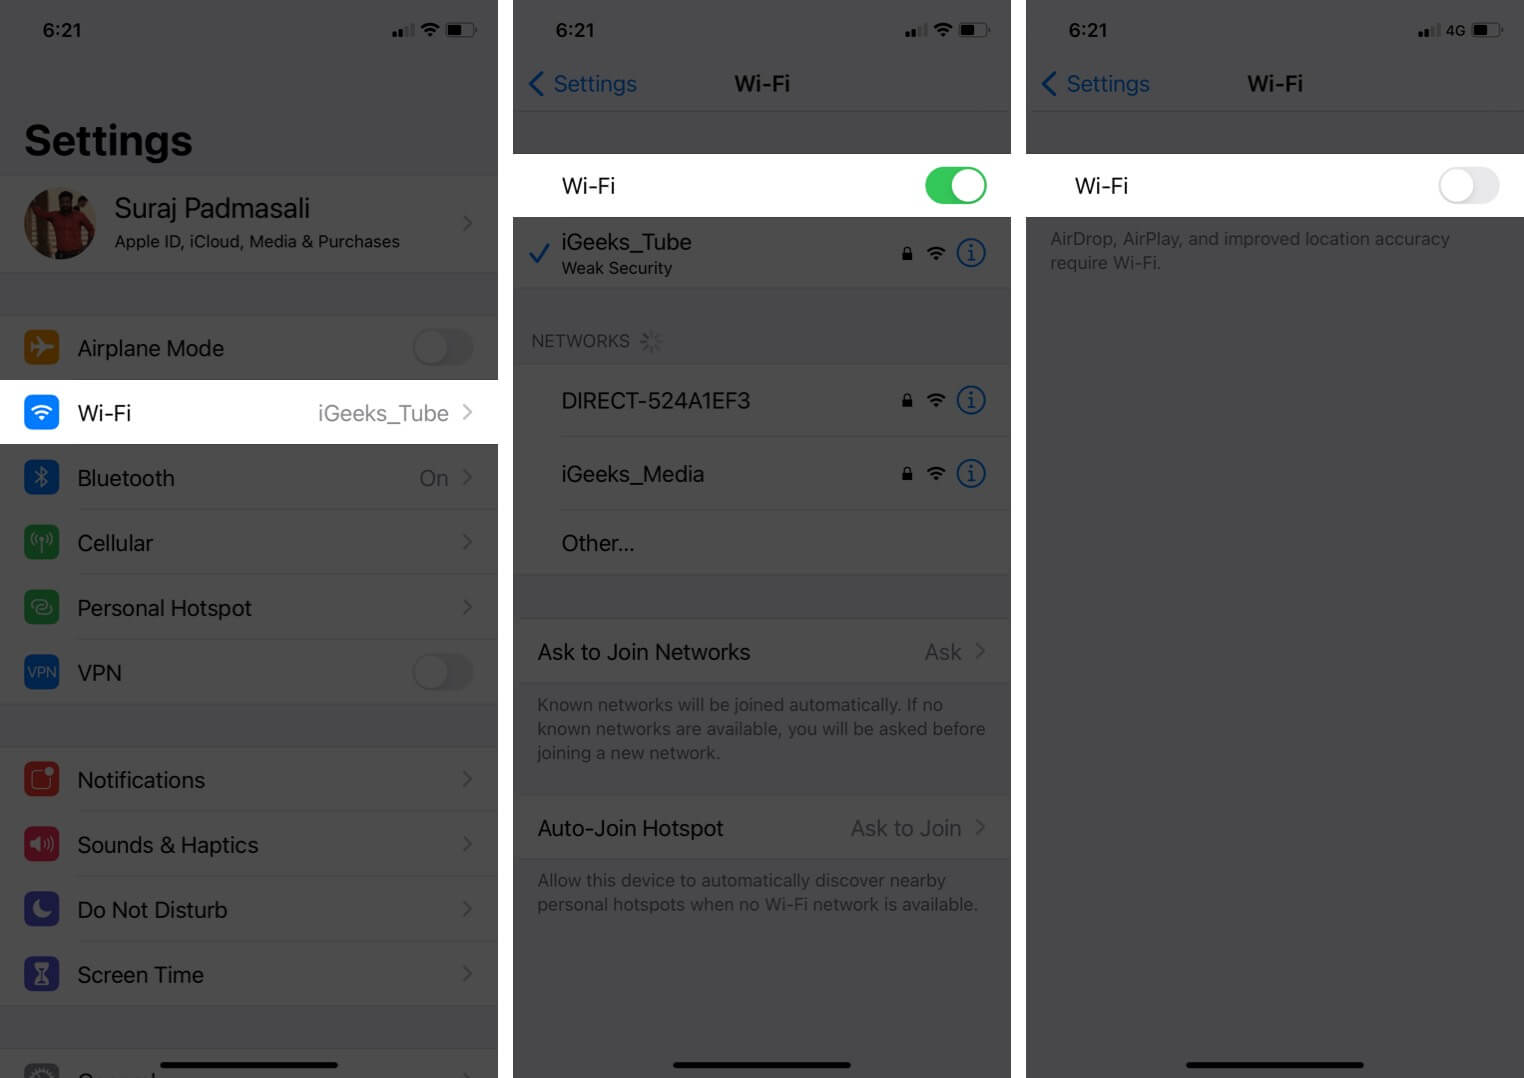
If you’ve restarted your router but still can’t connect to your Wi-Fi network, try disabling and enabling the Wi-Fi on your phone. This forces your iPhone to re-establish the connection with the router, which can fix any temporary glitches.
- Open Settings on your iPhone → Tap Wi-Fi.
- Turn off the toggle for Wi-Fi.
- After a few seconds, toggle on Wi-Fi to enable it.
- Connect your iPhone to the network. If it doesn’t connect automatically, tap on the Wi-Fi name to join it. If asked, enter the Wi-Fi password.
3. Enable and disable Airplane Mode
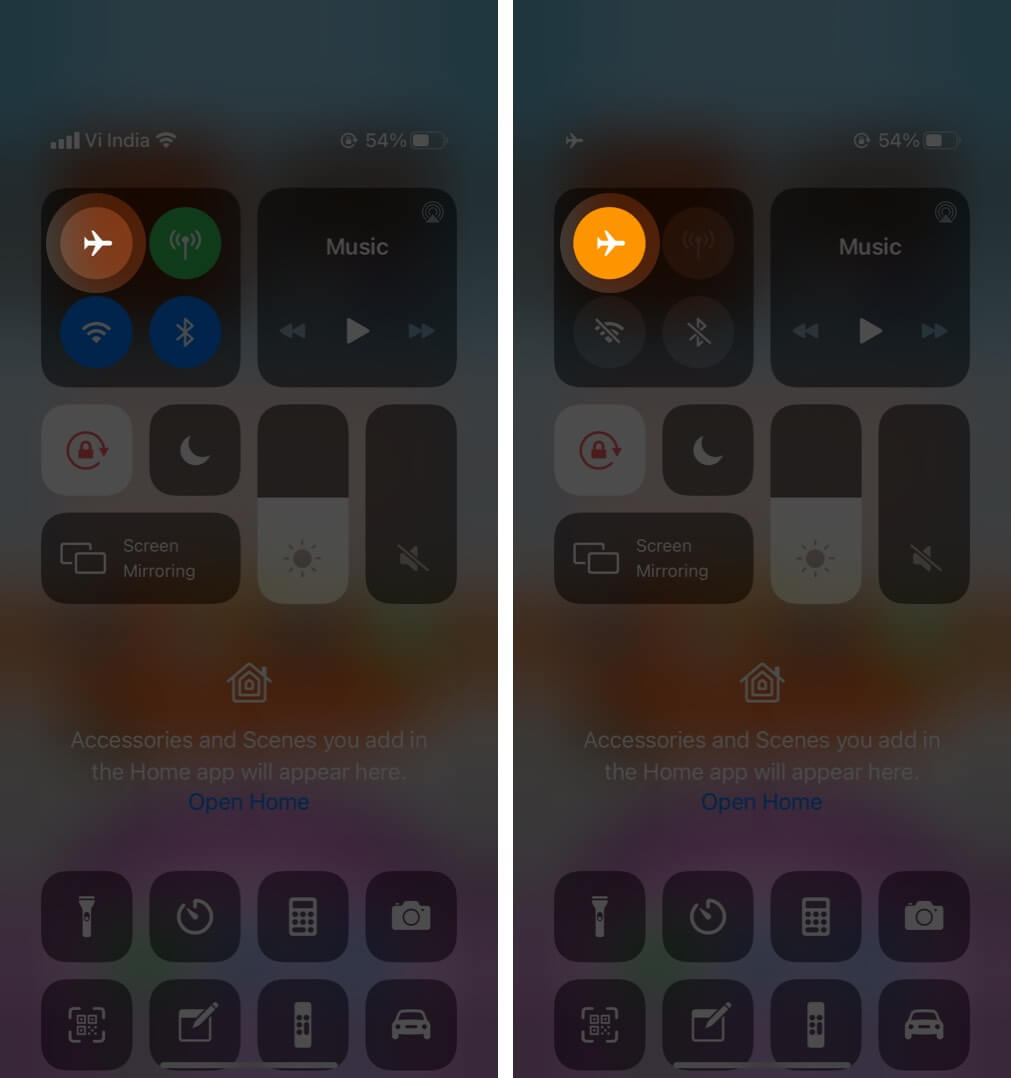
Like the previous method, enabling and disabling Airplane Mode refreshes your iPhone’s connection with the router and may solve the Wi-Fi not connecting issue.
- To bring up the Control Center: On an iPhone with Face ID, swipe down from the screen’s top right. On models with the Home button, swipe up from the bottom of the screen.
- Tap the airplane icon to enable it.
- After 15 seconds, tap on the same icon to disable it.
Your iPhone should automatically connect to a Wi-Fi network and work correctly. If required, connect to Wi-Fi manually from the Settings app.
4. Restart your iPhone
This is an effective fix for solving several iPhone network problems. When you restart the device, the RAM is cleared, broken tasks are reset, misbehaving apps get a fresh start, and more. As a result, temporary glitches get resolved.
To restart your iPhone, press and hold the Power + Volume down buttons → Slide to power off → Wait for about 30 seconds, and then power on your phone again.
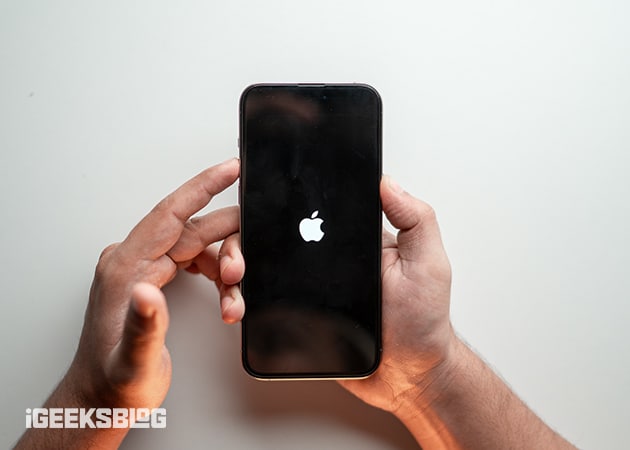
If you are using an iOS device with a Home button, check out our guide on how to restart your iPhone for complete instructions.
5. Forget the Wi-Fi network and rejoin
In this step, you will re-add the Wi-Fi network to your iPhone. Make sure you know your Wi-Fi password before following the steps below.
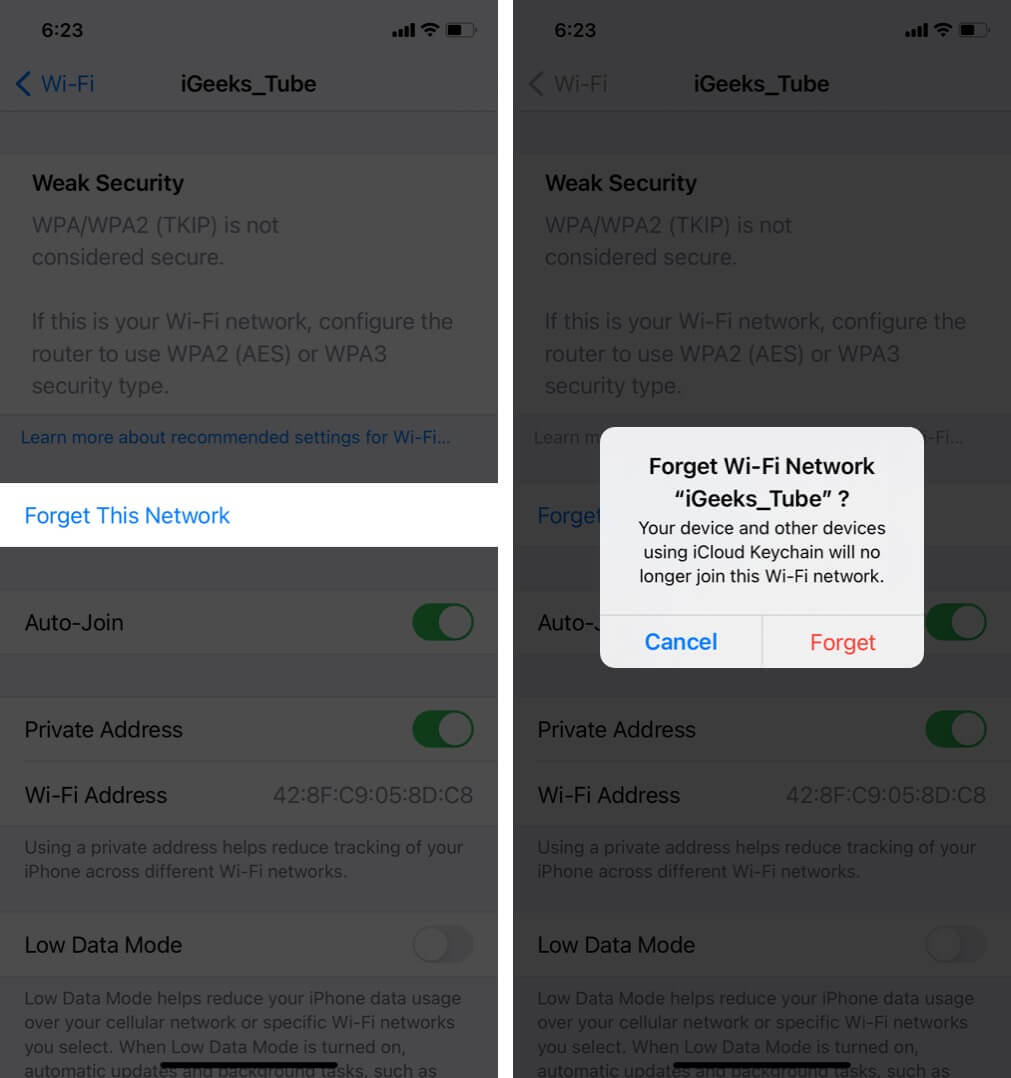
- Open Settings → Tap Wi-Fi.
- Tap the info (i) icon next to the joined network.
- Tap Forget This Network → Forget.
- Optional but recommended: Restart your iPhone.
- Open Settings → Wi-Fi. Please tap on the Wi-Fi name and enter its password to reconnect.
6. Turn off VPN
Sometimes, when you use a VPN on your iPhone, it can interfere with Wi-Fi and cause connectivity issues with some apps and websites.
To check this, try turning off the VPN using its specific app or open Settings on your iPhone and turn off the toggle for VPN.
7. Check if there’s an issue with the internet service provider
It’s possible that the problem is not with your device or router but rather the entire network. Check for outages by contacting your Internet Service Provider and explaining your issue. Also, confirm that you have a valid internet plan and that your account is functioning as expected. Service providers might restrict or block your access if you haven’t paid your bills.
8. Update your iPhone to the latest iOS version
We recommend that you update your iPhone as soon as Apple releases an iOS update. This ensures that you have the latest bug fixes and features.
To check for updates, go to Settings → General → Software Update. Download and install any updates if available.
9. Reset Network Settings
This step will delete all the network settings on your iPhone, including saved Wi-Fi, Bluetooth devices, VPN configurations, etc., and restore them to default. However, personal data like photos, videos, contacts, and apps will not be affected.
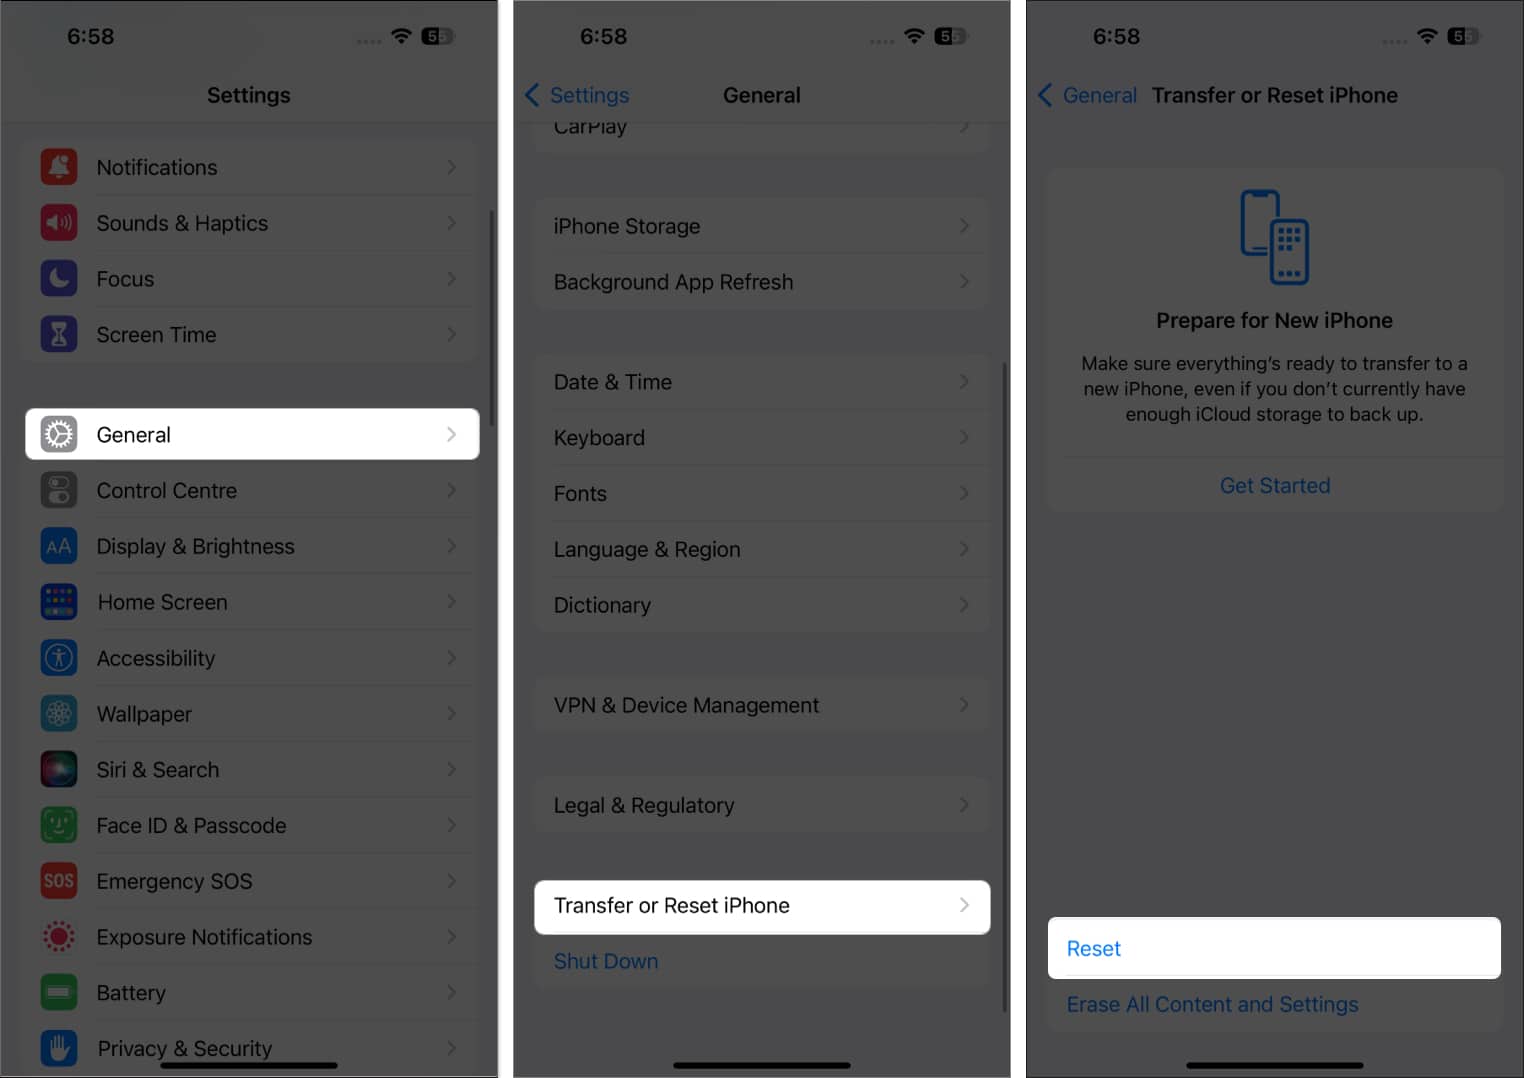
- Open Settings and tap General.
- Go to the end and tap Transfer or Reset iPhone → Reset.
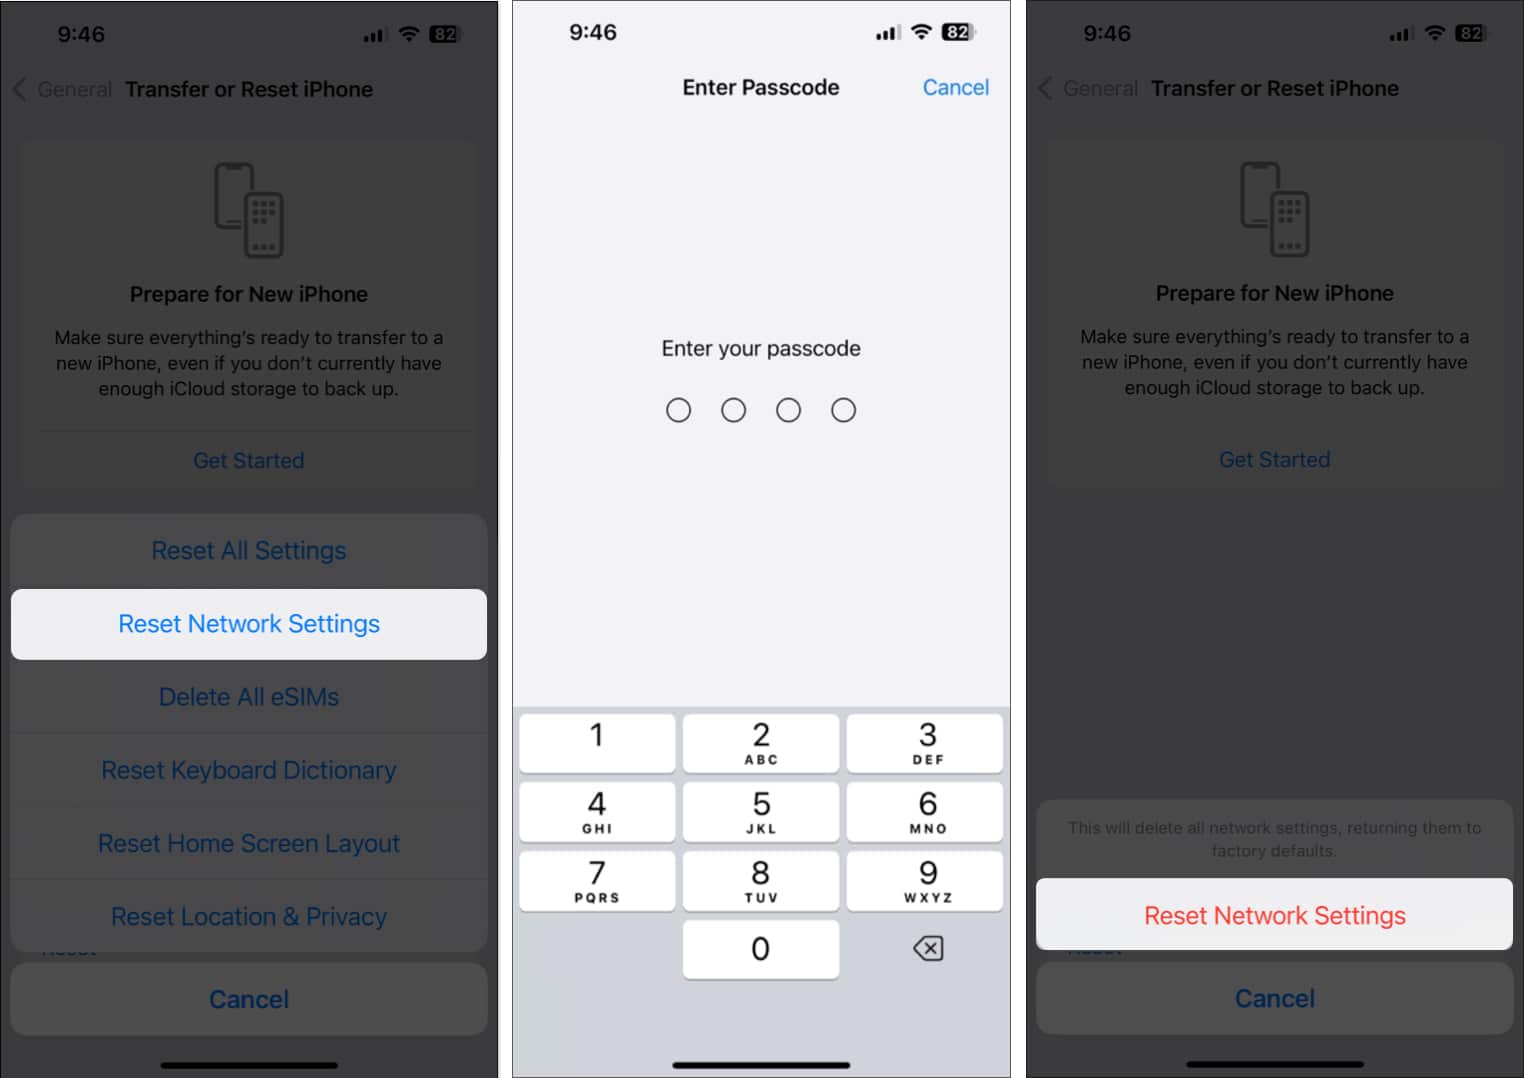
- Tap Reset Network Settings.
- Enter your device passcode and confirm your choice.
For more details about this process, check out our full guide about how to reset network settings on your iPhone.
10. Contact Apple Support
Finally, when nothing seems to solve the problem, your best bet is to contact Apple Support for assistance. You can reach them via online chat, call, or even Twitter.
Video: How to fix Wi-Fi not working on iPhone or iPad
Signing Off
I hope this article has helped you fix Wi-Fi issues on your iPhone. Let me know in the comments below if you have further questions.
Also read:

