iPhone users occasionally run into a strange error – the 9, 4005, 4014 / 4013 – that prevents you from upgrading to latest iOS version via iTunes. Barring OTA updates, any update that is done through iTunes runs the risk of several errors and one of them, the 4013/4014, is our concern here.
Put simply, the error is hardware related, but like all things digital, you don’t really get to fix this one without your share of head-banging. There are a variety of solutions that worked for various people. What we try here is to make sure you don’t go about trying them randomly but in an ordered way. That makes it easier to fix.
Before You Start
As always:
- Use the latest version of iTunes
- Make sure the iPhone has enough space to bring in a new update. A gig or more is recommended
- Also, make sure the iPhone is not low on battery
- Update your Mac or PC, if there is an update available for it
How to Fix iTunes Error 9, 4005, 4014/4013
The Real Problem
Error, 9, 4005, 4013 or 4014 could be due to certain reasons like faulty cable/port or poor Wi-Fi network. On the surface, your iPhone connects to the computer, iTunes recognizes the device but somewhere down the line, iTunes thinks that the cable is not really that good or suddenly Wi-Fi starts ill-functioning. Even your computer may turn out to be the real villain.
Solution #1: Reboot your iPhone
- Disconnect your iPhone from the computer and reboot it. To do so, just press and hold the Home button and sleep/wake button at once for about ten seconds. On 7 and 7 Plus, press and hold the volume down button and sleep/wake at once
- Once your iPhone has restarted, connect it to the computer again. And try to Update/Restore it as usual
Solution #2: Check Out the Faulty Cable/Port
- Check out the faulty cable and port as they could be causing trouble as well. Try a different cable and use another port
Solution #3. Is Wi-Fi Network Working Properly?
- If Wi-Fi is not working properly or it’s poor, the update process may get disconnected and therefore you will get the error message. Hence, make sure that you have a proper Wi-Fi connection
- Disconnect Wi-Fi both on your computer and iPhone and try to connect them to the network after some time
- Give another network a try as well; if it’s there
Solution #4: dr.fone – Repair
When you’re dealing with an iPhone, you should make sure to use only the most reliable recovery methods. As such, dr.fone – Repair is advisable because it’s an application rolled out by Wondershare technology, a reliable company that has even received critical acclaim from Forbes magazine. Most importantly, you can use it to fix the error 4013 without losing your data!
How to Fix iPhone Error 4013 with dr.fone – iOS System Recovery
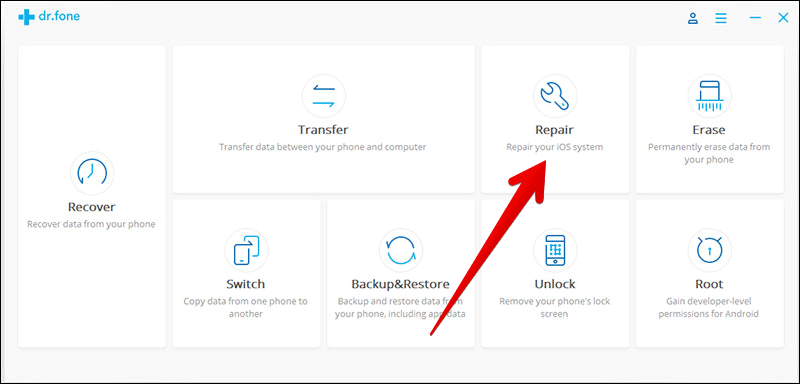
Step #1. Launch dr.fone and select “Repair.”
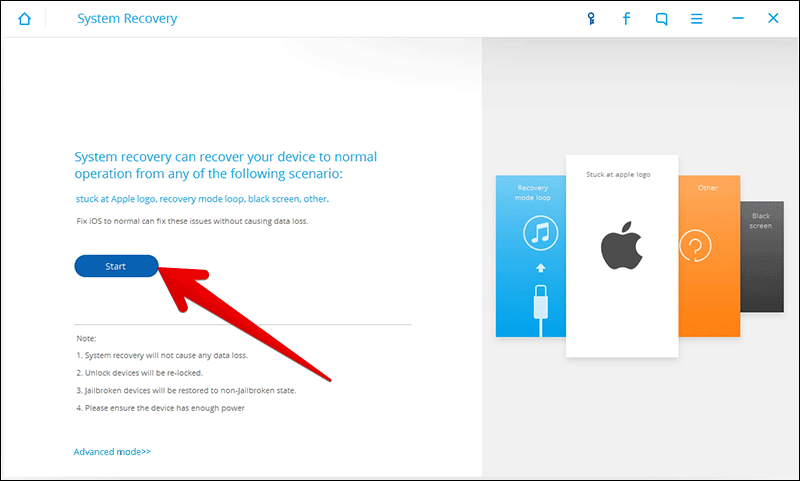
Step #2. Connect your iPhone to Mac and click on “Start.”
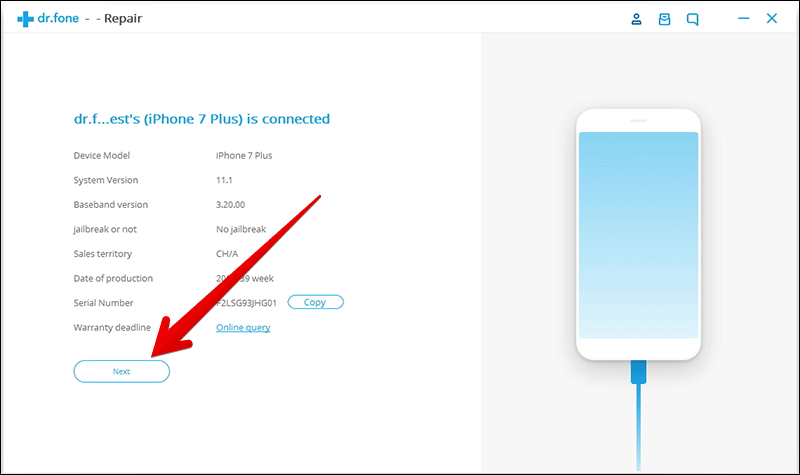
Step #3. In the next window, you’ll find all your iPhone’s details including the model, version, etc. Simply click on “Next.”
Step #4. You need to boot your iPhone by entering DFU Mode.
- Press the Power and Home buttons simultaneously
- After 10 seconds, release the Power button but not the Home button
- Keep pressing the Home button till dr.fone informs you that you’ve entered DFU mode
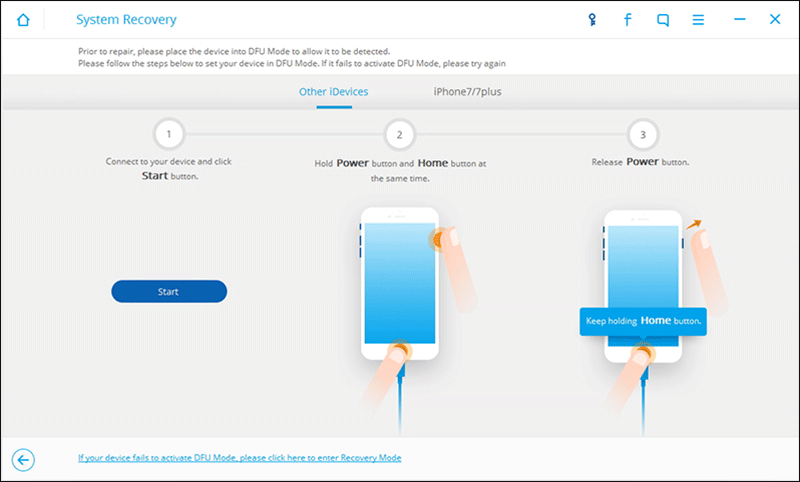
Step #5. In the next window, select your iPhone model and allow dr.fone to select the latest firmware for download.
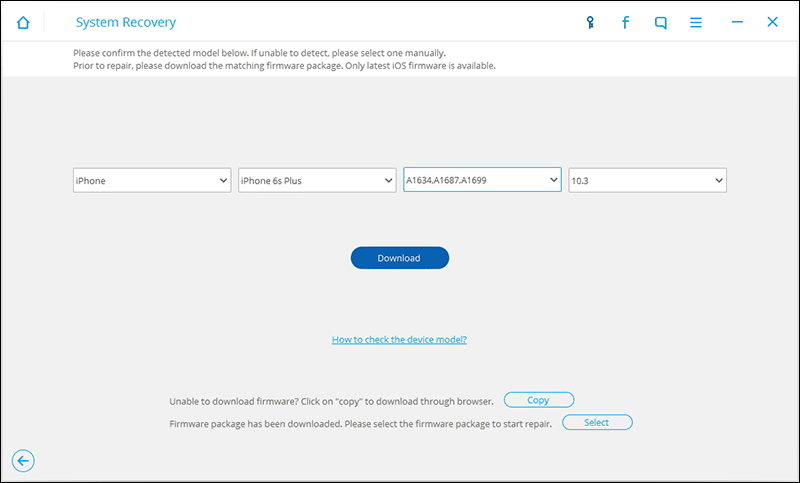
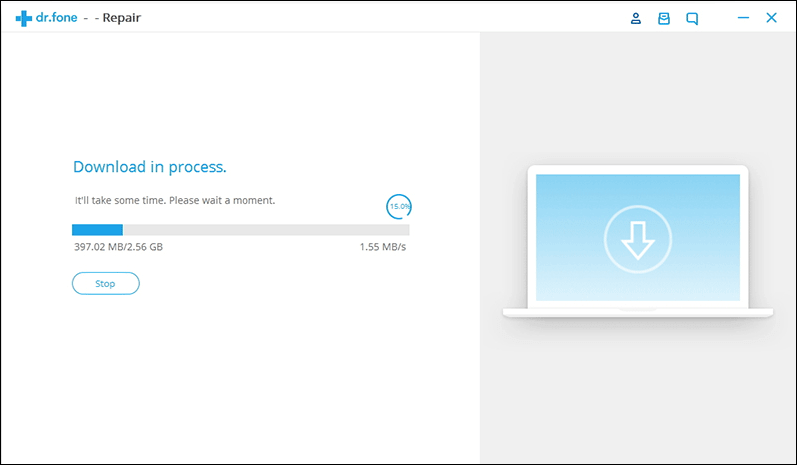
Step #6. After the firmware has been downloaded, click on “Fix Now” so that dr.fone can start repairing your iPhone.
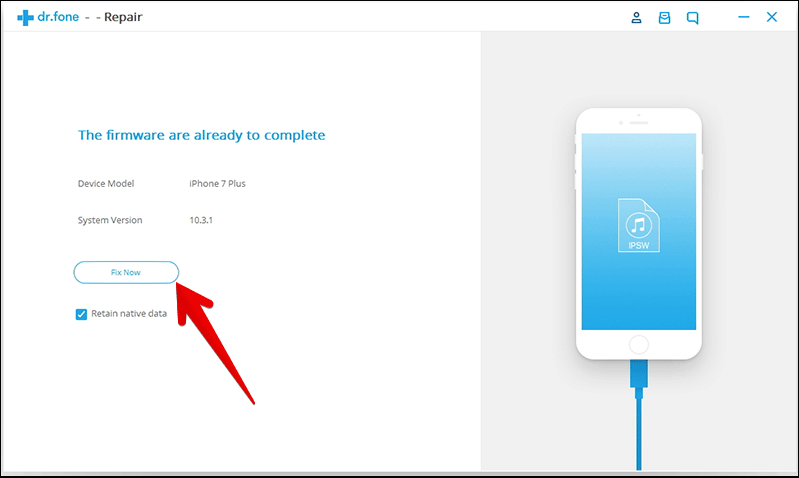
Step #7. Now it will proceed to fix the iPhone Error 4013. After it’s done, you can restart the iPhone and use it normally.

This simple 5 pronged process will ensure that your iPhone isn’t just fixed from the iTunes error 4013 problem, but it’s also upgraded properly. And, don’t worry, your data is safe and intact.
Solution #5: Clean Up Your iPhone
- The error may appear due to lack of storage on your iPhone to accommodate the update. Hence, clean it up
- Follow this complete guide on how to free up space on iPhone to retrieve plenty of storage without needing to delete photos and apps
Solution #6: Restart Your Computer, Reset Your iPhone
- If the first two solutions don’t help you in fixing the trouble, restart your computer and reset all settings on your iPhone
(Settings → General → Reset →Reset All Settings.)
If Everything Else Fails…
If all the tricks mentioned above don’t help you in fixing the error, then you must contact Apple. The tech giant will take care of the issue and offer a better solution to it.
Stay connected with us for more such handy tips and feel free to shoot your valuable feedback in the comments as well.
